ELARABY TORNADO GHV-M90CSU-BK User manual

1 - ENGLISH

2 - ENGLISH
Before leaving the factory, this appliance was tested and regulated by expert and
skilled personnel to give the best operating results. Any repair or regulation that
may subsequently be necessary must be carried out with the greatest care and
attention. For this reason, we recommend you always contact the Dealer you
bought the appliance from or our nearest Service Centre, specifying the type of
problem and the model of your appliance. Please remember as well that the
original spare parts are available only from our Technical Service Centres. Do not
leave the packaging unguarded, both for the safety of children and for the
protection of the environment, but dispose of it in a centre for differentiated waste.
The symbol on the product or on the packaging means that the product must
not be considered as normal household refuse, but must be taken to the
appropriate collection point for the recycling of electric and electronic equipment.
The appropriate disposal of this product helps avoid potential negative
consequences on the environment and for health, which could be caused by
inappropriate disposal of the product. For more detailed information on the
recycling of this product, please contact your municipal offices, the local waste
disposal service or the store where the product was purchased.
TABLE OF CONTENTS
GENERAL WARNINGS
Instructions for use:
Description of the main parts of the appliance
Gas burners (operation, lighting, advice)
Operation of electric hot plates
Maintenance and cleaning
Instructions for installation:
Positioning and gas connection
Electrical connection
Adaptation to different types of gas
Instructions for building in the units
ENGLISH

3 - ENGLISH
General warnings
Dear Customer,
Thank you for having chosen one of our products. This appliance is easy to use,
but you must read this booklet carefully before installing and using it. The booklet
contains instructions that will help you to install, use and service the product in the
best way.
WARNING: This appliance and its accessible
parts become very hot during use. Take care
and do not touch the heating elements. Unless
they are supervised at all times, children
younger than 8 years of age must be kept well
away from the appliance.
WARNING: This appliance may be used by
children from 8 years of age onwards and by
persons with reduced physical, sensorial or
mental capabilities, or who lack experience and
knowledge so long as they are properly
supervised or have been trained on how to use
the appliance safely and are aware of the risks
involved. Children must not play with the
appliance. The appliance must not be cleaned
or serviced by unsupervised children.
WARNING: Do not leave a hob unattended
when fat or oil is being used. This could be
dangerous and cause a fire.
WARNING: NEVER attempt to put out a
fire/flames with water. Switch off the appliance

4 - ENGLISH
General warnings
and cover the flame with a lid or a blanket made
of fire-retardant material for example.
WARNING: Fire risk. Do not leave objects on
the surface of the hob.
WARNING: If the glass or glass-ceramic surface
is cracked, switch off the appliance to prevent
the risk of an electric shock.
The appliance cannot be switched on by an
external timer or a separate remote control.
Do not use jets of steam to clean the appliance.
It is very important for this instruction booklet to be kept with the appliance if it
changes hands.
These instructions are only applicable in countries whose pictograms appear on
the cover and on the appliance itself.
This appliance has been designed for non-professional use by private individuals
in their homes and its purpose is to cook and heat food. Do not use it for other
purposes.
The appliance must be installed by a skilled and qualified installer who is familiar
with the installation rules in force.
Before it is cleaned or serviced, the appliance must be disconnected from the
electric power source and allowed to cool.
Before you switch on the appliance, make sure that it has been correctly regulated
for the type of gas available in your area (consult the relative section).
When you turn on the burners, always make sure that the flame is regular.
If a burner goes out accidentally, turn off the control knob and wait at least one
minute before turning it on again.
It is advisable to switch off the relative heating element before you remove the
saucepans.

5 - ENGLISH
General warnings
The electric power cable of the appliance must not be replaced by the user. It must
only be replaced by a qualified electrician.
When used, gas-fired appliances produce heat and humidity in the room where
they are installed. Make sure that this room is properly ventilated by keeping the
natural air vents open or by installing a extractor hood with exhaust duct.
Additional ventilation may be required (by opening a window or increasing the
degree of forced ventilation) when gas-fired appliances are used for long periods of
time.
Make sure that you do not place unstable or deformed saucepans on the burner or
electric hotplates. They could overturn or overflow and cause accidents.
Always use saucepans with suitable diameters for the cooking zones. Never use
pans with smaller diameters than the cooking zones and never switch on the
cooking zones without pans on them.
Make sure that you do not place unstable or deformed saucepans on the heating
surfaces. They could overturn or overflow and cause accidents. Do not switch on
the cooking zones without saucepans on them.
Always call an authorized Technical Assistance Center and insist on original spare
parts if repairs are required. Repairs made by incompetent persons could cause
damage.
The appliance is switched off when all its knobs have been turned to position 0 / .
-The appliance is conform to the following European Directives and Regulations :
Directive 2014/35/EC ( Low Voltage Appliances )
Directive 2014/30/EC ( ElectroMagnetic Compability )
Directive 2012/19/EC ( WEEE - Waste Electrical and Electronic Equipment )
Directive 2009/125/EC ( ErP - Eco Design )
Directive 2011/65/EC ( RoHS - restriction of hazardous substances)
Regulation 1935/2004/EC ( Materials intended to come into contact with food )
Regulation 1907/2006/EC ( REACH Restriction of Chemicals)
Regulation 2016/426/EC ( GAR - Gas Appliances )

6 - ENGLISH
Instructions for use
2
3
4
Description of the main parts of the appliance
5
6 7 8910
1 = grid
2 = cover
3 = spreader
4 = ON spark plug (for versions
with lighting)
5 = safety valve (for models
equipped with a safety valve)
6 = knob for burner ignition and
adjustment (* ON switch on
the knob for the versions so
equipped)
7 = electric hot plate control knob
8 = separate ON switch (for the
versions so equipped)
9 = electric hot plate (where
there is one)
10 = electric hot plate operation
pilot lamp
1
0
iI

7 - ENGLISH
Instructions for use
The hob control area houses the devices and knobs for operation of the gas
burners and/or the electric hot plates.
Operation of gas burners
The burner regulation knobs can be turned anticlockwise from the closing
position to the widest open position and vice versa in the opposite direction
(put the needle to the position required):
= no gas/ electric supply
= maximum gas/ electric supply
= minimum gas/ electric supply
Lighting the burners
For models equipped with electrical ignition device, the ignition of burners
takes place by pressing and rotating the knob until the position of maximum
output is reached. In the versions with separate ignition key, only press this
key and at the same time press and rotate the knob proportional to the desi-
red burner, until it reaches the position of maximum output.
For versions without electric lighting (or if there is a power cut) perform the
operations described using a match or lighter to light the gas (in such an
event, pay the utmost attention not to burn yourself).
For models with safety valve keep the knob pressed for about 3-4 seconds
until the device keeps the flame alight automatically.
The safety valve operates when the flame is turned off accidentally, stop-
ping the supply of gas (e.g. in draughts, spills of liquid, etc.).
seconds.
If a burner is turned off accidentally or does not light, turn the control knob
OFF and repeat the lighting after at least 1 minute.
When the burner is lit adjust the flame as required.
To turn the gas supply OFF turn the knob clockwise to the << >>
position.

8 - ENGLISH
Instructions for use
Advice on the use of gas burners
For lower gas consumption and a better yield, use saucepans with diameter suita-
ble for the burners, avoiding the flame coming up round the side of the saucepan
(see the Container Table). Use only flat-bottomed pans.
As soon as a liquid starts to boil, turn the flame down to a level sufficient to maintain
boiling.
During cooking, when using fats and oils, be very careful because if they overheat
they could catch fire.
Take care that the containers don't escape from the edges of the plan and don't
invade the control panel.
Container table (use flat-bottomed saucepans)
Burners
(heights cover)
mm (mm) (mm)
Auxiliary 80 140
Medium quick 140 200
Quick 200 240
Triple ring
240 280
Electric hot Plates ()80 160
Electric hot Plates (5) 160 200

9 - ENGLISH
Instructions for use
Electrical Connection:
Pay attention to the following points while making the electrical connections.
Make sure that the current carrying capacity of home mains and the socket,
to which the device will be connected, is correct for the maximum power used
by the stove.
Make sure that the operating voltage stated on the type label is the same as
the mains voltage.
Connect the device directly to the socket. There should not be any additional
connections such as transformers etc.
Connect to a grounded socket.
The grounded socket should be near the device. No extension cables should
ever be used.
The supply cable should not touch the hot surface of the device.
In case of any damage to the supply cable, call the Authorized Service. The
cable should be replaced by the Authorized Service.
In case of an incorrect electrical connection, the device may be damaged.
This type of damage is not covered by the warranty.
The device is adjusted to be suitable for 220 - 240 Volt electricity. If the mains
electricity is different from the provided value, call the Authorized Service
immediately. After placing the stove, make sure that the control button is in the
off position then put the plug in the socket.
Unplug the device before each maintenance.

10 - ENGLISH
Instructions for use
CONNECTION OF THE FEEDING CABLE TO THE MAINS
Connect the feeding cable to a plug suitable for the load indicated on the
rating plate of the product. In case of a direct connection to the mains
(cable without plug), it is necessary to insert a suitable omnipolar switch
before the appliance, with minimum opening between contacts of 3 mm
(the grounding wire should not be interrupted by the switch).
Before connecting to the mains, make sure that:
the electrical counter, the safety valve, the feeding line and the socket are
adequate to withstand the maximum load required (see rating plate).
the supply system is regularly grounded, according to the regulations in
force.
the socket or the omnipolar switch can easily be rea-
ched after the installation.
after carrying out the connection to the mains, check
that the supplying cable does not come into contact
with parts subject to heating.
never use reductions, shunts, adaptors which can
cause overheating or burning.
When the appliance is to be installed above a built-in oven, the two applian-
ces must be connected separately, to make it easier to take the appliances
out and for electrical safety.
The manufacturer is not liable for any direct or indirect damage cau-
sed by faulty installation or connection. It is therefore necessary that
all installation and connection operations are carried out by qualified
personnel complying with the local and general regulations in force.

11 - ENGLISH
Instructions for use
The Operation of the Electric Heater:
The heaters are controlled by 3-stage buttons.
We can operate the button of the device belonging to the relevant heater
by switching between stages 1-3. If the warning lamp under the control
buttons is on, that means the device is working.
Location Cooking information
0 Off
1 For melting fat and heating a small amount of liquid
2 For slow cooking of low quantities
3 Boiling large amounts of liquid and frying
Electric heater power positions
Level Tolerans
1000w
1500w
Rpd 1500w
200
0w
Rpd
1100w 125w 125w 175w
2250w 750w 500w 750w
31000w 1500w 1500w 2000w
WARNING The electric heater may emit odors and smoke during the first 30
minutes. It is normal.
WARNING Electric burners should never be used for heating. Should always have a
load on them while working.
WARNING: Depending on the usage duration, it is normal for a yellow tint to
appear around electrical burner in the stainless steel burner plate bottoms.
Advice on use of the hot plates
So that the electric hot plates last longer and to save energy, only use flat-
bottomed saucepans whose diameter is not smaller than that of the hot plates.
Avoid boiling liquids spilling out of the saucepan on to the hot plates.
Do not leave the hot plates on empty or with empty saucepans and do not use
them to heat the room.
Switch the hot plates on after you have put the saucepans on them.
Do not forget that when the hot plates are switched off they remain hot for
some time.

12 - ENGLISH
Instructions for use
3
1
12
2
4
51 Hot Plate
2 Hot Plate (Rapid)
3 Nob
4 Lamp
5 Hot Plate table
Description electric cooker
Model 1 Electric 2 Electric 4 Electric
Voltage / Frequency 220-240 V ~ 50 / 60 Hz 220-240 V ~ 50 /
60 Hz
380-415V 2N
~ 50 / 60 HZ
Fuse to Use 10 A 16 A
3
2
A
1
6
A
Cable Type / Section H05RR-FG
Cable Length 1,5 m -
Class 1 IPX0
Hotplates
1500 W
2000 W
1000 W
1500 W
Technicial Specifications:

13 - ENGLISH
Instructions for use
The manufacturer shall not be responsible for any damages that may arise
if used without a grounded line.
Warning: The device may only be connected to the mains electricity by an
authorized and competent person and the product warranty only begins
after the correct installation. The manufacturer may not be held
responsible for any damages arising from operations carried out by
unauthorized persons.
Warning: The electric cable should not be crushed, folded, compressed, or
come into contact with hot parts of the device. In case of any damage to the
electric cable, it should be replaced by a competent electrician. Otherwise,
there is a danger of electric shock, short circuit, or fire!
Warning: Mains supply information should be the same as the information
on the type label of the unit. The type label is on the rear housing of the
device.
Warning: Before performing any operation on the electrical installation,
disconnect the product from the electricity. There is a danger of electric
shock.
If it is not possible to separate the poles in the mains supply, a separation
unit (fuses, line safety switches, contactors) with a minimum 3 mm contact
distance should be connected and all poles of this separation unit must be
adjacent (not over) to the stove per IEE regulations. Failure to follow this
instruction may result in operational problems and void the device warranty.
CONNECTION DIAGRAM:

14 - ENGLISH
Instructions for use
Maintenance and cleaning
Do not use jet of steam for cleaning.
Before any operation disconnect the appliance electrically. Wash the enamelled
parts with lukewarm water and detergent. Do not use abrasive products.
Wash the burner spreader frequently with boiling water and detergent being sure to
remove any deposits which could block the flame outlet. Rinse the stainless steel
parts well with water and dry them with a soft cloth.
To clean the hob use slightly damp sponges and wiping cloths: if too much water is
used it could penetrate the internal parts and damage electrical parts.
The grids of the hob can be washed in the dishwasher.
For persistent stains use normal non-abrasive detergents, specific products com-
monly available on the market or a little hot vinegar. Clean the glass hob with hot
water, avoiding the use of rough cloths.
Do not use stainless steel pads or acids for cleaning.
To prevent lighting difficulties, carefully clean the lighting spark
plugs regularly (ceramic and electrode).
To clean the electric hot plates use damp wiping
cloths and grease slightly with a little oil when the hot
plate is still lukewarm.
Periodically, or if the knobs become difficult to turn, contact a
qualified engineer to lubricate the taps.
Contact a qualified engineer to deal with any other problems which may arise during
use.
YES
NO
Important.
IN CASE OF BURNERS REMOVAL FOR CLEANING PURPO
-
SES, WE RECOMMEND TO MAKE SURE THAT ALL PARTS ARE COR
-
RECTLY POSITIONED BEFORE IGNITING THE BURNERS AGAIN.
AFTER
A POSSIBLE GRID REMOVAL
FOR CLEANING AND/OR MAINTENANCE
NEEDS, WE RECOMMEND TO VERIFY THE PRESENCE OF SUCH RUB
-
BER PADS AND TO PUT THE GRIDS BACK IN THEIR STABLE AND CEN
-
TRED CORRECT
POSITION.

15 - ENGLISH
Below we give the instructions for qualified installers so that the installation,
setting and maintenance operations are performed correctly and according
to the regulations in force.
Positioning
products.
The appliance can only be installed and operate in permanently ventilated
rooms according to the local regulations in force.
The natural flow of air must be direct through permanent holes made in the
walls of the room to be ventilated leading to the outside, or through single
or collective branched ventilation ducts.
The ventilation openings must have a effective cross-section of at least 100
cm2 and must be protected against accidental blocking (protection with
metal grills or grids). For appliances without safety valve on the hob, the
opening section is doubled with a minimum of 200 cm2.
There may also be an indirect flow of air from rooms next to that where the
appliance is installed, as long as these rooms have direct ventilation, there
is no fire risk in these rooms and they are not bedrooms.
The flow of air between adjacent room and the room where it is installed
must be free through permanent openings (which may be obtained by
making the gap between door and floor larger).
In the room where it is installed there must be a system for leading the com-
bustion fumes to the outside. This may be with a hood or an electric fan
which switches on when the appliance is switched on.
Gas connection
The appliance must be connected to the gas supply or the cylinder accor-
ding to the specifications of the standards in force and after checking that
it is adjusted for the type of gas available.
The appliance is set up to operate with the gas specified on the calibration
label placed both on the packaging and on the back of the appliance.
When the type of gas available does not correspond to that for which the
appliance is set up, replace the corresponding injectors (provided), being
careful to put on the new calibration label (provided) and remove the old
one.

16 - ENGLISH
To perform these operations the qualified installer will follow the indications
given in the "Adaptation to the various types of gas" section.
For safety operation make sure that the supply pressure respects the values
given in the "Table of burner and injector
If the appliance is supplied with liquid cylinder gas, make sure that the cylin-
der pressure regulator conforms to the local regulations in force.
The appliance must be connected to the gas system by a rigid metal pipe
(copper or steel) or continuous wall stainless steel flexible hose in such a
way that the appliance is not stressed in
any way.
The appliance gas inlet tube has an end
nut to which is connected the elbow union
(supplied; 1/2 thread male gas). It can be
turned depending on installation needs.
The rigid or flexible metal supply pipe
(l max = 2mt) is connected to the part
oppo- site the elbow union. Remember to
put the gaskets supplied at the two ends of
the elbow union.
When these parts are disassembled and
reassembled, always replace the gaskets
with new ones.
Once the appliance is installed, check that the gas pipe is not pinched or
damaged by mobile parts.
Important: When installation is complete, check that all the gaskets are
leaktight using a soap-based solution, never a flame.
Warning: The customer should call the service line for ELARABY
/TORNADO or national gas company for gas hob installation or gas
conversion as it must be carried out by specialized qualified person,
otherwise the company won't be responsable for any accidents due to any
change or dismantling from unaccredited centers nor unauthorized person.
Pipe
Nut
Gasket
Elbow
union
Gasket
Nut
Rigid or flexible
metal supply pipe

17 - ENGLISH
Adaptation to different types of gas
To adapt the appliance to a gas different from that for which it was set up
(see label on both the packaging and the bottom of the appliance) proceed
as follows:
remove the grids
remove the covers and the spreaders
with a 7 mm socket spanner unscrew and remove the
injectors.
replace the injectors with those supplied corresponding
to the gas available (see burner and injector characte-
ristics Table)
replace the various parts proceeding in reverse.
Remember to replace the old rating plate with the new
one (supplied).
Whenever the gas pressure used is different (or variable)
from that used, install a pressure regulator which conforms to the local regu-
lations in force on the input pipe.

18 - ENGLISH
Setting the minima
The flame on the small output is regulated in the factory. When the injec-
tors have been replaced or there are special mains pressure conditions, it
may be necessary to regulate the minimum again. The operations neces-
sary to perform this operation are the following:
light the burner
turn the knob to the minimum position
take out the knob (and gasket if there is one)
using a suitably sized screwdri-
ver turn the regulation screw insi-
de or by the side of the tap shaft
until a small regular flame is
obtained
put the knob back on and turn it
quickly from the maximum posi-
tion to the minimum position,
checking that the flame does not
go out
for burners with safety valve make sure that the regulation obtained is
sufficient to maintain heating of the thermocouple. If it is not increase the
minimum.
Regulation of minimum for LPG
To regulate the minimum for LPG, completely tighten (clockwise) the screw
inside or next to the gas tap pin.
The operations described above can easily be performed whatever the
positioning or fastening of the hob to the cabinet.
THE BURNERS REQUIRE NO REGULATION OF THE PRIMARY AIR.

19 - ENGLISH
Burner and nozzle characteristic table
Category: II 2H 3B/P
Burner
(heights
cover)
(mm)
By pass
1/100mm
Thermal power
(*)
(kW)
Liquid gas
Natural
gas
Output
(g/h)
G30 =G31
Injector
1/100mm
Output
(l/h)
G 20
Injector
1/100mm
Rated Reduced
Triple ring
64
3,1
1,45
218
90
278
130
Quick
44
2,80
0,80
207
85
264
115
Medium
quick
34
1,70
0,60
120
65
166
97
Auxiliary
29
0,95
0,40
65
50
91
72
Rated supply pressure
(mbar) (1 mbar 10,197mm H2O)
G30 = 28 - 30
G31 = 37
G20 = 20
(*) = With dry gas and with greater calorific power (Hs

20 - ENGLISH
100 min
100 min
Instructions for building in the units
The appliance is of class 3. It can be installed with just one side part (to right
or left of the hob) higher than the cooking hob and placed at a minimum
distance as shown in figure.
It can be built into all units whose walls withstand a temperature higher
than room temperature (UNI EN 30-1-1 e/o CEI EN 60335-2-6).
L P H
PL
H
(mm) (mm) (mm)
hobs series
steel or enameled
glass
30 320 520 40 40
45 450 520 40 40
60 590 520 40 40
70 680 520 40 40
90
9132
9710
9711
9143(model)
9720(model)
120
860
865
850
890
860
880
1180
520
520
510
525
410
510
410
40
-
-
-
51
78
51
40
-
-
-
51
78
51
Avoid installing the appliance near inflammable materials (e.g. curtains,
cloths, etc.).
The dimensions of the openings for building in are given in the figure which
also gives the minimum distances to be respected between the hole for buil-
ding in and the side and back walls.
Hole dimensions
1)Hob series 30 cm (290x490)
2)Hob series 45 cm (420x490)
3)Hob series 60 and 70 cm (560x490)
4)Hob series 90 cm (830x490)
5)Hob 9143 model (830x380)
6)Hob 9720 model (860x490)
7)Hob series 120 cm (1150x380)
1-2-3-4-6=490 mm
5-7= 380 mm
This manual suits for next models
6
Popular Hob manuals by other brands

Electrolux
Electrolux 65557 G-M Instruction booklet

KitchenAid
KitchenAid KHMS 9010/I instructions
AIRLUX
AIRLUX ATI42BBK Instructions of use and maintenance
Siemens
Siemens EA6..GF17G Instructions for installation and use

Drija
Drija Alemania 90 Instruction manual / installation manual
CAN
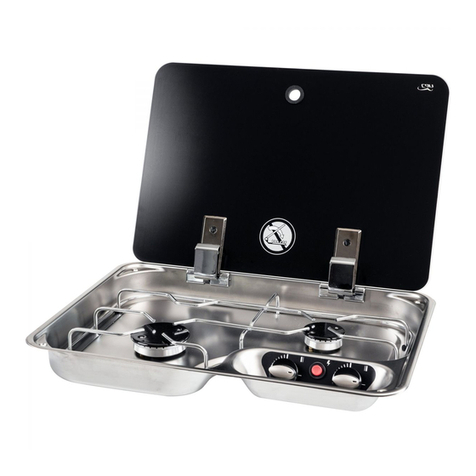
CAN FC1346 Series INSTALLATION, USE AND MAINTENANCE INSTRUCTION MANUAL

