Elba EWMD-H6060TS(BK) User manual

For The Warranty Terms & Conditions, Please Refer To Warranty Certificate
Owner’s Manual
Please read this manual carefully before
operating your set.
Retain it for future reference.
Record model number and serial number
of the set.
See the label attached on the set and
quote this information to your dealer when
you require service.
BUILT-IN WARMING DRAWER
MODEL: EWMD-H6060TS(BK)

CONTENTS
1. SAFETY PRECAUTIONS…………....…………………………………………………………………………………………….1
2. ATTENTIONS…………………………………………………………………………………………………………………………2
3. INSTALLATION…………………..…………………………………………………………………………………………….2-3
4. CONNECTION OF THE APPLIANCE…………………………………………………………………………………………4
4.1 FITTING ON A POWER SUPPLY CABLE……………………………………………………………………………………4
4.2 CONNECTING THE SUPPLY CABLE TO THE MAINS…………………………………………………………………4
5. FOR THE FIRST TIME USING…………………………………………………………………………………………………….5
6. PRODUCT DESCRIPTIONS……………………………………………………………………………………………………….5
6.1 CONTROL PANEL……………………………………………………………………………………………………………………….6
7. PROGRAMS AND FUNCTIONS……………………………………………………………………………………….7
7.1 SELECTING THE WARMING DRAWER PROGRAMS……………………………………………………………………7
7.2 WARMING DRAWER FUNCTIONS…………………………….………………………………………………………7-8
8. CLEANING AND MAINTENANCE…………………………………………………………………………………….9
9. TECHNICAL SPECIFICATION…….………………………………………………………………………………………….9

We recommend that you read the instructions in this owner’s manual carefully before using
it for the best performance and to extend the lifespan of your appliance, as it will provide you
with all the instructions you require to ensure its safe installation, use and maintenance.
1. SAFETY PRECAUTIONS
Do not carry the appliance at the front panel, this might damage the warming drawer door.
To ensure your safety, all electric appliances should only be installed or serviced by
qualified technician. If the supply cord is damaged, it must be replaced by the authorized
service center or similarly qualified technician in order to avoid hazard.
Do not place supply cord on the edge of table and counter, or near any heating appliance.
In order to avoid electric shock, do not immerse supply cord, plug or other parts into water.
In order to avoid burning or explosion, combustibles or flammable material (curtains, cloth,
wallpaper and others) should be kept away from the appliance.
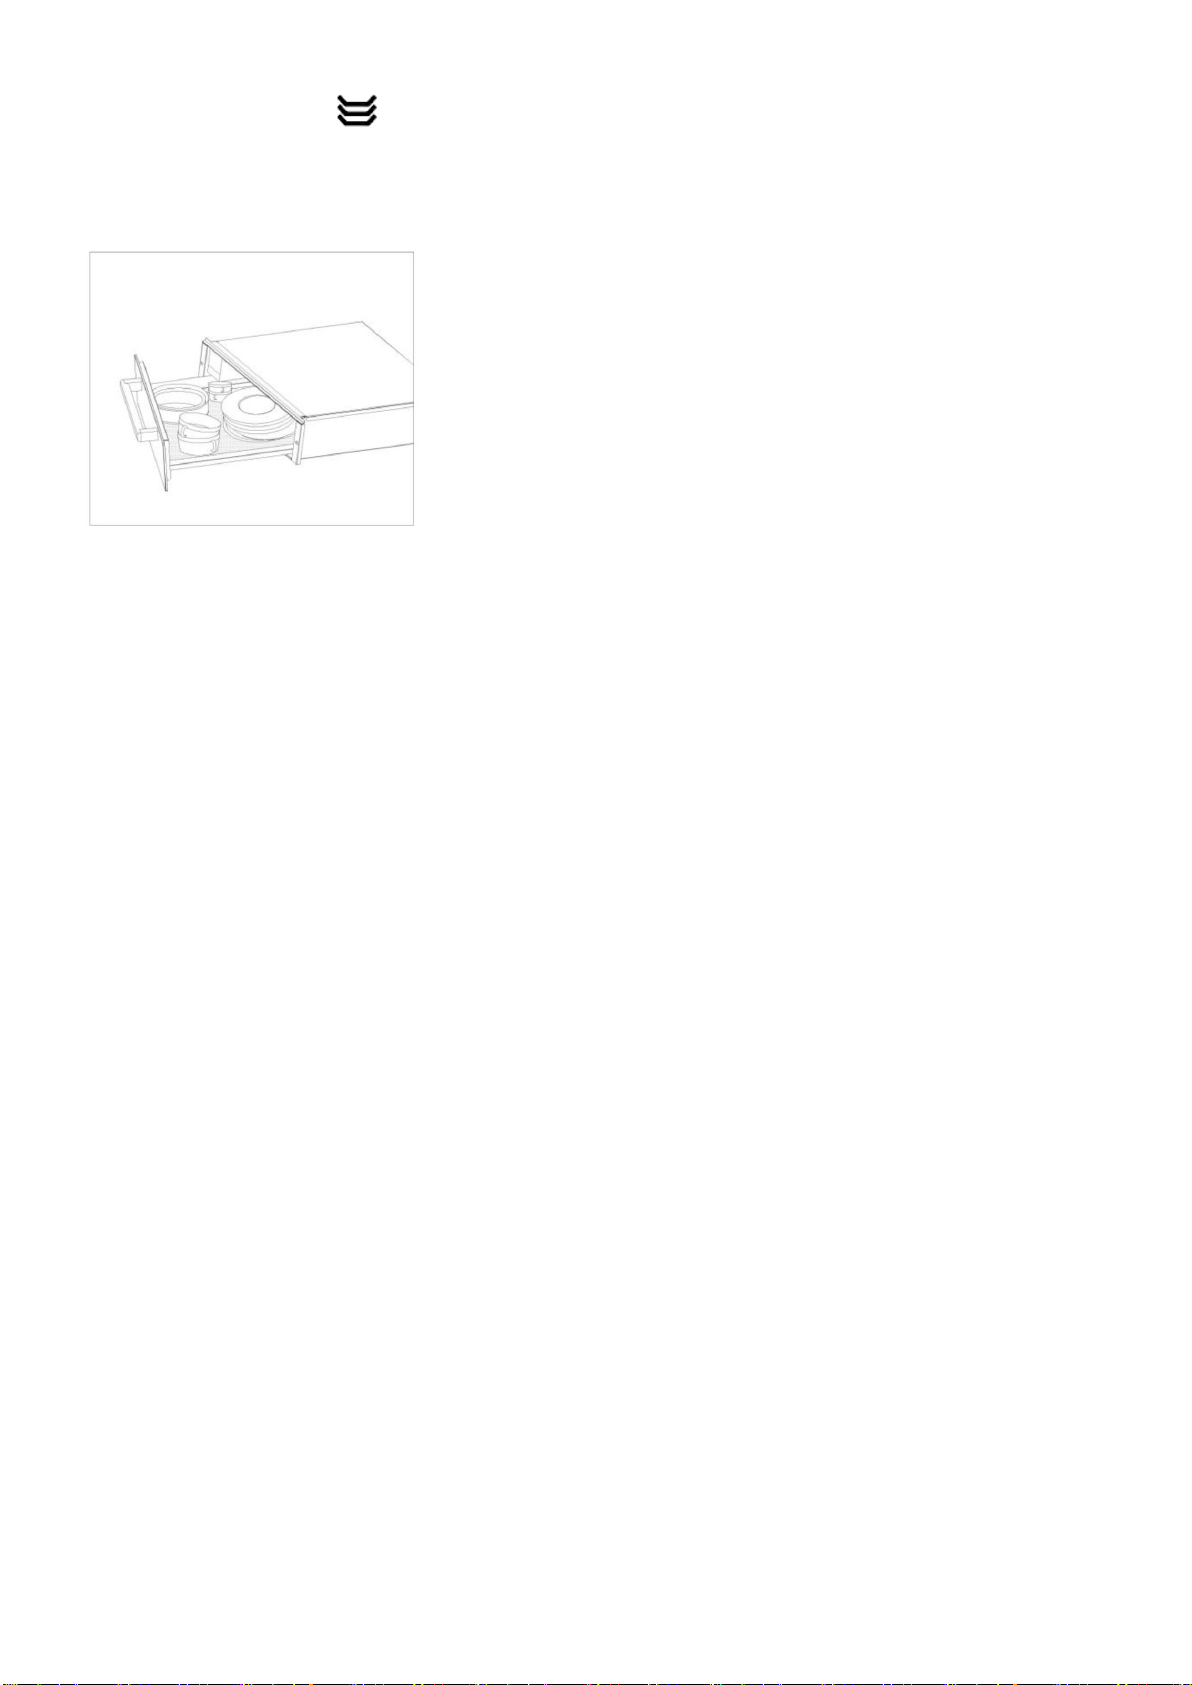
Do not place paperboard, plastic or other similar items in the warming drawer. When the
warming drawer is not being used, everything should be removed except provided
accessory.
Do not cover slag pan or other parts with tinsel since it will result overheat.
Accessible parts may become hot during use, please keep away from children.
Never obstruct vents provided for ventilation and heat dispersal.
When the appliance is faulty, please contact the authorized service center.
Disconnect the warming drawer from the power supply and waiting until it is cool, before
cleaning or maintenance.
In order to avoid electric shock, never use wire brush to clean the appliance since pieces
of metal is easy to touch live part.
Never use metal scouring pads or sharp scrapers which will damage the door surface or
interior wall, leading to scratches of the coating.
In order to avoid burn or electric shock, never put item more than 6 place settings.
Please make sure the warming drawer function has been switched off when it is not be
used.
Unplug from the socket when you are planning not to use the warming drawer for long
time.
Never use your warming drawer outside the cabinet.
This appliance is intended for domestic use only to warm plates, dishes and other crockery.
Any other usage is not supported and could be dangerous.
Do not sit or lean on the opened drawer. This can damage the telescopic runners. The
drawer has a maximum load bearing capacity of 15 kg.
1

2. ATTENTIONS
In order to avoid electric shock, please make sure the warming drawer has been shut off
before carrying out the maintenance.
Use only original accessories provided by ELBA or its authorized service center.
Do not use wet parts of body to touch the warming drawer.
Do not pull and push the warming drawer by its supply cord, this may lead to socket
disconnection.
Improper or dangerous operations are forbidden.
Do not let the power cord of other appliances to touch the heated parts of the warming
drawer.
The warming drawer should not be exposed to rain or direct sunshine.
Do not use or store flammable objects near to the warming drawer.
Distributors decline all liability for not following above instructions or some improper operations
which caused personal injury and property loss.
3. INSTALLATION
The material of the cabinet should be insulated. The panels of the adjacent cabinets must be
made of heat-resistant material which can withstand temperatures of up to 100°C. In compliance
with current safety standards, contact with the electrical parts of the warming drawer must not be
possible once it has been installed.
Positioning the appliance in the housing unit.
Push the appliance into the housing unit.
2

If the appliance is not intended to be installed in combined with any other appliance, please
installation with the follow:
Open the drawer, and use the 2 screws supplied to secure the appliance to the side walls
of the housing unit.
The appliance is supplied with three metal trims which have an adhesive underside.
These trims must be stuck on to the warming drawer so that they seal any gaps between
the housing unit and the appliance. Any air gap created acts as additional insulation and
helps prevent heat-loss.
Carefully pull the protective foil off the underside of each trim.
Then position the trim as shown in the illustration so that they are flush with the side walls
and the back wall of the housing unit and then stick them to the warming drawer. If the
unit does not have a back wall you do not need the third trim.
Build in the combination appliance in accordance with its operating and installation
instruction
Important:
The power supply to the appliance must be cut off before any adjustments or
maintenance work is carried out.
The AC power supply should be supplied with 220-240V, 50/60Hz with minimum 13A
distribution circuit fuse or at least 13A distribution circuit breaker.
3

4. CONNECTION OF THE APPLIANCE
4.1 Fitting on a Power Supply Cable
The appliance has to be equipped with a three-core power supply cable which is designed to
operate with an alternating current. The AC power supply should be supplied with 220-240V,
50/60Hz and a minimum 13A distribution circuit fuse or at least 13Adistribution circuit breaker.
4.2 Connecting the Supply Cable to the Mains
Install a standardized plug corresponding to the load indicated on the marking plate. The supply
cable should be positioned so that it does not reach a temperature of more than 50°C with
respect to the room temperature, anywhere along its length, or protected by insulation having an
appropriate rating.
Before making the connection, check that:
The electrical safety of this appliance can only be guaranteed if the appliance is correctly
and efficiently earthed, in compliance with regulations on electrical safety.
Always ensure that the earthing is connected. If you have any doubts please contact a
qualified technician to check the connection. The manufacturer declines all liability of
damage resulting from a connection which has not been earthed properly.
Before plugging the appliance into the mains, check that the specifications indicated on
the marking plate correspond to the electrical mains system of your home.
Check that the electrical capacity of the system and sockets will support the maximum
power of the appliance, as indicated on the marking plate.
If the socket and appliance plug are not compatible, have the socket replaced with a
suitable model by a qualified technician. The latter, in particular, will also have to ensure
that the cross sections of the socket cables are suitable for the power absorbed by the
appliance.
The use of adapters, multiple sockets and /or extensions, is not recommended. If their
use cannot be avoided, remember to use only single or multiple adapters and extensions
which comply with current safety regulations. In these cases, never exceed the maximum
current capacity indicated on the single adapter or extension and the maximum power
indicated on the multiple adapter .The plug and socket must be easily accessible.
4

5. FOR THE FIRST TIME USING
The first time you use your appliance, we recommend that set the thermostat to the highest
setting and leave the warming drawer on for about half an hour with nothing in it, with the door
shut completely. Then open the door and let the air in. The odor that is often detected during this
initial use is due to the evaporation of substances used to protect the warming drawer during
storage and until it is installed.
6. PRODUCT DESCRIPTION
1. ON/OFF Button
2. Temperature Control
3. Warming Drawer
4. Operation Indicator
1
2
3
4
5

6.1 Control Panel
Icon
Descriptions
ON Button,
Press button to turn appliance on.
OFF Button,
Press button to turn appliance off.
Cups or glasses (approx. 40°C)
Turn the knob to select the program.
Serving dishes or plates (approx. 60°C)
Turn the knob to select the program.
Press button to turn on appliance. Select the program by turn the knob to desire program.
The temperature of the warming drawer will heat up after the program is selected and take about
30-35 minutes to heat evenly.
6

7. PROGRAMS AND FUNCTIONS
7.1 Selecting the Warming Drawer Programs
To select the warming drawer programs, turn the knob to desire program. The detail of the
programs as below:
Symbol
Function Descriptions
The temperature range can be set within the range of 40-50ºC. This program is
used to warm the cups or glasses. Drinks poured into warmed cup do not cool down
so quickly.
The temperature range can be set within the range of 60-80ºC(Maximum). This
program is used to warm the serving dishes or plates. Food stays warm for longer if
served in pre-heated dishes.
7.2 Warming Drawer Functions
The features of this warming drawer include the following functions:
CUPS OR GLASSES
Suggested temperature: 40 °C
This program is used to warm the cups or glasses. Drinks poured into warmed cup do not cool
down so quickly. It will take around 40 minutes to heat evenly.
Capacity: - 80 espresso cups or
- 40 cappuccino cups or
- 30 punch glasses
7

DISHES OR PLATES
Suggested temperature: 60 °C
This program is used to warm the serving dishes or plates. Food stays warm for longer if served
in pre-heated dishes. It will take around 30-35 minutes to heat evenly.
Capacity: - 20 dinner plates (Φ28 cm) or
- 36 soup bowls (Φ22 cm) or
- 10 dinner plates (Φ28 cm) and 10 soup bowls (Φ22 cm) or
- 10 pizza plates (Φ36 cm)
NOTE: The heat up times will affect by the various factor such as material and thickness
of the crockery, the quantity, the temperate setting, the crockery arrangement and so on.
NOTE: The maximum load bearing capacity of the drawer is 15 kg.
8

8. CLEANING AND MAINTENANCE
Before cleaning or performing maintenance on your warming drawer, disconnect the
appliance from the power supply. To extend the lifespan of your warming drawer, it must
be cleaned frequently.
All surfaces and controls should be cleaned using warm water with a little washing up
liquid applied with a soft sponge or cloth.
Clean the glass panel using non-abrasive products or sponges and dry it with a soft cloth.
Avoid:
- Cleaning detergent containing soda, acids or chlorides,
- Abrasive cleaners, e.g. powder cleaners and cream cleaners,
- Stainless steel cleaners,
- Cleaning agents containing descaling,
- Dishwasher detergent,
9.TECHNICAL SPECIFICATION
Notice:
Physical measurement may be different from label because of the products is in
continuous improvement. Please refer to physical measurement to make sure definite
size.
NOTICE
This product must not be disposed together with domestic waste. It has to be disposed at an authorized place for
recycling of electrical and electronic appliances. By collecting and recycling waste, you help to save natural
resources and make sure the product is disposed in an environmental friendly and healthy way.
Model
EWMD-H6060TS(BK)
Capacity
6 place settings
Voltage
220 –240V
Frequency
50/60Hz
Rated Power
390-470W
Product Dimension (mm)
594 (W) x 140 (H) x 465 (D)
Built-in Dimension (mm)
560-568 (W) x 141 (H) x min 600 (D)
Carton Dimension (mm)
653.5 (W) x 195 (H) x 657 (D)
Gross / Net Weight
18.0 KGS / 16.5 KGS
9

Table of contents