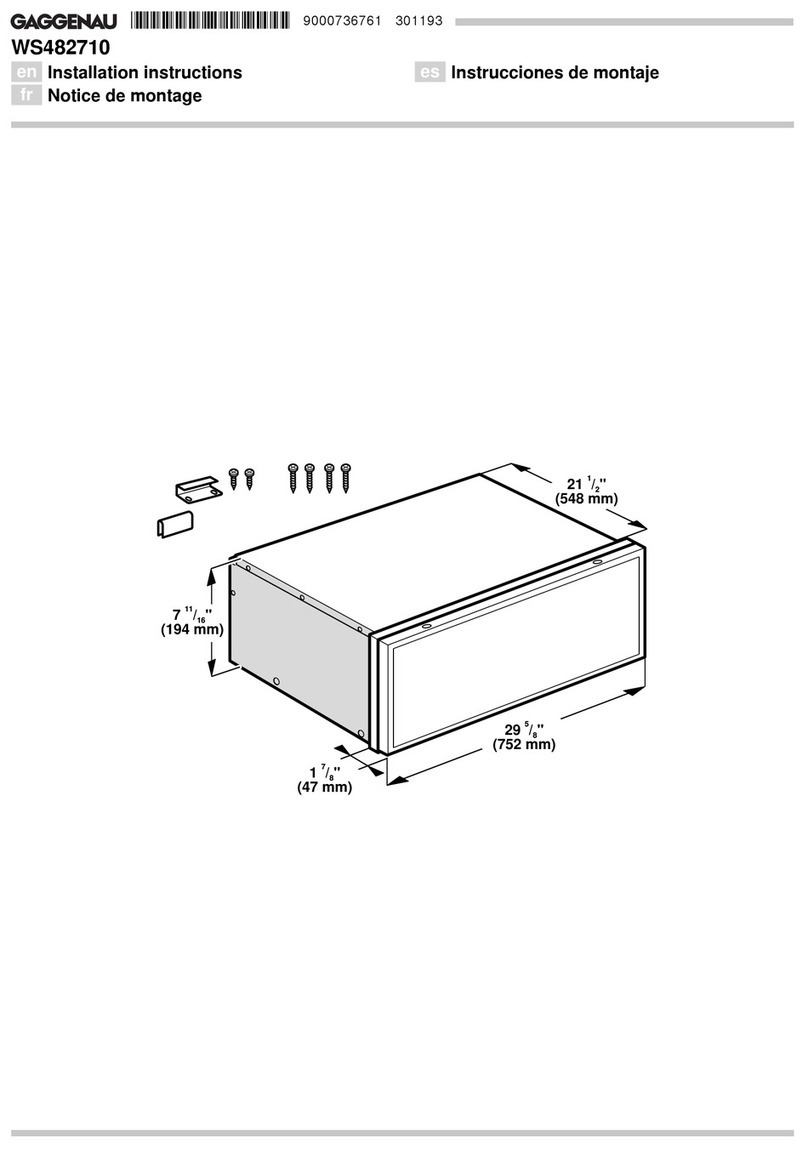
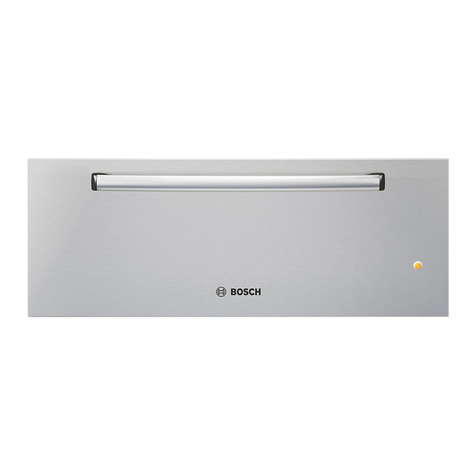
Brandt WD1014X User manual

FR GUIDE D’UTILISATION
EN USER GUIDE
DE BETRIEBSANLEITUNG
NL GEBRUIKSAANWIJZING
DA BRUGERVEJLEDNING
ES MANUAL DE UTILIZACIÒN
PT MANUAL DE UTILIZAÇÃO
IT MANUALE D’USO
WD1014X

2
Chère cliente, cher client,
Vous venez d’acquérir un tiroir chauffant BRANDT et nous vous en
remercions.
Nous avons mis dans cet appareil toute notre passion, notre savoir-faire pour
qu’il réponde au mieux à vos besoins. Innovant, performant, nous l’avons
conçu pour qu’il soit aussi toujours facile à utiliser.
Vous trouverez également dans la gamme des produits BRANDT, un vaste
choix de fours, de tables de cuisson, de hottes aspirantes, de cuisinières, de
lave-vaisselle, de lave-linge, de sèche-linge, de réfrigérateurs et congélateurs
que vous pourrez coordonner à votre nouveau tiroir chauffant BRANDT.
Bien entendu, dans un souci permanent de satisfaire le mieux possible vos
exigences vis à vis de nos produits, notre service consommateurs est à votre
disposition et à votre écoute pour répondre à toutes vos questions ou
suggestions (coordonnées à la fin de ce livret).
Et connectez-vous aussi sur notre site www.brandt.com où vous trouverez
tous nos produits, ainsi que des informations utiles et complémentaires.
BRANDT
Dans le souci d’une amélioration constante de nos produits, nous nous réservons le droit
d’apporter à leurs caractéristiques techniques, fonctionnelles ou esthétiques toutes
modifications liées à leur évolution.
Important : Avant de mettre votre appareil en marche, veuillez lire
attentivement ce guide d’utilisation afin de vous familiariser plus
rapidement avec son fonctionnement.
3
SOMMAIRE
FR
Protection de l’environnement 3
Description du tiroir chauffant 4
Conseils de sécurité 5
Installation 6
Encastrement 7
Utilisation du tiroir chauffant 8
Entretien et nettoyage 11
Service après vente et relations consommateurs 11
PROTECTION DE L’ENVIRONNEMENT :
Les matériaux d’emballage de cet appareil sont recyclables. Participez à leur
recyclage et contribuez ainsi à la protection de l’environnement en les
déposant dans les conteneurs municipaux prévus à cet effet.
Le symbole sur le produit ou son emballage indique que ce produit ne
peut être traité comme déchet ménager. Il doit plutôt être remis au point de
ramassage concerné, se chargeant du recyclage du matériel électrique et
électronique. En vous assurant que ce produit est éliminé correctement,
vous favorisez la prévention des conséquences négatives pour
l’environnement et la santé humaine qui, sinon, seraient le résultat d’un
traitement inapproprié des déchets de ce produit.
Pour obtenir plus de détails sur le recyclage de ce produit, veuillez prendre
contact avec le bureau municipal de votre région, votre service d’élimination
des déchets ménagers ou le magasin où vous avez acheté le produit.

4
FR
DESCRIPTION DU TIROIR CHAUFFANT
1. Minuterie interrupteur marche/arrêt
2. Voyant de mise sous tension en façade
3. Sélecteur de température
4. Tiroir à vaisselle
5. Fond antidérapant

5
CONSEILS DE SECURITE
FR
Conservez cette notice d’utilisation avec votre appareil. Si l’appareil
devait être vendu ou cédé à une autre personne, assurez-vous que la
notice d’utilisation l’accompagne.
Merci de prendre connaissance de ces conseils avant d’installer et
d’utiliser votre tiroir chauffant. Ils ont été rédigés pour votre sécurité et
celle d’autrui.
Ce tiroir chauffant a été conçu pour être utilisé par des particuliers dans leur
lieu d’habitation. Il est destiné exclusivement à préchauffer la vaisselle. Toute
autre utilisation est interdite et peut être dangereuse. Le fabricant se dégage
de toute responsabilité en cas d’utilisations non conformes.
N’utilisez cet appareil qu’après encastrement. Seul l’encastrement permet
d’éviter tout risque de contact avec les composants sous tension.
N’ouvrez en aucun cas la carrosserie de l’appareil.
L’enceinte du tiroir chauffant peut atteindre 70°C suivant la température
choisie et la durée d’utilisation. Pour enlever la vaisselle chaude, utilisez des
maniques ou des gants.
N’utilisez pas le tiroir chauffant pour maintenir au chaud, réchauffer ou cuire
des aliments ou des boissons. L’humidité des aliments ou boissons pourrait
entraîner une corrosion de l’appareil.
Ne montez et ne vous asseyez pas sur le tiroir ouvert. Les rails télescopiques
seraient endommagés. La capacité de charge du tiroir est de 20 kg
maximum.
Ne rangez pas de récipient en plastique ou d’objets inflammables dans
l’appareil. Ils pourraient fondre ou prendre feu à sa mise en marche.
L’appareil n’est pas prévu pour être utilisé par des enfants ou des personnes
handicapées sans surveillance. Les enfants doivent être surveillés pour
s’assurer qu’ils ne jouent pas avec l’appareil.

6
FR
INSTALLATION
Avant d’effectuer le branchement, s’assurer que les fils de votre
installation électrique sont d’une section suffisante pour alimenter
normalement l’appareil. Le fusible de votre installation doit être de 10
ampères.
Il faut prévoir dans le circuit d'alimentation un dispositif de coupure bipolaire
dont l'ouverture des contacts est supérieure à 3 mm.
Le raccordement électrique est à réaliser avant la mise en place de l’appareil
dans le meuble.
Le tiroir doit être branché avec un câble d’alimentation (normalisé) à 3
conducteurs de 1 mm² (1 ph + 1 N + terre) qui doivent être raccordés sur
réseau 220-240 V ∼monophasé par l’intermédiaire d’une prise de courant 1
ph + N + terre normalisé CEI 60083 ou conformément aux règles
d’installation. Le fil de protection (vert/jaune) est relié à la borne
de
l’appareil et doit être relié à la terre de l’installation.
Dans le cas d’un branchement avec prise de courant, celle-ci doit rester
accessible après l’installation de l’appareil.
Le neutre du tiroir chauffant (fil bleu) doit être raccordé au neutre du réseau.
Si le câble d’alimentation est endommagé, il doit être remplacé par un câble
équivalent (H05RNF 3x1mm²) disponible auprès du service après-vente.

7
ENCASTREMENT
FR
Placez l’appareil dans la niche du meuble. Vérifiez que la carrosserie de
l’appareil soit bien positionnée.
Ouvrez le tiroir et fixez l’appareil aux parois latérales du meuble avec les 4 vis
et les 4 entretoises livrées.
WD1014X

8
FR
UTILISATION DU TIROIR CHAUFFANT
INFORMATION PREALABLE :
Cet appareil doit exclusivement servir à préchauffer la vaisselle.
L’appareil dispose d’un système de chauffage à air chaud. Un ventilateur
répartit la chaleur de la résistance dans le tiroir. La vaisselle est réchauffée
uniformément et rapidement grâce à la circulation d’air.
Une grille de protection évite le contact avec la résistance et le ventilateur.
Le fond du tiroir est recouvert d’une surface antidérapante qui empêche que
la vaisselle ne glisse lors de l’ouverture du tiroir.
ELEMENTS DE COMMANDE :
Vous disposez d’un sélecteur de température et d’une minuterie interrupteur
Marche/Arrêt. Ils ne sont apparents que lorsque le tiroir est ouvert.
Lorsque le tiroir est fermé, le voyant situé sur le devant de l’enceinte vous
permet de voir si l’appareil est en marche.
PRINCIPE DE COMMANDE :
Posez la vaisselle dans le tiroir.
Sélectionnez une température.
Sélectionnez une durée (minimum 10 minutes).
Le voyant de mise sous tension s’allume.
Fermez le tiroir.
Lorsque la durée réglée est écoulée, le système de chauffage à air chaud
s’arrête et une sonnerie retentit.
Pour arrêter la sonnerie, se mettre en position 0.

9
UTILISATION DU TIROIR CHAUFFANT
FR
SELECTION DE LA TEMPERATURE :
Le sélecteur de température permet de régler une température comprise
entre 30 et 70 °C.
Sur l’échelle de température, voici les meilleures températures pour le type
de vaisselle utilisé :
40 °C : pour les tasses ou les verres. Versées dans des tasses ou verres
préchauffés à cette température, les boissons chaudes conservent leur
chaleur plus longtemps et le récipient peut être touché sans se brûler.
60 °C : pour les assiettes et les plats. Les mets disposés sur des assiettes
ou plats préchauffés conservent leur chaleur. Les assiettes et plats
peuvent cependant être touchés sans risquer de se brûler.
TEMPS DE PRECHAUFFAGE :
Le temps de préchauffage est fonction de plusieurs facteurs :
matériau et épaisseur de la vaisselle
charge
disposition de la charge
réglage de la température
Il est donc impossible de donner des valeurs toujours vérifiables.
Quelques repères :
Pour un réglage de température de 60 °C, le réchauffage homogène :
de la vaisselle nécessaire à un repas pour six personnes est d’environ 30
min.
de la vaisselle nécessaire à un repas pour douze personnes est d’environ
40 min.
Vous déterminerez vous-même avec l’expérience quelle durée est la plus
appropriée pour votre vaisselle.

10
FR
UTILISATION DU TIROIR CHAUFFANT
CAPACITE :
La capacité dépend de la hauteur du modèle, du poids et des dimensions de
votre vaisselle.
Le modèle présente une capacité de charge maximale de 20 kg.
Les exemples suivants sont donnés à titre indicatif :
WD1014X
Les quantités sont déterminées par le volume
Vaisselle pour 6 personnes :
6 grandes assiettes Ø 28 cm
6 assiettes à soupe Ø 22 cm
1 saladier Ø 22 cm
1 saladier Ø 20 cm
1 saladier Ø 18 cm
2 plats à viandes 36 cm
ou 16 grandes assiettes Ø 28 cm
+ 8 bols Ø 10 cm
ou 24 assiettes à soupe Ø 22 cm
ou 40 bols Ø 10 cm
ou 60 tasses Ø 8 cm
ou . . .

11
ENTRETIEN ET NETTOYAGE
FR
Avant tout entretien, arrêtez l’appareil et laissez-le refroidir.
Nettoyez toutes les surfaces uniquement avec une éponge, du produit à
vaisselle et de l’eau chaude. Séchez ensuite avec un chiffon doux.
Ne pas nettoyer l’appareil avec un nettoyeur à vapeur.
L’emploi de produits abrasifs, d’alcool ou de diluant est déconseillé; ils sont
susceptibles de détériorer l’appareil.
La façade en inox est sensible aux rayures et aux coupures. Utilisez un
détergent spécial inox non abrasif.
Le fond antidérapant peut être enlevé pour nettoyer le fond du tiroir.
Vous pouvez nettoyer le fond antidérapant avec de l’eau chaude et du liquide
vaisselle. Ensuite, séchez-le bien et remettez-le dans le tiroir lorsqu’il est
parfaitement sec.
Service après-vente et relations consommateurs
FR

12
EN
EDITORIAL
Dear Client,
You have just acquired a BRANDT warming drawer; thank you for your
purchase.
Our research teams have designed a new generation of appliances with you
in mind. Their quality, design and state-of-the-art technology incorporate our
unique know-how that makes these products exceptional.
Your new BRANDT warming drawer will be an attractive addition to your
kitchen, combining ease of use with effective performance for preheating your
tableware.
BRANDT products include a wide range of ovens, microwave ovens, glass-
ceramic cook tops, vented hoods, built-in dishwashers and refrigerators that
you can match to your new BRANDT warming drawer.
Our consumer department is of course at your service, because we want to
do our best to meet your expectations with regard to our products. We will be
happy to respond to your questions or suggestions.
These "new valuables" serve as landmarks in our daily lives – BRANDT, a
reference for excellence, extends an invitation to join a new art of living.
The BRANDT trademark.

13
TABLE OF CONTENTS
EN
Protection of the environment 13
Description of warming drawer 14
Safety tips 15
Installation 16
Encasement 17
Using your warming drawer 18
Cleaning and maintenance 21
After sales service 21
PROTECTION OF THE ENVIRONMENT:
The packaging materials used for this appliance can be recycled. Take part in
recycling and help protect the environment by discarding them in the
appropriate waste bins provided by the municipal authorities.
The symbol on the product or on its packaging indicates that this product
may not be treated as household waste. Instead it shall be handed over to
the applicable collection point for the recycling of electrical and electronic
equipment. By ensuring this product is disposed of correctly, you will help
prevent potential negative consequences for the environment and human
health, which could otherwise be caused by inappropriate waste handling of
this product.
For more detailed information about recycling of this product, please contact
your local city office, your household waste disposal service or the shop
where you purchased the product.

14
EN
DESCRIPTION OF WARMING DRAWER
1. Timer, stop/start switch
2. Signal light on the front showing that power is on
3. Temperature control
4. Drawer for dishes
5. Antiskid mat

15
SAFETY TIPS
EN
Keep these instructions with your appliance. If the appliance should be
sold or given to another person, be sure that these instructions are
supplied with it.
Please read these recommendations before installing and using your
warming drawer. They have been drafted for your safety and that of
others.
This warming drawer has been designed for use by private persons in their
homes. It is intended exclusively for warming dishes. Any other use is
prohibited and could be dangerous. The manufacturer cannot be held liable in
the event of non-complying use.
Do not use this appliance until it has been installed in the cabinet. Only full
installation of the drawer prevents any risk of contact with powered
components.
Never open the body of the appliance.
The inside of the drawer can heat up to 70°C depending on the selected
temperature and the duration of use. Use hot-pan holders or gloves to
remove the hot dishes.
Do not use the warming drawer to keep food or drinks hot or to reheat or cook
food or drinks. The moisture in the food or drinks could cause corrosion of the
appliance.
Do not stand or sit on the open drawer; this would damage the telescopic
rails. The maximum load of the drawer is 20 kg.
Do not store any plastic goods or inflammable objects in the appliance. They
could melt or catch fire when it is turned on.
The appliance is not intended for use by young children or infirm persons
without supervision.
Young children should be supervised to ensure that they do not play with the
appliance.

16
EN
INSTALLATION
Before connecting the appliance to the power supply, check that the
wires of your electric installation have sufficient diameter to supply
power to the appliance during normal use. The fuse for the installation
should be 10 amps.
It is necessary to provide a bipolar cut-off device in the power supply circuit,
with an open contact gap of more than 3 mm
.
The electric connection should be made before the appliance is installed in
the cabinet.
The drawer should be connected by a (standard) power cord with three 1
mm² wires (1 single phase + 1 N + ground) to the 220-240 V single phase
power supply via an electric circuit corresponding to the CEI 60083 standard
or complying with the installation rules. The protective wire (green/yellow)
corresponds to ground
on the appliance and should be connected to the
ground of the installation.
In the case of a connection via an electric outlet, the outlet should be
accessible even with the appliance installed.
The neutral on the heating drawer (blue wire) should be connected to neutral
on the power supply.

17
ENCASEMENT
EN
Set the appliance into the niche in the cabinet. Make certain that the body of
the appliance is positioned correctly.
Open the drawer and fasten the appliance to the sides of the cabinet with 4
screws and the 4 spacers delivered with the appliance.
WD1014X

18
EN
USING YOUR WARMING DRAWER
INFORMATION BEFORE USE:
The appliance should be used exclusively to preheat dishes.
The appliance uses a hot air system to heat the dishes. A fan distributes the
heat from the resistor in the drawer. The dishes are heated rapidly and
uniformly by circulation of hot air.
A protective grid prevents the dishes from coming into contact with the
resistor or the fan.
The floor of the drawer is covered with an antiskid mat that prevents the
dishes from sliding when the drawer is opened.
CONTROLS:
The controls include a temperature knob and a Start/Stop switch. These are
only visible when the drawer is open.
When the drawer is closed, the signal light on the front of the drawer comes
on when the appliance is running.
SETTING THE CONTROLS:
Put the dishes in the drawer.
Select the temperature.
Set the timer (minimum 10 minutes).
The signal light shows that the power is on.
Close the drawer
When the timer runs out, the hot air heating system stops and a bell rings.
To turn the bell off, turn the knob to 0.

19
USING YOUR WARMING DRAWER
EN
SELECTING THE TEMPERATURE:
The temperature knob adjusts the temperature between 30 and 70 °C.
The most appropriate temperatures for the types of dishes used are as
follows :
40 °C: for cups or glasses. Hot drinks stay hot longer when poured into
cups or glasses preheated to this temperature, without danger of burns
when people drink from them.
60 °C: for plates and dishes. Food served on prehea ted plates or dishes
maintain their heat and the dishes can be touched without burning the
hands.
PREHEATING TIME:
Preheating time depends on several factors:
the thickness of the dishes and the material they are made from
the load
disposal of the load
temperature setting
Consequently, we cannot give times that will correspond systematically.
A few hints :
For a temperature setting of 60 °C, heated evenly:
dishes for a meal for six take about 30 min.
dishes for a meal for twelve take about 40 min.
After using the drawer a few times, you will know for yourself how long it
takes to heat your dishes.

20
EN
USING YOUR WARMING DRAWER
CAPACITY:
Capacity depends on the height of the model and the weight and size of your
dishes.
This model has a maximum capacity of 20 kg.
The following examples are given as an indication only :
WD1014X
Quantities are determined by volume
Dishes for 6:
6 dinner plates Ø 28 cm
6 soup plates Ø 22 cm
1 serving bowl Ø 22 cm
1 serving bowl Ø 20 cm
1 serving bowl Ø 18 cm
2 serving platters 36 cm
or 16 large plates Ø 28 cm
+ 8 bowls Ø 10 cm
or 24 soup plats Ø 22 cm
or 40 bowls Ø 10 cm
or 60 cups Ø 8 cm
or . . .
Table of contents
Languages:
Popular Warming Drawer manuals by other brands

Bosch
Bosch BIC630N 1A Series instruction manual

Lynx
Lynx L30WD User's manual & installation instructions

Bosch
Bosch BIC630NS1W instruction manual

Jenn-Air
Jenn-Air ELECTRIC WARMING DRAWER user guide

Miele
Miele ESS 2060SS operating instructions

APW Wyott
APW Wyott HDD-1 Installation and operating instructions

Enthermics
Enthermics EC230L Operation and care manual

Thermador
Thermador WD27ES installation manual

CookMax
CookMax 913114 manual

Viking
Viking RVEWD330 Quick reference guide

Thermador
Thermador MASTERPIECE PROFESSIONAL Series installation instructions

GE
GE PJ7000SFSS Dimensions and installation information