19800.925.1491
|
eldoradostone.com/outdoor
FIREBRICK INSTALLATION
The manufacturer requires that the firebox be lined with a minimum 1–1¼" thick firebrick (included). Thicker firebrick may be used as an
option. The pattern for the firebrick lining is also an owner option.
Use the supplied Flue-Set Refractory Mortar to adhere the firebrick to the inside of the firebox and create the finished face joints of the
brickwork. Mixing instructions may vary because of different climates and conditions. The use of good masonry practices for your area
should also be considered. All required through-wall accesses (gas & electrical line feeds and combustion air supply access holes) should
be drilled BEFORE the required firebrick lining is installed.
Mix 50lb bag with 3.75 quarts of clean water or .75 quarts per 10 lbs.
of dry product until completely blended. Only mix what can be
utilized within 15 minutes; do not retemper (the addition of water
after the chemical reaction has begun). The use of warm water
will accelerate setup.
Complete set time is between 48 and 72 hours. For best results,
please allow 7 days before heat is applied.
CAUTION: Do not add additives such as fireclay, sand, cement, or
other accelerators.
APPLYING FIREBRICK
1. Wet mop the inside of the firebox with a damp sponge to
remove dust and loose particles from the interior before
installing firebrick.
2. Determine your pattern and face joint dimensions. Face joint
dimensions of " to ¼" in the brickwork is recommended and
has the best appearance. Other face joint dimensions are
acceptable however smaller joints may not leave room for heat
expansion of firebrick.
HINT:Dip each firebrick into water before applying.
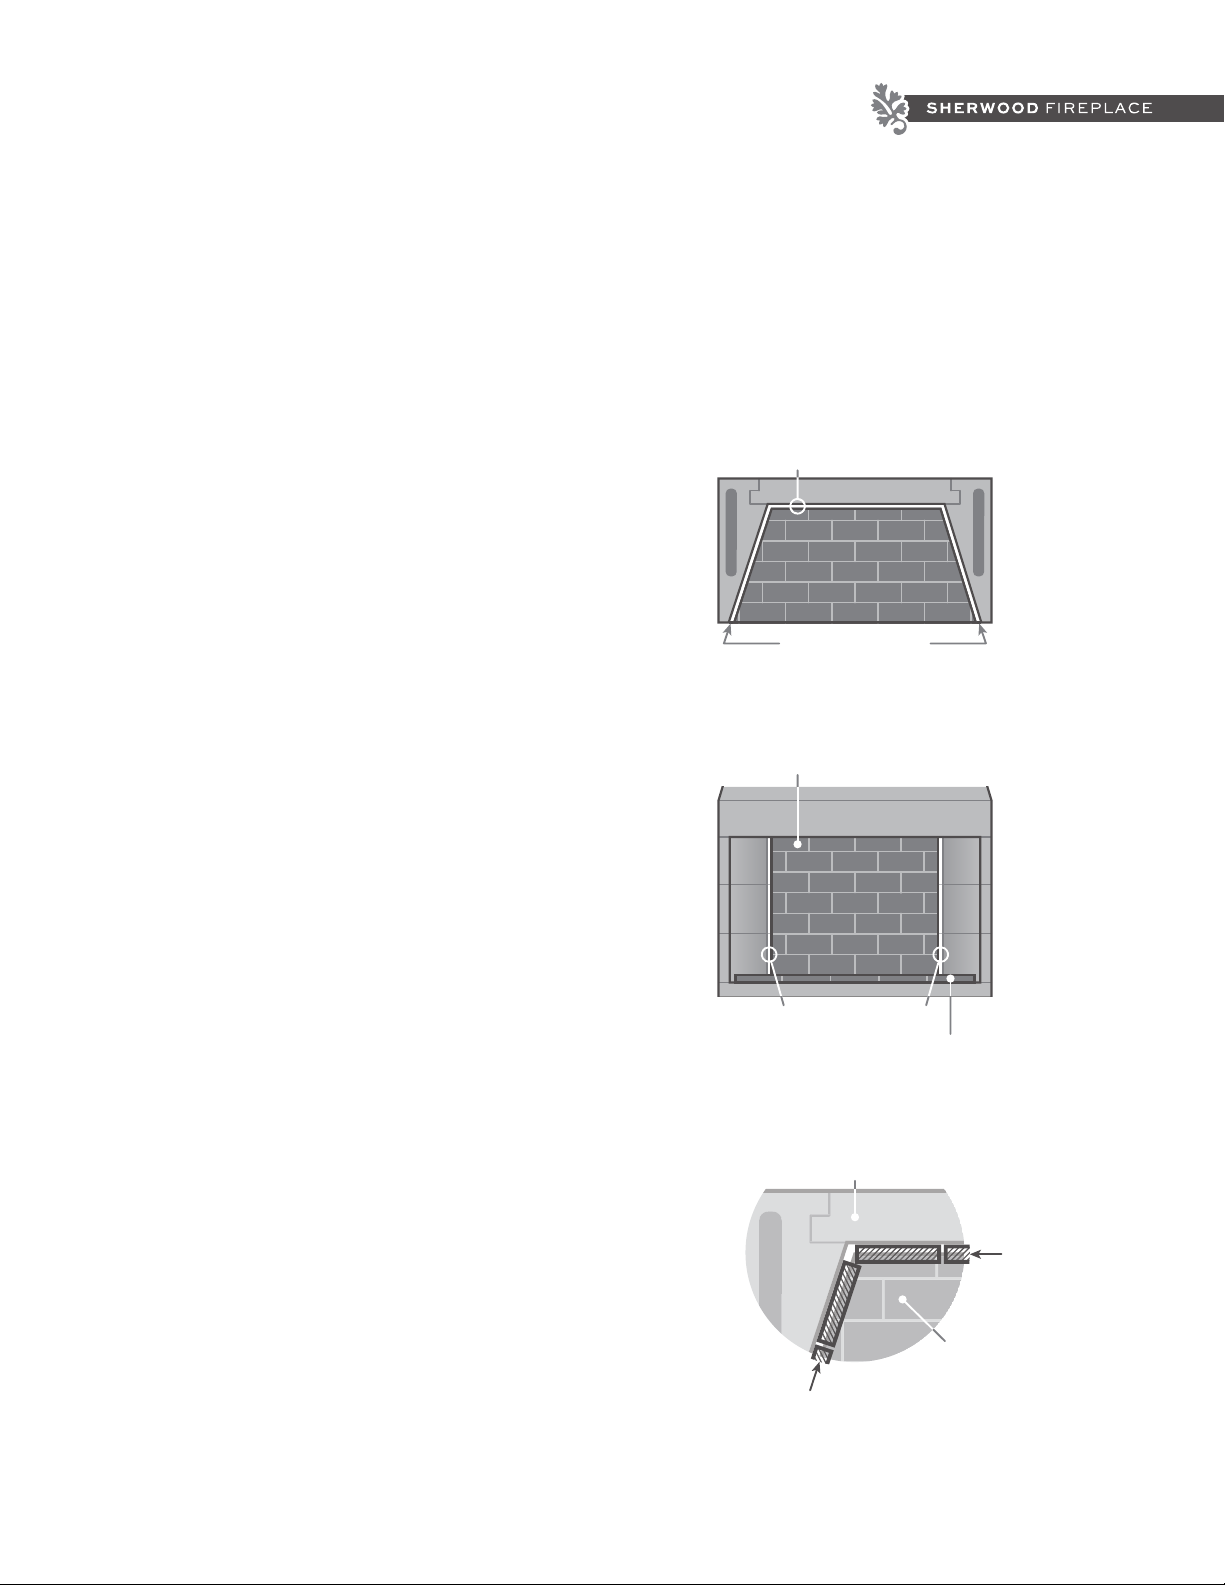
3. Start the firebrick at the front edge of the floor of the Isokern
firebox, proceeding inward toward the back. Give the floor brick
a gap of approximately ½" from the back and side walls (Figure A).
This air space allows heat expansion of the fire brick and is to
be left empty of mortar.
4. Next, adhere firebrick to the back wall of the unit. The firebrick
on the back wall will cover up the ½" expansion gap left on the
brick floor along the back wall of the firebox. Give the firebrick
on the back wall a gap of approximately ½" from the side walls
(Figure B).
5. Set the side walls firebrick by starting at the front edge and
work towards the back. The side wall firebrick, when completed,
covers up the ½" expansion gaps on both the floor and back
side walls where the firebrick was held off (Figure C).
NOTE:It is typical for heat stress cracks to appear in the firebrick
in fireplaces.
½" Expansion Gaps
½" Expansion Gap
Figure A (Overhead View):
Set Firebrick on Floor FIRST
Firebrick Back Wall
½" Expansion Gaps
Firebrick Floor
Figure B (Front View):
Set Firebrick on Back Wall SECOND
Firebox Wall
Firebrick Side Wall
Firebrick Floor
Firebrick
Back Wall
Figure C (Overhead View–Left Corner):
Set Firebrick on Side Walls LAST