Solder or crimp connection
and insulate
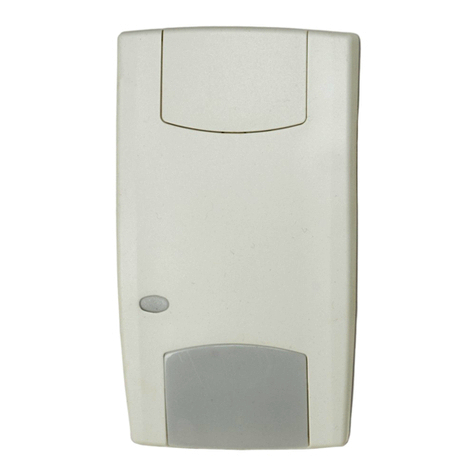
GS/3 Propane Detector
Electro Systems has made
boats and recreational
vehicles safer for over 30
years. We have a complete
line of propane detectors for
you to choose from.
To find out more about our
products, ask your local
dealer, or contact us. We’ll be
glad to send you our current
information.
Electro Systems Inc.
#8-415 Dunedin St.
Victoria, BC
Canada V8T 5G8
T: 250.385.0911
toll free:1.800.668.2254
F : 250.385.0733
toll free:1.800.661.4977
E: info@es-web.com
www.es-web.com
Install within 6" of floor
Do not install
higher than
6" from floor
Specifications
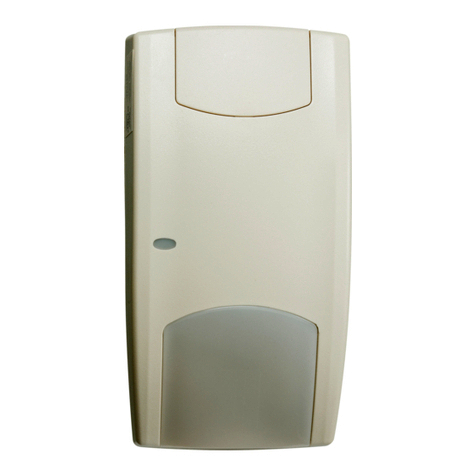
Size 4.32" High, 3.55" Wide, 1.23" Deep
(exposed depth of flush mount: 0.45")
Power Req. 12VDC @ 86mA
Sensitivity <25% of Lower Explosive Level
Alarm output 85dB
Installation
Install the detector with the LEDs up for best visibility and, because
propane is heavier than air, within 6" of the floor or the lowest area
of the RV. Detach the top of the detector from the back by placing
one thumb on each clip. Press each clip towards the center of the
detector and lift the top away from the back. Put the top aside, follow
instructions to secure the back.
Connecting to your power supply
Run power lines (#18 AWG minimum with 1/32" insulation) from the 12
volt battery to the installation location via a fuse or breaker of no more
than 0.5 Amps.
Surface-mount back
Determine the center position for your detector and drill 1/2"D hole
through your installation surface. Feed the power line through from
behind. Screw down the detector back.
Flush-mount back
Determine the center position for your detector and use a 31
/8" (79mm)
hole saw to cut the opening or scribe a 31
/8" (79mm) diameter circle
and cut the opening with a saber saw. Feed the power line through
from behind. Screw the detector back onto your installation surface.
Connecting electronics
Connect the power lines to the leads from the detector, (red to
positive, black to negative)*. Wires may be soldered or splice crimped
and connections must be insulated. Snap the top onto the back.
You’re done!
*If you accidentally reverse the polarity, the detector will not be
damaged, but will not function until you reconnect the wires correctly.
Operation
When you connect power to your new detector it goes through a start-up cycle. The green LED (marked “Power”)
comes on. The red LED (marked “Alarm”) and horn will pulse for approximately 5 seconds until the sensor is warmed
up. If no fumes are detected, the red LED and horn stop and the green LED remains on, indicating the detector is
active. The detector can be tested by injecting gas (no flame) from a butane lighter for 5 seconds into the lower grill.
Perform this test monthly to ensure proper operation of the detector.
If fumes are present at start-up, the horn and red LED will continue to pulse – from 60 pulses/minute at
concentrations lower than 25% of the lower explosive level, to 80 pulses/minute at higher concentrations. If fumes
are detected at any time after start-up the horn and red LED will start to pulse. If this occurs, immediately shut off the
propane supply and ventilate the area. Avoid using any source of ignition, including electric switches, electric motors,
pilot lights or other open flames. When the fumes have dissipated, the horn will stop and the red LED will turn off,
indicating a safe atmosphere. Correct the leak before resuming operation of the propane system. A continuous tone
indicates a short in the electronics and a single pulse every 10 seconds indicates a faulty sensor. If either of these
signals occur, return the detector to your dealer for repair or warranty replacement.
The presence of other organic vapors, such as paint fumes, solvents or hair spray can trigger a false alarm. Ventilate
the area and this should stop the alarm. Your detector needs unrestricted air flow through the grill for reliable
operation. Keep free of any obstructions and vacuum monthly.
Information contained in this brochure is subject to change without notice.
This brochure is for information purposes only. Printed and manufactured in Canada. Last updated: February 22, 2010
