manuals.online logo
Brands
  1. Home
  2. •
  3. Brands
  4. •
  5. Electrolux
  6. •
  7. Refrigerator
  8. •
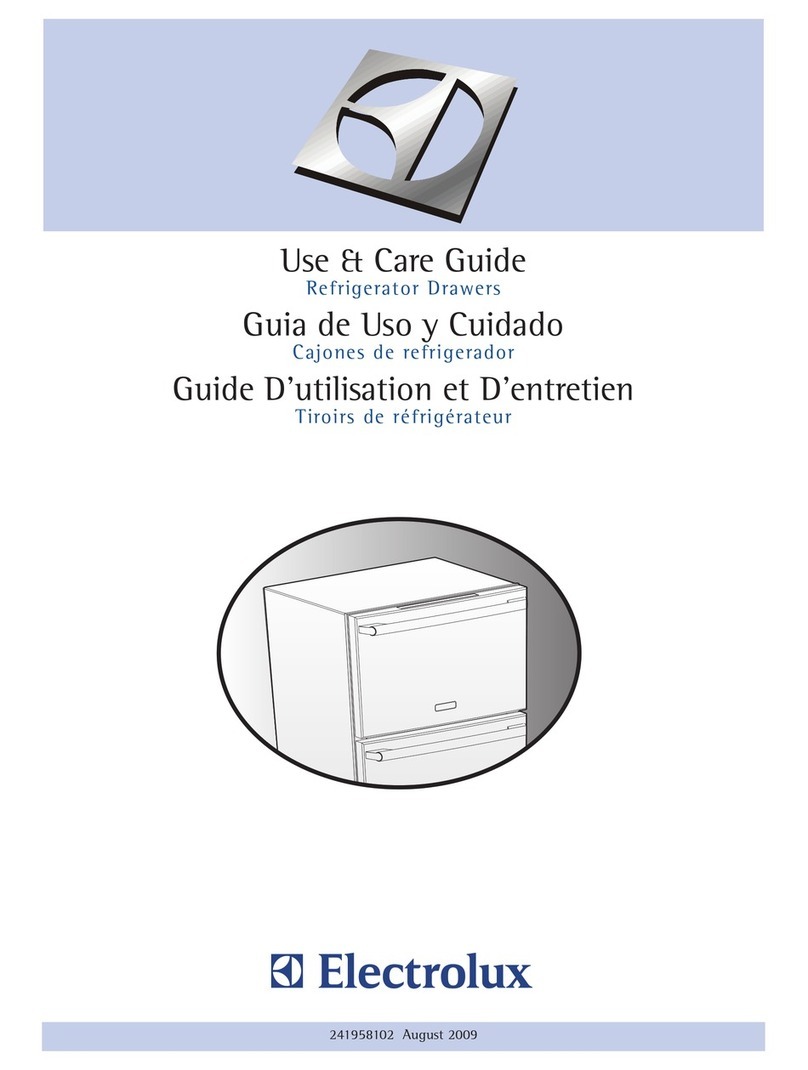
  9. Electrolux ICON User manual

Electrolux ICON User manual

Use Et Care Guide
French Door Bottom Freezer/Refrigerator
Guia de Uso y Cuidado
Refrigerador con congelador inferior de puerta doble
Guide d'utilisation et d'entretien
R_frig_rateur 5 portes frangaises/Cong_lateur en has
Electrolux ICON ®
iiiliii!i!!!iiiiiiiili!ilii_!ililiil!iiiiiliiiilliiiiiiliiliii!ilili!iiii!iiiiiii!iiii!ililliiiiiiiiiili!!_iiii!_iiliilili!!iiiii!ililiil_ii!!iiiii!ililiii_ii!!iiiii!iliiiii_ii!!iiili!iiiliii_ii!!iiiii!iliiiil_ii!!iiiii!iliiiii_ii!!iiiii!iliiiii_ii!!iliii!iiiiiii_ii!!iiili!iiiliil_ii!!iiiii!iliiiii_ii!!iilii!iliiiii_ii!!iiili!iiiliii_ii!!iiili!iiiliil_ii!!iilii!iiiiiii_ii!!iiiii!iliiiii_ii!!iiili!iiiliii_ii!!iiiii!iliiiil_ii!!iiiii!iliiiii_ii!!iiiii!iliiiii_ii!!iliii!iiiiiii_ii!!iiili!iiiliil_ii!!iiiii!iliiiii_ii!!iilii!iliiiii_ii!!iiili!iiiliii_ii!!iiili!iiiliil_ii!!iilii!iiiiiii_ii!!iiiii!iliiiii_ii!!iiili!iiiliii_ii!!iiiii!iliiiil_ii!!iiiii!iliiiii_ii!!iiiii!iliiiii_ii!!iliii!iiiiiii_ii!!iiili!iiiliil_ii!!iiiii!iliiiii_ii!!iilii!iliiiii_ii!!iiili!iiiliii_ii!!iiili!iiiliil_ii!!iilii!iiiiiii_ii!!iiiii!iliiiii_ii!!iiili!iiiliii_ii!!i_!_!i!!_i_i!!ilii!iiil!! !_iiiiii_!i_!_ii!i!!_!_iili!iiiii!iiill!iiiii!iiili_iiii!i!iii!i!ili!iiiii!iiiii!i!iii!iii_i!ii!ii!i!iii!iiill!iiiii!_!iii!iil_i_ii!ii_i!iii!iii_i!ii!ii_i!i_i_iii_i!ii!ii_i!i_i_iii_i!ii!ii_i!i_i_iil_i!ii!ii_i!i_i_iii_i!ii!ii_i!i_i_iii_i!ii!ii_i!i_i_iii_i!ii!ii_i!i_i_iil_i!ii!ii_i!i_i_iii_i!ii!ii_i!i_i_iii_i!ii!ii_i!i_i_iii_i!ii!ii_i!i_i_iil_i!ii!ii_i!i_i_iii_i!ii!ii_i!i_i_iii_i!ii!ii_i!i_i_iii_i!ii!ii_i!i_i_iil_i!ii!ii_i!i_i_iii_i!ii!ii_i!i_i_iii_i!ii!ii_i!i_i_iii_i!ii!ii_i!i_i_iil_i!ii!ii_i!i_i_iii_i!ii!ii_i!i_i_iii_i!ii!ii_i!i_i_iii_i!ii!ii_i!i_i_iil_i!ii!ii_i!i_i_iii_i!ii!ii_i!i_i_iii_i!ii!ii_i!i_i_iii_i!ii!ii_i!i_i_iil_i!ii!ii_i!i_i_iii_i!ii!ii_i!i_i_iii_i!ii!ii_i!i_i_iii_i!ii!ii_i!i_i_iil_i!ii!ii_i!i_i_iii_i!ii!ii_i!i_i_iii_i!ii!ii_i!i_i_iii_i!ii!ii_i!i_i_iil_i!ii!ii_i!i_i_iii_i!ii!ii_i!i_i_iii_i!ii!ii_i!i_i_iii_i!ii!ii_i!i_i_iil_i!ii!ii_i!i_i!iiili!i!iiii!i!ii
_i:_i_ii_i_!_!_i@!_!:ii!_!:ii!_!_!ii_!_ii_i!_!!_!i_ii_i!ii_iii@_i_i_i_iii_ii
Finding information
Please read and save this guide Tabmeof contents
Thank you forchoos ng E ectro ux our new prem um Fin in Inf rm in 2
(J g 0 at 0 ..............................................
brand in home appliances.This Use & Care Guide is
part of our comm tment to customer sat sfact on and f
Sa ety ............................................................... 3
product quality throughout the service life of your new
app ance •FeatureOverview................................................. 5
;;; Keep a record for quick reference .
mslaliaflon .........................................................
Co..ecting theWater Supply.................................. 12
__ Controls ........................................................... 13
Aut0maticlce&WaterlVlaker/Dispenser.................... 15
Electroluxserial number StorageFeatures ................................................ 16
..........................
ChangingtheWater andAir Filters........................... 22
i!_!_i!i_ii_!i!_!_i!i_ii_!i!_!_i!i_ii_!i!_!_i!i_ii_!i!_!_i!i_ii_!i!_!_i!i_ii_!i!_!_i!i_ii_!i!_!_i@ii_i
take the precautions listed below.
Proper Disposal of Refrigerators/Freezers i_i!_!_i!i_ii_!i!_!_i!i_ii_!i!_!_i!i_ii_!i!_!_i!i_ii_!i!_!_i!i_ii_!i!_!_i!i_ii_!i!_!_i!i_ii_!i!_!_i!i_ii_!i!_!_i!i_ii_!i!_!_iii_
Safety
Emectrical information
,The refrigerator must be plugged into its own
dedicated 115 Volt, 60 Hz, AC-only non-GFCl
electric outlet. The power cord of the appliance
isequipped with a three-prong grounding plug for
your protection against electrical shock hazards.
It must be plugged directly intoa properly
grounded three-prong receptacle. The receptacle
must be installed inaccordance with local codes
and ordinances. Consult a qualified electrician.
Do not use an extension cord or adapter plug.
If the power cord isdamaged, itshould be
replaced by the manufacturer, service technician,
or a qualified person.
,Never unplug the refrigerator by pulling on the
power cord. Always grip the plug firmly and
pull straight out from the receptacle to prevent
damaging the power cord.
i!_!_i!i_ii_!i!_!_i!i_ii_!i!_!_i!i_ii_!i!_!_i!i_ii_!i!_!_i!i_ii_!i!_!_i!i_ii_!i!_!_i!i_ii_!i!_!_i!i_ii_!i!_!_i!i_ii_!i!_!_ii_i
Crisper
Drawer Drawer i_i!_!_i!i_ii_!i!_!_i!i_ii_!i!_!_i!i_ii_!i!_!_i!i_ii_!i!_!_i!i_ii_!i!_!_i!i_ii_!i!_!_i!i_ii_!i!_!_i!i_ii_!i!_!_i!i_ii_!i!_!_iii_:_
i!_!_i!i_ii_!i!_!_i!i_ii_!i!_!_i!i_ii_!i!_!_i!i_ii_!i!_!_i!i_ii_!i!_!_i!i_ii_!i!_!_i!i_ii_!i!_!_i!i_ii_!i#i!_!_ii_i
Installation
Required Tools
You wiii need the following tools:
Components Provided:
Top Hinge Top Hinge
Cover Front Cover Rear
Screw _ _crew
_:_---Hinge Screw _-_l
Screw
Tools Necessary:
Phillips TM Hea
or
#2 Square Drive
Head
This Use & Care Guide provides general installation
and operating instructionsfor your model. We
recommend using a service or kitchen contracting
professional to installyour refrigerator. Use the
refrigerator only as instructed inthis Use & Care
Guide. Before starting the refrigerator, follow these
important first steps.
Allow the following clearances for ease of
installation,proper air circulation, and plumbing
and electrical connections:
Sides & Top 3/8inch (9.5 mm)
Back 1 inch(25.4 mm)
• Choose a place that is near a grounded, non-
GFCI, electrical outlet. Do Not use an extension
cord or an adapter plug.
i!_!_i!i_ii_!i!_!_i!i_ii_!i!_!_i!i_ii_!i!_!_i!i_ii_!i!_!_i!i_ii_!i!_!_i!i_ii_!i!_!_i!i_ii_!i!_!_i!i_ii_!i#i!_!_ii_i
5 Recheckgasketseal. wrenchtoturntheadjustmentscrews(oneperside). i_i!_!_i!i_ii_!i!_!_i!i_ii_!i!_!_i!i_ii_!i!_!_i!i_ii_!i!_!_i!i_ii_!i!_!_i!i_ii_!i!_!_i!i_ii_!i!_!_i!i_ii_!i!_!_i!i_ii_!i!_!_iii_
i!_!_i!i_ii_!i!_!_i!i_ii_!i!_!_i!i_ii_!i!_!_i!i_ii_!i!_!_i!i_ii_!i!_!_i!i_ii_!i!_!_i!i_ii_!i!_!_i!i_ii_!i!_!_i!i_ii_!i!_!_ii_i
Installation
To adjust the door stop:
Door stop isadjustable between 85 to 145 degrees.
Hinge
1
2
Adjustable Door Stop
Open door to provide access to screw.
Loosen screw.
5 Re-tighten screw.
Rota
Sto
Re-tighten
Screw
Re=tighten Screw
6 Ensure door stops in desired locationbefore
resuming normal use.
To level the doors using the adjustable lower hinge
(select models):
1 Remove all food itemsfrom door bins on door
being adjusted.
2 Open doors to 90 degrees.
i!_!_i!i_ii_!i!_!_i!i_ii_!i!_!_i!i_ii_!i!_!_i!i_ii_!i!_!_i!i_ii_!i!_!_i!i_ii_!i!_!_i!i_ii_!i!_!_i!i_ii_!i!_!_i!i_ii_!i!_!_ii_i
isflushwiththehinge. andflippermullion. i_i!_!_i!i_ii_!i!_!_i!i_ii_!i!_!_i!i_ii_!i!_!_i!i_ii_!i!_!_i!i_ii_!i!_!_i!i_ii_!i!_!_i!i_ii_!i!_!_i!i_ii_!i!_!_i!i_ii_!i!_!_iii_
i!_!_i!i_ii_!i!_!_i!i_ii_!i!_!_i!i_ii_!i!_!_i!i_ii_!i!_!_i!i_ii_!i!_!_i!i_ii_!i!_!_i!i_ii_!i!_!_i!i_ii_!i!_!_i!i_ii_!i!_!_ii_i
Installing Freezer Drawer
_i:iiiii_ii_!i_iiii!i_iii_ii!i_i!iilSi_%!ii%!iiiiiiijiii
Connectin theWater upply
To Connect Water Supply Line To Ice Maker Inlet Valve
1. Disconnect refrigerator from electric power source.
2. Placeeneofwatersupplyineintosinkorbucket.
TurnOawatersupplyandflushsupplyineuntil
waterisclear.TurnOFFwatersupplyatshutoffvalve.
3. Removeplasticcapfromwatervalveinletand
discardcap.
4. ffyouusecoppertubing-Sidebrasscompression
nut,thenferrule(sleeve) ontowatersupplyine. Push
watersupplyineintowatervalveinletasfarasitwil
go(_A inch/6.4mm).Sldeferrule(sleeve) intovalve
inletandfingertightencompressionnutontovalve.
Tightenanotherhalfturnwlhawrench;UONOT
overtighten.SeeFigure 1.
Ifyouusestainlesssteeltubing-Thenutand
:::::i ferrulearealreadyassembledonthetubing. Slde
compression nutontovalveinletandfingertighten
compression nutontovalve.Tightenanotherhalfturn
withawrench;DONOTovertighten.SeeFigure2.
5. Wthsteelclampandscrew, securewatersupplyine
(coppertubingonly)torearpanelofrefrigeratorasshown.
6. Colexcesswatersupplylne(coppertubing
only), about 2V2turns, behind refrigeratoras
shown and arrangecoils sotheydo notvibrateor
wearagainstanyothersurface.
7. Turn ON water supply at shutoff valve and tighten
any connections that leak.
i!iiiiii!iiiiii!iiiiii!iiiiii!iiiiii!iiiiii!iiiiii!iiiiii!iiiiii!_!iiii
Controls
A red indicator light will be illuminated above most active features.
Touch the icon to activate the options below.
fast freeze Activatesafaster rateforfreezingfood.
fast ice Increasesthe production of ice
energysaver Keepthis switchsetonenergysaver(lighton)for lowestenergyusage.If moistureap-
pearsonthecabinetbetweenthe doors,pressingthisbuttonwill turnthe lightoffand
enableanelectricheaterusedto reducemoistureonthecabinetbetweenthedoors.
water filter Pressand hold for three secondsto resetafterfilter change.
air filter Filtercondition status isalwaysdisplayedwhen door is open.Press andhold for
three secondsto resetafter filter change.
temp mode Touchto toggle displayfrom Fahrenheitto Celsius.
mute sounds Tonesemitted byeachkeypresscan beturned off basedon userpreference.The
soundsare mutedwhen the red indicatorislit. Warning signalswill stayactive.
defaultsettings Resetsall refrigerator settings suchastemp, temp display andtonesto their fac-
tory defaultsettings.
on off Pressand hold for three secondsto turn offthe coolingsystem to cleanthe refrig-
erator.Italso turns off the ice maker.Thetemperature displayswill readOFE
14coo ,.ol
s
IQoTouch TM:Sabbath Mode '_
TheSabbathMode_safeaturethatd_sab_esportions
• " TM "
of the refrigerator and tts controls for IQ-Touch m
accordance wth observance of the week y Sabbath
ana re,,g!ous no,,uays w,m,n me urmoaox ,Jew,sn
communtty. ......................................................................................................................................................................................................................................................................................................................................................................................................................................................................................................................
SabbathModeisturnedONandOFFbypressingand
holdingthefreezertemp -andtherefdgeratortemp,,
"+" indicatorsforfiveseconds.Thedisplayshows"Sb
while in Sabbath mode•
IntheSabbathMode, theHighTempalarm isactive
forhealth reasons, lfahightemperaturealarm is
activatedduringthistime, forexampleduetoadoorleft
ajar, thealarm will sound intermittentlyforabouttwo
minutes.The alarm will then silence on its own and a
redhightemperatureiconwilldisplay.Thehightemp
iconwillcontinuetodisplay, even ifthedoorisclosed,
until the Sabbath mode is exited and the icon reset.
Therefrigeratorwillfunctionnormallyoncethedooris
closed, withoutanyviolationoftheSabbath/Holidays.
Forfurtherassistance, guidelinesforproper
._ usageandacompletelistofmodelswiththe
_,_ Sabbath feature, please visit the web at
i!_!_i!i_ii_!i!_!_i!i_ii_!i!_!_i!i_ii_!i!_!_i!i_ii_!i!_!_i!i_ii_!i!_!_i!i_ii_!i!_!_i!i_ii_!i!_!_i!i_ii_!i!_!_i!i_ii_!i!_!_ii_i
Turning the ice maker on and off
Ice production is controlled by lifting/lowering the ice
maker's wire signal arm. To gain access to the ice
maker, pull the freezer drawer out. Lift the wire signal
arm to turn the ice maker OFF and lower the wire signal
arm to turn it ON.
Signal Arm
Ice maker tips
= If your refrigerator is not connected to a water
supply or the water supply is turned off, turn off
the ice maker by lifting wire signal arm.
Cleaning the ice maker
Clean the ice maker and ice bin at regular intervals,
especially prior to vacation or moving.
1 Turn off the ice maker.
2 Remove the ice bin.
3 Empty and carefully clean the ice bin with mild
detergent. Do not use harsh or abrasive cleaners.
Rinse with clean water.
4 Allow the ice bin to dry completely before
replacing in the freezer.
5 Replace the ice bin. Turn the ice maker on.
Remove and empty the ice bin if:
* An extended power failure (one hour or longer)
causes ice cubes in the ice bin to melt and freeze
together.
Remove the ice bin and shake to loosen the cubes or
clean as explained above.
i_i!_!_i!i_ii_!i!_!_i!i_ii_!i!_!_i!i_ii_!i!_!_i!i_ii_!i!_!_i!i_ii_!i!_!_i!i_ii_!i!_!_i!i_ii_!i!_!_i!i_ii_!i!_!_i!i_ii_!i!_!_iii_
Storage Features
Shemffeatures
Your refrigerator includesa variety of storage drawers.
These drawers are located in fixed positions at the
bottom of the fresh food compartment.
Your refrigerator includesglass shelves that are
designed to catch and hold accidental spills.
You can easily adjust shelf positions in the fresh food
compartments to suit your needs. The shelves have
mounting brackets that attach to slotted supports at the
rear of each compartment.
To change the position of a shelf:
1 Before adjusting a shelf, remove all food.
2 Lift the front edge up and pull the shelf out.
3 Replace by insertingthe mounting bracket hooks
intothe desired support slots.
Crispers
Crisper drawers are designed for storing fruits,
vegetables, and other fresh produce.
I
Opening Crisper Drawer
4 Lowerthe shef and ock nto poston Otis er humidit control
pv
FullCustom-DesignTMSheff Crisperdrawersincludeaslidingcontrolforadjusting
,4_,, the humidity inside the crisper. Leafy vegetables keep
_il best when stored with the Humidity Control set on
I_i Higher Humidity. Fresh fruits keep best when stored
withtheHumidityControlsetonLowerHumidity.
......... t Humidity Control
!
or _ig her Low(_r
..... .,_ Humidity Humidity
Adjusting Crisper Humidity
Storage Features
_\\\
To remove
the Crisper
Drawer for
cleaning:
1 Pull the
drawer "_
out until
it stops•
Lift the
front
slightly
and
remove the drawer•
Special Special
items rack Rack
(select
models) _/
The
innovative
design of the
special items --.
rack allows _..
you to store
Removing Crisperfour bottles
Drawer wine or soft
drink bottles.
Cool Zone (select models)
Some models are equipped with a meat keeper drawer for short-term storage of bulk meat items. This drawer
includes sliding controls for adjusting the humidity inside.
Any meat to be kept longer than two days should be frozen. If you store fruits or vegetables in this drawer, set it to
a higher humidity.
Custom Temp TMDrawer (select models)
i!_!_i!i_ii_!i!_!_i!i_ii_!i!_!_i!i_ii_!i!_!_i!i_ii_!i!_!_i!i_ii_!i!_!_i!i_ii_!i!_!_i!i_ii_!i!_!_i!i_ii_!i!_!_i!i_ii_!i!_!_ii_i
extensionandliftout.
Toreinstallupperbasket,positionbasketontothe
retainerclipsmakingsurethefrontofthebasketrests
intheretainerclipsonthestabilizerbar.
To Remove Lower Basket
1
2
Remove all items from basket.
Remove the basket by tilting it forward and lifting
it from the retainer clips.
Basket
Retainer
Removing Lower Basket
Bar
Upper Basket Divider
Lift up on the rear of the lower divider and pull out.
Lower Basket
Divid
Spi
Tra'
Lower Basket Divider &
Spill Guard Tray
i_i!_!_i!i_ii_!i!_!_i!i_ii_!i!_!_i!i_ii_!i!_!_i!i_ii_!i!_!_i!i_ii_!i!_!_i!i_ii_!i!_!_i!i_ii_!i!_!_i!i_ii_!i!_!_i!i_ii_!i!_!_iii_
i!_!_i!i_ii_!i!_!_i!i_ii_!i!_!_i!i_ii_!i!_!_i!i_ii_!i!_!_i!i_ii_!i!_!_i!i_ii_!i!_!_i!i_ii_!i!_!_i!i_ii_!i!_!_i!i_ii_!i!_!_ii_idays should be frozen. • Refer to the "Controls" section for procedures on
temperature settings,
i!_!_i!i_ii_!i!_!_i!i_ii_!i!_!_i!i_ii_!i!_!_i!i_ii_!i!_!_i!i_ii_!i!_!_i!i_ii_!i!_!_i!i_ii_!i!_!_i!i_ii_!i!_!_i!i_ii_!i!_!_ii_i

Other manuals for ICON

6

Other Electrolux Refrigerator manuals

Electrolux E23CS78EPS User manual

Electrolux

Electrolux E23CS78EPS User manual

Electrolux ER8197B User manual

Electrolux

Electrolux ER8197B User manual

Electrolux ERT1662AOW2 User manual

Electrolux

Electrolux ERT1662AOW2 User manual

Electrolux TC 15012 User manual

Electrolux

Electrolux TC 15012 User manual

Electrolux ERB3222 User manual

Electrolux

Electrolux ERB3222 User manual

Electrolux ERN3213AOW User manual

Electrolux

Electrolux ERN3213AOW User manual

Electrolux FBE5100SCRE User manual

Electrolux

Electrolux FBE5100SCRE User manual

Electrolux IK329SAR User manual

Electrolux

Electrolux IK329SAR User manual

Electrolux LNB3AF26W0 User manual

Electrolux

Electrolux LNB3AF26W0 User manual

Electrolux TK14012 User manual

Electrolux

Electrolux TK14012 User manual

Electrolux ERN1400AEW User manual

Electrolux

Electrolux ERN1400AEW User manual

Electrolux ICON User manual

Electrolux

Electrolux ICON User manual

Electrolux RM 4280 User manual

Electrolux

Electrolux RM 4280 User manual

Electrolux ERN 1572 User manual

Electrolux

Electrolux ERN 1572 User manual

Electrolux 102237 User manual

Electrolux

Electrolux 102237 User manual

Electrolux ERB3022X Quick guide

Electrolux

Electrolux ERB3022X Quick guide

Electrolux E24RD75HSS - 24" Double Drawer Refrigerator User guide

Electrolux

Electrolux E24RD75HSS - 24" Double Drawer Refrigerator User guide

Electrolux ERN3122 Quick guide

Electrolux

Electrolux ERN3122 Quick guide

Electrolux 241737900 User manual

Electrolux

Electrolux 241737900 User manual

Electrolux EAL6240AOU User manual

Electrolux

Electrolux EAL6240AOU User manual

Electrolux EAL6147WOK User manual

Electrolux

Electrolux EAL6147WOK User manual

Electrolux ER 8126/1 B User manual

Electrolux

Electrolux ER 8126/1 B User manual

Electrolux ER 1380 U User manual

Electrolux

Electrolux ER 1380 U User manual

Electrolux ecostore RE4142GR User manual

Electrolux

Electrolux ecostore RE4142GR User manual

Popular Refrigerator manuals by other brands

Frigidaire FRT18S6A Factory parts catalog

Frigidaire

Frigidaire FRT18S6A Factory parts catalog

Vinotemp WINE-MATE VINO4500DS Installation & operation

Vinotemp

Vinotemp WINE-MATE VINO4500DS Installation & operation

LG LFX25971 Series user manual

LG

LG LFX25971 Series user manual

Samsung RS267TD series user manual

Samsung

Samsung RS267TD series user manual

AIRLUX RD28PC manual

AIRLUX

AIRLUX RD28PC manual

Dometic CFF SERIES operating manual

Dometic

Dometic CFF SERIES operating manual

Zanussi Electrolux ZER 240 W Instruction book

Zanussi Electrolux

Zanussi Electrolux ZER 240 W Instruction book

Dometic CDF-11 operating manual

Dometic

Dometic CDF-11 operating manual

GE Profile PTS22LHS Dimensions and installation information

GE

GE Profile PTS22LHS Dimensions and installation information

Midea HD-468RWEN user manual

Midea

Midea HD-468RWEN user manual

Samsung BRF365200AP/AA user manual

Samsung

Samsung BRF365200AP/AA user manual

Indesit NBAA 33 NF NX D operating instructions

Indesit

Indesit NBAA 33 NF NX D operating instructions

AEG SKB618F1DS user manual

AEG

AEG SKB618F1DS user manual

True TR3R-3S Specifications

True

True TR3R-3S Specifications

ZANKER USD251 Instruction booklet

ZANKER

ZANKER USD251 Instruction booklet

GE CYE22UELDDS Owner's Manual & Installation Instructions

GE

GE CYE22UELDDS Owner's Manual & Installation Instructions

Furrion ARCTIC FCR20DCAFA-SG user manual

Furrion

Furrion ARCTIC FCR20DCAFA-SG user manual

Beko GN141622ZGB user manual

Beko

Beko GN141622ZGB user manual

manuals.online logo
manuals.online logoBrands
  • About & Mission
  • Contact us
  • Privacy Policy
  • Terms and Conditions

Copyright 2025 Manuals.Online. All Rights Reserved.