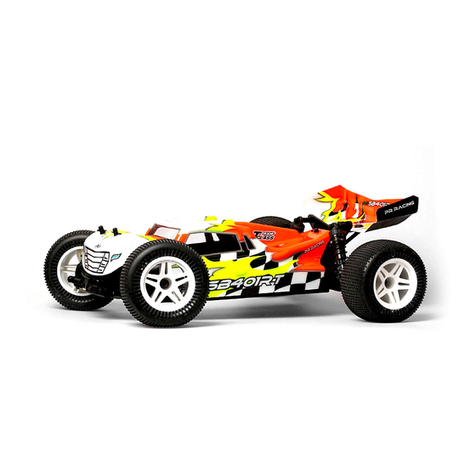
Electus Distribution GT4850 User manual

USER MANUAL
14+
GT4850
1:16 Scale
R/C Truggy

2

!
Safety Precautions
In order to operate the car safely. Be sure that you have observed
the following points:
●It is a radio control model, not a toy!
●In order to enjoy running the car, you need to finish assembly before operation. Do routine maintenance
work after operation. Replacement parts and option parts are available separately.
●Improper usage with Alkaline cells or rechargeable batteries may damage the electronics for the car or
the radio.
Please follow the points as below in order to prevent accident from happening to the car and
people.
Precautions for Battery Use
1. Transmitter uses 2x1.5V “AA” batteries.
2. Please pay attention to correct polarity when replacing batteries.
3. Rechargeable batteries should be charged under adult supervision.
4. Do not mix old and new batteries. Do not mix alkaline, standard (carbon-zinc), or rechargeable
batteries.
5. After the battery is exhausted, the model should be removed.
6. Exhaust battery should be safety dispose!
7. DO NOT short circuit any terminals.
8. DO NOT attempt to recharge non rechargeable batteries.
9. Remove batteries from the model when charging.
10. DO NOT put batteries into a fire or into water.
11. The rated input voltage battery charger MUST be suitable for your mains power voltage.
12. During charging it is quite normal for the charger and batteries to heat up.
13. Do not swallow battery!
14. Store only in cool, dry and dark places and should be keep out of the children!
15. When the battery leaks the liquid and let it into you eyes, please right away rinse them and consult
an ophthalmologist.
Warning:
Choking hazard! This product contains small parts. NOT suitable for children under 3 years. Contains
electrical components and should be kept dry at all times. Regularly check the battery charger wires,
plugs and shell and other components for damage. DO NOT use if any part is damaged.
Warnings & Cautions
1. Detachable small parts should be stored safely and out of reach of children.
2. If interference is experienced, turn the model off and try it again in a different area.
3. Transmitter will not function correctly if the batteries are low. Please replace the batteries.
4. Please discard old/used batteries in a safe manner. Consider your environment!
5. Please store the remote control model in cool, dry place.
6. DO NOT expose to fire or high temperatures, do not store in moist place.
7. Once the battery get wet, wipe immediately with a soft dry cloth.
If the battery any deformation, please stop using.
8. If you don’t use the model for a long time, please raise the chassis to let the wheels hang in the air.
-1-
3

!Do NOT operate the model in the following places and situations.
(Non-observance may lead to accident!)
Operating Your Model Safely
●Operate your model in spacious and safe areas! Do not operate it:
1. On road!
2. In places where children and many people gather.
3. In residential districts and parks!
4. Do not operate the model on public roads, in crowded places and near infant as it may cause
accidents.
5. Indoors and in limited space! Non-observance may result in personal injury and property damage!
●The car must stop immediately and check for the reasons when it is operating abnormal.
As long as the problem is not cleared, do NOT operate it! This may lead to further trouble and
unforeseen accidents!
●Always check the transmitter batteries!
With weak dry batteries, transmission and reception of the transmitter would fall off. You may lose
control of your model in such condition. This may also cause serious accidents!
●Keep in mind that people around you may also operate a radio control model!
NEVER share the same frequency with somebody else at the same time! Otherwise, Radio signals
will be mixed up and you will lose control to your model. This may lead to accidents.
●Do NOT put fingers or any objects inside rotating and moving parts!
●Right after use, do NOT touch the motor! Danger of burning yourself!
●When the model is not in use, always turn off the receiver and transmitter. Further more, disconnect
the batteries and remove them from the model and the transmitter. This may be dangerous such as
overheat and leakage.
●Be sure to read thoroughly
the manual before you
begin. Fresh user should
seek advice from people
having rich experience in
order to assemble the
model correctly.
●Cutters, nippers and
screwdrivers need careful
handling.
●Do not expose this model
to high temperature, humidity
or direct sunlight.
●Never reverse connection/
disassemble the battery.
This may lead to damage
and leakage.
●As the product contains
small and sharp parts,
assemble and store this
product only in places
out of the reach of children.
-2-
4

Power
1. Turn on the power switch of the transmitter, the signal indicator of the transmitter flashes.
2. Press the car’s power switch button on the side of the ESC, the indicator light of high speed car
flashes.
3. Please operate the high speed car after the indicator light stays on.
!
Electronic Speed Controller (ESC)
Antenna
Power switch
Yellow cable
Blue cable
!Please note: Do not insert the plug in the opposite direction.
LED light
BEC
Car light (CH3)
Servo (CH1)
●Please do not touch the throttle and steering joystick during turning on the transmitter. After
turning on the transmitter, please operate after you see the indicator lights of transmitter on.
●Please comply the policy “When turning on, please turn on the transmitter at first, then turn on
the high speed car.”
●During match code/frequency, please make sure there is only one set transmitter and a high
speed car, otherwise the car maybe match incorrect transmitter.
-4-
5

If the car can’t run straightly during driving, it can be adjusted via this trimmer.
①ST.TRIM (Steering servo trimmer)
②Fn (CH3 Light control)
Transmitter Product Diagram
① ST.TRIM (Steering servo trimmer)
②Fn (CH3 Light control)
③Power switch
(OFF-70%TH-100%TH)
④ LED light
⑤ CH1: ST (Steering)
⑥ CH2: TH (Throttle)
Short Press the “ ” button to turn on/off the light of high speed car.
-5-
6

Indicator lights flash quickly Matching code.
Indicator lights stay on The frequency has matched already, can work.
Indicator Lights flash slowly a. Has lost the signal of transmitter.
b. Entering into the low-power state.
Indicator Lights off Entering into over current or over high-temperature protection state.
Indicator Lights flash quickly Forward or backward.
LED Description
In the middle Turn left Turn right
70%
(70% Throttle)
OFF 100%
(100% Throttle)
③The power/Speed switch ④LED Indicator
Flash quickly Matching code
Stay on Working well
Flash slowly The power of
transmitter is low
⑤CH1: ST (Steering)
-6-
7

Forward
Brake: When the car is running forward, pull back the throttle
of transmitter, the car will brake. After pushing the throttle
to the middle, pull the throttle back again, then the car will
backward.
*Please Note, the car does not have the brake function during backward.
Backward
In the middle
Push
forward
Pull
back
Pull
back
⑥CH2: TH (Throttle)
Fix the head wheels frame
to the rear of the car with 4
screws.
(Please disassemble 2 screws of car head firstly)
Wheel Stand Installation
Remote Control Battery Installation
Open the battery cover of the transmitter, install the 2*AA batteries according to the battery polarity
in the transmitter, then close the battery cover.
-7-
8

①Turn the battery lock knob, then flip up the cover;
②Connect the receiver plug to the battery;
③Put the battery into the battery box and make sure it is installed in place;
④Flip back the cover and turn the knob to lock.
Battery Installation & Charging
Battery installation
Adapter 5V 2A
(Not Included)
High speed car battery: 7.4V 850mAh 25C.
When charging with a 5V 2A USB adapter, the charging time is about 90 minutes.
●When the battery is charging, the green indicator light flashes;
●When the battery is fully charged, the green indicator light stays on.
*The above charging time data is based on a 5V 2A adapter. Using different adapters and power supply
equipment will affect the actual charging time. It is recommended to use a 5V 2A adapter for charging.
Charging
-8-
9

Car Shell Installation
2. Insert the 4 clips into the holes to lock the car body.2. Insert the 4 clips into the holes to lock the car body.
1. Align the 4 holes of the car body with the body pillars, then install it.
-9-
10

Specications:
• Speed: Up to 31km/h
• Frequency: 2.4GHz
• Remote Control Range: Up to 45m
• Play Time: Up to 10 Minutes
• Charging Time: Up to 90 Minutes
• Batteries:
Car: 7.4V Li-po, 850mA (Included)
Remote: 2 x AA (Not Included)
• Dimensions: 310(L) x 222(W) x 130(H)mm
11

Distributed by:
Electus Distribution Pty Ltd
46 Eastern Creek Dr,
Eastern Creek NSW 2766 Australia
Ph 1300 738 555
Int’l +61 2 8832 3200
Fax 1300 738 500
www.electusdistribution.com.au
Table of contents
Other Electus Distribution Motorized Toy Car manuals
