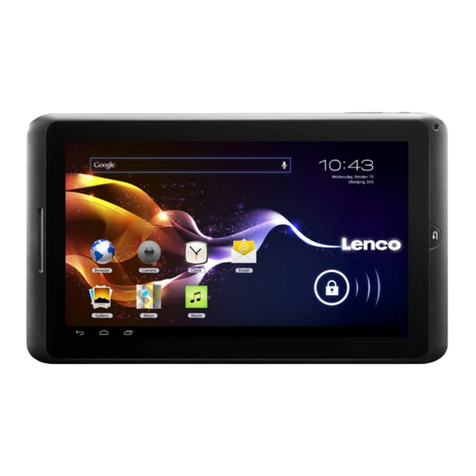
Element14 LCD8000-97C User manual

LCD8000-97C
A 9.7” LCD Module for SABRE Lite & MarS Board
By
User Ma ual
Versio 1.0
Dated: 10
th
December 2013

Revisio History:
Version Date Description
1.0 10/12/2013 Original Version

Table of Co te ts
1: Product Overview .......................................................................... 1
1.1: Packing List .......................................................................... 1
2: Hardware Features ........................................................................ 2
2.1: Operational Parameters .......................................................... 2
3: Usi g LCD8000-97C With the MarS Board ...................................... 3
3.1: Hardware Connections ........................................................... 3
3.2: Software Configurations ......................................................... 4
4: Usi g LCD8000-97C o SABRE Lite ................................................ 7
4.1: Hardware Connections ...........................................................
4.2: Software Configurations ......................................................... 8

Page |
1
1: Product Overview
The LCD8000-9 C is a 9. ” capacitive touchscreen developed by element14
for use with the MarS Board - a super ARM DIY platform, and SABRE Lite.
The LCD8000-9 C has an LVDS interface and supports a resolution of up to
1024x 68 and 260,000 colours. Its multi-touch screen brings an enhanced
experience to the users of the MarS Board and the SABRE Lite.
1.1: Packi g List
LCD8000-9 C
Mini HDMI C-to-C Cable (for Mars Board)
LVDS Cable (for SABRE Lite)

Page |
2
2: Hardware Features
9. ” TFT Screen
Resolution of 1024x 68, 260,000 colours
Supports LVDS Signals
Multi-Touch Capacitive Touch-Screen
2.1: Operatio al Parameters
Operating Ambient Temperature: 0°C ~ +50°C
Storage Temperature: -25°C ~ +65°C
Operating Humidity: 20% - 90%
Dimension: 239mm x 185mm
Power Supply: +5V (provided by MarS Board or SABRE Lite)

Page |
3
3: Usi g LCD8000-97C With the MarS
Board
3.1: Hardware Co ectio s
1) Use the Mini HDMI cable provided with the product to connect the
LVDS interface on the MarS Board to the Mini HDMI interface on the
LCD8000-9 C as shown below;
Figure 1
Connection between MarS Board and LCD8000-97C
2) Use a (Type Mini B Male to Type A Male) USB cable to connect the USB
debugging interface on the MarS Board to a USB interface on your PC,
and then connect a 5V power supply to the board to finish the
hardware connections as shown below;

Page |
4
Figure 2
Complete hardware connection
3.2: Software Co figuratio s
1) The latest images and source code for Linux and Android on the MarS
Board have been updated to support the LCD8000-9 C.
For download please visit: www.element14.com/iMX6
2) Please refer to the MarS Board User Manual for detailed instructions
on how to update the Linux/Android images on the board;
3) After updating is done, please reboot the MarS Board and press any
key on your PC’s keyboard to enter u-boot when you see “Hit any key
to stop autoboot” in your terminal window.
U-Boot 2009.08-svn1 (Mar 14 2013 - 14:07:49)
CPU: Freescale i.MX6 family TO0.0 at 792 MHz
Temperature: 51 C, calibration data 0x58150469
mx6q pll1: 792MHz
mx6q pll2: 528MHz
mx6q pll3: 480MHz
mx6q pll8: 50MHz

Page |
5
ipg clock : 66000000Hz
ipg per clock : 66000000Hz
uart clock : 80000000Hz
cspi clock : 60000000Hz
ahb clock : 132000000Hz
axi clock : 264000000Hz
emi_slow clock: 29333333Hz
ddr clock : 528000000Hz
usdhc1 clock : 198000000Hz
usdhc2 clock : 198000000Hz
usdhc3 clock : 198000000Hz
usdhc4 clock : 198000000Hz
nfc clock : 24000000Hz
Board: MX6Q-MARSBOARD:[ POR]
Boot Device: I2C
I2C: ready
DRAM: 1 GB
MMC: FSL_USDHC: 0,FSL_USDHC: 1
JEDEC ID: 0xbf:0x25:0x41
Reading SPI NOR flash 0xc0000 [0x2000 bytes] -> ram 0x276009b8
SUCCESS
*** Warning - bad CRC, using default environment
In: serial
Out: serial
Err: serial
Net: got MAC address from IIM: 00:00:00:00:00:00
----enet_board_init: phy reset
FEC0 [PRIME]
Hit any key to stop autoboot: 0
(press any key to enter uboot)
MX6Q MARSBOARD U-Boot >
4) Execute the following instructions to set the display mode for the
9. -inch LVDS LCD;
setenv bootargs console=ttymxc1,115200 init=/init rw video=mxcfb0:dev=ldb,
LDB-XGA,if=RGB666 fbmem=10M vmalloc=400M androidboot.console=ttymxc1
saveenv
Note:
At present, the touch screen of LCD8000-9 C only supports single point touch

Page |
6
on a Linux based system
5)
Reboot the MarS Board again and the process will be complete. You
can now use the LCD8000-9 C.

Page |
7
4: Usi g LCD8000-97C o SABRE Lite
4.1: Hardware Co ectio s
1) Use the LVDS cable provided with the product to connect the Mini
HDMI interface on the LCD8000-9 C to the LVDS and IIC interfaces
on the SABRE Lite as shown below:
Figure 3
Connections between SABRE Lite and LCD8000-97C
2) Use the serial cable provided with the SABRE Lite to connect the serial
interface on the device to your PC. Following this, insert a TF card into
the SABRE Lite and connect a 5V/4A power supply to finish the
hardware connection as shown below:

Page |
8
Figure 4
Complete hardware connection
4.2: Software Co figuratio s
1) The latest images and source code for Linux and Android on the
SABRE Lite have been updated to support the LCD8000-9 C; Please
visit www.element14.com/iMX6
2) Please refer to the Sabre Lite User Manual and Quick Start Guide for
detailed instructions on how to update the Android/Linux images on
the board.
3) After updating is done, please reboot the SABRE Lite and press any
key on PC’s keyboard to enter u-boot when you see “Hit any key to
stop autoboot” in your terminal window.
U-Boot 2009.08 (Nov 13 2013 - 11:06:28)
CPU: Freescale i.MX6 family TO1.2 at 792 MHz
Temperature: 42 C, calibration data 0x5764fd69
mx6q pll1: 792MHz
mx6q pll2: 528MHz
mx6q pll3: 480MHz

Page |
9
mx6q pll8: 50MHz
ipg clock : 66000000Hz
ipg per clock : 66000000Hz
uart clock : 80000000Hz
cspi clock : 60000000Hz
ahb clock : 132000000Hz
axi clock : 264000000Hz
emi_slow clock: 132000000Hz
ddr clock : 528000000Hz
usdhc1 clock : 198000000Hz
usdhc2 clock : 198000000Hz
usdhc3 clock : 198000000Hz
usdhc4 clock : 198000000Hz
nfc clock : 24000000Hz
Board: MX6Q-SABRELITE:[ POR]
Boot Device: I2C
I2C: ready
DRAM: 1 GB
MMC: FSL_USDHC: 0,FSL_USDHC: 1
JEDEC ID: 0xbf:0x25:0x41
Reading SPI NOR flash 0xc0000 [0x2000 bytes] -> ram 0x276009b8
SUCCESS
*** Warning - bad CRC, using default environment
In: serial
Out: serial
Err: serial
Net: got MAC address from IIM: 00:00:00:00:00:00
FEC0 [PRIME]
Hit any key to stop autoboot: 0
(press any key to enter uboot)
MX6Q SABRELITE U-Boot >
4) Execute the following instructions to set the display mode for the
9. -in LVDS LCD;
setenv bootargs console=ttymxc1,115200 init=/init rw video=mxcfb0:dev=ldb,
LDB-XGA,if=RGB666 fbmem=10M vmalloc=400M androidboot.console=ttymxc1
saveenv
Note:
At present, the touch screen of LCD8000-9 C only supports single point touch

Page |
10
on Linux based systems
5) Reboot the SABRE Lite again and the process will be complete. You
can now use the LCD8000-9 C.
Table of contents


