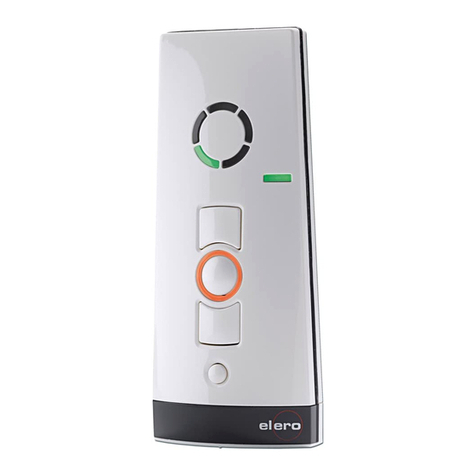
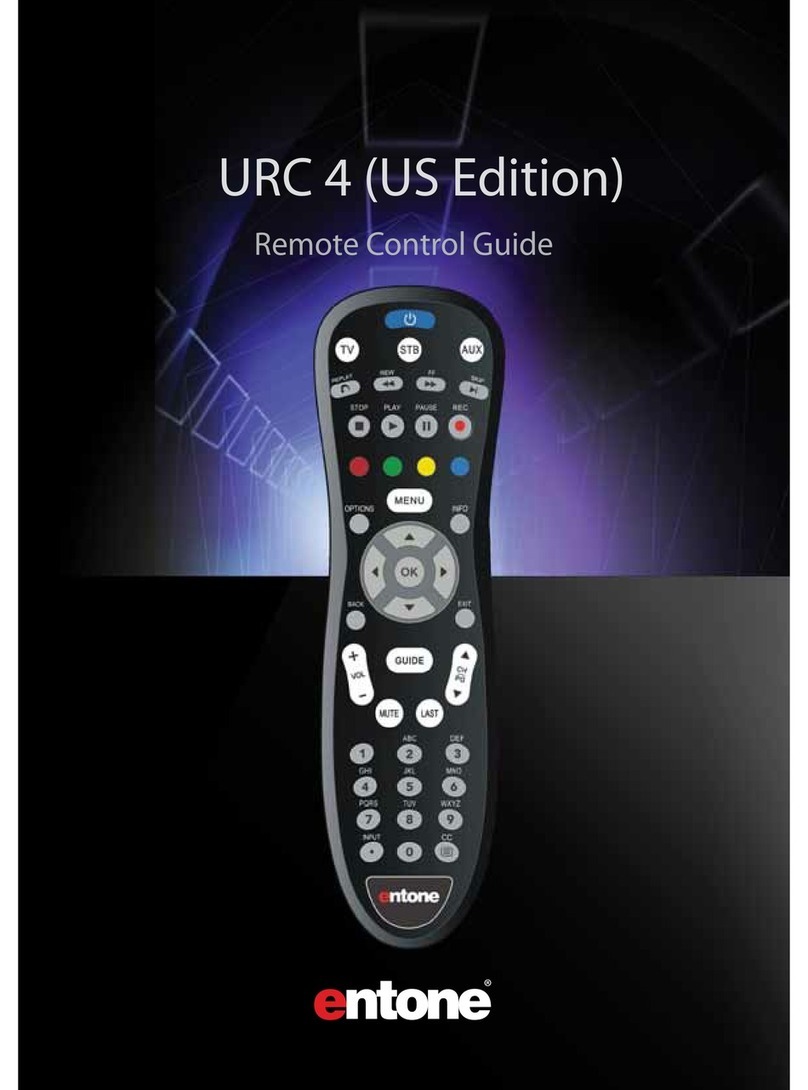
elero MultiTel 2 User manual

182030001_EN_0514
Operating instructions
Keep the operating instructions in a safe place!
MultiTel 2
867 / 868 / 915 MHz

2 | EN Ⓒelero GmbH Ⓒelero GmbH EN | 3
Contents
1 General information 5
1.1 Notes on the operating instructions 5
1.2 Standards and Directives 5
1.3 Intended use 6
1.4 Predictable misuse 6
1.5 Warranty and liability 7
1.6 Manufacturer's customer service 7
2 Safety 8
2.1 General safety instructions 8
2.2 Safety principles 8
2.3 General obligations of the operator 9
2.4 Requirements for personnel 10
2.5 Safety instructions for the technical status 10
2.6 Safety instructions for operation 11
3 Product description 11
3.1 General information 11
3.2 Device explanation 12
3.3 Product types 13
3.4 Technical data 13
4 Operation 15
4.1 Bidirectional radio system 15
4.2 Initial operation 15
4.3 Power supply 16
4.4 Operating mode 16
4.5 Menu mode 24
4.6 Programming the transmitter 32
4.7 Changing the batteries 40
4.8 Cleaning and care of the device 40
Translation from the original German version.
All other documents in dierent languages are translations
of the original version.
All rights reserved in the event of registration of patents,
working models or design patents.

4 | EN Ⓒelero GmbH Ⓒelero GmbH EN | 5
5 EC Declaration of conformity 41
6 Troubleshooting 41
7 Repair 42
8 Address 42
9 Disposal 43
1 General information
1.1 Notes on the operating instructions
The contents are arranged by the life phases of the
MultiTel 2 radio remote control (referred to below as
the "device").
The manufacturer reserves the right to make changes
to the technical data in the operating instructions. They
may dier from the actual model of the device without
fundamentally changing the basic information and losing
validity. The current status of the technical data can be
requested from the manufacturer at any time. Claims
based on the above will not be accepted. Deviations from
statements in the text and illustrations are possible and
will depend on the technical development, equipment
and accessories of the device. The manufacturer will
provide information on special models with the sales
documentation. Other information will remain unaected
by the above.
1.2 Standards and Directives
The basic occupational health and safety requirements of
the applicable laws, standards and directives have been
incorporated into the design. The safety of the device is
conrmed by the declaration of conformity (see Chapter 5,
EC Declaration of Conformity). All information on safety in
the operating instructions are based on the current laws
and regulations applicable in Germany. All information in
the operating instructions must be observed at all times.
In addition to the safety instructions in the operating
instructions the regulations for accident prevention,
environmental protection and occupational health and

6 | EN Ⓒelero GmbH Ⓒelero GmbH EN | 7
safety applicable at the place of use must be observed
and complied with. Regulations and standards for risk
assessment can be found in the EC declaration of
conformity.
1.3 Intended use
The device is intended for use in the eld of building
technology (for controlling electrically operated roller
shutters, awnings, venetian blinds, roller blinds, electric
lighting and electric heaters). It is a multichannel
radio hand-held transmitter. Any other uses must be
discussed beforehand with the manufacturer, elero GmbH
Antriebstechnik (see Chapter 8, Address).
The operator will be solely responsible for any damage
arising from use of the device that is not in conformity with
the intended use. The manufacturer does not accept any
liability for personal injury and property damage caused
by misuse or process errors, improper operation and
commissioning.
Conformity with the intended use as specied in the
operating instructions is the only guarantee of safe and
error-free use and the operational safety of the device.
1.4 Predictable misuse
Predictable misuse is considered use that is not
in accordance with the purposes approved by the
manufacturer, elero GmbH Antriebstechnik (for address
see Chapter 8, Address).
1.5 Warranty and liability
The General Terms of Supply and Delivery of the
manufacturer, elero GmbH Antriebstechnik (for address
see Chapter 8, Address) are applicable. The terms and
conditions of sale and delivery are a component of the sales
documentation and are handed over to the operator on
delivery. Liability claims in the event of personal injury and
property damage will not be accepted if they are the result
of one or more of the following causes:
• Device opened by the customer (breakage of seal)
• Improper use of the device
• Incorrect installation, commissioning or operation of
the device
• Structural modications to the device without approval
in writing by the manufacturer
• Operation of the device with incorrectly installed
connections, defective safety equipment or incorrectly
installed safety and protective equipment
• Non-observance of the occupational health and safety
regulations and instructions in the operating instructions
• Exceeding the specied technical data
1.6 Manufacturer's customer service
The device must be repaired by the manufacturer only
if it needs repair. See Chapter 8 "Address" for where
to send the device to customer service for repair.
If you did not purchase the device directly from elero,
contact the supplier of the device.
Have the serial number ready for the customer service.
It is on the name plate on the back of the device.

8 | EN Ⓒelero GmbH Ⓒelero GmbH EN | 9
2 Safety
2.1 General safety instructions
The operating instructions contain all safety instructions
that must be observed to avoid and prevent dangers
arising from using the device in combination with the
motors and components that it controls in its various life
cycles. The device is guaranteed for safe use if all safety
instructions are observed.
2.2 Safety principles
The device is designed and constructed in accordance
with the state of the art and accepted safety technical rules
and is inherently safe. The basic occupational health and
safety requirements of the applicable laws, standards and
directives have been incorporated into the design of the
device. The safety of the device is conrmed by declaration
of incorporation.
All information on safety is based on the currently valid
regulations of the European Union. In other countries the
operator must ensure compliance with the applicable laws
and national regulations.
In addition to the safety instructions in the operating
instructions the generally applicable regulations for accident
prevention, environmental protection and occupational
health and safety applicable at the place of use must be
observed and complied with.
The device may be used only if it is in good technical
condition and used safely in conformity with the regulations
and in awareness of possible hazards as directed by the
operating instructions. The device is designed for use as
specied in the chapter on "Proper use". Improper use
of the device may result in danger for life and limb of the
user or other persons and damage to the device and other
property. Accidents or near-accidents when using the
device, which could cause or may have caused injury to
persons and/or damage in the vicinity, must be reported
directly to the manufacturer without delay.
All safety instructions on the device and in the operating
instructions must be observed at all times. In addition
to the safety instructions, the operator must ensure
compliance with all applicable national and international
regulations and additional applicable regulations regarding
operational safety, accident prevention and environmental
protection. Only trained technicians qualied to work safely
and authorized are permitted to carry out any work on
the device.
2.3 General obligations of the operator
The operator is required to use the device only if it
is good and safe condition. In addition to the safety
instructions in the operating instructions, the general
safety and accident prevention regulations, the
requirements of DIN VDE 0100 the environmental
protection regulations of the country of use must be
observed.
The operator is responsible for ensuring that all work on
the device is conducted by trained technicians who have
been authorised and trained in safe operation.
The operator or authorised personnel are also
responsible for accident-free operation.

10 | EN Ⓒelero GmbH Ⓒelero GmbH EN | 11
2.4 Requirements for personnel
Every person authorised to work with the device must
have read and understood the complete operating
instructions before carrying out the appointed work.
This is also applicable if the person has already worked
or had training with a similar device.
All work on the device is conducted by trained
technicians who have been authorised and trained in
safe operation. All operatives must be familiarised with
the dangers of working with the device before starting
any work with it.
All persons are permitted to conduct only work in
accordance with their qualications. The area of
responsibility of the person must be clearly dened.
No person who is appointed to work with the device
may have any physical restrictions that could temporarily
or permanently reduce attention span and judgement
(e.g. fatigue).
Minors or persons under the inuence of alcohol, drugs
or medications are not permitted to use the device or
conduct any assembly, disassembly or cleaning work.
2.5 Safety instructions for the technical status
The operator is required to use the device only if it is
good and safe condition. The technical status must
conform to the legal requirements at all times.
If hazards to persons or changes in operating
characteristics are detected, the device must be taken
out of service immediately and reported to the operator
of the system.
The device must not be modied, attached or converted
in any way without approval by the manufacturer.
2.6 Safety instructions for operation
The operator of the device is required to ensure
that the device is in safe operating condition before
commissioning.
This is also required at regular intervals to be
dened by the operator during the life of the device.
The operator is responsible for inspections before
starting operation.
3 Product description
3.1 General information
The device is a multichannel radio hand-held transmitter.
It can be used exclusively for bidirectional data
communications (compatible with the elero ProLine 2
program).
It is used to control roller shutters, venetian blinds and
sunshades, for switching electrical lighting equipment and
electric heaters.

12 | EN Ⓒelero GmbH Ⓒelero GmbH EN | 13
3.2 Device explanation
Front and back of device
1. Display
2. Left menu key
3. Right menu key
4. Joystick
(multidirectional key)
5. Operating mode
display
6. UP key
7. STOP key
8. Status display
9. DOWN key
10. Selection key
11. Programming key P
12. DIP switch 1
(for experts)
13. DIP switch 2
(for experts)
Tab. 1 Explanation of device (pictures of front and back)
3.3 Product types
The device can be supplied in dierent models (each within
a specic frequency range: 867, 868, 915 MHz). See the
order conrmation for the exact conguration of your
device.
3.4 Technical data
All information in this chapter is based on an ambient
temperature of 20 °C (± 5 °C).
3.4.1 Table of technical parameters
MultiTel 2 technical data
Operating voltage 3V DC
Battery type 2 x LR06 (AA)
IP Code IP 20
Approved ambient
temperature [°C]
0 to 55
Radio frequency [MHz] 868 (915 or 867)
Weight (incl. batteries) [g] 140
Delivery including wall bracket
Tab. 2 MultiTel 2 technical parameters
The values of your device, which depend on the model,
can be found on the name plate.

14 | EN Ⓒelero GmbH Ⓒelero GmbH EN | 15
3.4.2 Mounting of the wall bracket
The wall bracket consists of a top and bottom
section.
• Before installing the unit in the required
position, check that the transmitter and
receiver are functioning perfectly.
• Push the bracket upper and lower parts
to separate them.
• Fix the bracket lower part onto the wall
using the screws and dowels provided.
• Install the wall bracket where the holes
are away from any electrical wires.
3.4.3 Product features
15-channel hand-held radio transmitter for bidirectional
communications between transmitter and receiver(s)
Selection key for switching between "Auto/Manual" with
automatic status display by LED and "Hand" or "Auto"
icon
UP/Stop/Down keys for manual operation
Programming button on the back of the device
(can be operated with cover)
Menu-controlled function setting with plain-text displays
and channel and product management with editing
options in a maximum of two text elds per channel
Display menu control in 14 languages in backlighted
display
Conguration options for up to ve dierent groups
(combination of up to a maximum of 5 programmed
channels from the available individual channels)
Master channel for common addressing of all individual
channels, availability of master channel can be switched
Selection of the individual channels, group channels or
the matser channel with display function
Information on executed commands by status LED and
display icons
4 Operation
This chapter contains basic information on using the
operating instructions and the device.
4.1 Bidirectional radio system
A bidirectional radio system transmits radio signals to
radio receivers and enables feedback from radio receiver
to the transmitter. The radio signal can be sent directly to
the target receiver. If this is not possible, the radio signal
is routed via other bidirectional devices until the signal
reaches the target receiver. The target receiver carries
out the command and sends a conrmation back to the
transmitter. The prerequisite for bidirectional radio is
therefore that all components can transmit and receive
radio signals.
4.2 Initial operation
Press any key to activate the hand-held transmitter;
Display, status display and operating mode display light up.
When using the device for the rst time select the required
language in the menu control.

16 | EN Ⓒelero GmbH Ⓒelero GmbH EN | 17
4.3 Power supply
The device is powered by two AA batteries. When using
batteries make sure that there are two identical 1.5 V
batteries. The device switches o automatically if the
batteries are at. Low batteries are indicated by a battery
indicator in the top section of the display (toolbar) beside
the channel number display.
Important:
Replacing batteries:
see Chapter 4.6, Replacing batteries.
4.4 Operating mode
The channel display indicates when the device is ready for
use.
The display backlighting switches o automatically if keys
are not pressed and/or the joystick is not moved for longer
than 2 minutes.
After programming the transmitter channel to a receiver,
in the operating mode a product-specic pictogram with
an icon showing the current movement status and an icon
for automatic or manual mode of the receiver is displayed.
The display can show the pictograms for roller shutters
(standard), interior shading (roller blind), venetian blind,
awning, light or heating. The icons for the movement status
and automatic or manual operation of the receiver are
shown on the right of the product pictograms.
The bottom display row shows the functions that can be
selected with the two selection keys (soft keys) in the
current operating mode.
Example 1 of a display in the operating mode
1 Channel number/group number
2 Toolbar
3 Display of product
4 Movement
5 Auto/Manual operating mode
6 Left selection key
7 Right selection key
Fig. 1 Display in operating mode (example 1):
Channel 12, programmed venetian blind,
automatic active, movement up
Example 2 of a display in the operating mode
Text eld 1 (living room)
Text eld 2 (right)
Product eld
Operating mode eld
Position eld
Fig. 2 Display in operating mode (example 2):
Channel 12, programmed venetian blind,
stop status, manual active;
Text eld 1 (living room) and
text eld 2 (right) individually entered

18 | EN Ⓒelero GmbH Ⓒelero GmbH EN | 19
A group pictogram is shown for a group channel and for
the master channel (combination of all channels, "All").
A channel or group number is not displayed in the master
channel.
Important:
If there are dierent products in a single channel after
programming, the product pictogram is shown with
an additional reference to dierent products (product
combination).
This is applicable only if "INTERNAL" is selected in the
Settings - Product Selection menu, because only in this
case is the product type returned by the programmed
receiver displayed.
4.4.1 Icons in the device display
Pictograms in the toolbar
Battery indicator
(low battery capacity)
Tab. 3 Pictograms in the toolbar of the display
Icons in the product eld
Roller shutter
Interior shading
Icons in the product eld
Venetian blinds
Awning
Light
Heating
Combination of dierent
products in the single channel
Display of group and master channel
Tab. 4 Icons in the product eld of the display
Icons in the position eld
Up
Down
Upper end position
Lower end position

20 | EN Ⓒelero GmbH Ⓒelero GmbH EN | 21
Icons in the position eld
Intermediate position reached
(roller shutter, awning; venetian blind)
Ventilation position, fabric tautening or
tilting position reached
(roller shutter, awning; venetian blind)
STOP status
Tab. 5 Icons in the position eld of the display
Icons in the operating mode eld
Manual mode of receiver
Automatic mode of receiver
Tab. 6 Icons in the operating mode of the display eld
4.4.2 Status LED
A radio signal is displayed by the illumination of the status
display (LED ring around the STOP key).
The status LED can display dierent colours:
Status display (status LED) and its meaning
orange
ashing
Channel not yet programmed
to a receiver
Status display (status LED) and its meaning
orange
fast ashing
Channel in programming
mode, previously
programmed receivers
cannot be operated. Lights
continuously every three
seconds in group mode
orange, then green Receiver has received the
signal sent by the hand-held
transmitter and responded
orange, the red ashing Receiver has not received
the signal sent by the hand-
held transmitter
red and green
2 x alternately, then red
Channel deleted in receiver
and transmitter
Tab. 7 Status displays and their meaning
The transmission power and radio range are reduced as
the battery power decreases (reduced battery capacity).
If the status LED does not light up when a key is pressed,
the batteries must be replaced (see Chapter 4.6, Replacing
batteries).
4.4.3 Group control unit and master channel (All)
A group refers to the control of several receivers (channels)
at the same time. The selected group is controlled
by a travel command.
With the MultiTel 2 individual channels can be combined
into ve dierent groups for group control. The master
channel ("All" channel selection in the display) controls
all available channels simultaneously.

22 | EN Ⓒelero GmbH Ⓒelero GmbH EN | 23
4.4.4 Joystick (multidirectional key)
The joystick (4-way key) is the master control unit for
navigating in the display menus. You can use it to select
any of 15 channels by pressing "down" or "up". Only the
programmed channels are displayed in the operating mode.
individual channel (1)
individual channel (15)
group channel (1)
group channel (5)
master channel
Fig. 3 Navigation in channels, groups, master channel
If multiple single channels are allocated to dierent groups,
the joystick can be used to select up to ve congurable
group control units simply by moving it to the side.
Channels are allocated to a group with the "Administration"
menu (see menu structure in "Menu mode", Chapter 4.5).
There is an additional channel for the master channel,
to which all individual channels are assigned. The master
channel is selected by moving the joystick slightly to the
side.
4.4.5 Selection button
Press the selection key briey to query the current
automatic status and the receiver position of the
programmed receiver and to update on the hand-held
transmitter.
After pressing the key briey, all channels, including
channels that have not been programmed yet, can be
selected with the joystick for 30 seconds; after 30 seconds
only the programmed channels are visible.
Press the selection key for a longer time (longer than
1 second) to switch the operating mode of the channel
(between "Auto" and "Manual").
"Manual" operating mode:
The operating mode indicator lights up red and the
operating mode in the display switches between "manual"
and "automatic".
• The receiver now carries out manual travel commands
only and does not respond to automatic travel
commands.
Important:
All automatic functions are disabled in the receivers, the
receiver does not respond to automatic timer commands
and shading commands from programmed sensors.
Exception:
Alarm movements are a result of reported alarms of
corresponding sensors (e.g. wind and rain sensors) are still
executed.

24 | EN Ⓒelero GmbH Ⓒelero GmbH EN | 25
"Automatic" operating mode:
The operating mode indicator shows green and the
operating mode display switches to "Auto".
• The receiver now executes automatic and manual travel
commands.
Important:
Switching the operating mode in the master channel
changes the "Auto" or "Manual" operating mode for all
individual channels.
Switching the operating mode within a group changes
the "Auto" or "Manual" operating mode for all individual
channels of the group.
A dierent "Auto" and "Manual" operating mode in individual
channels is shown in the display with an orange operating
mode indicator and "Automatic icon" and "Manual icon"
side by side.
4.4.6 UP, DOWN and STOP keys
Actuating the keys initiates a travel operation or a stop in
the channel of the programmed receiver.
4.5 Menu mode
The functions of the device are divided into menus.
In the initial display select "Menu" and then the desired
menu or submenu.
Exiting the current menu level: Select "Back", if
necessary select "Back" repeatedly until you are returned
to the initial display or otherwise press and hold "Back".
Entering text: To enter text (e.g. for naming groups and
channels), you can use the text input to select upper and
lower case, numeric characters, special characters and
accented characters. The selected character set is visually
supported by highlighting the allocated icons in the display.
Dialogue guidance in the display is menu-guided.
All functions can be accessed via the various menus.
See diagram below for a view of the complete menu
structure:
MultiTel 2 menu structure
Administration
Settings
Groups
Channels
All
Reset
Language
Lighting
Channels
Groups
All
Factory setting
Expert Alle On / Off
INFO On / Off
Version
Product selection
Channel-related allocations (text field 1, text field 2, groups)
Group selection for channel allocation and text input
(text field 1, text field 2, channels)
Resets all group allocations and text fields
Text input (text field 1, text field 2)
on availability >/= 1 channel
Selection of language
}
Intermediate position or
intermediate position 1
(in seconds)
Ventilation /tilting position or
intermediate position 2 or
fabric tautening position (in 0,1 s)
Backlighting of display
Product-related transmitter configuration of
individual channels by runtime, transmission mode,
product pictogramm (channels only)
Setting travel to intermediate position
(factory setting: no runtime)
Setting travel time to
desired postition
(factory setting: no runtime)
Function
Reset all settings to factory settings
(texts, groups, language;
channel settings without channel allocation change)
Information on the software version
Enabele or disable option for selecting
master channel (all individual channels)
Enable or disable periodic query
for position reports during travel
in groups and in master channel
Fig. 4 Menu structure of the MultiTel 2

26 | EN Ⓒelero GmbH Ⓒelero GmbH EN | 27
Key functions
Selections and changes in the menus are made with the
joystick and the left and right menu keys. The assignment
of the menu keys is dened depending on the context by
a correspondingly allocated text eld.
Joystick functions in menu mode in the MultiTel 2
Movement down Scrolls down or changes
the value (-).
Movement up Scrolls up or changes
the value (+).
Movement to
the left/right
Changes the setting ranges or
activates the eld.
Tab. 8 Joystick functions in the MultiTel 2
Important:
If the device is in menu mode and the buttons are not
touched for more than 30 seconds, the operating type
switches to the operating mode.
4.5.1 "Administration" menu
The following chapter structure corresponds to the menu
structure in the MultiTel 2. The "Administration" menu oers
the option of selecting individual channels, groups (group
channels) or the master channel and giving them names.
Individual channels can also be allocated to dierent
groups; all individual channels are automatically allocated
to the master channel.
"Channels" submenu
A selected channel can be allocated to one or more groups.
A name for the selected channel can be dened in two text
elds each with a maximum of 15 characters.
"Groups" submenu
Individual channels (maximum 5 channels per group)
can be allocated for ve selectable groups. A name for
the selected group can be dened in two text elds each
with a maximum of 15 characters
Important:
The group allocation is only available if at least two
programmed individual channels are available.
"All" submenu
A name for the master channel can be dened in two text
elds each with a maximum of 15 characters. This submenu
is not available in the event of cut-out in "Menu: Function -
Expert".
"Reset" submenu
Resets all group allocations and text elds: All names and
allocations can be reset to the factory settings by selecting
the "Rest" menu.
4.5.2 "Settings" menu
You can make various function settings in the "Settings"
menu.
"Language" submenu
A language for the menu texts can be selected from the list.

28 | EN Ⓒelero GmbH Ⓒelero GmbH EN | 29
Display languages in the MultiTel 2 display
German English French
Italian Spanish Portuguese
Dutch Swedish Danish
Polish Hungarian Czech
Slovenian Turkish
Tab. 9 Available languages in MultiTel 2
• "Save" menu key
(Display) "Lighting" submenu
You can switch the display backlighting on or o.
The backlighting automatically switches o after 10 seconds
if a key is not pressed. The lighting is enabled in the factory
setting.
"Channel settings" submenu
"Group" submenu
"All" submenu (with activated function only)
The above three submenus ("Channel Settings", "Group",
"All") branch further into three submenus
• "Product selection"
• “Intermediate position”
• "Ventilation/tilting position"
Product selection (for channels only)
Regardless of products previously dened during
programming (INTERNAL setting), the product view can
be redened individually for the channel with the assigned
pictogram.
• "Save" menu key
Important:
The customised product views will be lost and must be
redened if the device is reset to the factory settings.
Intermediate position
You can set a runtime from zero to 360 seconds for
approaching an intermediate position from the top end
position if the radio receiver product (roller shutter, venetian
blind, awning) does not support saving an independent
intermediate position.
The runtime can be set in 1-second steps by time
preselection by joystick or intuitively with the DOWN or UP
key with travel distance setting; the factory setting for the
intermediate position runtime is zero seconds (no runtime
setting).
• "Save" menu key
The intermediate position is approached by the dened
runtime by double-clicking the DOWN key.
Ventilation/tilting position
You can set a runtime in 0.1-second steps for approaching
a ventilation position (roller shutter) or tilting position
(venetian blind) from the bottom end position if the radio
receiver product does not support saving an independent
intermediate position.
The runtime can be set in 0.1-second steps by time
preselection by joystick or intuitively with the DOWN or UP
key with travel distance setting; the factory setting for the
ventilation position runtime is zero seconds (no runtime
setting).
• "Save" menu key

30 | EN Ⓒelero GmbH Ⓒelero GmbH EN | 31
4.5.3 "Function" menu
Factory setting submenu
The selection and conrmation of this menu item resets all
settings to the factory setting, except for the channel-related
receiver allocation (language, customised texts, group
allocations, runtimes, product display, automatic mode
status). Settings must be redened if necessary.
Factory settings
of the MultiTel 2
Standard
setting
Administration
• Channels
• Groups
• All
Allocations
text eld 1
text eld 2
none
empty
empty
Settings Language
Lighting
German
On
Settings
• Channels
• Groups
• All
Product selection
Intermediate
position
Ventilation
position
Roller shutter
or depending
on programmed
receiver
Without
runtime setting
Without
runtime setting
Function
• Expert
All On/O
INFO On/O
All On
INFO On
Tab. 10 Factory settings of the MultiTel 2
Expert submenu
"All On/O"
The master channel is available in the factory setting:
"All On".
If this is not wanted or does not appear appropriate
(e.g. with mixed operation with roller shutters and awnings),
the function can be disabled with "All O".
If the "All O" setting is selected, the control and
programming options of the master channel are disabled.
"INFO On/O"
On or O function for the periodic query of the individual
channels when starting and during travel motion in the
group or in the master channel. The shut-o of radio trac
during transmission in the group can be greatly reduced
depending on the individual channels in the group or in
the master channel. In the case of cut-out the position
display is updated by the internal of the transmitter.
"Version" submenu
Display of current rmware version

32 | EN Ⓒelero GmbH Ⓒelero GmbH EN | 33
4.6 Programming the transmitter
A maximum of 15 individual channels is available for
programming receivers. Press the selection key briey
to allow all channels to be available for selection for
programming for 30 seconds. After selection of the channel
the programming process can be started with the Pkey.
All channels will also be displayed during the programming
process if a programming process is started with the Pkey.
During a programming process the user can switch between
empty and previously programmed channels (except when
programming a channel with more than 10 simultaneous
receivers).
Condition:
The bidirectional receiver is installed.
For programming in front of the programmed blind.
1. With electrical receivers which have already been
installed, switch the fuse o, and on again a few seconds
later. The receiver is now in programming mode for about
5 minutes.
2. Press the programming key Pon the back of the device
briey (approx. 1 second) until the status display lights
up briey. The blind moves up and down for approx. two
minutes, showing that the receiver is in programming
mode.
3. Press the UP key immediately (maximum 1 second) after
the start of a upward movement. The status display lights
up briey.
The blind stops briey, starts moving again and then
moves downwards.
4. Press the DOWN key immediately (maximum 1 second)
after the start of any downward movement. The status
display lights up briey. The blind stops. The channel is
now programmed by the transmitter.
Important:
If the blind does not stop, it must be programmed again.
A programming process can be cancelled by pressing
the STOP key for six seconds.
4.6.1 Programming additional transmitters
Important:
If multiple receivers are connected to the same feeder,
they are all in programming mode for approximately
5 seconds after switching on the power.
If the Pbutton on the transmitter is pressed, all the
receivers start programming mode at the same time
(movement up and down). Randomly dierent intervals
between movements up and down cause the receivers
to become oset against one another. The longer
programming is delayed, the greater the oset will be.
You can stop the short movements up and down by briey
pressing the STOP button on a transmitter which has
already been programmed. Programming mode in the
receiver is cancelled.
You can now assign the transmitter without having to
disconnect individual receivers. If the blind moves in the
wrong direction, delete the transmitter and restart the
programming process (see Chapter 4.5.12 "Deleting
positions/deleting transmitters").

34 | EN Ⓒelero GmbH Ⓒelero GmbH EN | 35
If you wish to program additional transmitters to a receiver:
1. Press the UP and DOWN keys and the programming
button P(back of the device) simultaneously (for 3
seconds) on a transmitter that is already programmed
for the receiver. The status display lights up briey. The
receiver is now in programming mode.
2. Press the programming button P on the transmitter to
be programmed, until the status display lights up briey.
The receiver is now in programming mode (movements
up and down).
3. Press the UP key immediately (maximum 1 second) after
an upward movement has started. The status display
lights up briey. The blind stops briey, starts moving
again, stops and then moves in the DOWN direction.
4. Press the DOWN key immediately (maximum 1 second)
after the start of a downward movement. The status
display lights up briey. The blind stops.
The transmitter is now programmed.
If more than 10 bidirectional receivers are being
programmed at the same time, the transmitter channel in
programming mode switches to group mode. Group mode
is indicated by fast ashing with pauses.
Programming in group mode is terminated after 2 minutes
without pressing a key or the joystick or by pressing the
STOP key for 6 seconds.
Important:
For venetian blinds, a jogging mode for quickly reaching
receivers which are further away is not possible in a
transmitter channel with more than 10 programmed
receivers.
4.6.2 Synchronous programming mode
If a transmitter must be programmed for multiple receivers
at the same time:
1. Press the DOWN key and the programming button P
(back of the device) simultaneously (for 3 seconds)
on a transmitter that is already programmed for the
receivers. The status display ashes. The receivers
are now in programming mode.
2. Press the programming button Pon the transmitter
to be programmed, until the status display lights up
briey. The receivers are now in programming mode
(movements up and down).
3. Press the UP key immediately (maximum 1 second) after
an upward movement has started. The status display lights
up briey. The blinds stop briey, start moving again, stop
and then move in the DOWN direction.
4. Press the UP key immediately (maximum 1 second) after
the start of a upward movement. The status display lights
up briey. The blinds remain stopped.
The transmitter is now programmed.
4.6.3 Stopping programming mode in transmitter
Press and hold the STOP key for at least 6 seconds until
the status display shows orange.
4.6.4 Approaching end positions of roller shutter,
awning, venetian blind
Condition:
The transmitter is now programmed. The end positions
have been set.
Approaching the lower end position (roller shutter/awning)
Press the DOWN key briey. The blind approaches the
lower end position or the awning opens completely.

36 | EN Ⓒelero GmbH Ⓒelero GmbH EN | 37
Approaching the lower end position (venetian blind)
Press the DOWN key until the status display lights up
briey. The blind approaches the lower end position.
Press the DOWN key briey (jogging mode with drive YES,
pulse operation with Combio Pulse). The blind moves briey
and then stops.
Approaching the upper end position (roller shutter /
awning)
Press the UP key briey. The blind approaches the upper
end position or the awning closes.
Approaching the upper end position (venetian blind)
Press the UP key until the status display lights up briey.
The blind approaches the upper end position.
Press the UP key briey (jogging mode with drive JA, pulse
operation with Combio Pulse), the blind moves briey and
then stops.
Intermediate position of blinds
Roller
shutter
Awning Venetian
blinds
Interior
shading
Pos
▼
Inter-
mediate
position
Intermediate
position
Intermediate
position
Inter-
mediate
position 1
Pos
▲
Ventilation
position
Fabric
tensioning
Tilting
position
Inter-
mediate
position 2
Tab. 11 Intermediate positions of blinds
4.6.5 Programming the intermediate position in
the receiver
Requirement
The transmitter is now programmed.
The end positions of the drive have been set.
The blind/shutter is at its upper end position.
1. Traverse the blind to the desired position with the DOWN
key. Keep pressing the DOWN button.
2. Press the STOP key also. The blind will stop. The status
display lights up briey.
The intermediate position is programmed.
4.6.6 Programming the ventilation/tilting position
in the receiver
Requirement
The transmitter is now programmed.
The end positions of the drive have been set.
The blind/shutter is at its lower end position.
• Traverse the blind in the UP direction with the UP key
until the ventilation gaps open or the slat tilt position is
reached. Keep pressing the UP button while it is moving.
In addition press the STOP button. The blind will stop.
The status display lights up briey.
The ventilation/tilt position is programmed.
Approaching the intermediate position
Requirement
The transmitter is now programmed.
The blind/shutter is at its upper end position.
1. Press the DOWN button briey twice. The status display
lights up briey.
2. The blind travels to the stored intermediate position.
Venetian blinds are automatically tilted after reaching
the intermediate position if a tilting position has

38 | EN Ⓒelero GmbH Ⓒelero GmbH EN | 39
been programmed. If an intermediate position is not
programmed, the blind moves down to the bottom end
position (not if Combio Pulse is used).
Approaching the ventilation/tilting position
Requirement
The transmitter is now programmed.
The blind/shutter is at its lower end position.
1. Press the UP button briey twice. The status display
lights up briey.
2. The blind travels to the stored ventilation / tilting position.
If a ventilation/tilting position is not programmed, the blind
moves down to the bottom end position (not if Combio
Pulse is used).
4.6.7 Operation of transmitter with Combio JA Pulse
A Combio-867 / -868 / -915 JA pulse for exact setting of
the slats can be used with venetian blind drives. Press the
UP or DOWN key to move for the preset pulse time of the
Combio Pulse.
The user can change the pulse time. This is done by
pressing and holding the STOP and UP keys for 6 seconds.
The drive starts moving in short pulses. As soon as the
blind has moved the desired distance, release the UP key
then release the STOP key. The new pulse time is saved.
The new pulse time is equal to the total of all pulse times
while programming the pulse time. After 30 pulses the
Combio JA Pulse terminates programming the pulse time.
4.6.8 Deleting positions/deleting transmitters
Deleting the intermediate position in the receiver
1. Press both the STOP button and the DOWN button.
2. Press and hold this key combination for approx.
3 seconds. The status display lights up briey.
Deleting the ventilation/tilting position in the receiver
1. Press both the STOP button and the UP button.
2. Press and hold this key combination for approx.
3 seconds. The status display lights up briey.
Deleting the transmitter channel in the receiver
• Press both the STOP key and the programming button P
(back of the device).
3. Press and hold this key combination for approx.
6 seconds until the status display lights up briey orange
and then red.
The channel (or the group) in the transmitter is also
deleted.
Deleting all the transmitters in the receiver
1. Press the STOP key, the programming button P(back of
the device) and the UP key and the DOWN key together.
2. Press and hold this key combination for approx.
6 seconds. The status display lights up orange-green
briey twice, followed by red.
The channel (or the group) in the transmitter is also
deleted.
4.6.9 Expert settings
DIP switch 1 on the back of the device, under the cover:
OEM setting
Other manuals for MultiTel 2
1
Table of contents
Other elero Remote Control manuals


