Emerson Research ES20 User manual

MICRO CD SYSTEM
with DIGITAL TUNER,
THINOVATION™
FLAT PANEL SPEAKERS
and BUILT IN SUBWOOFER
ES20
OWNER'SMANUAL
Visitourweb siteatwww.emersonradio.com
TM
ES20_ib061303.p65 13/6/2003, 12:1336

1
TO PREVENT FIRE OR SHOCK HAZARD, DO NOT USE THIS PLUG WITH AN
EXTENSION CORD, RECEPTACLE OR OTHER OUTLET UNLESS THE BLADES
CAN BE FULLY INSERTED TO PREVENT BLADE EXPOSURE. TO PREVENT FIRE
ORSHOCKHAZARD,DONOTEXPOSETHISAPPLIANCETORAINORMOISTURE.
IMPORTANTSAFETYINSTRUCTIONS
1.) Read these instructions.
2.) Keep these instructions.
3.) Heed all warnings.
4.) Follow all instructions.
5.) Do not use this apparatus near water.
6.) Clean only with dry cloth.
7.) Do not block any ventilation openings. Install in accordance with the manufacturer’s
instructions.
8.) Do not install near any heat sources such as radiators, heat registers, stoves, or other
apparatus (including amplifiers) that produce heat.
9.) Do not defeat the safety purpose of the polarized or grounding-type plug. A polarized plug has
two blades with one wider than the other. A grounding type plug has two blades and a third
groundingprong.Thewidebladeorthethirdprongareprovidedforyoursafety. If the provided
plug does not fit into your outlet, consult an electrician for replacement of the obsolete outlet.
10.) Protect the power cord from being walked on or pinched particularly at plugs, convenience
receptacles, and the point where they exit from the apparatus.
11.) Only use attachments / accessories specified by the manufacturer.
12.) Unplug this apparatus during lightning storms or when unused for long periods of time.
13.) Refer all servicing to qualified service personnel. Servicing is required when the apparatus
has been damaged in any way, such as power-supply cord or plug is damaged, liquid has
been spilled or objects have fallen into the apparatus, the apparatus has been exposed to rain
or moisture, does not operate normally, or has been dropped.
14.) This appliance shall not be exposed to dripping or splashing water and no object filled with
liquids such as vases shall be placed on the apparatus.
15.) Do not overload wall outlet. Use only power source as indicated.
16.) Use replacement parts as specified by the manufacturer.
17.) The product may be mounted to a wall only if recommended by the manufacturer.
18.) Upon completion of any service or repairs to this product, ask the service technician to
perform safety checks.
!
CAUTION
RISK OFELECTRICSHOCK
DONOTOPEN
The lightning flashwitharrow-
head symbol,withinan equi-
lateraltriangleisintented to
alertthe usertothe presence
ofuninsulated‘dangerousvoltage’
withinthe product’s enclosure
thatmaybe ofsufficient
magnitude toconstitutearisk
ofelectricshock topersons.
The exclamation pointwithin
an equilateraltriangleisin-
tended toalertthe userto
the presenceofimportant
operating and maintenance
(servicing)instructionsin
the literatureaccompany-
ing the appliance.
WARNING:TOREDUCETHE
RISK OFELECTRICSHOCK
DONOTREMOVE COVER
(ORBACK),NOUSER
SERVICEABLEPARTSINSIDE
REFERSERVICINGTO
QUALIFIEDSERVICE
PERSONNEL.
CAUTION
ES20_ib061303.p65 13/6/2003, 12:131

2
Thank you…………
For purchasing this Emerson Research Micro Audio System with the unique
Thinovation™ flat panel speakers, using the latest SLAB™ flat technology
from Slab Sound. We think you will be truly amazed by the sound produced
by these patented speakers that are less than one inch deep!
This system includes a digital tuner with 20 preset station memory, a CD
player with 20 track programmable memory, a clock timer so that you can
set to sleep or wake to the radio or your favorite CD, a built in compact
subwoofer for dynamic bass, and a full function remote control.
Please make sure to read this manual carefully and completely to make
sure that you understand all the functions we have included in this system
and get the maximum enjoyment from all the outstanding features.
This system was in perfect working order when it left our factory. If you
encounter any problems with the set-up or operation of this system,please
do not return it to the retail store. Please call the Emerson Research
Customer Service Hot Line Toll Free at 800-898-9020. One of our service
representatives will try to diagnose and correct the problem for you.
Once again, thanks for purchasing this Emerson Research audio product.
For future reference, record the serial number in the space provided.
Model No: ES20
Serial No:
AND ARETHETRADEMARKS OFSLAB TECHNOLOGYLIMITED
AND NEWTRANSDUCERSLIMITED.ALL PATENTRIGHTSRESERVED.
ES20_ib061303.p65 13/6/2003, 12:132

3
•Operatecontrolsand switchesas
described inthe manual.
•Beforeturning ‘On’the power,make
certainthatpowercordisproperly
installed.
•StoreyourCDs,inacoolarea toavoid
damage fromheat.
•When moving the set, be suretofirst
disconnectthe powercord.
•Avoidinstalling thisunitinplaces
exposed todirectsunlightorcloseto
heatradiating appliancessuchas
electricheaters,on top ofotherstereo
equipmentthatradiatestoo muchheat,
placeslackingventilationordustyareas,
placessubjecttoconstantvibrationand/
orhumidormoistareas.
•Donotattempttoclean thisunitwith
chemicalsolventsasthismightdamage
the finish.Useaclean drycloth.
CLASS 1LASERPRODUCT
CLASS 1LASERPRODUCT
APPAREILÁLASERDECLASSE 1
PRODUCTOLASERDECLASE 1
CAUTION
INVISIBLELASERRADIATION
WHENOPENAND INTERLOCKS
DEFEATED.
AVOIDEXPOSURETOBEAM
ThisproductcontainsalowpowerLaserDevice.
FCC INFORMATION
Thisequipmenthasbeen tested and found tocomplywiththe limitsforaClass Bdigital
device,pursuanttoPart15 ofthe FCC Rules.Theselimitsaredesigned toprovide
reasonableprotection againstharmfulinterferenceinaresidentialinstallation.This
equipmentgenerates,uses,and can radiateradiofrequency energyand,ifnotinstalled
and used inaccordancewiththe instructions,maycauseharmfulinterferencetoradio
communications.However,thereisno guarantee thatinterferencewill notoccurina
particularinstallation.Ifthisequipmentdoescauseharmfulinterferencetoradioortelevision
reception,whichcan be determined byturning the equipmentoff and on,the useris
encouraged totrytocorrectthe interferencebyone ormoreofthe following measures:
•Reorientorrelocatethe receiving antenna.
•Increasethe separation between the equipmentand receiver.
•Connectthe equipmentintoan outleton acircuitdifferentfromthattowhichthe receiver
isconnected.
•Consultthe dealeroran experienced radio/TVtechnician forhelp.
ThisdevicecomplieswithPart15 ofthe FCC Rules.Operation issubjecttothe following
twoconditions:
(1)Thisdevicemaynotcauseharmfulinterference,and
(2)Thisdevicemustacceptanyinterferencereceived,including interferencethat
maycauseundesired operation.
IMPORTANTNOTES
ES20_ib061303.p65 13/6/2003, 12:133
4
PREPARATIONFORUSE
UNPACKING AND SET UP
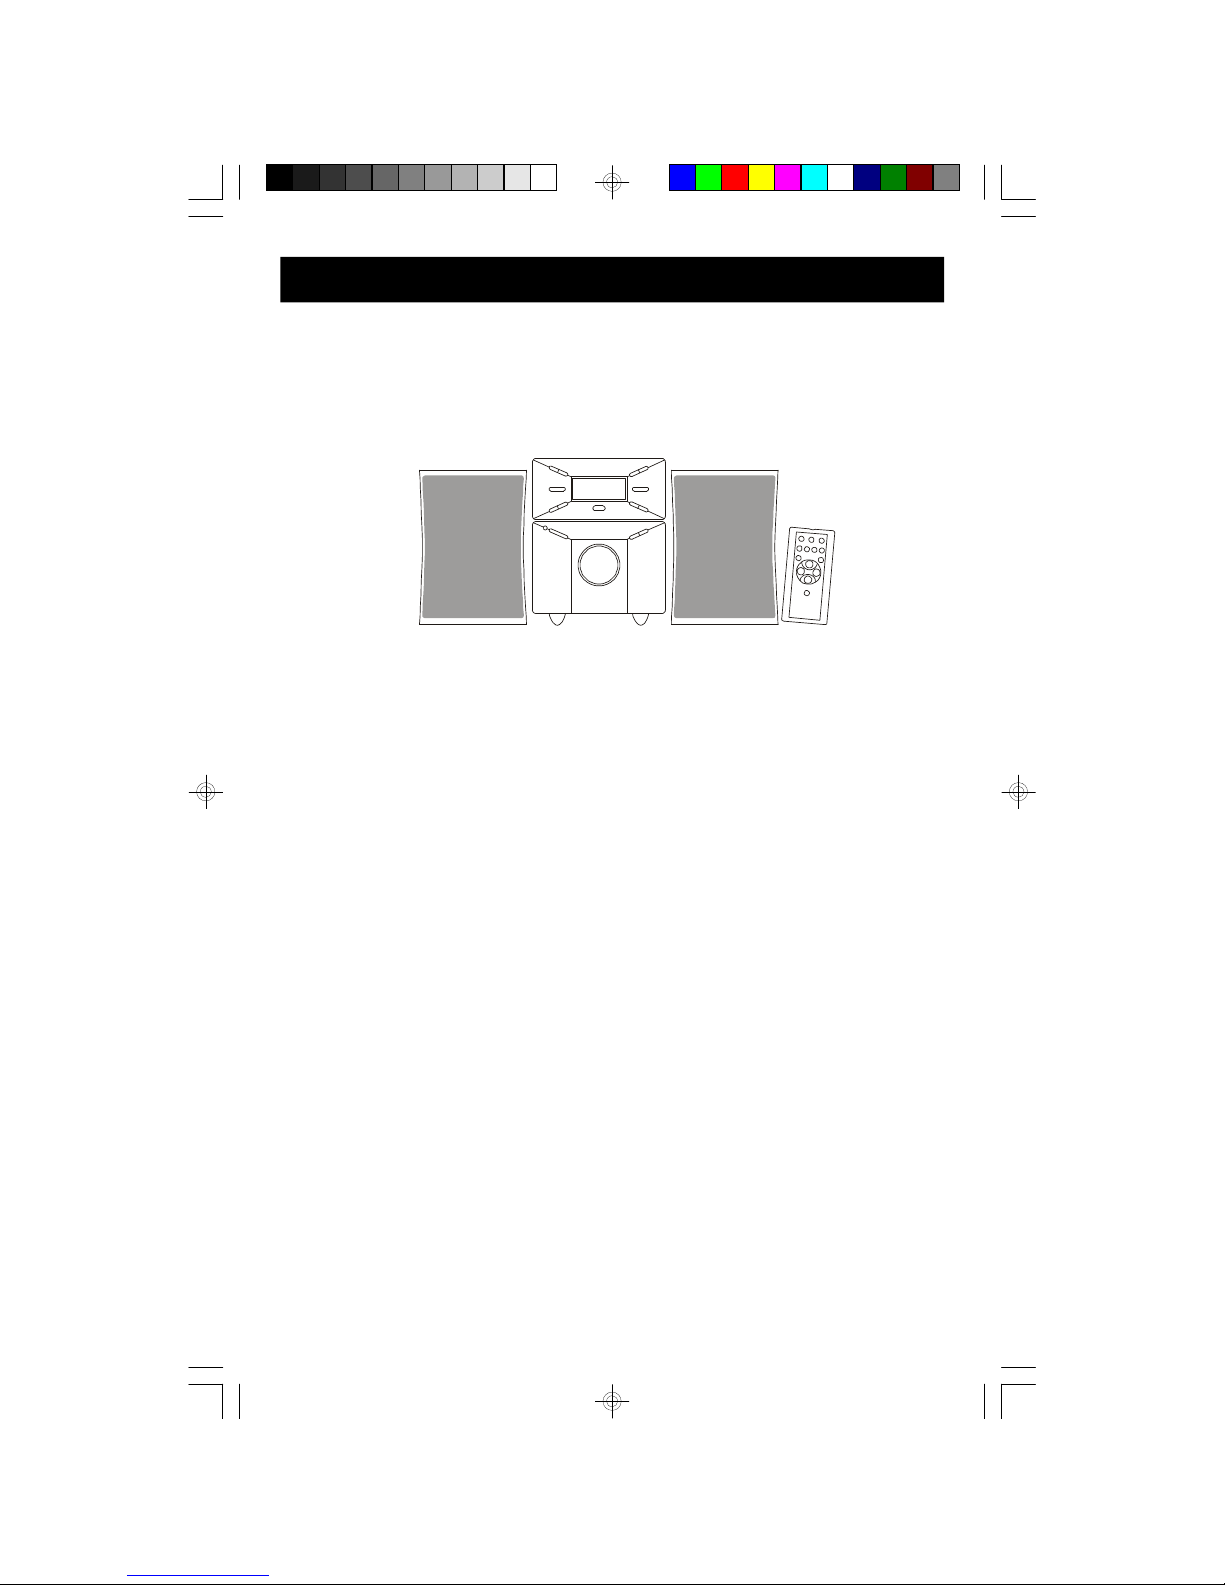
• This system consists of the following components: Tuner/CD Player unit,
Amplifier/Subwoofer unit, 2 “Thinovation™” Flat Panel Speakers, and Remote
Control.
Carefully remove all the components from the display carton and verify that
you have all the necessary components before you dispose of the display
carton.
• Remove all packing materials from the individual components. Remove any
descriptive labels that may be attached to the front panel of the main unit. Do
not remove any labels or stickers on the back panels of the main unit or the
speakers.
• Remove any small strips of tape that may have been used to prevent the CD
door from opening in transit.
• Place all the components in the desired location. This system is designed to
be used on level, stable, flat surface such as a table, desk, shelf, or stand,
convenient to an AC outlet, out of direct sunlight, and away from sources of
excess heat, dust, moisture, or vibration.
• Unwind the AC power cord on the back of the Amplifier/Subwoofer unit and
extend the cord to its full length.
• Unwind the lead wire FM antenna on the back of the Tuner/CD Player unit and
extend it to its full length.
• The main unit is shipped with a “dummy CD” display card in the CD player.
This “dummy CD” card must be removed before you can use the CD player.
Refer to the “PLAYING COMPACT DISCS” instructions on Page 21.
ES20_ib061303.p65 13/6/2003, 12:134
5
POWER SOURCE
This system is designed to operate on 120V AC 60Hz house current only.
Connecting this system to any other power source may cause damage to the
system and such damage is not covered by your warranty.
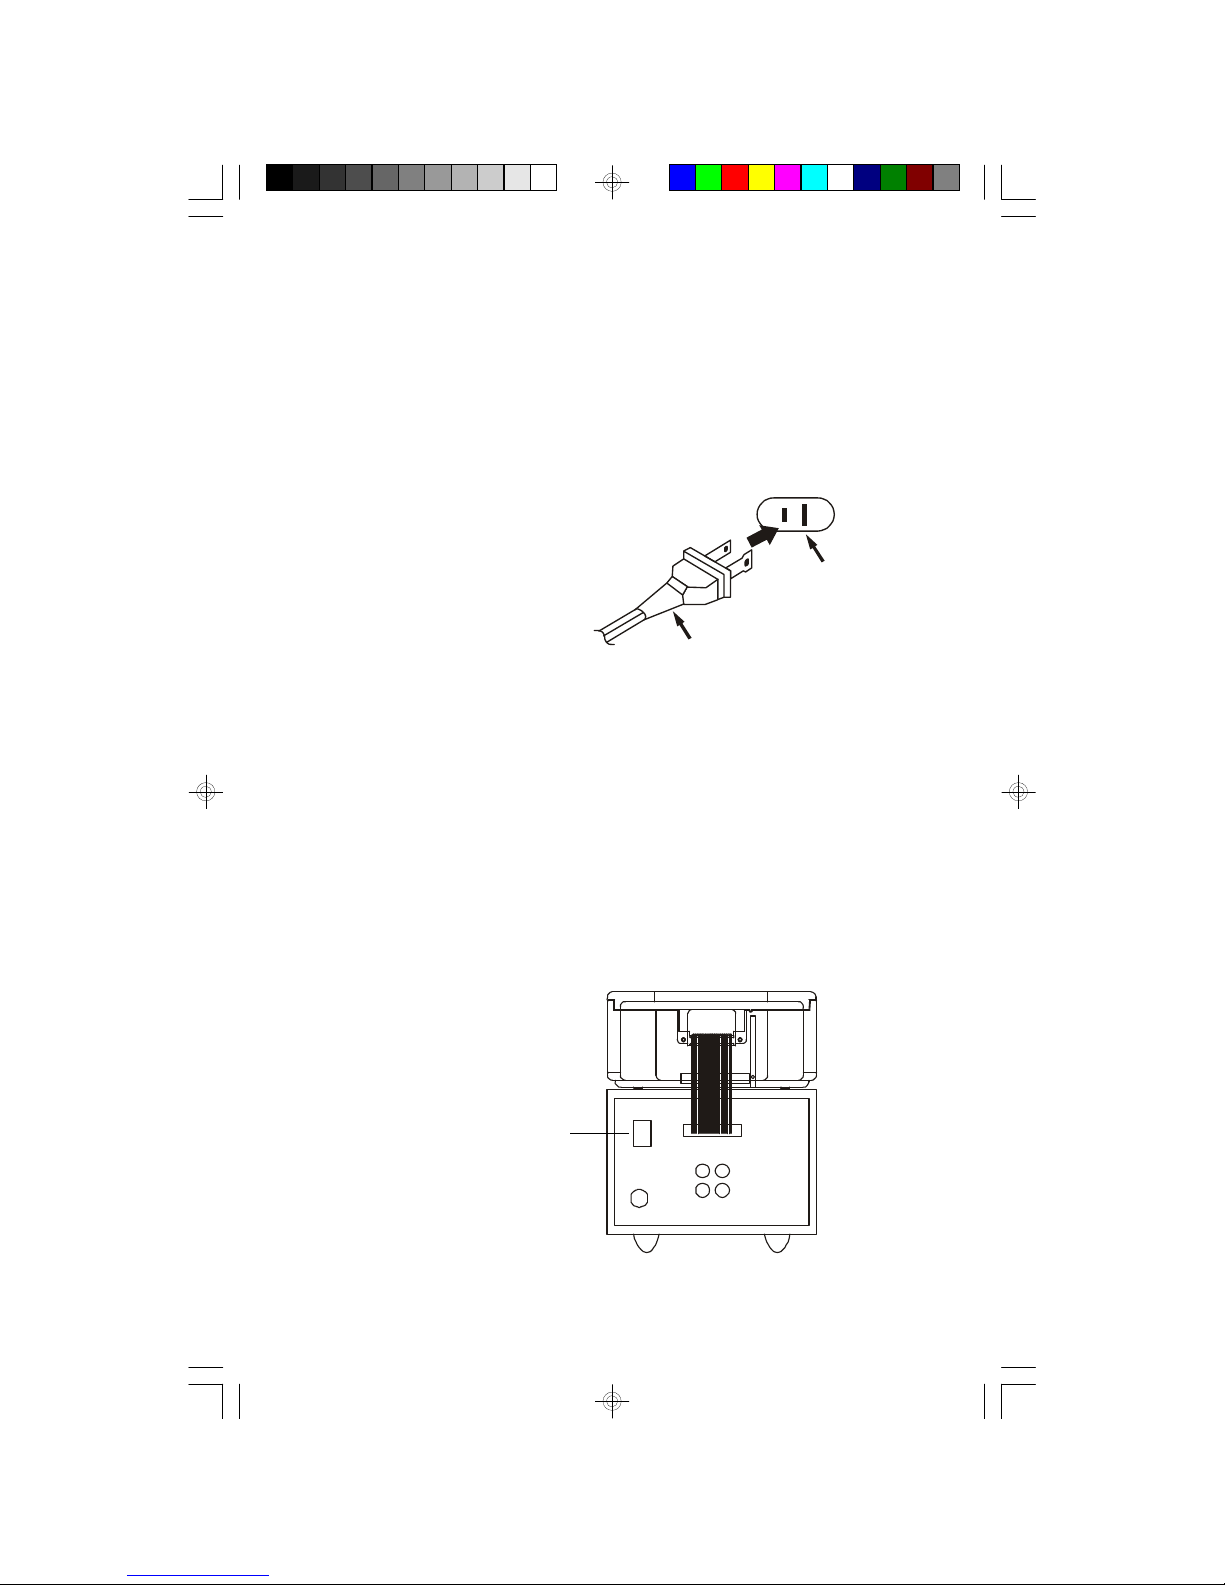
NOTE:The systemhaspolarized ACplug withone wide blade and one narrow
blade.The plug will onlyfitintomatching polarized ACoutlets.Thisisasafety
featuretoreducethe possibilityofelectricshock.If the plug will notfitinyourAC
outlets,you probablyhaveoutdated
non-polarized outlet. You should
haveyouroutdated outletchanged
byaqualified,licensed electrician.
Donotfilethewidebladeontheplug,
orusean adaptertomakethe plug
fitintoyouroutlet. Thisdefeatsthe
safetyfeatureand couldexposeyou toelectricshock.
MAIN POWER SWITCH
IMPORTANT: The main power switch is located on the back of the Amplifier/
Subwoofer unit. This switch must be ‘ON’ for the system to operate. The main
power switch should be left in the ‘ON” position at all times. The only time you
should set this switch back to the ‘OFF’ position is if you will not be using the
system for an extended period of time – for example, two weeks or longer. The
remote controller cannot operate the system if main power switch is in the ‘OFF’
position.
AC Plug
AC Outlet
R
L
ON
OFF
MAINSWITCH
ES20_ib061303.p65 13/6/2003, 12:135
6
BATTERY BACK UP
This system includes a battery back up circuit that will maintain the Tuner preset
station memories and the correct time in the event of a power interruption. The
battery back up circuit requires 4 “AAA” batteries, not included.
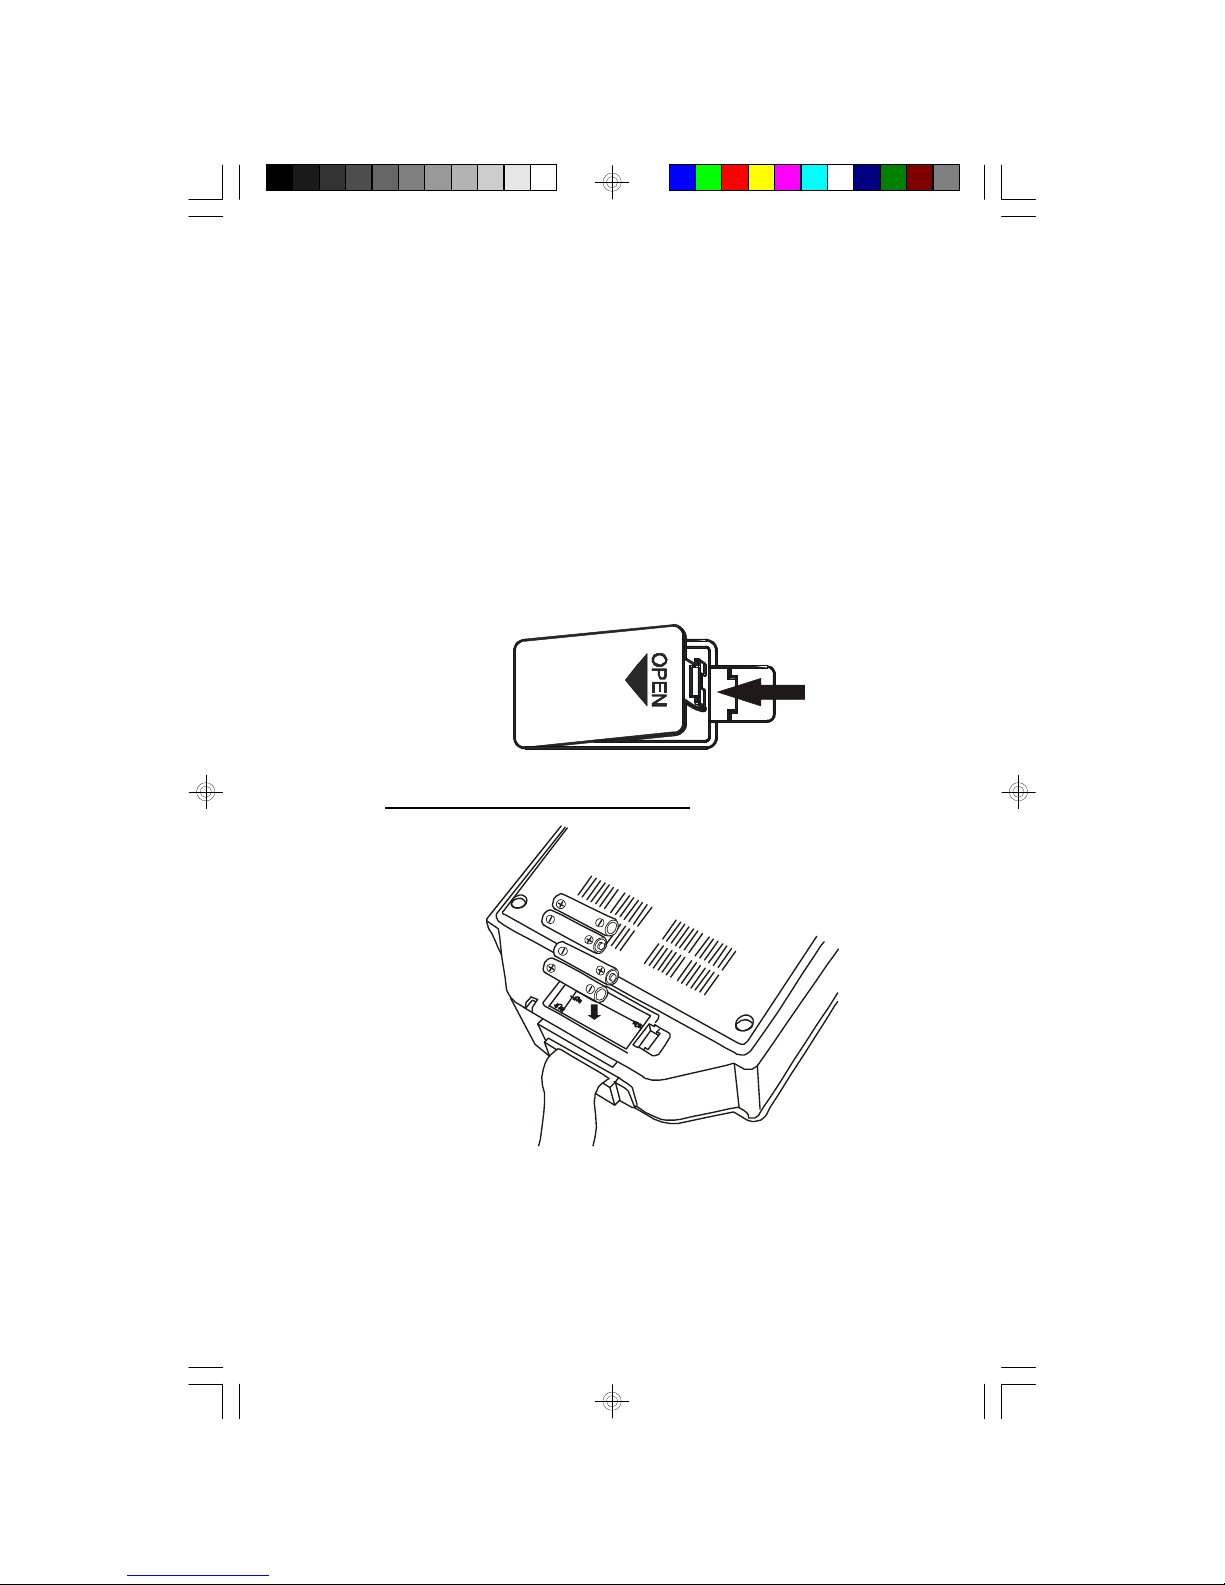
1.) The battery compartment is located on the bottom of the Tuner/CD Player
unit. Turn the Tuner/CD Player unit upside down.
NOTE: Place the unit on a soft surface such as a towel to avoid scratching
the finish on the top of the cabinet.
2.) Push the door locking tab in the direction of the arrow to open the battery door
and insert 4 “AAA” alkaline batteries according to the polarity markings inside
the battery compartment.
3.) Replace the battery door.
BottomViewOf Tuner/CD Unit
ES20_ib061303.p65 13/6/2003, 12:136
7
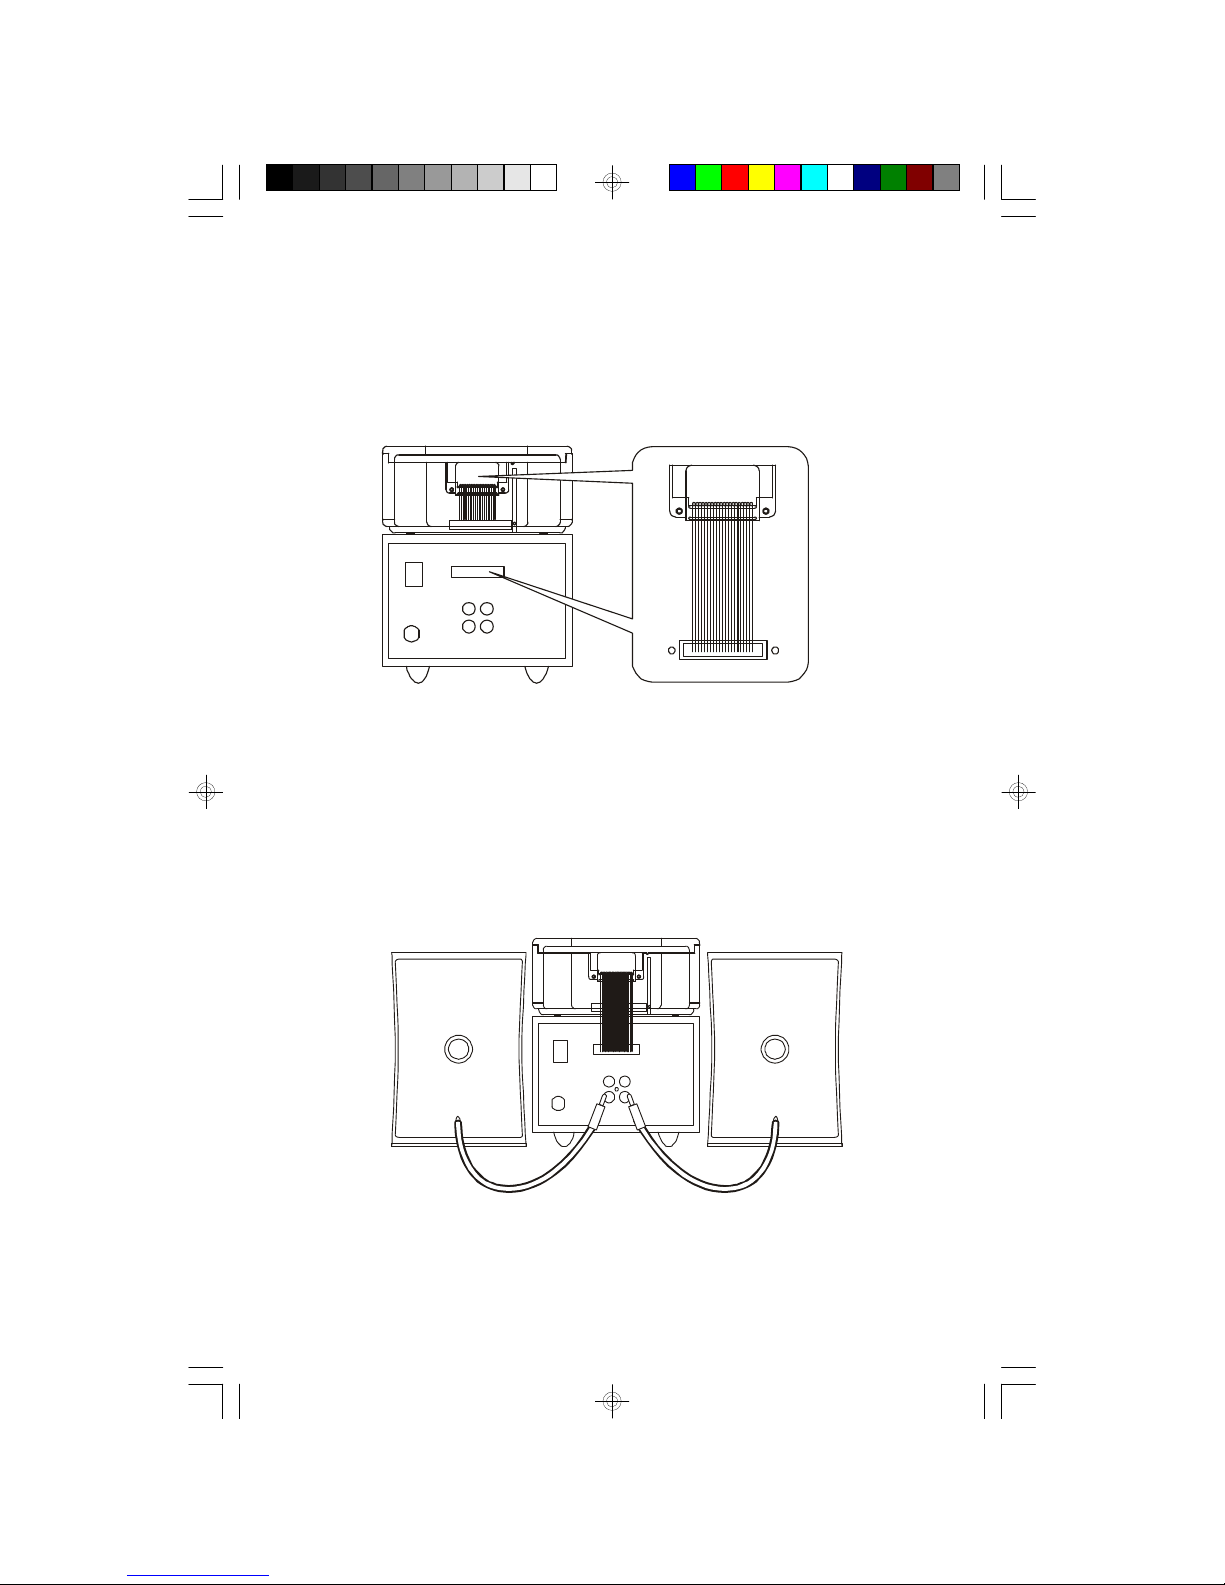
SYSTEM CONNECTION
Place the Tuner/CD Player unit on top of the Amplifier/Subwoofer unit. Note that
there is a multi-pin ribbon cable permanently attached to the back of the Tuner/CD
Player unit. The multi-pin plug at the end of this ribbon cable must be connected to
the multi-pin socket on the back of theAmplifier/Subwoofer unit.
SPEAKER CONNECTIONS
Connect the two “Thinovation™” Flat Panel speakers to the color-coded “L” and
“R” speaker jacks on the back of theAmplifier/Subwoofer unit. Make sure that the
speaker plugs are fully inserted into the speaker jacks. If the plugs are loose the
connection may be intermittent.
R
L
ES20_ib061303.p65 13/6/2003, 12:137
8
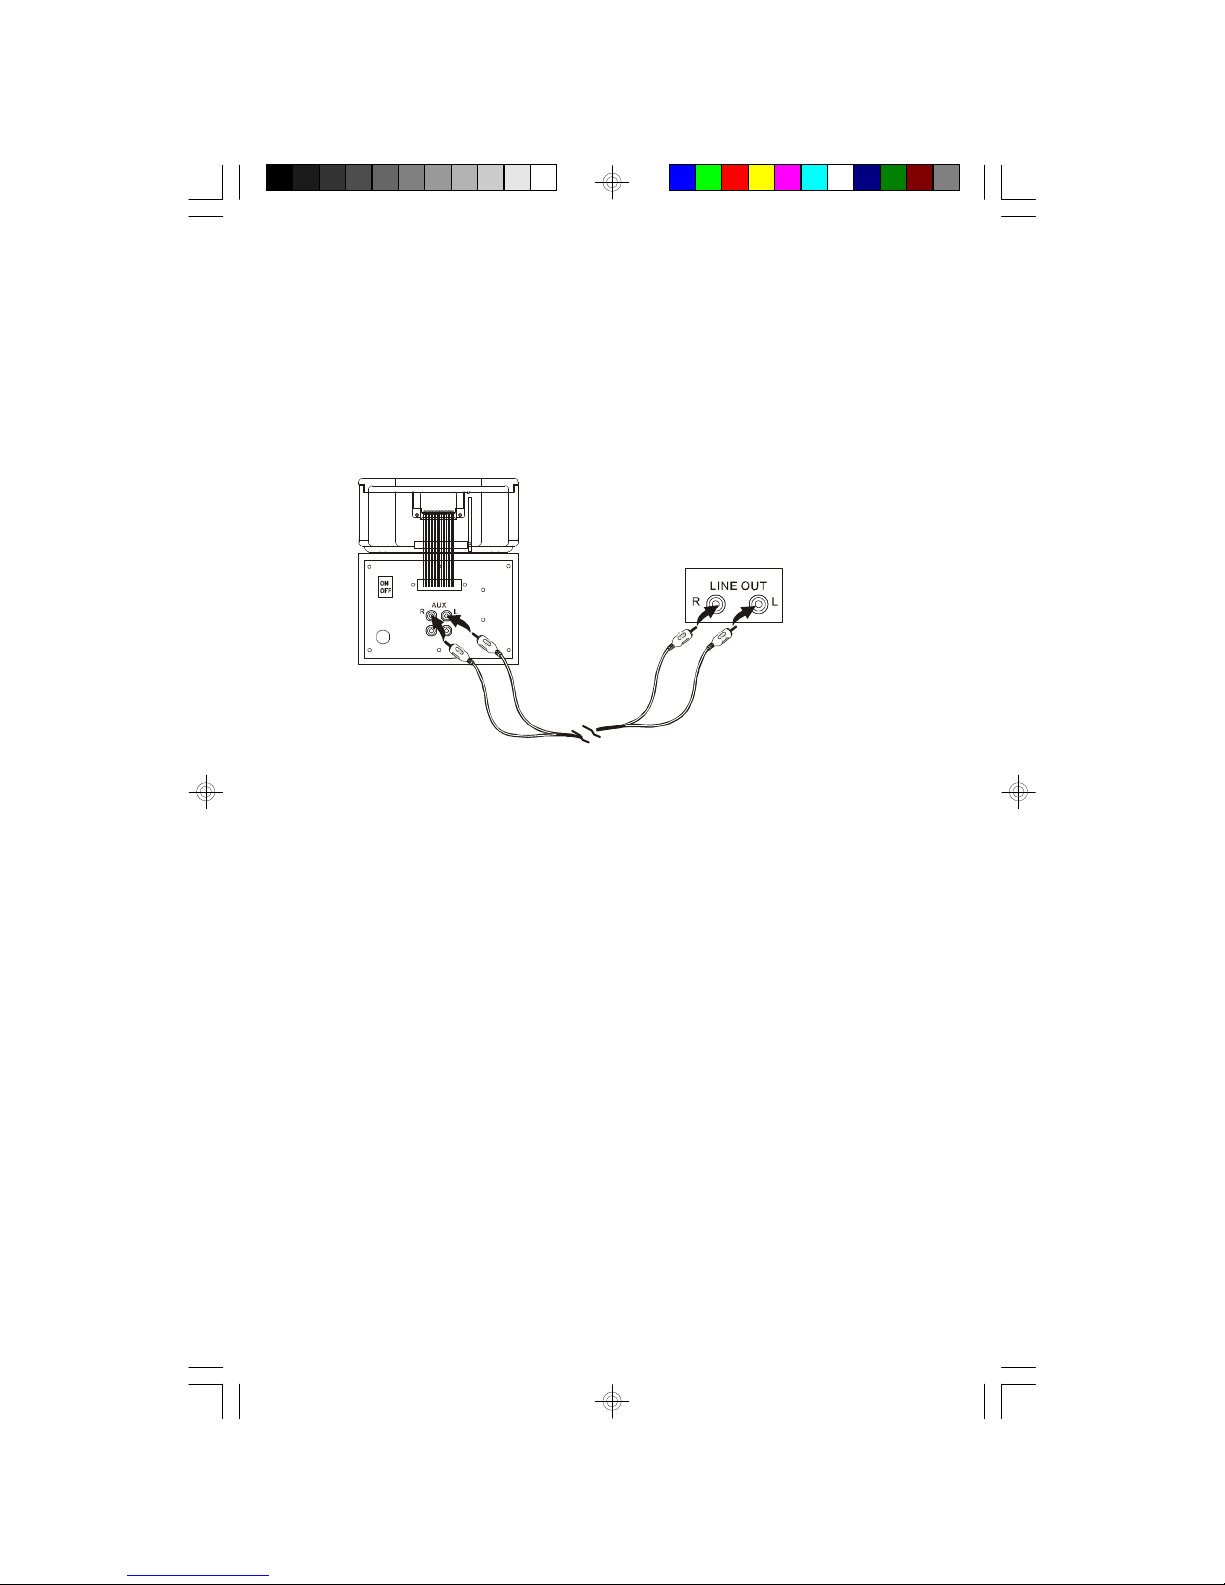
AUXILIARY SOURCE CONNECTIONS
You can listen to the sound from external audio sources through the speakers of
this system. Connect theAux/Line/Audio Output Jacks of the external audio source
to theAUX Input Jacks on the back panel of this system.
Note: Connection cables are not included.
Examples of audio sources that can be connected to this system are: Cassette
Player, Mini Disc Player, the sound from your TV, VCR, DVD player, etc.
Instructions for listening to external audio sources will be found later in this manual.
From External Audio Source
ES20_ib061303.p65 13/6/2003, 12:138

9
BATTERYPRECAUTIONS
Followtheseprecautionswhen using batteriesinthisdevice:
1.Useonlythe sizeand type ofbatteriesspecified.
2.Besuretofollowthe correctpolaritywhen installing the batteriesasindicated inthe battery
compartment. Reversed batteriesmaycausedamage tothe device.
3.Donotmixdifferenttypesofbatteriestogether(e.g.Alkalineand Carbon-Zinc)oroldbatteries
withfreshones.
4. If the deviceisnottobe used foralong period oftime,removethe batteriestoprevent
damage orinjuryfrompossiblebatteryleakage.
5.Donottrytorecharge batteriesnotintendedtobe recharged;theycan overheatand rupture.
(Followbatterymanufacturer’s directions.)
INSTALLING THE REMOTE CONTROL BATTERIES
1.) Slide the door in the direction of the arrow.
2.) Insert two “AAA” batteries in the compartment.
Follow the polarity markings engraved inside the
compartment.Ifthe batteriesare inserted incorrectly
the remote control will not work.
3.) Replace the battery door.
Notes: Use a well-known brand of alkaline batteries for longest life and best
performance. When the remote operation becomes intermittent replace both
batteries at the same time. Do not mix different types of batteries, such as
alkaline and carbon zinc batteries.
PROTECT YOUR FURNITURE !!
Thismodelisequipped withnon-skidrubber'feet'topreventthe product
frommoving when you operatethe controls.These'feet'aremade from
non-migrating rubbermaterialspeciallyformulated toavoidleaving any
marks orstainson yourfurniture.Howevercertaintypesofoil based
furniturepolishes,wood preservatives,orcleaning sprays maycausethe
rubber'feet'tosoften,and leavemarks orarubberresidue on the furniture.
Topreventanydamage toyourfurniturewestronglyrecommend thatyou
purchasesmall self-adhesivefeltpads,availableathardwarestoresand
homeimprovementcenterseverywhere,andapplythesepadstothebottom
ofthe rubber'feet'beforeyou placethe producton fine wooden furniture.
ES20_ib061303.p65 13/6/2003, 12:139

10
LOCATION OFCONTROLS AND INDICATORS
FRONTVIEW
BACK VIEW
SPEAKERS
AUX
ON
OFF
L
R
20
25
26
24
23
22
21 28
29
30
2
3
4
5
6
7
8
9
10
12
13
14
15
16
17
18
19
1
11
27
ES20_ib061303.p65 13/6/2003, 12:1310

11
1.) Rubber Feet.
2.) VARIABLE BASS VOLUME Control.
3.) STANDBY/ON Button.
4.) STANDBY/ON LED Indicator.
5.) TUNING /SKIP-SEARCH Button.
6.) TUNING /SKIP-SEARCH Button.
7.) REPEAT/ PRESET Button.
8.) STOP /BAND (AM/FM) Button.
9.) PLAY/PAUSE Button.
10.) CD Door.
11.) Multi-Function LCD Display.
12.) AUX Button.
13.) TUNER Button.
14.) CD Button.
15.) MEMORY/TIMEADJ. Button.
16.) TIMER/SLEEP Button.
17.) REMOTE Sensor.
18.) MAIN VOLUME + Button.
19.) MAIN VOLUME – Button.
20.) AC Power Cord.
21.) MAIN Power ON/OFF SWITCH.
22.) Back Up Battery Compartment (At Bottom Of Tuner/CD Unit)
23.) Ribbon Cable Connection Plug.
24.) Connection Ribbon Cable.
25.) FM MONO/STEREO Switch.
26.) FM WireAntenna.
27.) RESET Button.
28.) Ribbon Cable Connection Socket.
29.) AUX L/R Input Jacks.
30.) SPEAKER L/R Jacks.
ES20_ib061303.p65 13/6/2003, 12:1311

12
REMOTECONTROL
1.) VOLUME – Button.
2.) TUNING /SKIP Button.
3.) VOLUME + Button.
4.) MEMORY/TIME ADJ. Button.
5.) INTRO Button.
6.) CD/TUNER Button.
7.) ON/STANDBY Button.
8.) PLAY/PAUSE Button.
+
14
1
2
3
4
5
6
7
8
9
10
11
12
13
15
9.) STOP/BAND Button.
10.) RANDOM Button.
11.) REPEAT/ PRESET Button.
12.) MUTE Button.
13.) TUNING /SKIP Button.
14.) DISPLAY Button.
15.) Battery Compartment.
(Back Cabinet)
ES20_ib061303.p65 13/6/2003, 12:1312

13
OPERATINGINSTRUCTIONS
• Make sure the Tuner/CD Player unit is connected to the Amplifier/
Subwoofer unit with the built in ribbon cable.
• Make sure that the 2 “Thinovation™” Flat Panel speakers are connected
to the Amplifier/Subwoofer unit.
• Make sure that the Main Power switch on the back of the Amplifier/
Subwoofer unit is ‘On’.
• Make sure that you have installed the batteries in the remote control,
and the back up batteries in the Tuner/CD Player battery compartment.
• Make sure the AC power cord from the Amplifier/Subwoofer unit is
properly connected to a 120V 60Hz household AC power outlet.
USING THE CONTROLS
Most of the functions of this system can be operated by pressing the buttons on
the front panel, or the corresponding buttons on the remote control handset. If a
particular function can only be operated by controls on the main unit or controls on
the remote, the instructions will specify:
“MAIN UNIT ONLY” or “REMOTE CONTROL ONLY”
ES20_ib061303.p65 13/6/2003, 12:1313
14
SETTING THE CLOCK
When the system is connected to the AC outlet for the first time the STANDBY
LED indicator on the front panel glows red and “0:00” appears on the display. This
is your indication that the time display is incorrect and needs to be reset.
1.) Press the STANDBY/ON button
on the front panel or remote
control to turn the system ‘On’.
The STANDBY LED goes off and
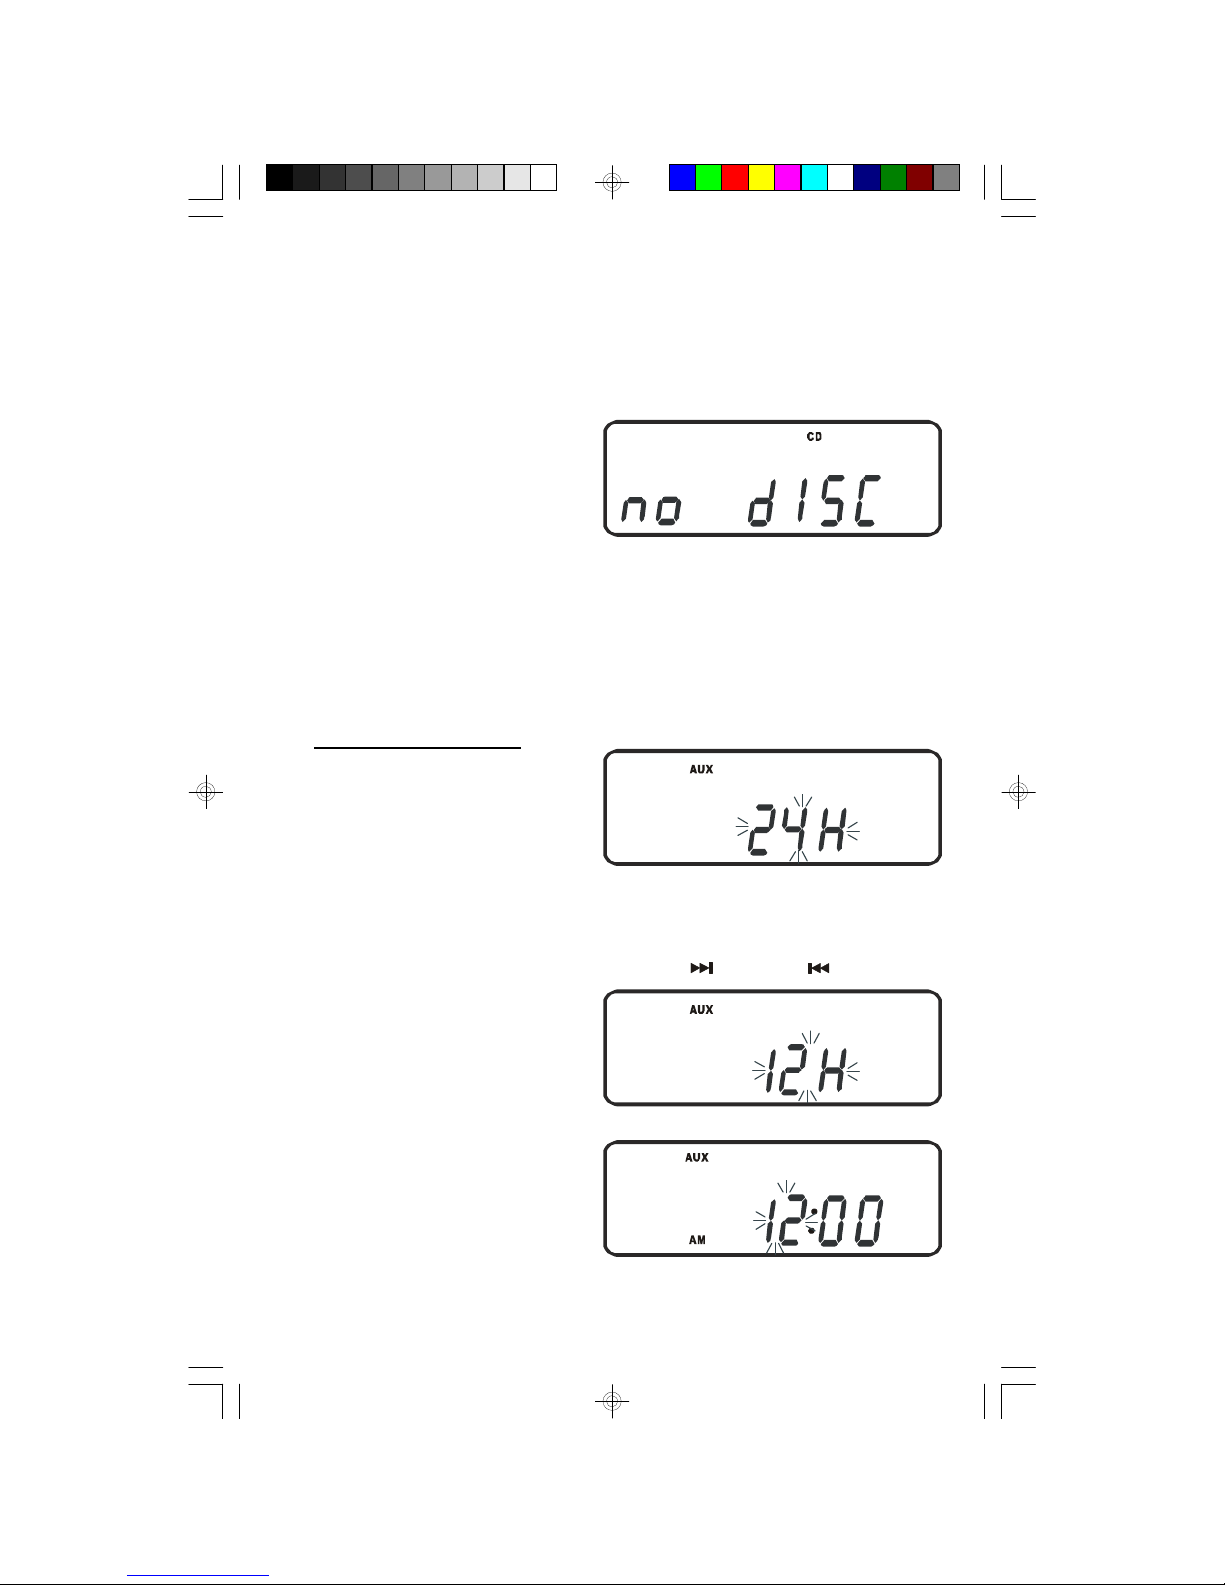
the CD display comes on. After a
few seconds the display will show
“no dISC”.
2.) Press the AUX button on the front panel to select the Aux function. The time
display will show 0:00 and the colon will be flashing.
3.) Press the MEMORY/TIMEADJ. button on the front panel or the remote control
for at least 3 seconds.
“24H” will begin flashing in the
display indicating that the clock
is set for 24-hour “European”
time.
(Example: 6:00 PM is shown as 18:00)
4.) Press either the TUNING/SKIP-SEARCH UP or DOWN button on the
front panel of the main unit or on
the remote control once to
change the clock format to 12
Hour “American” time. The
display will change from “24H” to
“12H”.
5.) Press the MEMORY/TIME ADJ.
button again. The Hour digits will
begin flashing.
ES20_ib061303.p65 13/6/2003, 12:1314

15
6.) Press the TUNING/SKIP-SEARCH UP or DOWN buttons on the front
panel of the main unit or on the remote control to set the display to the correct
Hour, AM or PM.
7.) Press the MEMORY/TIME ADJ.
button again. The Minute digits
will begin flashing.
8.) Press the TUNING/SKIP-SEARCH UP or DOWN buttons on the front
panel of the main unit or on the remote control to set the display to the correct
Minute.
9.) Press the MEMORY/TIME ADJ.
button once more. The time
display stops flashing and the
clock begins to run.
10.)Press the STANDBY/ON button on the front panel or remote control to turn
the system ‘Off’. The main display goes off and the STANDBY LED comes on
again.
Note: The correct time will appear on the display when the system is in the
Standby (Power Off) Mode, or when the AUX function is selected.
ES20_ib061303.p65 13/6/2003, 12:1315

16
MAIN VOLUME AND VARIABLE BASS VOLUME CONTROLS
Volume Adjustments
Press the MAIN VOLUME + or – buttons on the front panel or the remote control to
increase or decrease the volume. The volume level indicator appears in the main
display. The range is from “00 db” (Minimum) to “80 db” (Maximum). The system
remembers the volume level when the power is switched ‘Off’ and returns to the
same level when the power is switched ‘On’ again.
Variable BASS VOLUME Control
Rotate this control on the front panel of theAmplifier/Subwoofer unit to increase or
decrease the amount of bass response from the subwoofer speaker.
NOTES:
1.) We set this control to the Maximum setting at the factory.
2.) The Bass Volume level can only be adjusted manually by rotating the VARIABLE
BASS VOLUME level control on the front panel of the Amplifier/Subwoofer
unit. The Bass level cannot be adjusted by the remote control.
ES20_ib061303.p65 13/6/2003, 12:1316
17
LISTENING TO THE RADIO
1.) Press the STANDBY/ON button on the main unit or the remote control. The
main display turns on.
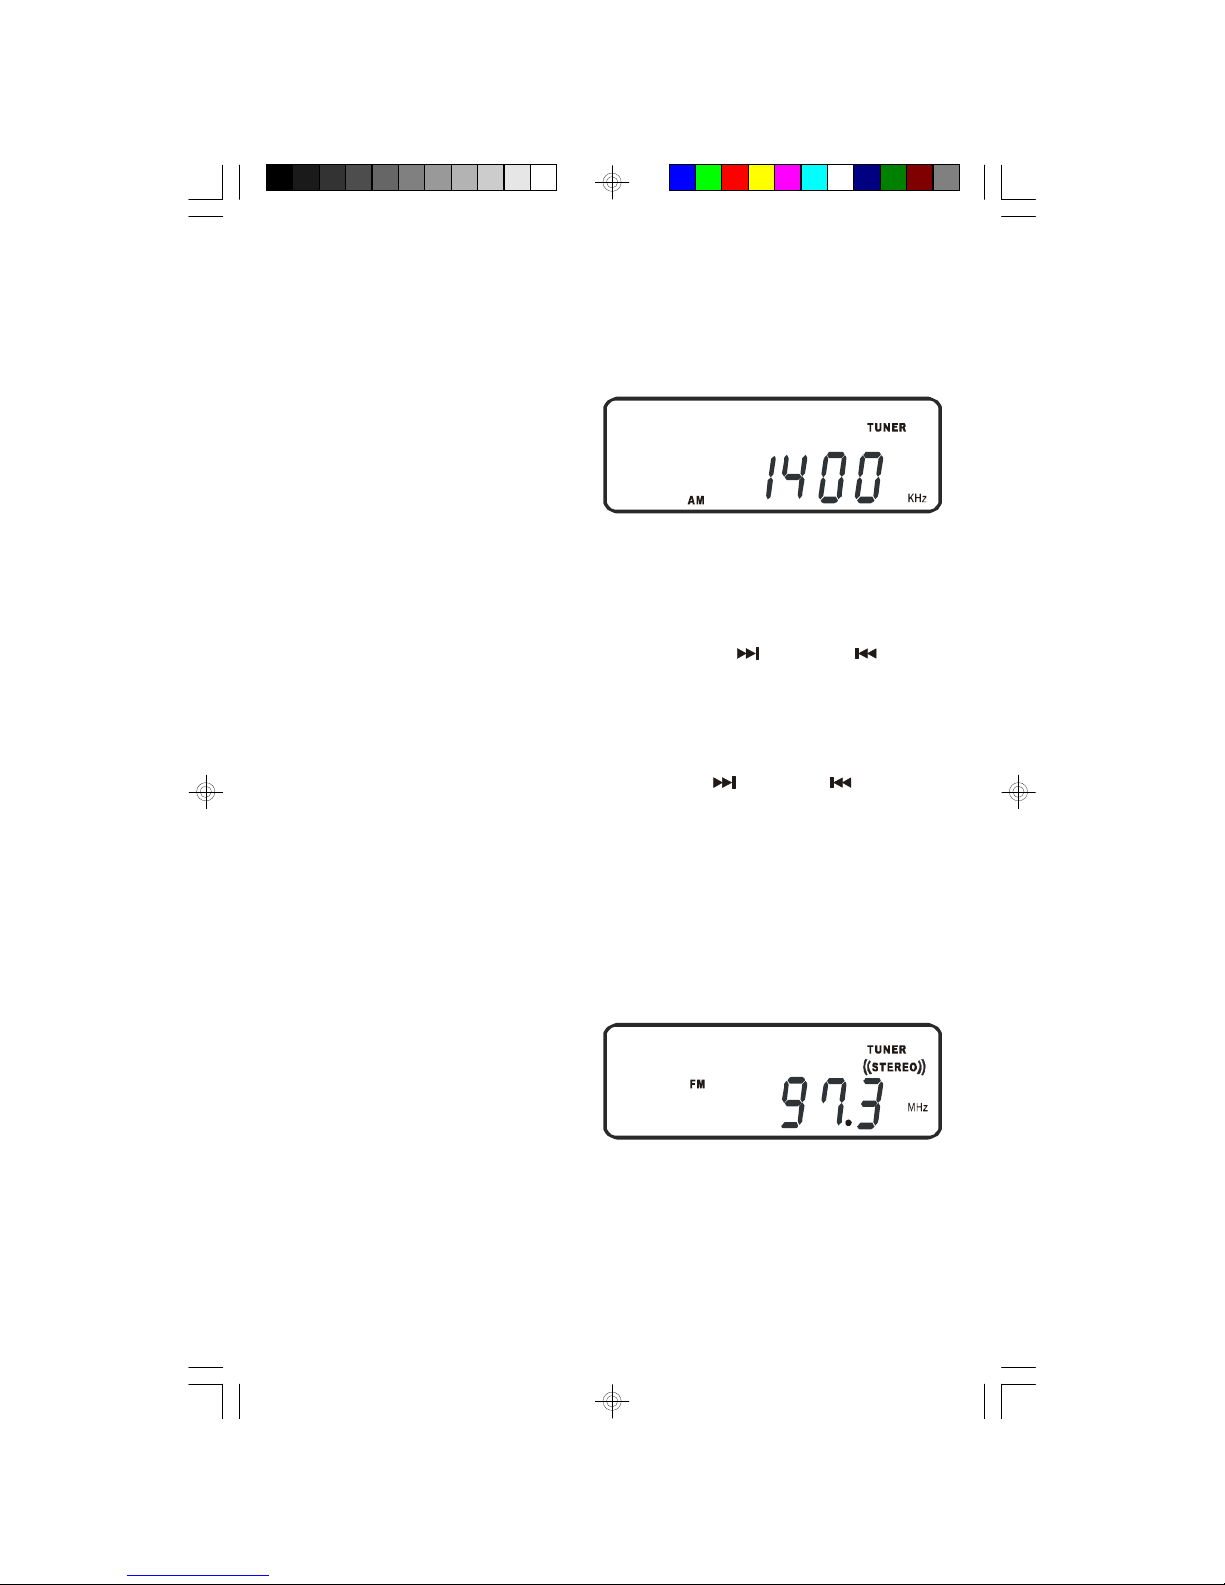
2.) If necessary, press the TUNER button on the front panel of the main unit or
the CD/TUNER button on the
remote control to select the Tuner
function. The display will show an
AM or FM station frequency. To
select a different band, press the
STOP/BAND button.
3.) Tune to the desired frequency as follows:
•Manual Tuning
Repeatedly press the TUNING/SKIP-SEARCH UP or DOWN buttons
on the front panel of the main unit or on the remote control until the frequency
of the desired station appears on the display.
•Automatic Tuning
Press and hold the TUNING/SKIP-SEARCH UP or DOWN buttons on
the front panel of the main unit or on the remote control until the display begins
to move, then release the buttons. The tuner will search up or down the band
for the next strong station and stop on that station. Repeat this procedure until
the tuner stops on your desired station.
4.) Adjust the VOLUME controls as desired. Also adjust the VARIABLE BASS
VOLUME level control on the front panel of theAmplifier/Subwoofer unit.
5.) If you tuned to an FM Stereo station the STEREO indicator will appear in the
main display. If the reception is
noisy or weak, set the MONO/
STEREO switch on the top panel
of the Tuner/CD Player unit to the
MONO setting. The STEREO
indicator will disappear. The reception will normally improve although the sound
will no longer be in stereo.
6.) When you are finished listening press the STANDBY/ON button on the main
unit or remote control to return to the STANDBY (Power Off) mode. The main
display goes off and the time display reappears.
ES20_ib061303.p65 13/6/2003, 12:1317

18
ANTENNA INFORMATION
FM
Make sure the FM lead wire antenna is unwound and extended to its full length. It
may be necessary to vary the direction of this wire antenna until you find the position
that provides the best reception for your favorite FM stations.
AM
TheAM ferrite bar antenna is inside the main unit. IFAM reception is unsatisfactory,
you may have to turn the main unit slightly until you find the position that provides
the best reception.
SPEAKERS
AUX
ON
OFF
L
R
FM lead wire antenna
ES20_ib061303.p65 13/6/2003, 12:1318

19
PRE-SETTING STATIONS IN THE TUNER MEMORY
This system includes a 20 station preset memory. You can store up to 10 FM
stationsand10 AMstations inthe tunermemoryforimmediaterecall.Theprocedure
for storing stations in memory is as follows:
1.) Follow step 3 under “LISTENING TO THE RADIO” above to select the first
station you wish to memorize.
Example: FM 103.5 MHz.
2.) When the desired station
appears on the display press the
MEMORY/TIME ADJ. button on
the front panel or the remote
control. The MEMORY indicator
flashes and Preset Memory
Number 01 appears in the display.
3.) Press the MEMORY/TIME ADJ.
button once more to enter your
station in preset memory number
01.
4.) Tune to the next station you wish to memorize. When the desired station
appears on the display press the MEMORY/TIME ADJ. button to start the
MEMORY indicator flashing, and then press the REPEAT/PRESET button to
select a different preset memory number.
(Each time you press the REPEAT/PRESET button the preset memory number
display advances by 1.)
5.) Press the MEMORY/TIME ADJ. button again to enter the station in the selected
preset memory number
6.) Repeat steps 4 and 5 until you have memorized up to 10 stations on the FM
band, the press the STOP/BAND button to switch to the AM band and follow
the same procedure to enter up to 10 stations on theAM band.
ES20_ib061303.p65 13/6/2003, 12:1319
Table of contents
Other Emerson Research Stereo System manuals


