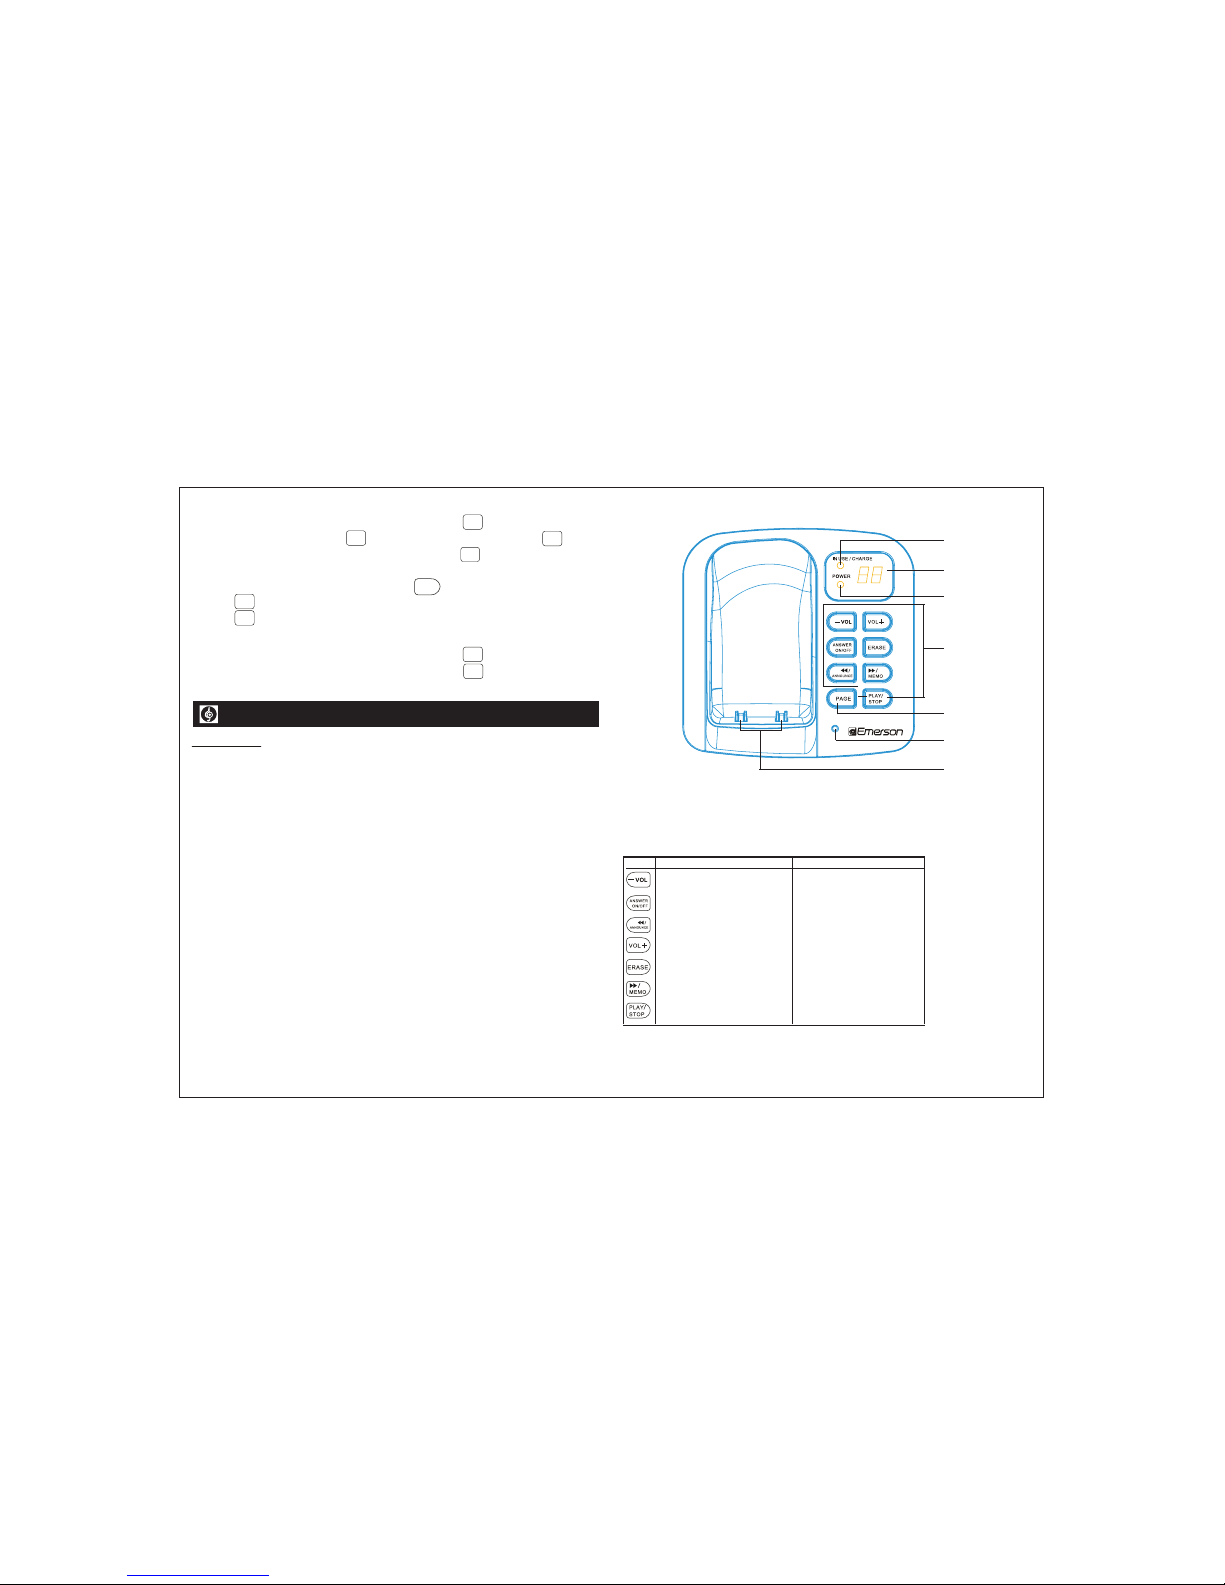
Emerson EM6113 User manual

Dect 6.0 Digital Answering System
User Guide
EM6113
www.emersonphones.com
Manufactured by Southern Telecom Inc. Brooklyn NY. 11232
© 2009 Southern Telecom Inc. All rights reserved.
Emerson and the G-Clef logo are registered trademarks of
Emerson Radio Corp. Parsippany, New Jersey USA.


4
Telephone jack requirements
Modular Telephone
Line Jack
To use this phone, you must have an RJ11C modular telephone
jack. If you do not have a modular jack, please call your local
telephone company to find out how to get one installed.
Installation
Digital Security System
Your cordless phone uses a digital security system to protect against false ringing,
unauthorized access, and charges to your phone line.
INSTALLATION NOTE: Some cordless telephones operate at frequencies that may cause
or receive interference with nearby TVs, microwave ovens, and VCRs. To minimize or
prevent such interference, the base of the cordless telephone should not be placed near
or on top of a TV, microwave ovens, or VCR. If such interference continues, move the
cordless telephone farther away from these appliances.
Certain other communications devices may also use the 1.9 GHz frequency for communi-
cation, and, if not properly set, these devices may interfere with each other and/or your
new telephone. If you are concerned with interference, please refer to the owner’s
manual for these devices on how to properly set channels to avoid interference. Typical
devices that may use the 1.9 GHz frequency for communication include wireless
audio/video senders, wireless computer networks, multi-handset cordless telephone
systems, and some long-range cordless telephone systems.
Important installation information
In the box
Ɣ1Hver install telephone wiring during a lightning storm.
Ɣ1HYHUWRXFKXQLQVXODWHGWHOHSKRQHZLUHVRUWHUPLQDOVXQOHVVWKHWHOHSKRQHOLQHKDV
been disconnected at the network interface.
ƔUse caution when installing or modifying telephone lines.
Ɣ1HYHULQVWDOOWHOHSKRQHMDFNVLQZHWORFDWLRQVXQOHVVWKHMDFNLVVSHFLILFDOO\GHVLJQHGIRU
wet locations.
19
Ɣ$QVZHULJV\VWHUPPHPRU\PD\EHIXOO(UDVHVRPHPHVVDJHV
Ɣ<RXPD\KDYHDFFLGHQWO\SUHVVHGWKHSOD\VWRSEXWWRQGXULQJSOD\EDFNDQG
stopped the message.
Won’t respond to remote commands
Ɣ<RXPXVWXVHDWRQHGLDOSKRQH7KLVSKRQHGRHVQRWVXSSRUWSXOVH
(rotary) dialing.
Ɣ0DNHVXUHWRHQWHUWKHFRUUHFWVHFXULW\FRGH
Ɣ'LGXQLWKDQJXS",I\RXWDNHQRDFWLRQIRUDSHULRGRIWLPHLWDXWRPDWLFDOO\
hangs up.
Poor reception
Ɣ$OXPLQXPVLGLQJ
Ɣ)RLOEDFNLQJRQLQVXODWLRQ
Ɣ+HDWLQJGXFWVDQGRWKHUPHWDOFRQVWUXFWLRQWKDWFDQVKLHOGUDGLRVLJQDOV
Ɣ<RX¶UHWRRFORVHWRDSSOLDQFHVVXFKDVPLFURZDYHVVWRYHFRPSXWHUVHWF
Ɣ$WPRVSKHULFFRQGLWLRQVVXFKDVVWURQJVWRUPV
Ɣ%DVHLVLQVWDOOHGLQWKHEDVHPHQWRUORZHUIORRURIWKHKRXVH
Ɣ%DVHLVSOXJJHGLQWR$&RXWOHWZLWKRWKHUHOHFWURQLFGHYLFHV
Ɣ%DE\PRQLWRULVXVLQJWKHVDPHIUHTXHQF\
Ɣ+DQGVHWEDWWHU\LVORZ
Ɣ<RX¶UHRXWRIUDQJHRIWKHEDVH
Product maintenance
To keep your unit working and looking good, follow these quidelines:
Ɣ$YRLGSXWWLQJWKHSKRQHQHDUKHDWLQJDSSOLDQFHVDQGGHYLFHVWKDWJHQHUDWH
electrical noise (for example: motors or fluorescent lamps).
Ɣ'2127H[SRVHWRGLUHFWVXQOLJKWRUPRLVWXUH
Ɣ$YRLGGURSSLQJWKHXQLWDQGRURWKHUURXJKWUHDWPHQW
Ɣ&OHDQZLWKDVRIWFORWK
Ɣ1HYHUXVHDVWURQJFOHDQLQJDJHQWRUDEUDVLYHSRZGHUEHFDXVHWKLVZLOO
damage the finish.
Ɣ5HWDLQWKHRULJLQDOSDFNDJLQJLQFDVH\RXQHHGWRVKLSLWDWDODWHUGDWH
Ɣ3HULRGLFDOO\FOHDQWKHFKDUJHFRQWDFWVRQWKHKDQGVHWDQGEDVHZLWKDVRIW
cloth.
Ɣ%DVH
Ɣ$&SRZHUDGDSWRU[
ƔCharging unit (x2)
Ɣ+DQGVHW[
Ɣ+DQGVHWEDWWHU\SDFN[
Ɣ%DWWHU\FRPSDUWPHQW[
ƔLine cord


6
Base layout
2
3
1
4
5
6
7
1. Charging / in use (flashing)
2. Display for answering machine
3. Power
4. Key for answering machine:
5. Paging key
6. Microphone
7. Charging contacts for handset
Key In idle mode During playback
briefly: check number of rings decrease speaker volume
press and hold: set number of rings
briefly: turn answering machine on/of stop playback
press and hold: select OGM
briefly: play OGM back to previous message
press and hold: record OGM (during settings: decrease value)
briefly: check remote PIN increase speaker volume
press and hold: set remote PIN
briefly: confirmation “Delete all“ Delete current message
press and hold: delete all messages
briefly: (no function) skip to next message
press and hold: record memo (during settings: increase value)
briefly: playback messages Pause
17
Troubleshooting
Telephone
No dial tone
Ɣ&KHFNRUUHSHDWLQVWDOODWLRQVWHSV
- Make shure the base power is connected to a working electrical outlet.
- Make shure the telephone line cord is connected to the base and the wall
jack.
Ɣ&RQQHFWDQRWKHUSKRQHWRWKHVDPHMDFN,ILWGRHVQ¶WZRUNWKHSUREOHP
might be your wiring or local service.
Ɣ7KHKDQGVHWPD\EHRXWRIUDQJHRIWKHEDVH0RYHFORVHUWRWKHEDVH
Ɣ0DNHVXUHWKHEDWWHU\LVSURSHUO\FKDUJHGIRUKRXUV
Ɣ0DNHVXUHWKHEDWWHU\LQWKHKDQGVHWLVSURSHUO\LQVWDOOHG
Ɣ7KHKDQGVHWVKRXOGEHHSZKHQ\RXSUHVVWKH7$/.EXWWRQDQGWKHFKDUJH
LQGLFDWRURQWKHEDVHVKRXOGOLWZKHQWKHKDQGVHWUHVWVLQWKHFUDGOH,I
QRWWKHEDWWHU\PD\QHHGWREHFKDUJHG
Ɣ3ODFHKDQGVHWLQFKDUJHFUDGOHIRUDWOHDVWVHFRQGVWRUHVHWWKHXQLW
Handset does not ring
Ɣ0DNHVXUHWKHULQJHUVZLWFKLVVHWWRWKHON position.
Ɣ7KHKDQGVHWPD\EHRXWRIUDQJHRIWKHEDVH0RYHFORVHUWRWKHEDVH
Ɣ&KHFNIRUDGLDOWRQH
You experience static, noise, or fading in and out
Ɣ7KHKDQGVHWPD\EHRXWRIUDQJHRIWKHEDVH0RYHFORVHUWRWKHEDVH
Ɣ0DNHVXUHWKHEDVHLVQRWSOXJJHGLQWRDQHOHFWULFDORXWOHWZLWKDQRWKHU
KRXVHKROGDSSOLDQFH,IQHFHVVDU\UHORFDWHWKHEDVH
Ɣ&KDUJHWKHEDWWHU\IRUKRXUV
Storing telephonenumbers
:KHQWKHGHVLUHGWHOHSKRQHQXPEHULVGLVSOD\HGSUHVVWKHEXWWRQ6HOHFWSAVE
TO PB if necessary and press the button. Enter the name and press the
button. Edit the telephone number if necessary. Press the button for deleting the
last character or press and HOLD for deleting the whole number. You can enter a dialing
pause (approximately 3 seconds) by pressing the button.
Press the button again to select a melody for the entry.
Press the button to store the entry.
Deleting telephonenumbers
:KHQWKHGHVLUHGWHOHSKRQHQXPEHULVGLVSOD\HGSUHVVWKHEXWWRQ
6HOHFW'(/(7(RU'(/(7($//LIQHFHVVDU\DQGSUHVVWKHEXWWRQ7KHHQWU\RUDOO
entries will be deleted.
MUTE
OK
MENU
OK
MENU
OK
MENU
OK
MENU
OK
MENU
OK
MENU
OK
MENU
3$86(

7
Installing the phone
Installing theHandset Battery
2.
Plug one end of the telephone line cord into the TEL LINE jack on the back of the base
and the other end into a modular jack.
3. Plug the AC power converter into the electrical outlet and the DC connector into the
jack on the back of the base.
4. Place the handset in the base cradle. The charge/in use voicemail indicator turns on,
verifying the battery is charging.
Base station
1.
Choose an area near an electrical outlet and a telephone wall jack (RJ11C), and place
your cordless telephone on a level surface, such as a desktop or tabletop, or you may
mount it on the wall.
Modular phone wall jack
Main power outlet
Replacethe
cover
Install two “AAA”
sizebatteries
Setting thespeaker volume
Press the button.
During a call you can adjust the volume from 1 to 5.
Muting themicrophone
Press the button.
During a call you can switch your handset’s microphone off. The display shows .
To unmute press the again.
Redial
Your handset saves the last 3 dialed telephone numbers
Viewing/dialing telephone numbers
The handset is in idle state
Press the button repeatedly (if necessary) until the desired telephone number is
displayed.
Press the button. The phone number is being dialed.
When you press the button and hear the dialing tone, the very last dialed telephone
number is dialed by pressig the button.
VOLUME
MUTE
MUTE
REDIAL
REDIAL
TALK
TALK
16
TALK
TALK
TALK
TALK
MUTE MUTE
Basic operation
Answering a call
Press the button, to answer a call.
Making a call
Enter the phone number, using telephone key pad. Delete wrong characters by pressing
the button. Press and HOLD the button to delete entire entry.
Press the button , and the phone number is being dialed.
You can also press the button, and you will hear the dialing tone. The entered
number will be dialed immediately. It is not possible to correct wrong digits individually
using this dialing procedure.
Ending a call
Press the button or replace the handset in the base station.
Call timer
Your handset automatically times the duration of every call.
Activating handsfree
During a call operation you can switch On/Off the speaker.
Press the button. The appears in the display when the speaker is ON.
CID
Inserting the batteries
Open the battery compartment cover. Put in the batteries. Close the battery
compartment cover.
aAttention: : Use only power adaptors and batteries supplied with this
product. To order a replacement please call Customer support :
1-877-768-9483 or online: www.emersonphones.com
Charging the batteries
Before the handset is used for the first time, insert it in the base
station / charging station for at least 16 hours.
The handset warms up during the charging process. This is normal and
does not represent a risk. The battery status is shown on the display. When the
battery capacity is nearly exhausted, the battery symbol will flash in the display.
End your call and place the handset into the base or charging station for
charging.
After a short time, the battery symbol will appear to be fully charged but this is
actually not the case. The battery capacity will decrease rapidly. We advise
you to put the handset on the base unit for 12 hours so that it can be
recharged completely.

8
Answering machine
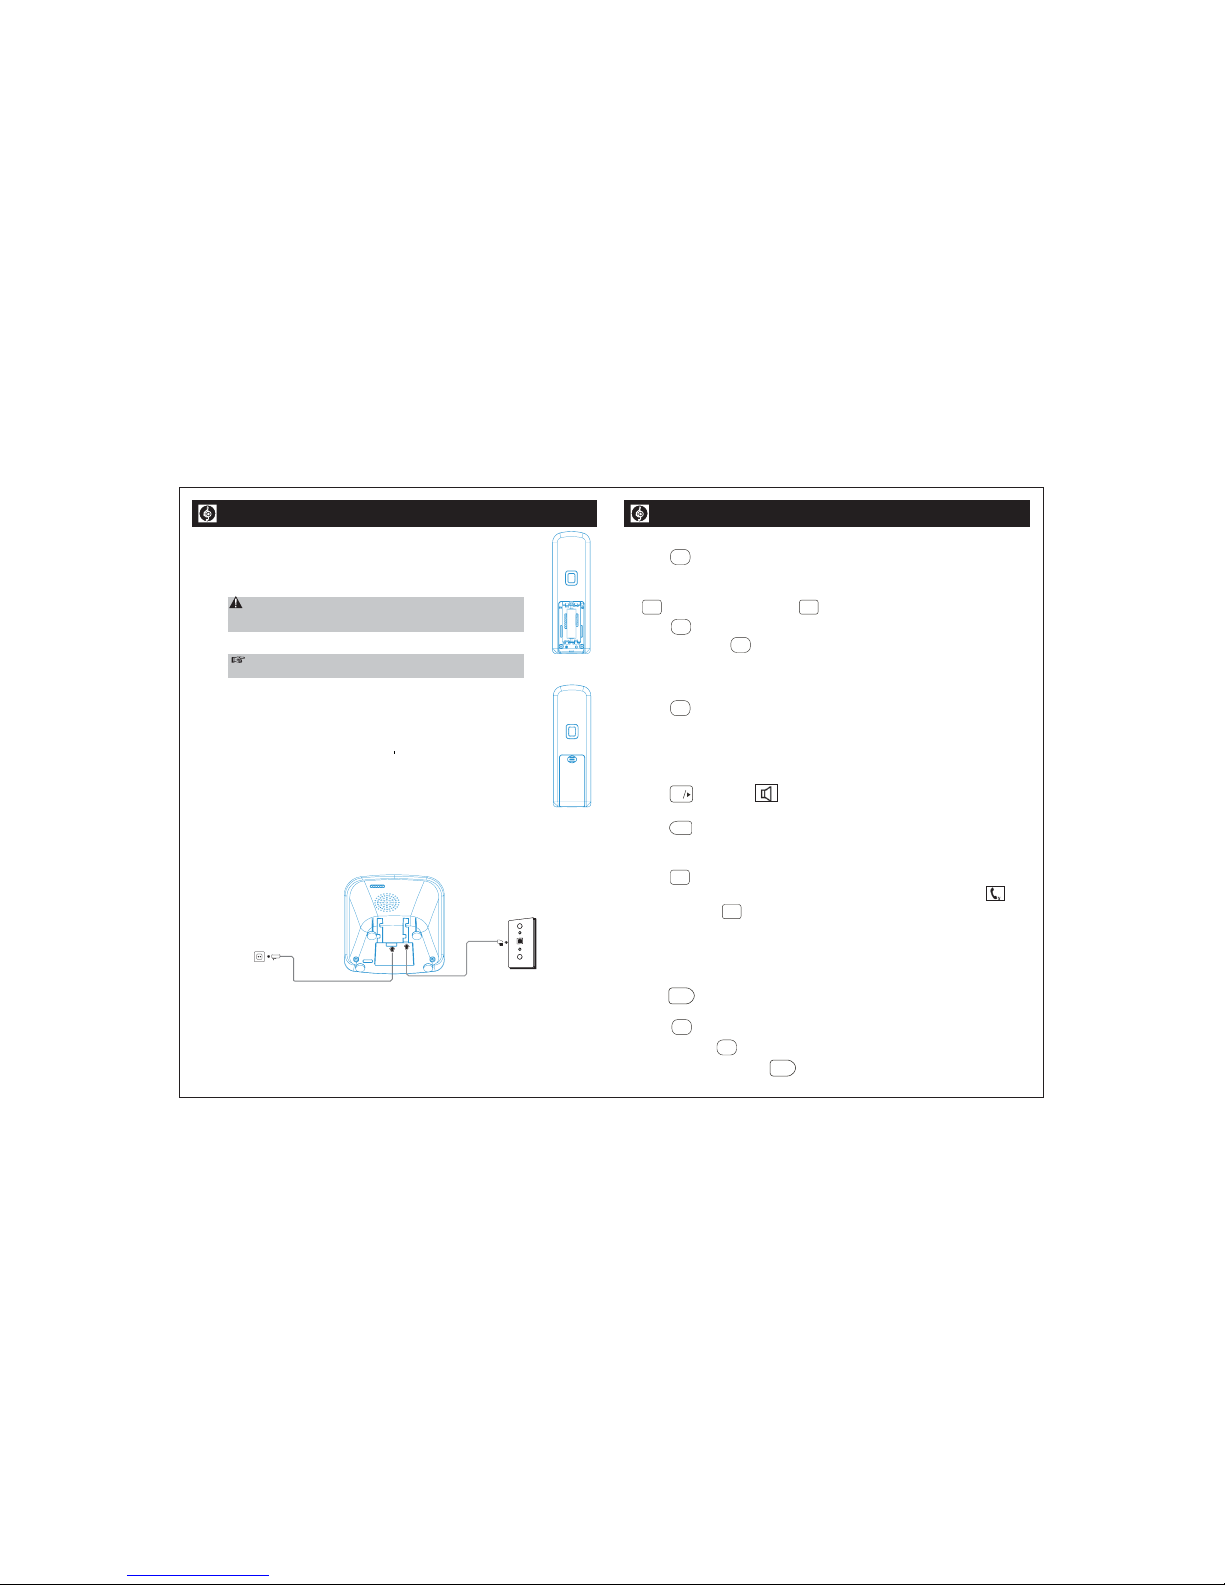
CAUTION: To reduce the risk of personal injury, fire, or damage use only the
EM6113 power adaptor listed in the user’s guide. This power adaptor is
intended to be correctly orientated in a vertical or floor mount position.
5. Allow the phone to charge for 16 hurs prior to first use. If you doon’t properly charge
the phone, battery performance is compromised
The integrated digital answering machine offers a total recording time of up to 11 minutes
for outgoing and incoming messages. Self recorded memos are treated like messages.
You can operate the answering machine at the base station. An internal voice will give
you advices. You can switch the language from german to french. Using a telephone
with tone dialling (DTMF) you have also a PIN protected remote access.
You can select between two mode:
- Answer and record
- Answer only
A standard announcement is already saved for every operating type at the delivery stage.
Therefore the answering machine is immediately operational. At “Answer and record” and
reaching of the maximum recording capacity the device will automatically switch to the
operating type “Answer only”.
If the answering machine is turned off the announcement for the operating type “Answer
only” will be played after approx. 10 rings.
When playback messages the voice will give you information about day and time of the
relevent call (only when date and time were set correctly).
The display gives you information:
XX Digits steadily on: Number of old (already heard) messages Flashing digits:
Number of new messages.
FL TAM memory is full.
Turning theanswering machineon/o
Press bfiefly .
Number of rings- setting /checking
The number of rings after which the answering machine will answer calls can be set from
2 - 9 and tS (toll saver). The standard setting is 3 rings. In toll saver mode, the machine
will answer after 5 rings if there are no new messages, and after 2 rings if there are new
messages. If there are no new messages and you call your machine to check your
messages remotely, you can hang up after the 2nd ring. You do not need to pay
connection fees and you know that you do not have any new messages.
Press briefly to check the setting.
Press and HOLD to enter setting mode. Use the and to set the number
of rings.
Press for confirmation.
15
Dialing from thephonebook /viewing entries
The handset is in idle state
Press the button. Select and entry. Press the button repeatedly, to show the
telephonoe number and the melody.
Press the button. The displayed telephone number is being dialed.
Editing an entry
The handset is in idle state
Press the button.
Press the button. Select EDIT ENTRY, using the or the button, and press
the button. Edit name if necessary and press the button. Edit number if
neccessary and press the button. Change melody and press the button.
Press the button to delete the last character or press and HOLD the button to
delete the whole entry. You can enter a dialing pause (approximately 3 seconds) by
pressing the button.
Press the button again to store the edited entry.
Deleting entries
When the desired entry is displayed, press the button. Select DELETE ENTRY
or DELETE ALL if necessary and press the button. The entry or all entries will be
deleted.
TALK
MEMORY
MEMORY
MEMORY
MEMORY
OK
MENU
OK
MENU
OK
MENU
OK
MENU
OK
MENU
OK
MENU
OK
MENU
MUTE MUTE
REDIAL
CID
Ż
OK
MENU
OK
MENU
OK
MENU
OK
MENU
/
/
OK
MENU
OK
MENU
OK
MENU
MEMORY
MUTE
MUTE
Phonebook
REDIAL
You can store up to 50 entries in the phonebook.
Storing an entry
The handset in the idle state.
Press the button. The first entry is shown in the display. If the phonebook is empty,
EMPTY will be displayed.
Press the button. Select NEW ENTRY if necessary and press the button.
Enter the name and press the button. Enter special characters and spaces by
pressing the “1” button. Enter the telephone number. Press the button to delete the
last character or press and HOLD the button to delete the whole entry. You can enter
a dialling pause (approximately 3 seconds) by pressing the button.
Area code
Press the button. Select HANDSET using and press the button.
Select AREA CODE using and press the button. Enter the area code using
key pad and confirm with the button.

Remoteaccess code - checking / setting
You need a 3-digit code (default 000) for remote access.
Press bfiefly to check the setting.
Press and HOLD to enter setting mode. Use and to set the first digit.
Press bfiefly for confirmation, and to get to the next digits input. Follow this
procedure for entering the digits and confirm by pressing . You will hear a repeat
confirmation of code.
Outgoing message- setting / checking / recording / deleting
Press and HOLD to select the OGM (outgoing message).
Press and HOLD until you hear a short beep. Speak your own new outgoing
message. Stop recording by pressing . You hear the new OGM.
Press briefly to check the OGM at any time.
It is only possible to select an outgoing message if the answering machine is turned on. If
the memory is full, only outgoing message 2 can be selected (only answering without
recording messages).
Remoteaccess
For remote access you need a telephone using tone dialing (DTMF).
Call your number, If the answering machine is set to off it will pick up the line after 10 ring
signals. If it set to on it will pick up the line after the pre-set numbers of ring signals. You
hear an announcement and a beep. If you want to skip the announcement press the
“star” ( ) key. 9
Playback messages / deleting messages
Press button. The messages will be played one after the other. If there are new
messages, only these will be played.
During playback
Press button to go to the beginning of the current message.
Press button twice to go to the previous message.
Press button to go to the next message.
Press button to pause playback (Pause), and restart playback.
Press button to stop playback (Stop).
Press button to delete the current message, press and HOLD for approxi-
mately 2 secodns until “dL” appears in the display. Press once again.
In idle state
Press button to delete all old messages (already heard), press and HOLD
for approximately 2 seconds until “dL” appears in the display. Press once again.
You’ll hear a confirmation announcement
*14
Registering a handset
Up to five handsets can by registered to a base station. The handsets delivered with your
telephone are already registered. To register a “foreign” handset please refer to it’s user
manual.
Press the button. Select REGISTER using and press the button.
Using select a base station to subscribe to and press the button. Enter the
base’s PIN (EM6113 base station in delivery state “000”). The phone will ask “PRESS
BASE”
Press and HOLD the paging key at the base station for approximately 10 seconds.
The LED “IN USE/CHARGE” will begin to flash. After this the base station will be in
registration mode for one minute.
/
/
PAGE
OK
MENU
OK
MENU
OK
MENU
OK
MENU
OK
MENU
MUTE
/
Deleting a handset
You can delete a handset from a base to allow another handset to be registered.
NOTE: You can only remove other handset in your system but you are not able to
remove the handset you are using.
Press the button. Select DE-REGISTER using and press the button.
Press and HOLD the button for approximately 3 seconds. Enter the PIN for base
station (EM6113 base station “000”). Enter the internal telephone number (1...5) of the
handset you want to remove.
Flash time
You can set the flash time to 100 ms (usially for special services fo your telephone
provider/delivery state) or 300 ms (e.g. for a telephone exchange). In case of questions
please contact your telephone provider or the system administrator of your PBX.
Press the button. Select BASE using and press the button.
Using select RECALL and press the button.
Using select SHORT or LONG and press the button.
OR
Press and HOLD the button for approximately 3 seconds. S (100ms) or L (300ms)
appears in the display.
System PIN
In delivery state the PIN is set to “000”. The PIN is valid for all registered handsets.
Press the button. Select BASE using and press the button.
Using select SYSTEM PIN and press the button. Enter the old PIN and
confirm by pressing the button. Enter the new PIN twice and confirm each by
pressing the button.
OK
MENU
OK
MENU
OK
MENU
OK
MENU
OK
MENU
OK
MENU
OK
MENU
OK
MENU
OK
MENU
/
/
/
/
/
REDIAL

10
Caller ID
IMPORTANT: In order to use this unit’s Caller ID features, you must subscribe to
either the standard Name/Number Caller ID Service or Call Waiting Caller ID Service
from your local telephone company.
This unit receives and displays information transmitted by your local phone company.
This information can include the phone number, date, and time; or the name, phone,
number, date, and time.
Your handset saves the numbers of the last 20 incoming calls in the call list. If the list is
empty, “EMPTY” is shown on the display.
New calls are signalled with the flashing icon.
Review / Dial back telephonenumbers
The handset is in the idle state
Press the to open the call list. The name or the telephone number of the last call is
displayed. To view number, date, and time of the call , press the button.
Press the button repeatedly, to view other entries.
Press the button, and the displayed telephone number is being dialled.
Enter the access code slowly after the beep (in delivery state “000”). You will hear two
short tones for confirmation.
You can now using the digit:
“2” - listen to the messages
During playback:
“2” - pause / proceed
“1” - repeat current message
“3” - skip to the next message
“11” - go to the previous message
“6” - stop playback
“7” - delete current message
“0” - delete all old mesages
“#” - record a message (Memo)
“4” - check the current OGM
“9” - select OGM /record new OGM
OGM selected:
“5” - start recording
“6” - stop recording
“8” - switch off answering machine (if it is set to on)
“9” - switch on answering machine (if it is set to off)
“6” - end remote operation
CID
MEMORY
CID
TALK
13
OK
MENU
OK
MENU
OK
MENU
OK
MENU
OK
MENU
/
/
/
pressing the button and enter the PIN (000 in delivery state).
Ton e/Pulse
You can switch the dial mode. In most situations the TONE option should be selected.
Press the button. Select BASE using and press the button.
Using select DIAL MODE and press the button.
Using select TONE or PULSE and press the button.
OR
Press and HOLD the button for approximately 3 seconds. T(Tone) or P(Pulse)
appears in the display.
Press the button. Select HANDSET using and press the button.
Using select SELECT BASE and press the button.
Using select AUTO or MANUAL and press the button. If “MANUAL” is
selected, all bases the handset is subscribed to are shown. Select a base and press the
button.
Resetting thehandset to (delivery state)
The handset will be resetted to the delivery state - the entries in the phonebook, the caller
list and the redial list will be deleted.
Press the button. Select HANDSET using and press the button.
Using select RESET and press the button. Confirm the safety request by
/
/
/
/
/
OK
MENU
OK
MENU
OK
MENU
OK
MENU
OK
MENU
OK
MENU
OK
MENU
OK
MENU
Handset name
In the idle state the handset name and the internal telephone number is shown in the
display.
Press the button. Select HANDSET using and press the button.
Using select HANDSET NAME and press the button. Delete the old name
using . Enter the new name using the digit keys and press the button.
Key tone
The key tone is an acustical confirmation for a pressed button.
Press the button. Select HANDSET using and press the button.
Using select KEYPAD BEEP and press the button.
Using select ON or OFF and press the button.
Selecting a base station
If the handset is subscribed to several bases you can select the active base. The setting
“AUTO” means, that the handset wil lautomatically search for the base station with the
strongest signal (only in idle mode).
OK
MENU
OK
MENU
OK
MENU
OK
MENU
OK
MENU
OK
MENU
OK
MENU
OK
MENU
/
/
/
/
/
MUTE

12
OK
MENU
OK
MENU
OK
MENU
OK
MENU
OK
MENU
OK
MENU
OK
MENU
OK
MENU
VOLUME VOLUME
/
/
/
/
/
/
/
OR
Press and HOLD the button to select the melody using and press button.
Base ringer
Press the button. Select BASE using and press the button.
Using select RING TONE or RING VOLUME and press the button.
Using select a melody or set the volume and press the button.
Auto talk
If Auto talk is “ON” an incoming call wil immediately be taken when the handset is taken
from the base.
Press the button. Select HANDSET using and press the button.
Using select AUTO TALK and press the button.
Using select ON or OFF and press the button.
OK
MENU
OK
MENU
OK
MENU
OK
MENU
OK
MENU
/
//
/
/
VOLUME
VOLUME
Handset ringer
Press the button, select HANDSET ring using and press the button.
Using select RINGTONE and press the button. Using select
EXTERNAL, INTERNAL or VOLUME, and press the button. Using select the
desired melody and volume and press the button.
OR
Press the button to set the volume using and press the button to
confirm.
Settings
OK
MENU
OK
MENU
OK
MENU
OK
MENU
Date/ Time
For a correct time stamp for entries in the caller list or messages on the answering
machine you have to enter time and date.
Press the button. Select DATE/TIME using and press the button.
Enter the year using the digit keys and press the button. Enter in the same way
month, day, hour and minute and confirm each entry by pressing the button.
/
3-Party conference
During an external call, press the button to enter the internal telephone number (1...5)
of the desired handset. The external call is put on hold.
When the called handset answers you can announce the call transfer, press and HOLD
the button for approx. 3 seconds. The conference is established.
ESC
INT
ESC
INT
11
TO PB, and press . Enter the name and press . Edit the telephone number if
necessary. Press for deleting the last character or press and HOLD for deleting
the whole number. You can enter a dialing pause (approximately 3 seconds) by pressing
button.
Press the button again to select a melody for the entry.
Press the button to store the entry.
Deletetelephonenumbers
NOTE: If you dont want to change or delete a record, simply press the button,
or wait for one minute to exit automatically.
When desired telephone number is displayed, press the button . Select DELETE or
DELETE ALL if necessary and press . The entry or all entries will be deleted.
Internal calls
Internal calls, transfers and conference calls are only possible if multiple handsets are
registered.
Making an internal call
Press the button to enter the internal telephone number (1...5) of the desired handset.
Press the button to take the call on the other handset. To end the call, press the
button.
Transferring an internal call
During an external call, press the button to enter the internal telephone number (1...5)
of the desired handset. The external call is put on hold.
When the called handset answers you can announce the call transfer, press the
button. The call will be transferred.
NOTE: Depending on (a) how the incoming caller’s phone number is formatted
when it is received, and (b) whether or not you previouslu pre-programmed your
local area code into the set up menu, you may need to adjust the format of the
incoming caller’s stored phone number, before making the call, press the
button to adjust the number, and try again.
Number of digits Explanation Example
Ten digits 3-digit area code + 317-888-8888
7-digit telephone number.
Seven digits 7-digit telephone number. 888-8888
Store telephone numbers
When the desired telephone number is displayed, press the button. Select SAVE
OK
MENU
OK
MENU
OK
MENU
OK
MENU
OK
MENU
OK
MENU
OK
MENU
MUTE
MUTE
PAUSE
ESC
INT
ESC
INT
ESC
INT
TALK
TALK
TALK
Table of contents
Other Emerson Answering Machine manuals