EMU procussion User manual

Procussion operation manual
1
INTRODUCTION 5
Procussion ...............................................................................................................................
6
CONNECTION INSTRUCTIONS 7
Basic Pad Setup ......................................................................................................................
7
Quick Setup for MIDI Keyboard .........................................................................................
8
Keyboard Setup .....................................................................................................................
9
Quick Setup for MIDI Drum Pads ....................................................................................
10
Live Performance Setup ......................................................................................................
11
Electronic Drum Kit Setup .................................................................................................
12
Overview of Outputs ..........................................................................................................
13
BASIC OPERATION 15
Controls .................................................................................................................................
17
Selecting Kits ........................................................................................................................ 18
Selecting MIDI Channels, Volume and Pan .................................................................... 18
Multi-Timbral Operation .................................................................................................... 19
Master Menu Functions ..................................................................................................... 20
Master Tune .......................................................................................................................... 20
Transpose .............................................................................................................................. 21
Submix Outputs ................................................................................................................... 21
MIDI Modes ......................................................................................................................... 22
Global Velocity Curve ......................................................................................................... 22
Global Trigger Tempo ......................................................................................................... 23
Zone Maps ............................................................................................................................ 23
User Zone Maps 1 + 2 ......................................................................................................... 24
Drum Replacement with the User Zone Maps................................................................ 24
Procussion Factory Zone Assignment Chart ................................................................... 25
Envelope Mode .................................................................................................................... 26
MIDI Enable ......................................................................................................................... 26
Program Change .................................................................................................................. 26
MIDI Mode Change............................................................................................................. 27
MIDI Controller Assign ...................................................................................................... 27
MIDI Footswitch Assign ..................................................................................................... 28
MIDI Program -> Kit ........................................................................................................... 28
Auto Select ............................................................................................................................ 29
Remote Edit .......................................................................................................................... 29
Send MIDI Data ................................................................................................................... 30
Viewing Angle ..................................................................................................................... 30
Demo Sequence .................................................................................................................... 31
About Procussion ................................................................................................................ 32
PROGRAMMING BASICS 33
Modulation ........................................................................................................................... 36
Procussion Modulation Sources ........................................................................................ 37
Envelope Generators ........................................................................................................... 38
Low Frequency Oscillators ................................................................................................. 39
CONTENTS

Procussion operation manual
2
PROGRAMMING BASICS (cont)
Modulation Patches ............................................................................................................. 40
Accent and Volume ............................................................................................................. 40
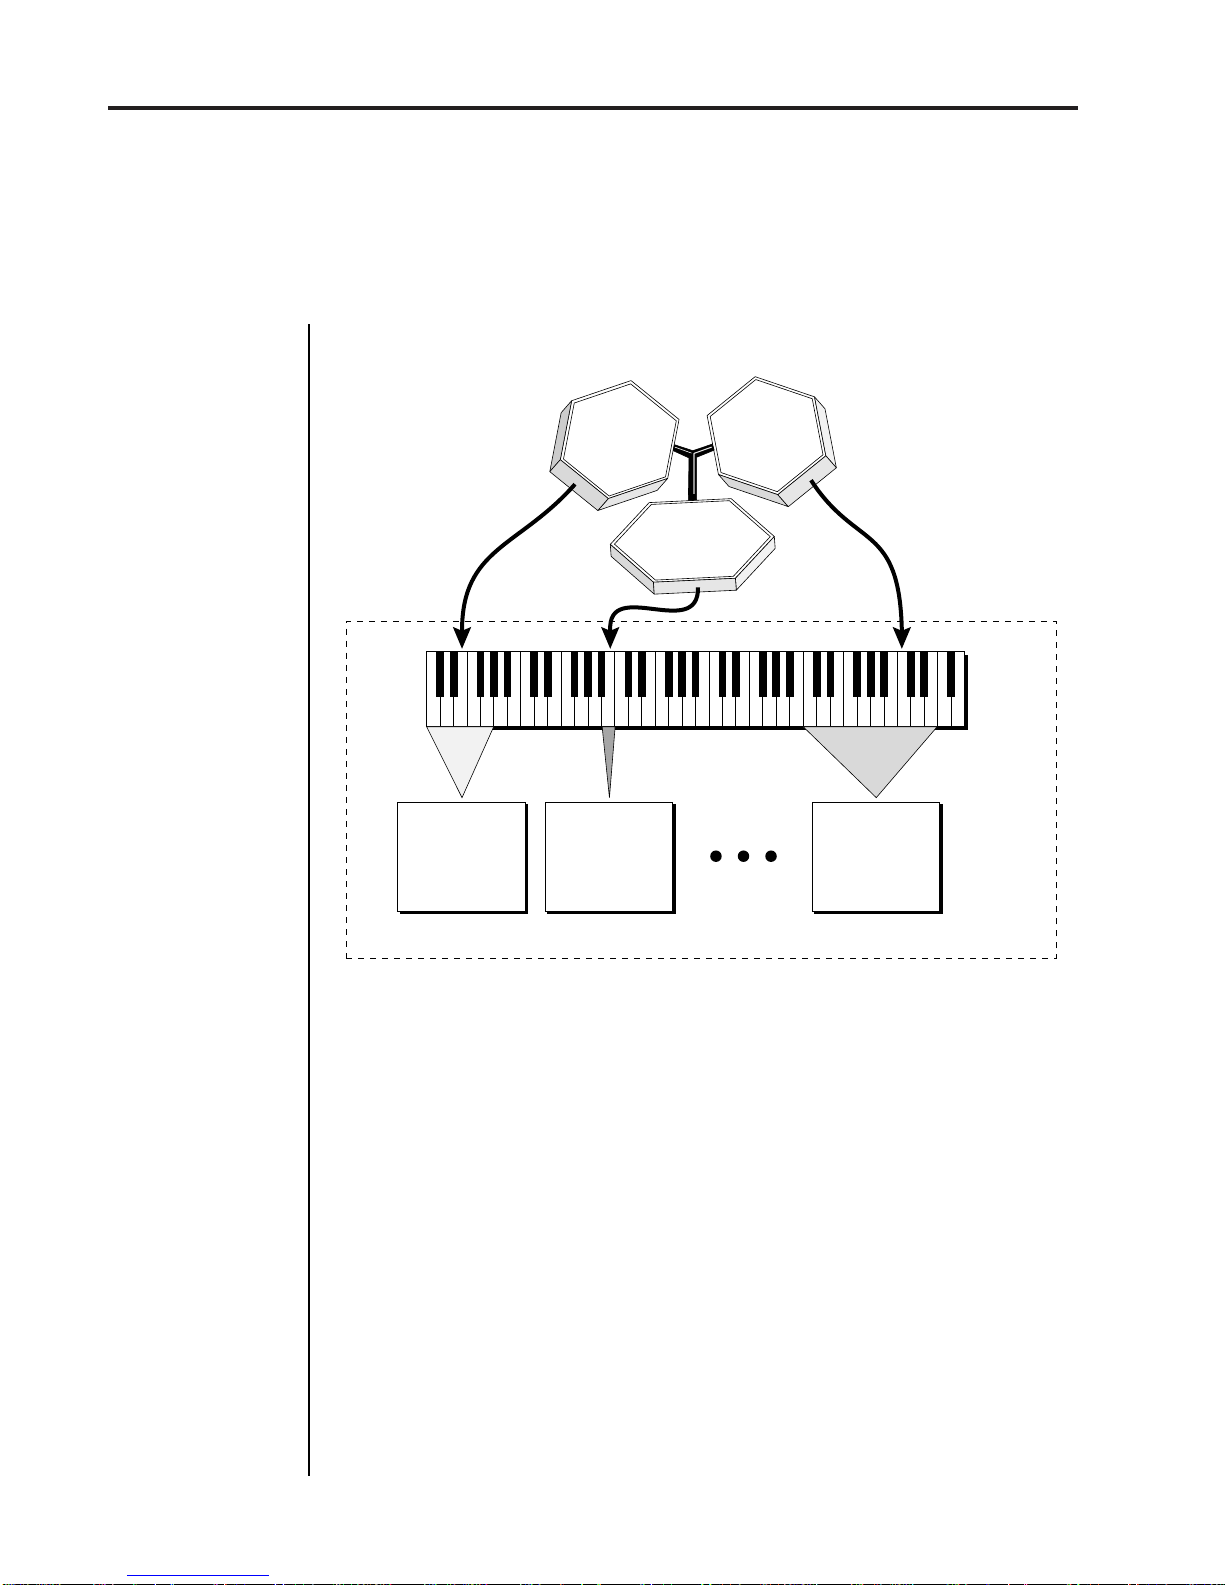
Instrument Layer Block Diagram ...................................................................................... 41
Key Number ......................................................................................................................... 41
Stack Block Diagram ........................................................................................................... 42
Velocity Curves .................................................................................................................... 43
MIDI Realtime Controls...................................................................................................... 44
Stereo Mix Outputs ............................................................................................................. 46
EDIT MENU 47
Enabling the Edit Menu ...................................................................................................... 49
Procussion Block Diagram ................................................................................................. 50
Kit and Zone Programming Functions
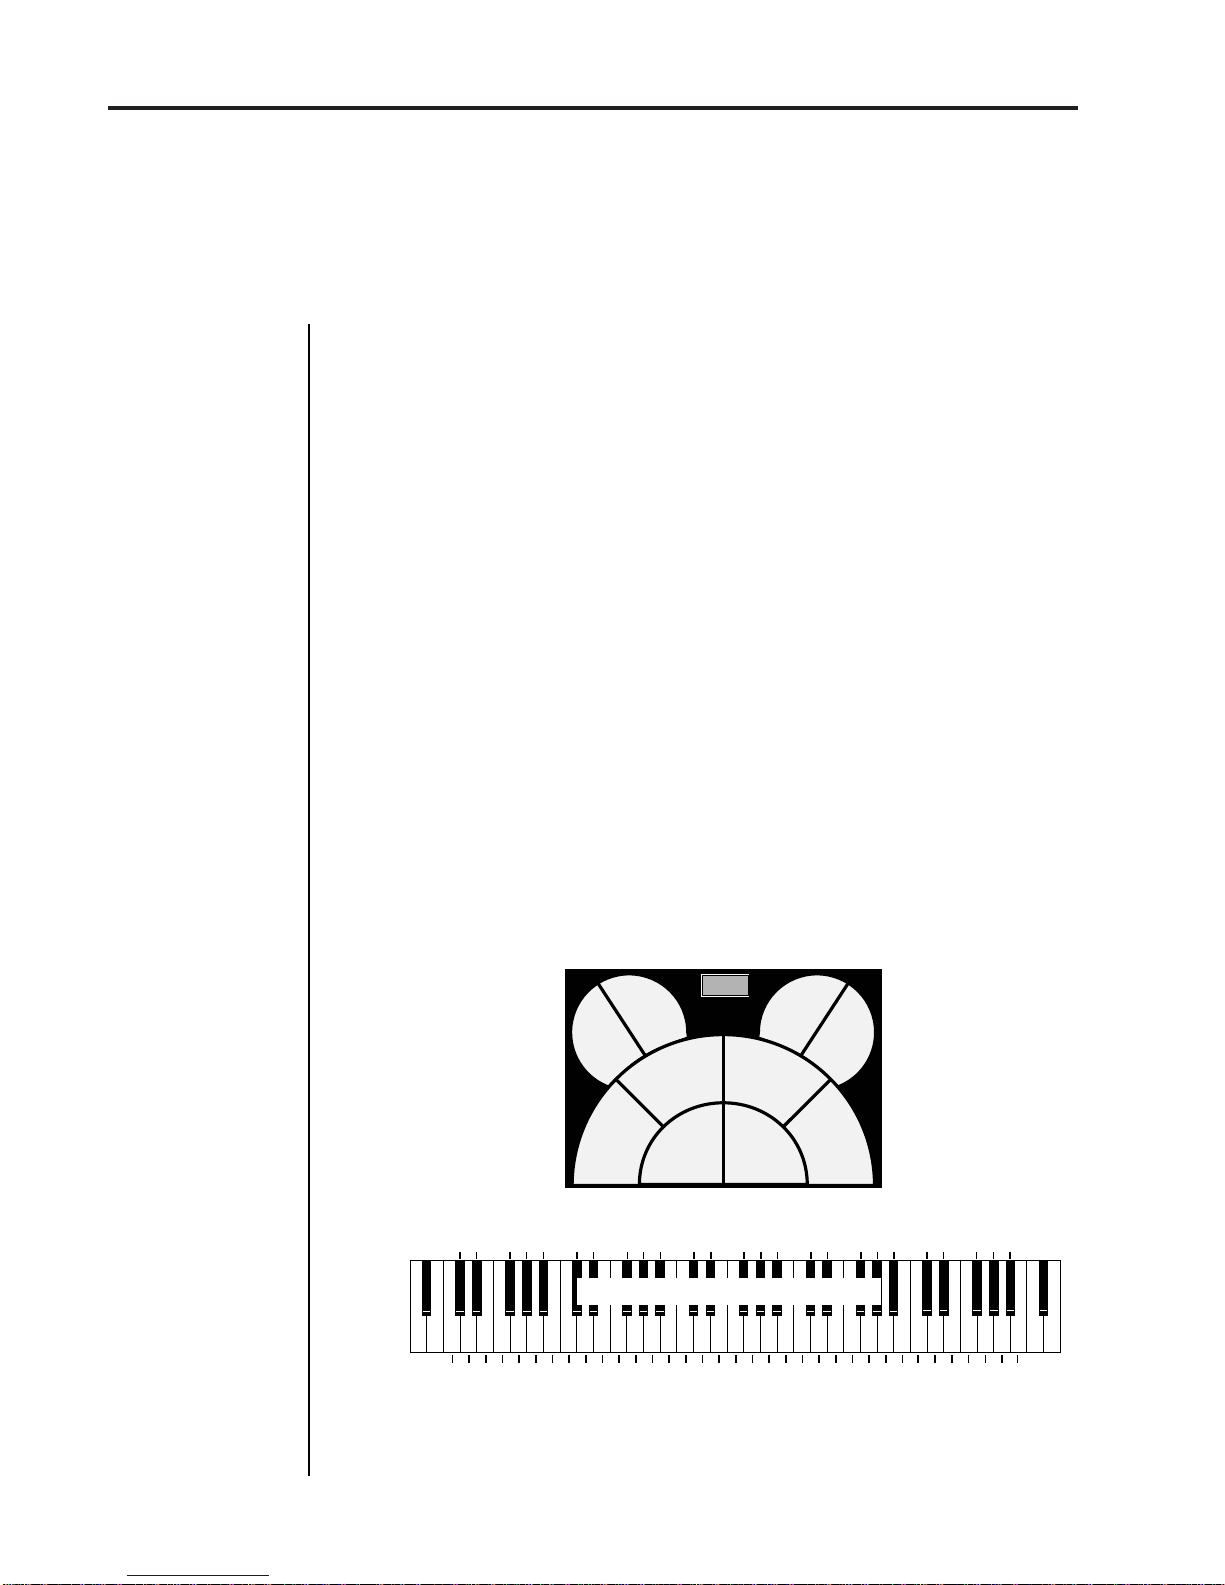
Kit Name and Keyboard Character Charts ...................................................................... 51
Stack Select............................................................................................................................ 52
Key Range ............................................................................................................................. 52
Zone Tuning ......................................................................................................................... 52
Zone Volume ........................................................................................................................ 53
Zone Pan ............................................................................................................................... 53
Nontranspose ....................................................................................................................... 53
Assignment Mode ............................................................................................................... 54
Zone Submix......................................................................................................................... 55
Modulation Enable .............................................................................................................. 55
Footswitch Enable................................................................................................................ 56
Modulation Patch 1 and 2................................................................................................... 56
Footswitch Control .............................................................................................................. 57
Velocity Curve ..................................................................................................................... 57
Trigger Tempo ..................................................................................................................... 59
Stack Programming Functions
Stack Name and Keyboard Character Chart ................................................................... 59
Stack Instruments ................................................................................................................ 60
Stack Tune............................................................................................................................. 60
Stack Volume........................................................................................................................ 60
Stack Pan ............................................................................................................................... 60
Delay/Sound Start............................................................................................................... 61
Reverse .................................................................................................................................. 62
Alternate Envelope .............................................................................................................. 62
Pitch Envelope ..................................................................................................................... 62
Low Frequency Oscillator .................................................................................................. 63
Stack Modulation Control .................................................................................................. 64
Stack Footswitch 3 and 4 .................................................................................................... 65
Switch Mode ......................................................................................................................... 65
Switch Group ....................................................................................................................... 67
Switch Source ....................................................................................................................... 67
Switch Points ........................................................................................................................ 68
Audition Layer ..................................................................................................................... 68
CONTENTS

Procussion operation manual
3
Copy and Save Functions
Copy Zone ............................................................................................................................ 68
Copy Stack ............................................................................................................................ 69
Save Kit ................................................................................................................................. 69
PROGRAMMING PROCUSSION 73
Creating a Custom Kit ........................................................................................................ 73
Editing Kits ........................................................................................................................... 74
Programming Tutorial ........................................................................................................ 75
Hi-Hat Investigation ........................................................................................................... 81
Programming Tips and Ideas ............................................................................................ 82
Procussion Synthesis ........................................................................................................... 83
Spatial Convolution ............................................................................................................. 85
Using Procussion with a Sequencer .................................................................................. 86
More Advanced Sequencing .............................................................................................. 86
REFERENCE SECTION 89
Factory Kit Listing ............................................................................................................... 90
Standard Kit Layout ............................................................................................................ 91
Factory Stack Listing ........................................................................................................... 92
Instrument Listing ............................................................................................................... 99
LFO, Delay and Envelope Times ..................................................................................... 103
Pitch Modulation Interval Charts ................................................................................... 104
Zone Map Chart ................................................................................................................. 105
Technical Specifications .................................................................................................... 106
MIDI Specifications ........................................................................................................... 107
INDEX
WARRANTY
REGISTRATION CARD
CONTENTS

Procussion operation manual
4

Procussion operation manual
5
Introduction
INTRODUCTION
MASTER EDIT DATA VOLUME
C01 Vol127 Pan=K
031 Sluggo Drums
CURSORENTER
MAXIMUM PERCUSSION MODULE
I/O
What is
PRO CUSSION?
Procussion is a multi-timbral percussion instrument whose sounds are
basedon actualdigital recordingsof“real” instruments.With Procussion,
you can instantly have hundreds of different drum and percussion
instruments at the tip of your drumstick.
Procussion begins with sound. Four megabytes of the highest quality 16
bit percussion samples selected from the Emulator III sound library and
stored on ROM (Read Only Memory) for instant access.
But this is only the beginning. Procussion gives you the ability to literally
take these sounds apart and re-assemble them into an almost limitless
number of entirely new percussion sounds, combining parts of one
instrument with another or with any of a selection of digital waveforms
also stored on ROM. The extensive cross-switching functions allow a
high degree of musical expression not normally attainable from sampled
percussion instruments. The 16 bit samples are arranged into 128 kit
locations, 64 of which are user-programmable.
Procussion also features 32 voice polyphony allowing you to take full
advantage of its layering capabilities (up to 8 sounds on each key or drum
pad) and its ability to respond multi-timbrally to all 16 MIDI channels
makes it ideally suited for multitrack sequencing and composing using
a MIDI sequencer.
Other features include 3 stereo outputs for individually processing
sounds (also configurable as 6 polyphonic submixes with fully program-
mable panning), integral sends and returns to allow the addition of
external effects units without the need for a separate mixer, and of course,
an extensive MIDI implementation.

Procussion operation manual
6
PROCUSSION INTRO
Procussion is organized as shown in the simplified diagram below.
Basic Organization
A number of sampled percussion instruments are mapped across a
keyboard or set of drum pads. Each instrument has many individual
attributes such as tuning, volume, pan, etc.
The Kit is a complete set of all program parameters for a set of up to 24
Procussion drum Stacks. There are 128 kit locations in the Procussion.
Kits 0-63 are unalterable factory kits; Kits 64-127 are user kits which can
be changed.
Stacks, which can be made of up to 4 percussion Instruments, are
assigned to MIDI key ranges called Zones. Up to 24 zones may be
assigned in one kit.
The instruments in a stack can be modulated in many ways or switched
on and off depending on various parameters such as velocity (how hard
a drum is played) or perhaps the position of the high hat pedal, sticking
speed, etc.
Drum
Stack
Up to 4 Instruments
which can be
controlled or switched
in various ways.
Up to 24 Zones
Zone
1Zone
2Zone
24
MIDI Drums
36 48 60 72 84 96
MIDI
Note # -
Drum
Stack
Up to 4 Instruments
which can be
controlled or switched
in various ways.
Drum
Stack
Up to 4 Instruments
which can be
controlled or switched
in various ways.
Zones larger than
1 note are used for
Tuned Percussion
PROCUSSION KIT
Zone 2
Zone 24
Zone 1

Procussion operation manual
7
SUB 2 SUB 1 MAIN
IN OUT THRU LLLR
STEREOMONO
MIDI OUTPUTS POWER
RR
MIDI Controller
(MIDI Drum Pads, Keyboard, Sequencer, etc.)
MIDI Out
OR
Speakers
Amp
Mixer
Home Stereo
System
Aux. or
Tape In
Male RCA plug
to
Male Phone plug
To
Main Outs
Use the Left Main Output
for Stereophones
Home Studio
System
Setup #1 BASIC PAD SETUP
CONNECTION INSTRUCTIONS
Connection Instructions - Basic Setup
MIDIIn
- Procussion is controlled by MIDI messages received at the MIDI
In connector. Connect the MIDI In of the Procussion to the MIDI Out
connector of a MIDI controller such as a MIDI keyboard, MIDI Drum Pads
or MIDI sequencer.
Outputs
- Procussion is a high quality, stereo audio device. In order to
reproduce its wide dynamic range and frequency response, use a high
quality amplification and speaker system such as a keyboard amplifier or
home stereo system. A stereo setup is highly desirable because of the
added realism of stereophonic sound. Headphones can be used if an
amplifier and speaker system is not available. Plug stereo headphones
into the Left Main output jack. The Right Main output jack serves as a
mono output when the left jack is not plugged in.
This diagram shows a typical equipment setup for the Procussion.
■
IfProcussiondoesnot
seem to be responding
correctly, make sure
that both Procussion
and your MIDI Control-
ler are set to the same
MIDI channel.

Procussion operation manual
8
Quick Setup - MIDI Keyboard
These instructions will get you up and running in the shortest amount of
time. Connect Procussion to your sound system and MIDI keyboard as
shown on the following page and turn everything on.
SET LEVELS
1) Turn the Procussion's volume control to minimum.
2) Press the Master button on Procussion.
3) Turn the Data knob clockwise to the very last screen which reads,
“DEMO SEQUENCE”.
4) Press the Cursor button to move the flashing cursor to the bottom line
in the display.
5) Press Enter to start the demo sequence, then slowly turn up the volume
control to a comfortable listening level. You may have to adjust the
volume of your sound system. Press Enter again to stop the demo.
PROCUSSION SETUP
The Zone Map function re-maps every kit in Procussion to fit your MIDI
keyboard. This is much easier than having to modify each individual kit.
1) Press the Master button on Procussion.
2) Turn the Data knob to the screen which reads, “ZONE MAPS”.
3) Verify that the bottom line of the display reads “Kit”. If the display
reads something other than “Kit”, press the Cursor button to move the
flashing cursor to the bottom line in the display, then press it again so
that the flashing cursor line is underneath the word in the lower line.
Turn the data knob until it does read “Kit”.
4) Press the Master button to return to the main screen.
5) Play your MIDI keyboard. You should now be hearing sound. If not,
verify that the MIDI light on Procussion flashes as the keys are played.
If it doesn't flash, check the MIDI connection.
6) Turn the data knob clockwise to select another kit. Remember,
Procussion has 128 different kits! Have fun.
QUICK SETUP
Using the PROCUSSION with a MIDI Keyboard

Procussion operation manual
9
Connection Instructions - Keyboard Setup
Setup #2 KEYBOARD SETUP
SUB 2 SUB 1 MAIN
IN OUT THRU LLLR
STEREOMONO
MIDI OUTPUTS POWER
RR
MIDI Out
MIDI Controller
(MIDI Keyboard, Sequencer, etc.)
Computer
MIDI In
MIDI In
Additional
MIDI
Devices
MIDI In
Sub 2
Sub 1
Main
OR
Home Stereo
System
Aux. or
Tape In
Male RCA plug
to
Male Phone plug
To
Main Outs
MIDIIn
- Procussion is controlled by MIDI messages received at the MIDI
In connector. Any MIDI controller such as a MIDI keyboard, MIDI drum
pads or a computer can be connected.
MIDI Out
- The MIDI Out jack is normally used to transmit program data
to a computer or other device.
MIDI Thru
-MIDI Thru transmits an exact copy of the messages received
at the MIDI In jack to additional MIDI devices.
Outputs
- Procussion has three sets of programmable stereo outputs;
Main, Sub 1, and Sub 2. Specific sounds can be routed to one of these stereo
pairs in order to be further processed or mixed separately.

Procussion operation manual
10
QUICK SETUP
Using the PROCUSSION with Drum Pads
Quick Setup - MIDI Drum Pads
These instructions will get you up and running in the shortest amount of
time. Connect Procussion to your sound system and MIDI drum pads as
shown on the facing page (or on page 7) and turn everything on.
1) Play your MIDI drum pads and verify that the MIDI light on
Procussion flashes as the pads are played. If not, check the MIDI
connection.
2) Set Procussion to Kit 000, “Ampitheater” (or any of the kits marked
with an asterisk in the kit listing).
3) Assign each pad of your MIDI drum pad controller to a MIDI note
number using the Standard Factory Kit Layout on page 91. Set the
MIDI pads up however you like, but be sure to save your layout to the
pad controller when you have finished.
4) Turn the data knob on Procussion clockwise to select another kit. Since
you used one of the Standard Kits as your model, most other
Procussion factory kits (marked *) will follow the same pad layout.
drumKAT
Note #38
Main Snare
Your MIDI Controller
assigns each
Pad a MIDI Number
Note #39
Aux. Snare
Note #52
Hi Hat Note #47
Tom Tom
Note #43
Tom Tom Note #45
Tom Tom
Note #49
Cymbal Note #46
Perc.
Note #51
Cymbal Note #50
Cymbal
33 35 36 38 40 41 43 45 47 48 50 52 53 55 57 59 60 62 64 65 67 69 71 72 74 76 77 79 81 83 84 86 88 89 91 93 95 96 98
MIDI Key #
Main Snare Aux. Snare
Hi Hat
Tom Tom
Tom Tom
Tom Tom
Cymbal
Cymbal
Cymbal
Percussion
Standard Factory Kit Layout
Use the Standard Factory Kit Layout to assign your Drum Pads so that most of the
Procussion Factory Kits will match up with your pad assignments.

Procussion operation manual
11
Connection Instructions- Performance Setup
SETUP #3 LIVE PERFORMANCE SETUP
MIDIIn
- Procussion is controlled by MIDI messages received at the MIDI
In connector. Connect the MIDI In of Procussion to the MIDI Out connec-
tor of a MIDI controller such as a MIDI percussion controller, or MIDI
keyboard.
MIDI Thru
- The MIDI Thru jack is used to connect additional MIDI
devices onto the MIDI chain. MIDI Thru transmits an exact copy of the
messages received at the MIDI In jack.
Outputs
- Each of the Sub 1 and Sub 2 output jacks on the Procussion are
stereo jacks. The tip of each jack (accessed when a standard phone plug is
inserted) connects to the left or right output of that group. If a stereo plug
is inserted, the Ring of the stereo plug serves as a signal Return which
sums into the Main outputs. See page 13 for additional details.
Sub Output
Return
(To Main Output)
Tip Ring
To Effect From Effect
SEND/RETURN CABLES
SUB 2 SUB 1 MAIN
IN OUT THRU LLLR
STEREOMONO
MIDI OUTPUTS POWER
RR
MIDI Controller
(MIDI Drum Pads, Keyboard, etc.)
MIDI In
drumKAT
MIDI Out
MIDI In
Additional
MIDI
Devices
Main Outputs
Send/Return
Effect Device
Send/Return
Effect Device

Procussion operation manual
12
MIDI Controller
(MIDI Drum Pads or Trigger Device)
MIDI In
dw
5
0
0
0
PocKet
PEDAL
MIDI Out
SUB 2 SUB 1 MAIN
IN OUT THRU LLLR
STEREOMONO
MIDI OUTPUTS POWER
RR
Pedal
Kick Drum
Pedal
Control
Footswitch
Pocket
Pedal
Trigger
Input 1
Hi-Hat and
Control Pedal
External Pads
drumKAT
Set to:
Modulation
SETUP #4 FULL ELECTRONIC DRUMKIT
Connection Instructions - Electronic Drum Kit
■
Make sure that the
velocity response is
correctly calibrated on
your MIDI Drum Pads.
The diagram above shows how to connect the Procussion as a full
electronic drum kit containing: a Kick Drum Pedal, Hi-Hat Pedal, MIDI
Drum Controller (with 2 external pads) and a Control Footswitch.
Kick Drum Pedal In
- In this example, a spring-loaded trigger pedal by
Drum Workshop is used. Connect the output of the pedal to Trigger #1
of your MIDI drum pads.
Hi-HatPedalIn
- A standard electronic music voltage pedal functions as
a combination Hi-Hat/Control Pedal. In this example, an Anatek Pocket
Pedal is used to merge the pedal into the MIDI data. Connect the
Footswitch and CV Pedal to the inputs of the Pocket Pedal as shown in the
example above. See your dealer about obtaining a suitable control pedal.
MIDI
- Connect MIDI Out from your MIDI drum pads to MIDI In of the
Pocket Pedal. Connect MIDI Out of the Pocket Pedal to MIDI In of
Procussion.
Outputs
- Connect the audio outputs to your other equipment as shown
in setup procedures 1, 2, and 3.
■
The Hi-Hat Pedal
corresponds to MIDI
key number 52 in the
Standard Factory Kit
Layouts.
▼
When using the
Anatek Pocket Pedal,
the first pedal move-
ment determines the
pedal's polarity.
Down 1st = Normal
Up 1st = Reversed

Procussion operation manual
13
SUBMIX OUTPUTS
Tip Ring Tip Ring Tip Ring Tip Ring Tip Tip Ring
SUB 2 SUB 1 MAIN
RL RL RL
R Bus
L Bus
Procussion Output Section
If a stereo plug is inserted into a Sub jack, the Ring of the stereo plug serves
as a signal Return which sums into the Main outputs.
Therefore, the Sub 1 and Sub 2 jacks can serve as effect sends and returns
in order to further process selected instruments and then return them to
the main mix.
The diagram below shows the Sub 1 and Sub 2 jacks being used as send/
returns in order to further process selected Procussion instruments
without using the effects bus on the mixing board. In a pinch, the effect
returns could also be used to sum additional instruments into the main
outputs of the Procussion.
POWER UP!
The power switch is located on the left side of the front panel. The
Procussion and its MIDI controller may be turned on in any order. When
power is applied, the liquid crystal display will light, indicating that the
Procussion is operating.
You may have noticed that there is no 110/220 Volt power selector
switch on the Procussion.
Procussion automatically switches itself for 110 or 220 Volt opera-
tion.
The Sub 1 and Sub 2 jacks can be used as effect returns to the Main Outputs.
Sub Output
Return
(To Main Output)
Tip Ring
To Effect From Effect
SEND/RETURN CABLES
■
Use Send/Return
cables as shown above
to access the Submix
Return points.
Submix I/O

Procussion operation manual
14

15
Procussion operation manual Basic Operation
BASIC OPERATION

16
Procussion operation manual

17
Procussion operation manual Main Controls
MAIN CONTROLS
■
Power Switch
- Switches AC power to the Procussion ON and OFF.
■
MIDI Activity LED
- Indicates that MIDI data is being received.
■
Master Menu Select Button
- The Master menu contains parameters
that affect the entire machine, not just certain Kits. An illuminated LED
above the button indicates that you are in the Master menu.
■
Edit Menu Select Button
- The Edit menu is used when you want to
change parameters of a Kit. An illuminated LED above the button
indicates that you are in the Edit menu.
■
Enter Button
- The Enter button is used as a “Home” key or to initiate
a particular operation within the Procussion. The red LED above the enter
button flashes to indicate that the Procussion is waiting for your response.
■
Cursor Control
- This button moves the cursor to the next parameter
on the display. (The cursor is a little flashing line underneath one of the
parameters in the display.) Press the cursor control repeatedly until the
cursor is underneath the desired parameter. The cursor can also be moved
bidirectionally using the data entry control while the cursor select button
is being held down (i.e. Press and hold the cursor button and turn the data
entry knob).
■
DataEntryControl
-Thedata entry control is a stepped, variable control
which is used to change parameter values. The control increments or
decrements the current value one unit with each click.
■
Volume Control
- This is the master volume control for all audio
outputs. Note: For maximum dynamic range, set this control at full level.
MASTER EDIT DATA VOLUME
C01 Vol127 Pan=K
031 Sluggo Drums
CURSORENTER
CURSOR
CONTROL
ENTER
BUTTON
POWER
SWITCH
MASTER MENU
SELECT
EDIT MENU
SELECT
DATA ENTRY
CONTROL
VOLUME
CONTROL
DISPLAY
MIDI
ACTIVITY
MAXIMUM PERCUSSION MODULE
I/O
BASIC OPERATION

18
Procussion operation manualChannel Selection
BASIC OPERATION
■
Channel Pan should
normally be set to “K”
unless realtime control
of panning is desired.
This will allow the
preprogrammed pan
settings for each zone
or stack to be used.
KIT SELECTION
Press the cursor key repeatedly until the cursor is underneath the kit
number. (The cursor is a little flashing line underneath one of the
parameters in the display.) As the data entry control is rotated, the kit
number and name will change. The displayed kit will be assigned to the
displayed MIDI channel. Kit numbers range from 000 to 127.
C01 Vol127 Pan=K ÷MIDI Channel Parameters
000 Kit Name ÷Kit Information
MIDI CHANNEL SELECTION
Press the cursor key repeatedly until the cursor is underneath the channel
number. (The cursor is a little flashing line underneath one of the
parameters in the display.) Rotate the data entry control to select MIDI
channel 01-16. As the channel is changed, the display will change to show
the kit, volume and pan associated with the displayed channel.
C01 Vol127 Pan+0
000 Kit Name
CHANNEL VOLUME
Press the cursor key repeatedly until the cursor is underneath the volume
value. Rotate the data entry control to select volume 00-127. (This is the
same parameter as MIDI volume control #7, and changes made over
MIDI will be shown in the display.)
CHANNEL PAN
Press the cursor key repeatedly until the cursor is underneath the pan
value. Rotate the data entry control to select pan values -7 to +7 or “K”.
When “K” is selected, the pan value specified in the kit is selected. Any
other value will override the pan parameter in the kit. (This is the same
parameter as MIDI pan control #10, and changes made over MIDI will be
shown in the display.)
■
If your Procussion is
notrespondingproperly
or plays the wrong kit,
make sure that
Procussion and your
MIDI controller are set
to the same MIDI chan-
nel and that the MIDI
Volume is turned up.
For more information
about MIDI, see MIDI
Realtime Controls on
page 44.

19
Procussion operation manual Multi-Timbral Operation
Each of the 16 MIDI channels can be assigned to play a specific kit in Procussion.
MULTI-TIMBRAL OPERATION
Multi-timbral operation means that the Procussion can play more than
one kit at the same time. For example, a MIDI sequencer could be playing
one kit while you play along on another. To access multiple kits on
different MIDI channels simultaneously, follow these instructions:
1. Set the MIDI mode to MULTI-Mode, using the MIDI mode function in
the Master menu (page 24).
2. Decide which MIDI channels you wish the Procussion to receive, and
turn all other channels OFF using the MIDI Enable function in the Master
menu (page 26). Up to 16 channels can be selected simultaneously!
3. Select the desired kit for each of the MIDI channels you wish the
Procussion to receive using the MIDI Channel/Kit selection screen (see
previous instructions).
4. Procussion will now respond multi-timbrally on the MIDI channels
you have specified. The volume and pan position parameters can be
adjusted over MIDI (for each MIDI channel) or using the Cursor and Data
Entry control in the MIDI Channel/Kit selection screen.
Channel 01 Volume
Pan
Channel 02 Volume
Pan
Channel 03 Volume
Pan
Channel 16 Volume
Pan
KIT
KIT
KIT
KIT
BASIC OPERATION
■
Kitnumbersforeach
MIDI channel can also
be selected via MIDI
program changes.
(Thisissosimplethatit
is often overlooked.)

20
Procussion operation manual
The Master menu contains functions that affect the overall operation of
the Procussion. For example, changing the Master Tune will change the
tuning of all the drum kits, not just the one currently displayed.
TO ENABLE THE MASTER MENU
Press the Master key, lighting the LED. The current screen will be the one
most recently selected since powering up the Procussion. The cursor will
appear underneath the first character of the screen heading on line one.
TO SELECT A NEW SCREEN
Press the cursor key repeatedly (or hold the cursor key while turning the
data entry control) until the cursor is underneath the screen title heading.
(You may also press the Enter button to return the cursor to “Home”
position.) Rotate the data entry control to select another screen.
TO MODIFY A PARAMETER
Press the cursor key repeatedly (or hold the cursor key while turning the
data entry control) until the cursor is underneath the parameter value.
Rotate the data entry control to change the value.
TO RETURN TO KIT SELECT MODE
Press the Master key, turning off the LED.
MASTER MENU FUNCTIONS
MASTER TUNE
Master Tune adjusts the overall tuning of all kits so that the Procussion
may be tuned to other instruments. The master tuning range is ±1
semitone in 1/64th semitone increments. A master tune setting of "00"
would indicate that the Procussion is perfectly tuned to concert pitch
(A=440 Hz).
MASTER TUNE
+63
Master Menu
MASTER MENU
Table of contents
Other EMU Recording Equipment manuals
Popular Recording Equipment manuals by other brands

Thrax Audio
Thrax Audio Trajan MC Step-Up Transformer operating manual

MediaMatrix
MediaMatrix NOIN Dante Hardware manual

Denon
Denon CDR-W1500 operating instructions

Alesis
Alesis MMT-8 Service manual

Genius Audio
Genius Audio GDSP-15404 user manual

Studio Technologies
Studio Technologies StudioComm 780-02 user guide