Energizer 50806 User manual

© 2017 Energizer. Energizer and certain graphic designs are
trademarks of Energizer Brands, LLC and related subsidiaries and are
used under license by Custom Accessories Europe Ltd. All other brand
names are trademarks of their respective owners. Neither Custom
Accessories Europe Ltd nor Energizer Brands, LLC is affiliated with the
respective owners of their trademarks.
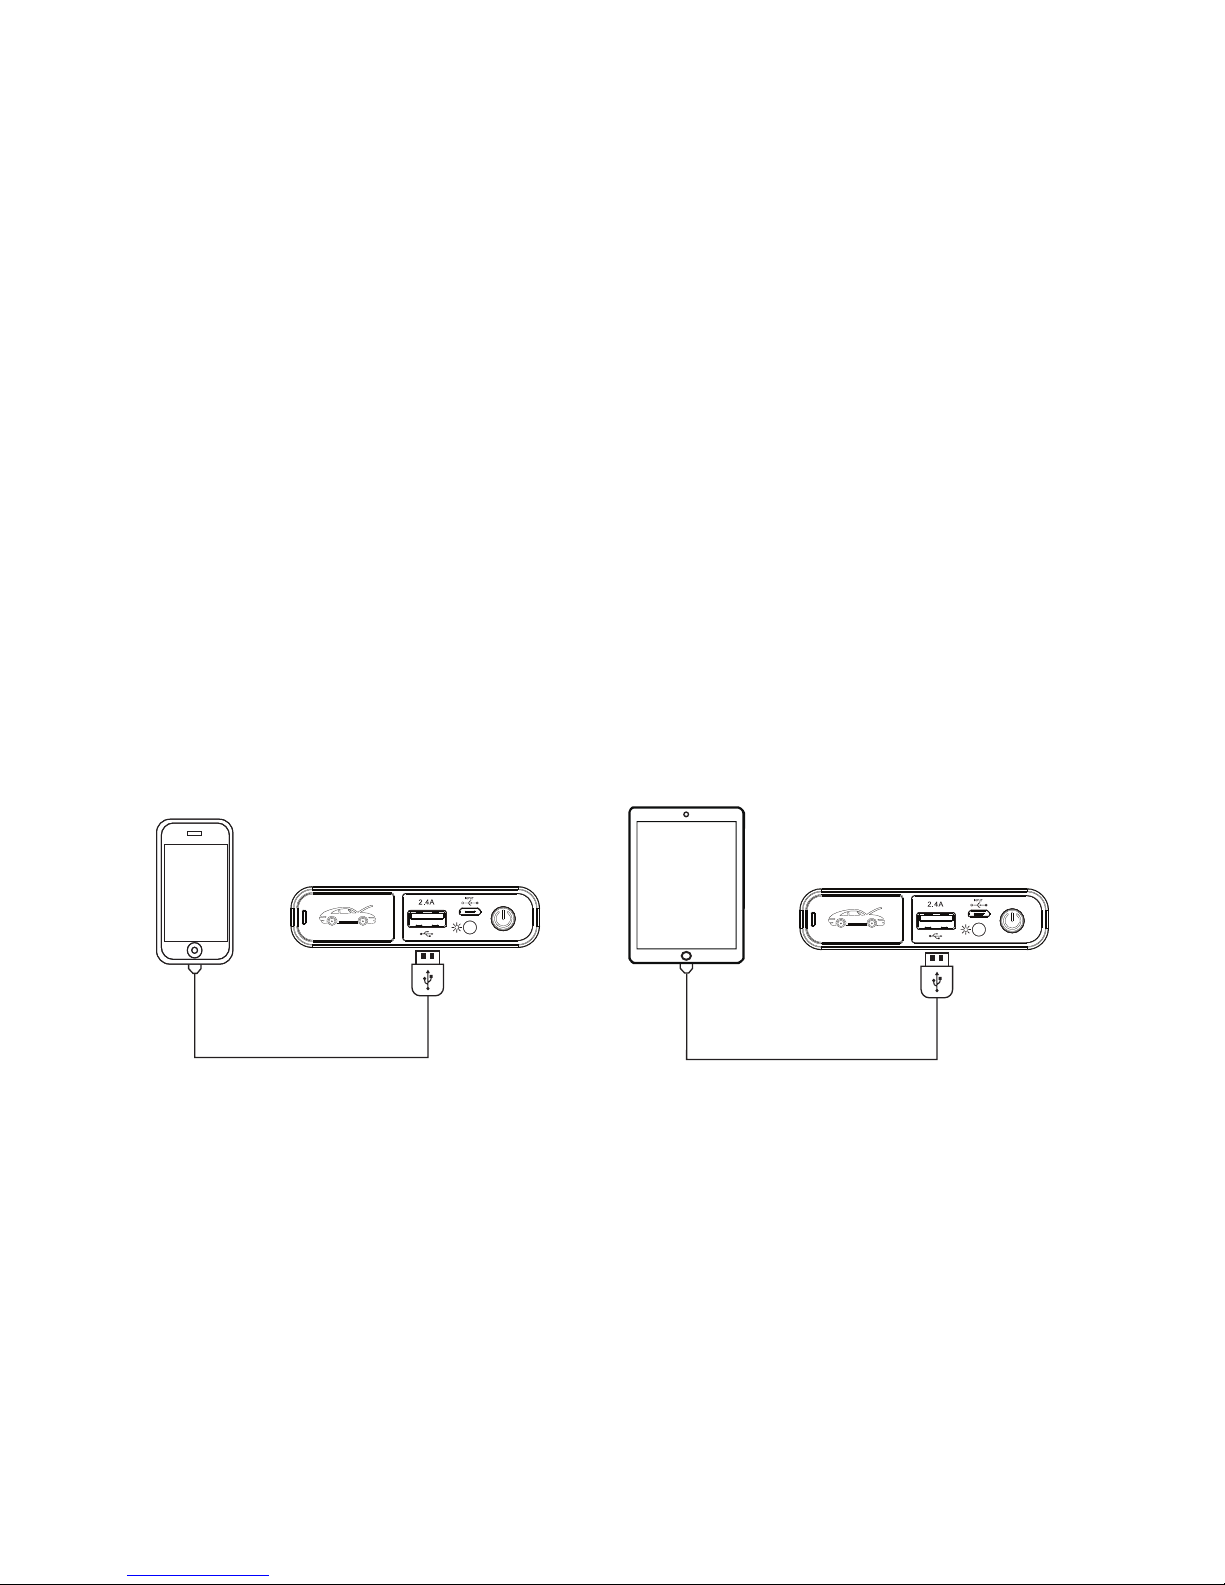
iPhone and iPod touch are trademarks of Apple Inc.,
registered in the U.S. and other countries.
iPad Air and iPad mini are trademarks of Apple Inc.
For more info,
scan QR code
50806
Made in China for:
Custom Accessories Europe Ltd,
The Granary, Standen Manor, Hungerford, Berkshire, RG17 0RB
Energizerautomotiveaccessories.eu
0800-5420825
This Lithium-ion Polymer Car Jump
Starter has been tested & approved
to the following standards:
EN55032 & EN55024.
PLEASE READ THIS USER GUIDE CAREFULLY BEFORE OPERATION
9000mAh LITHIUM-ION POLYMER
CAR JUMP STARTER
SUITABLE FOR ENGINES UP TO
4.0 LITRE (4000CC) PETROL & 3.0 LITRE (3000CC) DIESEL
USER GUIDE

INTRODUCTION
Thank you for purchasing your new Energizer®
Lithium-ion Polymer car jump starter. Before installing
and operating please read this user guide thoroughly.
This user guide contains important information relating
to various power requirements that your products may
have. Please keep this user guide for future reference.
IMPORTANT SAFETY INFORMATION
Misusing or incorrectly connecting the jump starter may
damage the equipment or create hazardous conditions
for users. Please pay particular attention to all the
safety precautions and warning statements in this
guide.
2

Do not crush, puncture, incinerate or short circuit
the jump starter, as this may lead to electric shock
or an explosion.
Do not expose to moisture.
Keep the jump starter out of reach of children.
Do not charge the jump starter in excess of 2 amps.
Only charge the jump starter when the temperature
is between 0°C and 40°C.
If there is any evidence of leakage wash your hands
immediately and avoid contact with eyes.
Do not use the jump starter if the case is hot or
discoloured.
Do not look directly at the LED light.
3
SAFETY PRECAUTIONS

4
FEATURES
Red ‘+’
Black ‘-’
A
B
L
M
I
K
J
H
F
E
D
G
C
A1
E

5
A Spring-loaded fully insulated colour coded clamps
B Mosfet unit with cross polarity safety function. Fully
protected against short circuiting
C LED Indicator
D Blue connectors
E Mosfet unit blue connector port
F USB 2.4A output suitable for most USB devices
including smart phones, tablets, iPhone, iPad & iPod
G LED light
H Charging cable
I 12V In-car charger
J Power switch
K DC Charge input 5V / 9V/ 2A (max)
L LED Power status display
M 400 Maximum crank amps Lithium-Polymer Car
Jump Starter

HOW TO CHARGE YOUR ENERGIZER®JUMP
STARTER
With the supplied charging cable your Energizer®jump
starter can be charged using either the supplied 12V
in-car charger (I) or via a USB port on a PC/laptop or a
suitable phone charger rated at 5V, up to a maximum of
2 amps.
Once connected the 4 blue power LED’s (L) will
progressively illuminate as the battery is charging.
When all 4 are permanently illuminated the battery is
fully charged. Depending on the existing charge this
could take up to 3 hours. When fully charged unplug
from the charging source. Please note that to maintain
the battery’s charge it is recommended that you charge
the jump starter battery every 3 months.
6

7
HOW TO JUMP START YOUR VEHICLE
Please note that to jump start a vehicle at least 2 of the
4 blue power LED’s (L) must be illuminated.
1. Plug the blue connector into the 12V jump starter
port (D), the LED (C) will flash green.
2. Connect the red clamp (A) to the positive '+', of the
vehicle's battery and the black clamp (A1) to the
negative '-'. If connected correctly the LED (C) will
show steady green. If the LED (C) shows red then
the clamps have been connected incorrectly.
Remove and start again. If you are sure that the
clamps are connected correctly but still the LED (C)
shows red, remove the red clamp and re-connect to
reset.
3. Only when the LED (C) shows steady green should
you start the vehicle.
4. Dependent on your vehicle’s battery status you may
need to turn the ignition 2-3 times for the jump

8
starter to operate. This isn’t a fault, it is just the jump
starter analysing the vehicle’s battery condition, for it
to work effectively.
5. Once the vehicle has started and the LED (C)
flashes green, disconnect the black and the red
clamps first from the vehicle’s battery, then remove
the blue connector from the jump starter.
6. Replace the protective cover over the ‘Engine Start’
port (C).
WARNING
1. Disconnect the jump starter within 30 seconds of
starting your vehicle.
2. Always connect the red clamp first, never both red
and black clamps at the same time.
3. Do not dismantle the jump starter.

HOW TO CHARGE YOUR PHONE/TABLETS OR
OTHER ELECTRONIC DEVICES
1. Plug you phone/tablet or other electronic device into
the USB port (F).
2. Turn the jump starter on by pressing the power
button (J).
EXAMPLES
9

HOW TO USE THE HIGH POWERED LED LIGHT
The LED light is switched on by pressing the power
button (J) twice in quick succession. To switch it off
press power button (J) once.
WARNING: Do not look directly into the LED light.
10

SPECIFICATIONS
Specifications are subject to change without notice.
Battery capacity 9000mAh (33.3Wh)
Starting current 250A
Peak current 400A
Operation temperature -20˚ to +60˚C
DC Charge input 5V / 9V max 2A
Rated USB output 5V/max. 2.4A
Physical Specifications
Dimensions (L x W x H) 14cm x 8.6cm x 2.1cm
Weight 0.35kgs / 358g / 0.78lbs
11

12
WARRANTY
The warranty covers defects in workmanship and materials in
your jump starter. The warranty lasts for 12 months from the
original date of purchase and proof of purchase is required to
make a warranty claim.
Provided that we are made aware of a defective product within
the warranty period, the jump starter will, at the discretion of the
company, be repaired or replaced free of charge. We reserve
the right to use new and/or reconditioned parts to effect a
warranty repair. We also reserve the right to use parts or
products of original or improved design in the repair or
replacement. Once the jump starter has been repaired or
replaced its warranty continues for the remaining portion of the
original warranty period or 90 days from the date of return to the
customer, whichever is greater. All replaced products and all
parts removed from repaired products become the property of
the company.
What is not covered by the warranty?
This warranty does not cover normal wear and tear of the
product or costs related to the removal, installation, or
troubleshooting of the customer's electrical systems. The
warranty does not cover any defects in, or damage to, the jump
starter if:

13
1. It has been misused, neglected, improperly installed,
physically damaged or altered, either internally or externally,
or damaged by improper use or use in an unsuitable
environment.
2. It has been subjected to fire, water, generalised corrosion,
biological infestations, or input voltage that creates
operating conditions beyond the maximum or minimum
limits listed in the product specifications including high input
voltage from generators and lightning strikes.
3. Repairs have been done to it other than by the Energizer®
Warranty Department.
4. It is used as a component part of a product expressly
warranted by another manufacturer.
5. Its original identification markings (trade-mark, serial
number etc) have been defaced, altered, or removed.
Please be aware that this warranty gives you specific legal
rights and does not affect your statutory rights.

14
RETURNS
1. Package the unit safely, preferably using the original box
and packing materials. Please ensure that your product is
shipped fully insured in the original packaging or equivalent.
This warranty will not apply where the product is damaged
due to improper packaging.
2. Include the following:
• A return address where the unit can be shipped. PO Box
addresses are not acceptable.
• A contact telephone number where you can be reached
during work hours.
• Information about the installation and use of the unit.
• Information about the failure and / or reason for the
return.
• A copy of your dated proof of purchase.

15
Please return your faulty jump starter, with the above
enclosures, to:
Cobalt Innovations Ltd
Energizer Warranty Dept.,
Unit 30-31
Lagrange,
Lichfield Road Industrial Estate,
Tamworth, B79 7XD.
This manual suits for next models
1
Table of contents
Other Energizer Remote Starter manuals
Popular Remote Starter manuals by other brands

RUGGED GEEK
RUGGED GEEK Intelliboost user manual

Autostart
Autostart AS-6270 user guide

Directed Electronics
Directed Electronics SmartStart 5000-series owner's guide

Directed Electronics
Directed Electronics ProStart CT-5472TW user guide

Fortin
Fortin EVO ALL STAND ALONE INSTALLATION

CrimeStopper
CrimeStopper RS-800 installation instructions

PURSUIT
PURSUIT PRO9556Z Quick installation guide

Automotive Data Solutions
Automotive Data Solutions TR1150AT owner's manual

Code Alarm
Code Alarm F30 owner's manual

AstroStart
AstroStart RS-611 user manual

Bulldog Security
Bulldog Security RS302 Installation and owner's guide

Schumacher
Schumacher Instant Power XP2260 owner's manual