Engineered air EngA CU Series User manual

A
IOM-14 Feb 06 R4
INSTALLATION, OPERATION
AND MAINTENANCE MANUAL
FOR
CU SERIES
CONDENSING UNITS
INDOOR AND OUTDOOR MODELS
UNIT MODEL NO. _________________
UNIT SERIAL NO. _________________
SERVICED BY: ___________________
TEL. NO: ________________________
CANADIAN
HEAD OFFICE
AND FACTORY
USA
HEAD OFFICE
AND FACTORY
CANADIAN
EASTERN FACTORY
1401 HASTINGS CRES. SE
CALGARY, ALBERTA
T2G 4C8
Ph: (403) 287-4774
Fx: 888-364-2727
32050 W. 83rd STREET
DESOTO, KANSAS
66018
Ph: (913) 583-3181
Fx: (913) 583-1406
1175 TWINNEY DRIVE
NEWMARKET, ONTARIO
L3Y 5V7
Ph: (905) 898-1114
Fx: (905) 898-7244
SALES OFFICES ACROSS CANADA AND USA
Retain instructions with unit and maintain in a legible condition.
Please give model number and serial number when contacting
factory for information and/or parts.
www.engineeredair.com

ACU MANUAL
IOM-14 2 of 46 Feb 06 R4
TABLE OF CONTENTS
YOU HAVE RESPONSIBILITIES TOO ...................................................................................................................................3
INTRODUCTION ................................................................................................................................................................3
SAFETY PRECAUTIONS ......................................................................................................................................................3
WARRANTY .......................................................................................................................................................................4
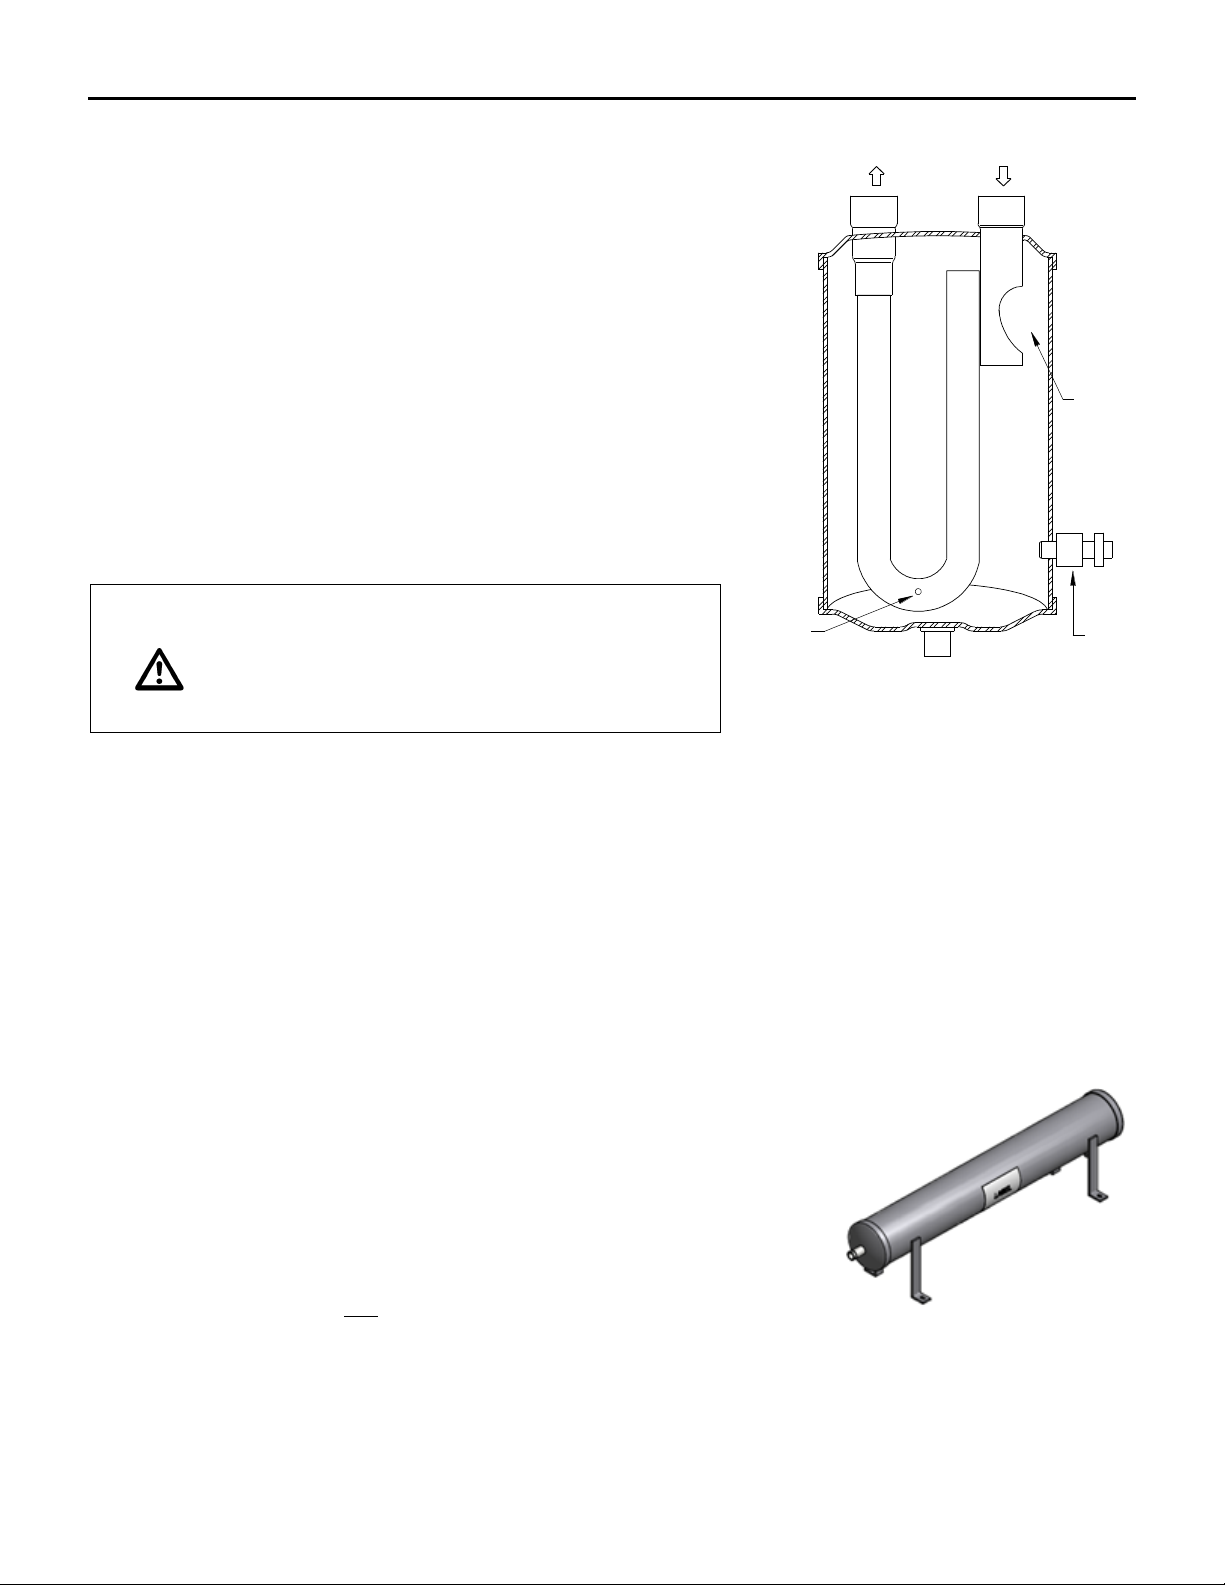
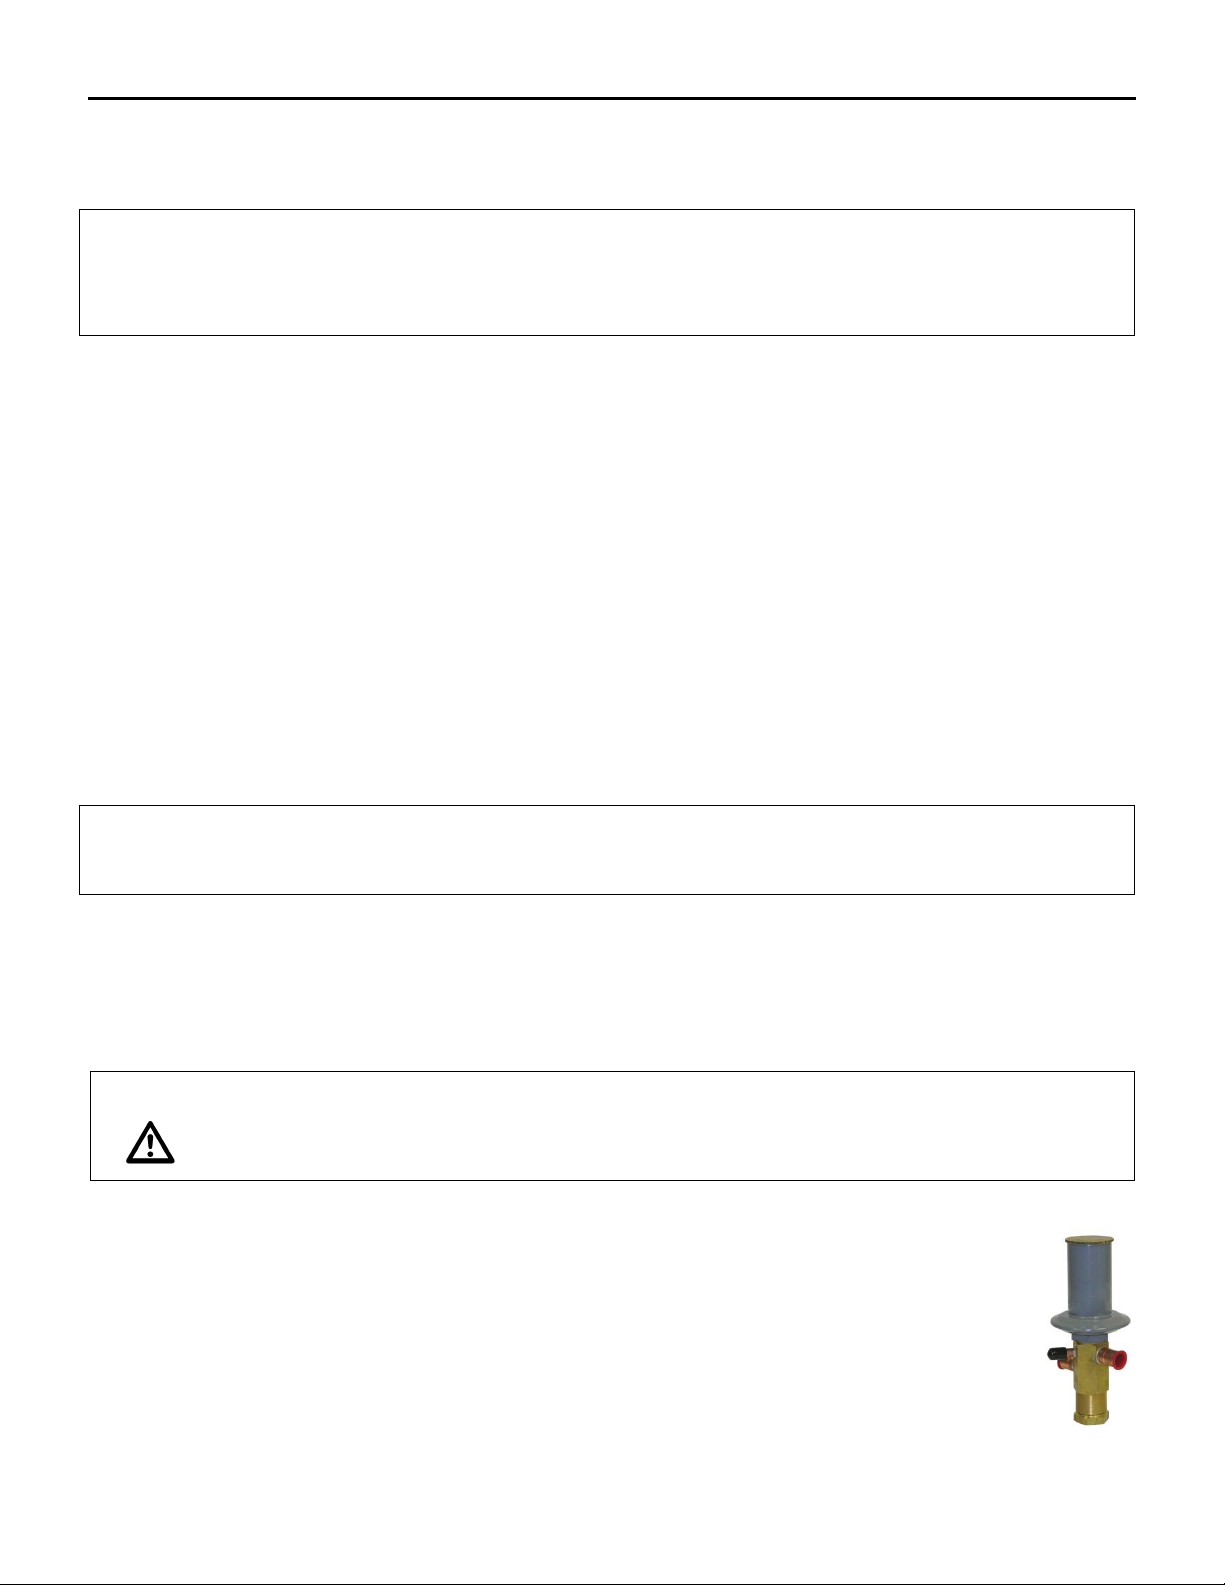
PARTS................................................................................................................................................................................4
RECEIVING.........................................................................................................................................................................5
TEMPORARY STORAGE .....................................................................................................................................................5
INSTALLATION...................................................................................................................................................................5
CODES...............................................................................................................................................................................6
In Canada:.........................................................................................................................................................................6
In USA: ..............................................................................................................................................................................6
MINIMUM CLEARANCE FOR SERVICE AND TO COMBUSTIBLES IN INCHES (mm)............................................................6
QUALIFIED INSTALLER.......................................................................................................................................................7
COMPONENT LOCATIONS.................................................................................................................................................7
PIPING RECOMMENDATIONS...........................................................................................................................................8
PIPE SELECTION PROCEDURE .........................................................................................................................................17
PIPING MATERIALS AND PROCEDURES ..........................................................................................................................23
CLEARANCE FOR CONDENSER AIR FLOW .......................................................................................................................25
LIFTING............................................................................................................................................................................26
MOUNTING.....................................................................................................................................................................26
SHIPPING MATERIALS.....................................................................................................................................................27
ASSEMBLY.......................................................................................................................................................................27
PIPING, ELECTRICAL OR CONTROL SERVICE CONNECTIONS...........................................................................................27
ELECTRICAL INSTALLATION.............................................................................................................................................28
BEFORE START-UP ..........................................................................................................................................................29
START-UP CHECK LIST.....................................................................................................................................................29
INITIAL START-UP............................................................................................................................................................33
CHARGING ......................................................................................................................................................................33
OPERATION.....................................................................................................................................................................34
SHUTDOWN PROCEDURE...............................................................................................................................................35
MAINTENANCE ...............................................................................................................................................................36
ELECTRICAL .....................................................................................................................................................................36
BELT ADJUSTMENT .........................................................................................................................................................36
BEARING SETSCREW TORQUES.......................................................................................................................................38
FILTERS............................................................................................................................................................................41
CONTROLS ......................................................................................................................................................................42
OUTDOOR AIR INTAKES, MIXING SECTIONS AND DAMPERS..........................................................................................42
REFRIGERATION..............................................................................................................................................................42
TROUBLESHOOTING CHART...........................................................................................................................................45
© Airtex Manufacturing Partnership. All rights reserved.

ACU MANUAL
IOM-14 3 of 46 Feb 06 R4
YOU HAVE RESPONSIBILITIES TOO
This installation, operation and maintenance manual cannot cover every possibility, situation or
eventuality. Regular service, cleaning and maintaining the equipment is necessary. If you are not capable
of performing these tasks, hire a qualified service specialist. Failure to perform these duties can cause
property damage and/or harm to the building occupants and will void the manufacturers’ warranty.
INTRODUCTION
Engineered Air units are high quality products designed and manufactured to provide many years of
trouble-free operation. We recommend that this manual be read thoroughly to ensure proper installation,
efficient operation and proper maintenance of this equipment. The submittal record is considered to be
part of the Installation, Operation and Maintenance Manual. Please report any omissions to the national
service manager.
SAFETY PRECAUTIONS
Read, understand and follow the complete manual before beginning the installation, including all safety
precautions and warnings.
Warning:
Improper installation, adjustment, alteration, service or maintenance can cause
property damage, injury or death. Read the installation, operating and maintenance
instructions thoroughly before installing or servicing this equipment.
Warning:
This unit is connected to high voltages. Electrical shock or death could occur if
instructions are not followed. This equipment contains moving parts that can start
unexpectedly. Injury or death could occur if instructions are not followed. All work
should be performed by a qualified technician. Always disconnect and lock out power
before servicing. DO NOT bypass any interlock or safety switches under any
circumstances.

ACU MANUAL
IOM-14 4 of 46 Feb 06 R4
WARRANTY
LIMITED WARRANTY ENGINEERED AIR will furnish without charge, F.O.B. factory, freight collect,
replacement parts for, or repairs to products covered herein which prove defective in material or
workmanship under normal and proper use for a period of twelve (12) months from the initial start-up or
eighteen (18) months from the date of shipment, whichever expires sooner, provided the customer gives
ENGINEERED AIR written notice of such defects within such time periods and provided that inspection by
ENGINEERED AIR establishes the validity of the claim and all pertinent invoices have been paid in full. The
repairs or replacements will be made only when the complete product(s) or part(s) claimed to be defective
are returned to ENGINEERED AIR or a depot designated by ENGINEERED AIR, transportation charges
prepaid. Repairs or replacements as provided for by this paragraph shall constitute fulfillment of all
ENGINEERED AIR's obligations with respect to this warranty. The refrigerant charge is not included in any
part of this warranty. This warranty does not apply to any products or parts thereof that have been subject
to accident, misuse or unauthorized alterations, or where ENGINEERED AIR's installation and service
requirements have not been met.
The foregoing warranty is in lieu of all other warranties, express or implied. ENGINEERED AIR specifically
disclaims any implied warranty of merchantability and/or fitness for purpose. Under no circumstances
shall ENGINEERED AIR be liable to, nor be required to indemnify, Buyer or any third parties for any claims,
losses, labour, expenses or damages (including special, indirect, incidental, or consequential damages) of
any kind, resulting from the performance (or lack thereof) of this Agreement or the use of, or inability to
use the goods sold hereunder, including, but not limited to, damages for delay, temporary heating/cooling
costs, loss of goodwill, loss of profits or loss of use. Furthermore, the parties agree that the Buyer's sole
remedy under this Agreement shall be limited to the limited warranty set forth in the preceding paragraph
relating to the repair or replacement of any defective goods. Under no circumstances shall any claim or
award against ENGINEERED AIR exceed the original contract price whether awarded through arbitration,
litigation or otherwise.
ENGINEERED AIR Warranty is void if:
1. The unit is not installed in accordance with this manual.
2. The start-up and operation of the unit is not performed in accordance with this manual.
3. The unit is operated in an atmosphere containing corrosive substances.
4. The unit is allowed to operate during building construction.
PARTS
Warning:
Any replacement part must be of equivalent listing or certification and be functionally
equivalent. The replacement part must meet the original’s specification in terms of
functionality including certifications, timing, input and output range, accuracy and
operation.
Failure to replace parts or components with equivalent parts can cause property
damage, injury or death.

ACU MANUAL
IOM-14 5 of 46 Feb 06 R4
1. Motors:
Motor manufacturers have service centers that will repair or replace motors as required.
2. Parts Other Than Motors:
Contact the nearest Engineered Air sales office or factory. Be sure to include Model Number, Serial
Number, date of installation and nature of failure along with the description of the parts required.
Some parts may not be stocked items that must be made or ordered.
RECEIVING
Refer to the back of the packing slip for receiving unit instructions.
On receipt of the unit, check for damage. Inspect protective covers for punctures or other signs that there
may be internal damage. Remove protective covers and check for internal damage. Replace covers if the
unit is not being assembled or installed at this time. Open access doors and check for internal damage.
Close access doors when the inspection is complete. If damage is found follow the instructions on the
packing slip.
On receipt of the unit, check electrical characteristics (see rating plate) to make sure the unit voltage is
compatible with that available for the unit. All parts for field installation are listed on the shipping order
form.
TEMPORARY STORAGE
If a unit is to be stored prior to installation the following precautions are required:
•Store in a well drained area that will not accumulate surface water.
•Store in an area where the unit will not get damaged.
•The entire perimeter and any full height cross members of the unit must be supported by a level
surface and the supporting surface must be adequate for supporting the entire weight of the unit.
•All protective coverings that were provided for shipping must be in place.
•Protect indoor units from rain and snow.
INSTALLATION
Warning:
This unit is not rated for hazardous locations and cannot be installed in areas requiring
any hazardous location rating.
Caution:
All wiring, piping and fuel line installation must be completed by qualified persons in
accordance with all federal, state, provincial and/or local codes.

ACU MANUAL
IOM-14 6 of 46 Feb 06 R4
Note: Installation shall be in accordance with this manual and all other associated component and
control Installation, Operation and Maintenance Manuals.
CODES
In Canada:
1. The installation of this unit shall be in accordance with the latest edition of the Canadian Electrical
Code, Part 1 –C.S.A. Standard C22.1, Provincial and Local Codes, and in accordance with the local
authorities having jurisdiction.
2. This unit shall be electrically grounded in accordance with the latest edition of the Canadian
Electrical Code, Part 1 –C.S.A. Standard C22.1, Provincial and Local Codes, and in accordance with
the local authorities having jurisdiction.
3. The installation of this unit shall be in accordance with the latest edition of the Mechanical
Refrigeration Code, C.S.A. Standard B52, Provincial and Local Codes, and in accordance with the
local authorities having jurisdiction.
4. The installation of this unit shall be in accordance with all other National, Provincial and Local
Codes, and in accordance with the local authorities having jurisdiction.
In USA:
1. The installation of this unit shall be in accordance with the latest edition of the National Electrical
Code (ANSI/NFPA 70), State and Local Codes and in accordance with the local authorities having
jurisdiction.
2. This unit shall be electrically grounded in accordance with the latest edition of the National
Electrical Code (ANSI/NFPA 70), State and Local Codes and in accordance with the local authorities
having jurisdiction.
3. If the unit has not been provided with an electric disconnect switch, one of adequate ampacity
shall be installed in accordance with Article 430 of the National Electrical Code (ANSI/NFPA 70).
4. The installation of this unit shall be in accordance with the latest edition of the ANSI/ASHRAE
Standard 15 - Safety Code for Mechanical Refrigeration, ANSI/ASME SEC VIII - Boiler and Pressure
Vessel Code, ANSI/ASME B31.S ASME Code for Pressure Piping and Refrigeration Piping, State and
Local Codes and in accordance with the local authorities having jurisdiction.
5. The installation of this unit shall be in accordance with all other National, State and Local Codes,
and in accordance with the local authorities having jurisdiction.
MINIMUM CLEARANCE FOR SERVICE AND TO COMBUSTIBLES IN INCHES (mm)
MODEL
COMBUSTIBLE CLEARANCE
SERVICE CLEARANCE
TOP
FRONT
BACK
SIDE
BOTTOM
SERVICE SIDE
CONTROL
PANEL †
CU
1"(25)
1" (25)
1" (25)
1"(25)
0
36" (915)
42" (1067)
†- As required by the Canadian Electrical Code or the National Electrical Code.
For Safety and Service, the minimum clearances must be observed.

ACU MANUAL
IOM-14 7 of 46 Feb 06 R4
Note:
The minimum clearance for proper air flow is 60” (1500 mm) to obstructions and 96” (2400
mm) to an adjacent condensing unit or air conditioning unit.
QUALIFIED INSTALLER
To complete the installation, an air-conditioning contractor experienced and qualified in system piping is
required. The contractor is responsible for the design, selection and installation of the refrigeration
specialties and refrigerant piping for this equipment. The following information is intended to provide
general information and guidelines for the successful installation of this equipment.
For detailed information about installation practices consult ASHRAE handbooks, ANSI/ASME Codes,
ANSI/ASHRAE Safety Code for Mechanical Refrigeration, CAN/CSA B52 Mechanical Refrigeration Code and
any local authorities having jurisdiction.
NOTE:
Component selection, piping design and installation of the air conditioning system are the
responsibility of the installing contractor. This manual is designed to provide general
guidelines and recommendations only. It is not intended to be a complete manual for air
conditioning design.
COMPONENT LOCATIONS
Consider the issues related to your installation and the relative location of the components.
Locate the condensing unit as close as practical to the evaporator section. Shorter refrigerant piping will
always result in a lower refrigerant charge, greater reliability and longer system life.
Considerations for different arrangements.
Three arrangements are possible:
1. Condensing unit above evaporator
2. Condensing unit is on the same level as evaporator.
3. Condensing unit below evaporator.
1. Condensing Unit Above The Evaporator
In this orientation, the suction gas must travel up a riser to get to the condensing unit. The suction riser
must be correctly sized to ensure proper oil return. Traps are required at the bottom of all risers. Double
risers may be required on systems with tandem compressors or unloaders. Refer to ASHRAE Refrigeration
Handbook for information on double risers.
The liquid line will have a vertical drop in this orientation and gravity will aid in taking the liquid to the
evaporator section. The liquid refrigerant will GAIN pressure at the rate of one half a psig per foot of
vertical drop. If the drop is considerable, this pressure gain may affect the sizing of the TX valve.

ACU MANUAL
IOM-14 8 of 46 Feb 06 R4
2. Condensing Unit At The Same Elevation As The Evaporator.
Select suction and liquid lines from the appropriate tables. Horizontal suction lines should slope down in
the direction of flow with a 1:200 slope.
3. Condensing Unit Located Below The Evaporator.
This arrangement should only be considered when other options are not available.
With the compressor below the evaporator, oil return in the suction line is helped by gravity. Horizontal
runs are sloped down in the direction of flow with a 1:200 slope.
The liquid must travel upwards, and there are several issues that must be addressed. As the liquid travels
upward, it must fight gravity and it will LOSE pressure at the rate of 0.5 psig per vertical foot. Adequate
subcooling is required to counteract the pressure losses due to vertical rise, plus the pressure drop due to
friction losses and accessories. Standard subcooling for most condensing units is 10°F, (5°C).
In the off cycle, all liquid refrigerant in the line will drain down to the condenser by gravity. When the
system restarts, time is required for the liquid refrigerant to fill the liquid line and travel to the TX valve. A
low-pressure control bypass timer may be required, to allow time for liquid to reach the TX valve, and
prevent the system from short-cycling during startup.
An EngA Intercooler (optional) may be installed at the TX valve to improve performance and reduce flash
gas during fluctuating load conditions.
Consider installing an additional liquid line sight glass at the TX valve to ensure that a solid column of liquid
reaches the TX valve. This simple step at installation time can save many hours of troubleshooting if there
is a flash gas issue.
PIPING RECOMMENDATIONS
Underground Piping
Caution:
Underground Piping is not recommended.
Improper installation of a condensing unit with underground piping will result in
equipment failure.
Consult Factory on all systems with underground refrigerant piping.
Underground piping will void compressor warranty unless specifically authorized by the
factory.
In the off cycle, the refrigerant charge will migrate to the coldest location. Typically, ground temperatures
are cooler than air temperatures, and the underground piping becomes the coolest location. In this case
the refrigerant charge will migrate to underground piping.
When the compressor starts, any liquid refrigerant in the suction line will enter the compressor causing
both diluted oil and slugging. Either condition will reduce the life of the compressor.

ACU MANUAL
IOM-14 9 of 46 Feb 06 R4
Suction line accumulators and crankcase heaters are required on all systems with underground piping.
Consult factory for guidance.

ACU MANUAL
IOM-14 10 of 46 Feb 06 R4
PIPING CONNECTION SIZES
Refrigerant piping must be selected to meet the conditions required for your specific installation. The
tubing connection sizes on the condensing unit and/or evaporator may or may not be the correct size for
your specific application.
NOTE:
DO NOT select tubing sizes based on the size of the connection stubs.
The correct tubing size for your installation must be checked and selected for each and every
job.
Traps
It is recommended that traps be installed on all suction or discharge gas risers.
Suction Line
The temperature penalty is a measure of capacity loss due to pressure drop in the tubing. Select the
suction line to have a maximum temperature penalty of 2°F (1°C). Higher temperature penalties will
reduce both system capacity and efficiency. See Refrigeration Table 3.
Use Refrigeration Table 2 Piping Guidelines to select the suction line size. Suction lines are selected at
design load conditions, and must be rechecked at minimum load conditions to ensure oil return. Tandem
compressor systems and systems with unloaders must be re-checked at the unloaded condition to ensure
oil return.
Should a compromise be required between oil return and pressure drop, oil return must always have
priority.
•Slope the suction line down with a 1:200 grade in the direction of flow to help oil return.
•Suction lines should be insulated to prevent unnecessary heat gain.
•Install oil traps at the bottoms of all risers.
Liquid Line
Select the line size using piping tables.
Liquid lines should have a maximum refrigerant velocity of 350 feet per minute (1.78 m/s) to avoid liquid
hammer.
Select pressure drop for a temperature penalty of less than 2°F. (1°C)
If a liquid line travels through a warm area, such as a boiler room, insulate the line to prevent heat gain.
Ensure the temperature penalty does not exceed the subcooling provided by the condensing unit.
A sight glass should be installed at the TX valve to ensure the valve is receiving a solid column of liquid if
adequate subcooling is a concern. An EngA Intercooler may be ordered and installed to help reduce the
effects of inadequate subcooling.

ACU MANUAL
IOM-14 11 of 46 Feb 06 R4
Condensate Line (Systems with Receivers Only)
The condensate line connects the condenser to the liquid receiver. This is perhaps one of the most critical
and misunderstood lines in a system. Condensate lines contain liquid and gas together, and are sized and
installed to provide sewer flow to the receiver.
Size condensate lines for a maximum liquid velocity of 100 FPM (0.4 m/s). This is often the same size as the
discharge line. The condensate must “free drain” to the receiver with no intervening traps. Recommended
slope is 1:50.
REFRIGERATION SPECIALTIES (BY OTHERS)
NOTE:
Refrigerant specialties are selected, supplied and installed by the installing contractor.
Most of these devices have specified directions of flow and may be permanently damaged if
not installed correctly. Always follow the installation instructions provided with the
components.
Service Valves (Recommended)
Service valves should be installed to allow servicing of the equipment. A suction and liquid line service
valve at the condensing unit is considered a minimum requirement.
Sight Glass/Moisture Indicator (Required)
Sight glasses are installed in the liquid line to give a visual indication of the
refrigerant charge. The moisture indicator gives an indication of the moisture
content of the refrigerant.
Liquid Line Filter-Drier (Required)
The filter-drier is installed in the liquid line to filter particulate and foreign matter
from the refrigerant. Filter-driers also absorb small amounts of moisture and acid.
Suction Line Filter (Optional)
A suction line filter is designed to catch any debris from the installation before it enters the compressor.
Suction filters are recommended on all systems with long refrigerant piping runs.
Liquid Line Solenoid Valve (Required)
The liquid line solenoid valve is installed to control liquid refrigerant in the off
cycle. The solenoid valve must be installed close to the TX valve at the evaporator
coil. Several different control methods are used to control liquid line solenoid
valves. See wiring diagram and unit function for details.

ACU MANUAL
IOM-14 12 of 46 Feb 06 R4
Hot Gas Solenoid Valves (Required When Equipped With A Hot Gas Bypass Valve)
Whenever a system is equipped with hot gas bypass valve, a hot gas solenoid valve is required. The valve
will open and close with the liquid line solenoid valve. The hot gas bypass solenoid valve must be installed
at the condensing unit, close to the discharge line tee.
NOTE:
Liquid line solenoid valves must be installed at the evaporator coil, close to the TX valve.
Hot gas solenoid valves must be installed at the condensing unit, close to the discharge line
tee.
Thermostatic Expansion Valve (TX Valve) (Required)
The thermostatic expansion valve is sized to match the capacity of the system. The
TX valve should be balanced or dual ported and must be externally equalized. One
valve is required per distributor. The equalization tube connects to the suction line
at the outlet of the evaporator downstream of the bulb. The TX valve sensing bulb
is installed at the same location tightly strapped to the suction line. Suggested
positioning is at the 4:00 o’clock or 8:00 o’clock position. It is good practice to insulate the TX bulb after
installation.
EngA Intercooler (Optional)
The EngA Intercooler is a small liquid heat exchanger installed
between the TX valve and the distributor. The heat exchanger
provides, “just in time”, subcooling to liquid refrigerant
entering the TX valve. This adds stability to systems that
experience occasional flashing in the liquid line.
TX VALVE
UPFLOW DISTRI BUTOR
SIGHT GLASS
(OPTIONAL)
LIQUID OU T
LIQUID LIN E
SIGHT GLASS
(OPTIONAL)
HOT GAS BY PASS
CONNECTION
(OPTIONAL)
LIQUID IN

ACU MANUAL
IOM-14 13 of 46 Feb 06 R4

ACU MANUAL
IOM-14 14 of 46 Feb 06 R4
Suction Accumulators
Suction accumulators are installed in the suction line close to the
compressor. These devices are designed to trap slugs of liquid
before they can cause damage to the compressor.
Accumulators are REQUIRED on:
1. Systems with multiple DX coils in series. All compressors on
the downstream DX coils require accumulators.
2. Systems with over 75 feet (20m) of piping.
3. All systems that operate below 50°F (10°C) ambient
temperature.
4. All systems with underground piping. (Underground piping
is not recommended, and may void warranty)
Caution:
Consult Factory on all systems with
underground refrigerant piping.
Underground piping will void compressor
warranty unless specifically authorized by
Engineered Air.
Accumulators are STRONGLY RECOMMENDED on:
1. 100% Outside air systems.
2. VAV systems.
3. Process cooling systems that experience rapid load changes.
Condensing units may be ordered with suction accumulators installed at the factory (optional) or they may
be field supplied and installed.
Discharge Holding Tank (Optional)
The Discharge Holding Tank (DHT) is designed to provide additional volume
to the system. The DHT is used when the entire system charge cannot be
held by the condenser. This occurs on split systems with long piping runs
where the pump down charge will not fit into the condenser.
It is installed between the compressor and the condenser to prevent the
liquid refrigerant from filling the discharge line and/or compressor during
the idle state. The DHT is not a receiver.
COMPRESSOR
TO COIL
FROM
DEFLECTOR
INLET
ORIFICE
METERING
SUCTION ACCUMULATOR
FUSIBLE PLUG

ACU MANUAL
IOM-14 15 of 46 Feb 06 R4
Liquid Receivers (Optional)
NOTE:
Liquid receivers MUST NOT be field installed unless the air-cooled condenser has been
specifically designed for use with a receiver.
If receivers are required the condenser coil must be ordered with a “receiver ready”
condenser coil (optional) or a factory installed receiver (optional).
Receivers are designed to hold excess refrigerant on systems that have variable refrigerant charges.
Typical applications are:
1. Systems with reheat coils.
2. Low ambient systems.
3. Systems with long piping runs where the pump down charge will not fit into the condenser.
The refrigerant entering a receiver must be saturated. If subcooled liquid is introduced into a receiver, the
system will experience pressure fluctuations, and will generally operate poorly.
The refrigerant leaving a receiver is saturated; however, subcooling is required to prevent flashing in the
liquid line due to pressure drop or static losses in liquid risers. All required subcooling must be added after
the receiver. Custom condenser coils must be ordered with separate subcooling circuits to allow
subcooling after the receiver.
Hot Gas Bypass (Optional)
NOTE:
Hot gas valves and hot gas solenoid valves must be installed close to the discharge line at the
condensing unit. Valves installed in the wrong location will cause compressor failure and void
warranty.
Hot gas bypass is a method of preventing evaporator frosting under low load conditions. The hot gas
bypass valve allows discharge gas into the low side of the system during low load conditions.
Correctly applied, a hot gas bypass system can reduce compressor cycling and prevent coil frosting during
low load conditions.
Caution:
Hot Gas bypass will cause system problems if it is not designed and piped correctly. If hot
gas bypass piping is oversized, or incorrectly installed, it can trap oil causing compressor
failures.
If the hot gas bypass valves are installed in the wrong location, the hot gas line can fill with
liquid refrigerant. Hot gas bypass piping should be insulated to reduce heat loss.
Two piping methods are acceptable.
1. For systems with short piping runs and operation above 50°F (10°C) ambient. Hot gas is
piped to the suction header at the evaporator coil. The hot gas bypass valve (located at
the condensing unit) can be sized for up to 80% of the unloaded circuit capacity.
2. For low ambient systems, less than 50°F (10°C), or systems with long piping runs, the hot

ACU MANUAL
IOM-14 16 of 46 Feb 06 R4
gas line is piped into the suction line at the compressor. This configuration requires the following
components.
a. Hot gas bypass valve.
b. Hot gas solenoid valve.
c. Desuperheating TX valve.
d. Desuperheating liquid solenoid.
e. Suction accumulator.
Internal hot gas bypass may be ordered as a factory option (recommended) or is field installed as required.
A suction accumulator is recommended to ensure good mixing of the desuperheating liquid and hot gas.
Internal hot gas bypass is limited to a maximum of 50% of the minimum compressor capacity due to oil
return issues in the suction line. Hot gas bypass piping may be sized for a relatively high-pressure drop to
encourage oil return at lower levels of bypass. Suction line velocities must be checked for proper oil
return at low loads with allowances made for the hot gas bypass capacity.
Example: With a 10 ton operating capacity per circuit, if the internal hot gas is bypassing 3 tons, the
capacity flowing through the suction line is:
10 tons –3 tons internal hot gas bypass = 7 tons suction gas line flow.
The suction line must be checked for oil return at 7 tons. If the compressor is equipped with unloaders or
has a tandem compressor set, the unloaded capacity minus the hot gas is checked.
LOW-AMBIENT OPERATION (optional)
Several low-ambient packages are available for cold weather operation. Standard condensing units are
designed for operation above 50°F (10°C) ambient.
Above 20°F (-7°C) Package
This package will have condenser fan motors operating at extended pressures. An Engineered Air
Intercooler is included, and is installed between the TX valve and the distributor to allow ‘just in time’
subcooling at the evaporator.
All Ambient -40°F (-40°C) Package
The minus forty system is equipped with a flooded condenser style of head pressure control. The package
will include head pressure valves, receivers and all required controls.
Piping For Low Ambient Systems
There are several concerns that must be addressed when piping low ambient systems.
•Hot gas bypass is not recommended. If hot gas bypass is used, it must be piped internal to the
condensing unit with an accumulator and desuperheating valve.
•The maximum amount of hot gas to be bypassed is 50% of the compressor unloaded capacity.
•Keep the overall length of outdoor suction piping to a minimum. When the ambient temperature is
colder than the saturated suction temperature (most of the winter), gas in the suction line may be
cooled and condense to a liquid before entering the compressor. Suction accumulators are required.
•All exposed refrigerant piping must be insulated.

ACU MANUAL
IOM-14 17 of 46 Feb 06 R4
PIPE SELECTION PROCEDURE
NOTE:
Distances shown on piping selection tables are for EQUIVALENT LENGTH. Equivalent length is
the actual distance PLUS allowance for fittings. Typically fittings will increase the “actual
length”by 50% to 100%.
1. Record the actual distance the piping must be run to connect the components. Refer to Submittal
Record for maximum allowed line length. If exceeded, please contact an Engineered Air office.
2. Determine the number of fittings required. Include all fittings required for traps etc.
3. Estimate an equivalent length by doubling the actual length of tubing.
4. Select a preliminary tubing size from Table 2.
5. Lookup the equivalent length of the fittings for this tubing size from Table 1.
6. Add the equivalent length of the fittings to the actual length of tubing to calculate the total
equivalent length of the tubing.
7. If the calculated length is substantially different from the estimated length (item 3) Reselect the
tubing size from Table 2. Use this value and repeat steps 5, 6 and 7.
Example:
A CU-212 with two 10.5-ton circuits is to be installed on a mall. Each circuit has 25 feet of horizontal run,
10-feet of vertical rise, 15 elbows and an angle service valve. Select a suction line and a liquid line for
each circuit.
Solution:
The capacity of each circuit is 10.5 tons.
Suction line selection
1. The system has 35 feet of actual piping run.
2. An initial estimate would be 70 feet of equivalent length (2 x 35ft.).
3. From Table 2 (R407c), select the closest length for the selection. (50 feet). Choose 1 3/8” tubing
(10 ton 50 feet Equivalent length).
4. Number of fittings is given at 15 elbows, 1 angle valve
5. From Table 1 determine equivalent length (EL) of fittings.
+ (15) long radius elbows at EL = 2.3 ft. each
+ (1) angle valve EL = 15 ft. each
6. Calculate equivalent length.
35 feet actual + (15 x 2.3 = 34.5 feet elbows) + (15 ft angle valve) = 84.5 feet.
7. This length is closer to 100 feet than the original 50 feet used for the first estimate. RESELECT from
table 2 (R407c). Using 100 Feet equivalent length.
8. Reselect at 100 feet. Choose 1 5/8 …new EL = (35 + (15 x 2.6) + 18) = 92 feet. (This is closer to the
100 feet the table used.)
9. Use: 1 5/8” tubing for the suction line.
Liquid line selection
1. Estimate 70 feet of EL; Select 5/8” from table 1. (the closest length is 50’) Calculate actual EL = 35 ft +
(15 x 1.0) + 7 ft. = 57 feet actual equivalent length. This is close to the length initially estimated.
2. Check the 100-foot column, the tube size is the same.
3. Use: 5/8” for liquid.
The piping selections for this CUB-212 example would be:

ACU MANUAL
IOM-14 18 of 46 Feb 06 R4
Suction line 1 5/8” Liquid line 5/8”
Refrigeration Table 1 Equivalent Length.
ACR (OD)
Approximate pressure loss of fittings
(equivalent feet of tubing)
Tubing
Size
90°
Std
90°
Long
Radius
90°
Street
45°
Std
Return
Bend
Tee
Branch
Flow
Tee
Straight
Through
Ball
Valve
Globe
Valve
Angle
Valve
1/2" OD
1.4
0.9
2.3
0.7
2.3
2.7
0.9
0.9
17
6
5/8” OD
1.6
1.0
2.5
0.8
2.5
3.0
1.0
1.0
18
7
7/8” OD
2.0
1.4
3.2
0.9
3.2
4.0
1.4
1.4
22
9
1 1/8” OD
2.6
1.7
4.1
1.3
4.1
5.0
1.7
1.7
29
12
1 3/8” OD
3.3
2.3
5.6
1.7
5.6
7.0
2.3
2.3
38
15
1 5/8” OD
4.0
2.6
6.3
2.1
6.3
8.0
2.6
2.6
43
18
2 1/8” OD
5.0
3.3
8.2
2.6
8.2
10.0
3.3
3.3
55
24
2 5/8” OD
6.0
4.1
10.0
3.2
10.0
12.0
4.1
4.1
69
29

ACU MANUAL
IOM-14 19 of 46 Feb 06 R4
Refrigeration Table 2 (R407c) Piping Guidelines for Normal Air Conditioning Duty.
R-22 / 407C
Net
Evaporator
Capacity
Equivalent Length
(Actual length plus fittings and valves)
Maximum
Riser Size
Tons
Line
30 feet
50 feet
100 feet
150 feet
3 tons
Suction
3/4” (7/8”)
7/8"
1 1/8”
1 1/8”
1 1/8"
Discharge
1/2"
5/8"
5/8"
3/4"
7/8"
Liquid
3/8"
3/8”
1/2"
1/2"
Condensate
5/8"
5/8"
4 tons
Suction
7/8"
7/8"
1 1/8”
1 1/8”
1 3/8"
Discharge
5/8"
5/8"
3/4” (7/8”)
7/8"
1 1/8"
Liquid
1/2”
1/2”
1/2"
1/2"
Condensate
5/8"
5/8"
5 tons
Suction
7/8"
1 1/8"
1 1/8"
1 3/8"
1 3/8"
Discharge
5/8"
3/4” (7/8”)
7/8"
7/8"
1 1/8"
Liquid
1/2"
1/2"
1/2"
5/8”
Condensate
3/4” (7/8”)
3/4” (7/8”)
7.5 tons
Suction
1 1/8"
1 1/8"
1 3/8"
1 3/8"
1 5/8"
Discharge
3/4” (7/8”)
7/8"
7/8"
1 1/8"
1 3/8"
Liquid
1/2"
5/8"
5/8"
5/8"
Condensate
7/8”
7/8”
10 tons
Suction
1 1/8"
1 3/8"
1 5/8"
1 5/8"
1 5/8"
Discharge
7/8"
7/8"
1 1/8"
1 1/8"
1 5/8"
Liquid
5/8"
5/8"
5/8"
3/4” (7/8”)
Condensate
1 1/8”
1 1/8”
12.5 tons
Suction
1 3/8"
1 3/8"
1 5/8"
2 1/8"
2 1/8"
Discharge
7/8"
7/8"
1 1/8"
1 1/8"
1 5/8"
Liquid
5/8”
5/8"
3/4” (7/8”)
3/4” (7/8”)
Condensate
1 1/8"
1 1/8"
15 tons
Suction
1 3/8"
1 5/8"
1 5/8"
2 1/8"
2 1/8"
Discharge
7/8"
1 1/8"
1 1/8"
1 3/8"
1 5/8"
Liquid
3/4” (7/8”)
3/4” (7/8”)
3/4” (7/8”)
7/8"
Condensate
1 1/8"
1 1/8"
20 tons
Suction
1 5/8"
1 5/8"
2 1/8"
2 1/8"
2 5/8"
Discharge
1 1/8"
1 1/8"
1 3/8"
1 3/8"
2 1/8"
Liquid
7/8"
7/8"
7/8"
7/8"
Condensate
1 3/8"
1 3/8"

ACU MANUAL
IOM-14 20 of 46 Feb 06 R4
Refrigeration Table 2 (R410a) Piping Guidelines for Normal Air Conditioning Duty.
R410a
Net
Evaporator
Capacity
Equivalent Length
(Actual length plus fittings and valves)
Maximum
Riser Size
Tons
Line
30 feet
50 feet
100 feet
150 feet
3 tons
Suction
3/4” (7/8”)
3/4” (7/8”)
7/8”
7/8”
7/8"
Discharge
1/2"
1/2"
5/8"
5/8"
5/8"
Liquid
3/8"
3/8”
1/2"
1/2"
Condensate
5/8"
5/8"
4 tons
Suction
3/4” (7/8”)
7/8"
7/8”
1 1/8”
7/8"
Discharge
1/2"
5/8"
5/8”
3/4” (7/8”)
5/8"
Liquid
3/8"
1/2”
1/2"
1/2"
Condensate
5/8"
5/8"
5 tons
Suction
7/8"
7/8"
1 1/8"
1 1/8"
1 1/8"
Discharge
5/8"
5/8”
3/4” (7/8”)
3/4” (7/8”)
5/8"
Liquid
1/2"
1/2"
1/2"
1/2”
Condensate
3/4” (7/8”)
3/4” (7/8”)
7.5 tons
Suction
7/8"
1 1/8"
1 1/8"
1 3/8"
1 3/8"
Discharge
5/8"
3/4” (7/8”)
7/8"
7/8"
3/4” (7/8”)
Liquid
1/2"
1/2"
1/2"
5/8"
Condensate
7/8”
7/8”
10 tons
Suction
1 1/8"
1 1/8"
1 3/8"
1 3/8"
1 3/8"
Discharge
3/4” (7/8”)
3/4” (7/8”)
7/8"
7/8"
7/8"
Liquid
5/8"
5/8"
5/8"
5/8”
Condensate
1 1/8”
1 1/8”
12.5 tons
Suction
1 1/8"
1 3/8"
1 3/8"
1 5/8"
1 5/8"
Discharge
7/8"
7/8"
7/8"
1 1/8"
7/8"
Liquid
5/8”
5/8"
5/8”
5/8”
Condensate
1 1/8"
1 1/8"
15 tons
Suction
1 3/8"
1 3/8"
1 5/8"
1 5/8"
1 5/8"
Discharge
7/8"
7/8"
1 1/8"
1 1/8"
1 1/8"
Liquid
3/4” (7/8”)
3/4” (7/8”)
3/4” (7/8”)
7/8"
Condensate
1 3/8"
1 3/8"
20 tons
Suction
1 3/8"
1 3/8"
1 5/8"
2 1/8"
1 5/8"
Discharge
7/8"
1 1/8"
1 1/8"
1 1/8"
1 1/8"
Liquid
7/8”
7/8”
7/8”
7/8”
Condensate
1 3/8”
1 3/8”
Table of contents
Popular Heat Pump manuals by other brands

Water Furnace
Water Furnace 700A11 installation manual

Little Giant
Little Giant EC-250 quick start guide

Zodiac
Zodiac Edenpac 2 manual

Carrier
Carrier 50ET Installation, Start-Up and Service Instructions

Daikin
Daikin ELSH12P30E installation manual

Dimplex
Dimplex WIH 120TU Installation and operating instruction

STIEBEL ELTRON
STIEBEL ELTRON WPL 13 basic Operation and installation

Mitsubishi Heavy Industries
Mitsubishi Heavy Industries ESA30EH2 Series user manual

Dimplex
Dimplex LI 11TES Installation and operating instructions

DeDietrich
DeDietrich AWHP-2 MIT-IN-2 iSystem Installation and service manual

Kaysun
Kaysun Aquantia KHPMS-BI Series Installation & owner's manual

Daikin
Daikin UATYQ-AFC3Y1 Installation, Use and Maintenance Instruction