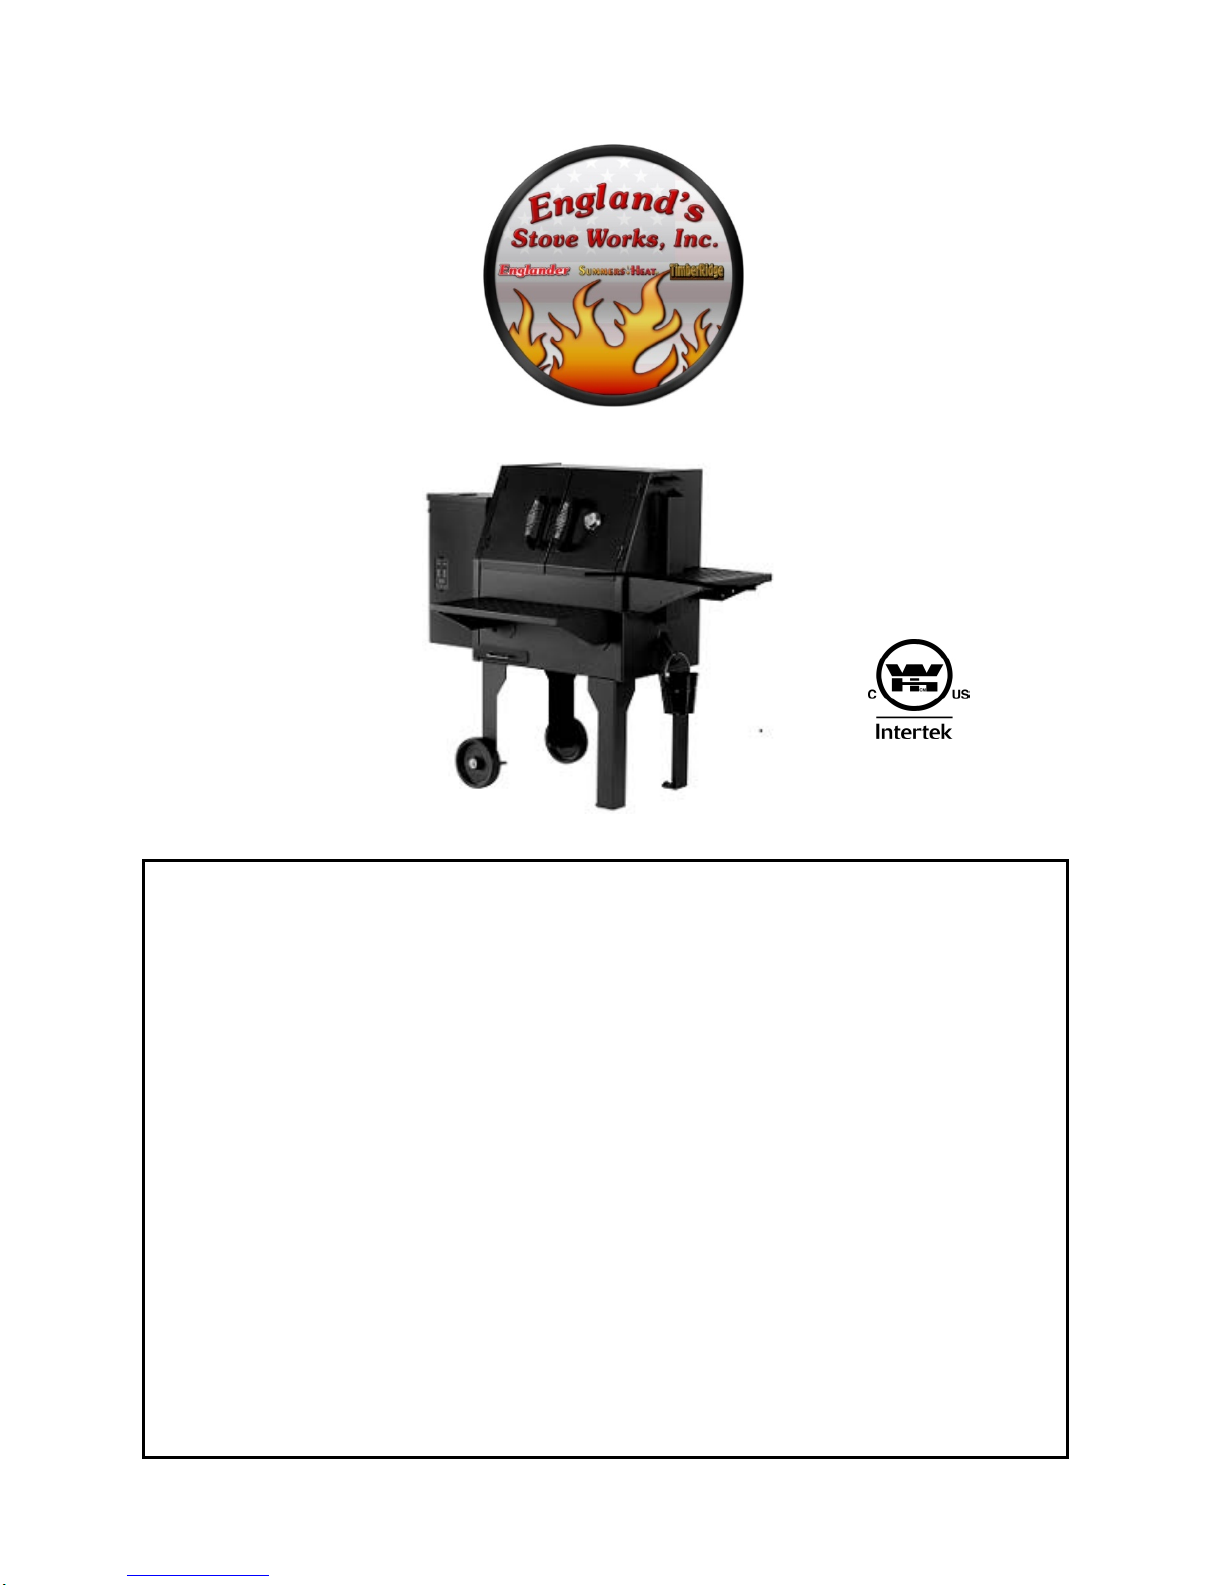
England's Stove Works 21-PG100 User manual

1
ManufacturedBy:
England’sStoveWorks,Inc.
POBox206
Monroe,VA24574
REV.2/27/2013
CAUTION
PLEASEREADTHISENTIREMANUALBEFOREINSTALLATIONAND
OPERATIONOFTHISPELLETFUEL‐BURNINGCOOKINGAPPLIANCE.KEEP
CHILDREN,FURNITURE,FIXTURESANDALLCOMBUSTIBLESAWAYFROM
COOKINGAPPLIANCE.CONTACTLOCALBUILDINGORFIREOFFICIALSABOUT
RESTRICTIONSANDINSTALLATIONINSPECTIONREQUIREMENTSINYOUR
AREA.
FAILURETOFOLLOWTHESEINSTRUCTIONSCANRESULTINPROPERTY
DAMAGE,BODILYINJURYOREVENDEATH.ENGLAND’SSTOVEWORKSINC.
WILLNOTBEHELDRESPONSIBLEFORCARELESSANDDANGEROUS
OPERATIONOFTHISUNIT.ALLWARRANTIESARENULLANDVOIDIFTHE
PRACTICESDESCRIBEDINTHEOPERATOR’SMANUALARENOTFOLLOWED.
AMAJORCAUSEOFFIRESISFAILURETOMAINTAINREQUIRED
CLEARANCES(AIRSPACES)TOCOMBUSTIBLEMATERIALS.ITISOFUTMOST
IMPORTANCETHATTHISPRODUCTBEINSTALLEDONLYINACCORDANCE
WITHTHESEINSTRUCTIONS.
SAVETHESEINSTRUCTIONS.
21-PG100
51-SHPG100
51-TRPG100

2
IMPORTANT:IFYOUHAVEAPROBLEMWITHTHISUNIT,DO
NOTRETURNITTOTHEDEALER.CONTACTTECHNICAL
SUPPORT@1‐800‐245‐6489.
Retainforyourfiles
ModelNumber________________________
DateofPurchase____________________
DateofManufacture___________________
SerialNumber________________________
*Thisinformationcanbefoundonthesafetytagattachedtotheinsideofthe
hopperlid.Havethisinformationonhandifyouphonethefactoryoryourdealer
regardingthisproduct.*
CAUTION
Keepchildrenaway.
Supervisechildrenwhileapplianceisinuse.
Alertchildrenandadultstothehazardsofhightemperatures.
DoNOToperatewithprotectivebarriersopenorremoved.
Hotwhileinoperation!Keepclothing,furniture,andother
combustiblesaway.Contactmaycauseskinburns!
Thisgrillisintendedforuseasafoodsmoker,barbequeandgrill.
Itisnotintendedforanyusenotspecificallydescribedinthis
manual.Misuseofthisgrillcanresultinseriousproperty
damage,bodilyinjuryorevendeath.
UseONLYfood‐gradewoodpelletswiththisunit.
DONOTUSEGASOLINE,GASOLINETYPELANTERNFUEL,KEROSENE,
CHARCOALLIGHTERFLUID,ORSIMILARLIQUIDSTOSTARTOR
FRESHENUPAFIREINTHISAPPLIANCE.KEEPALLSUCHLIQUIDS
WELLAWAYFROMTHEAPPLIANCEWHENINUSE.

3
Introduction
Introduction...................................4
Warning
Warning.........................................5
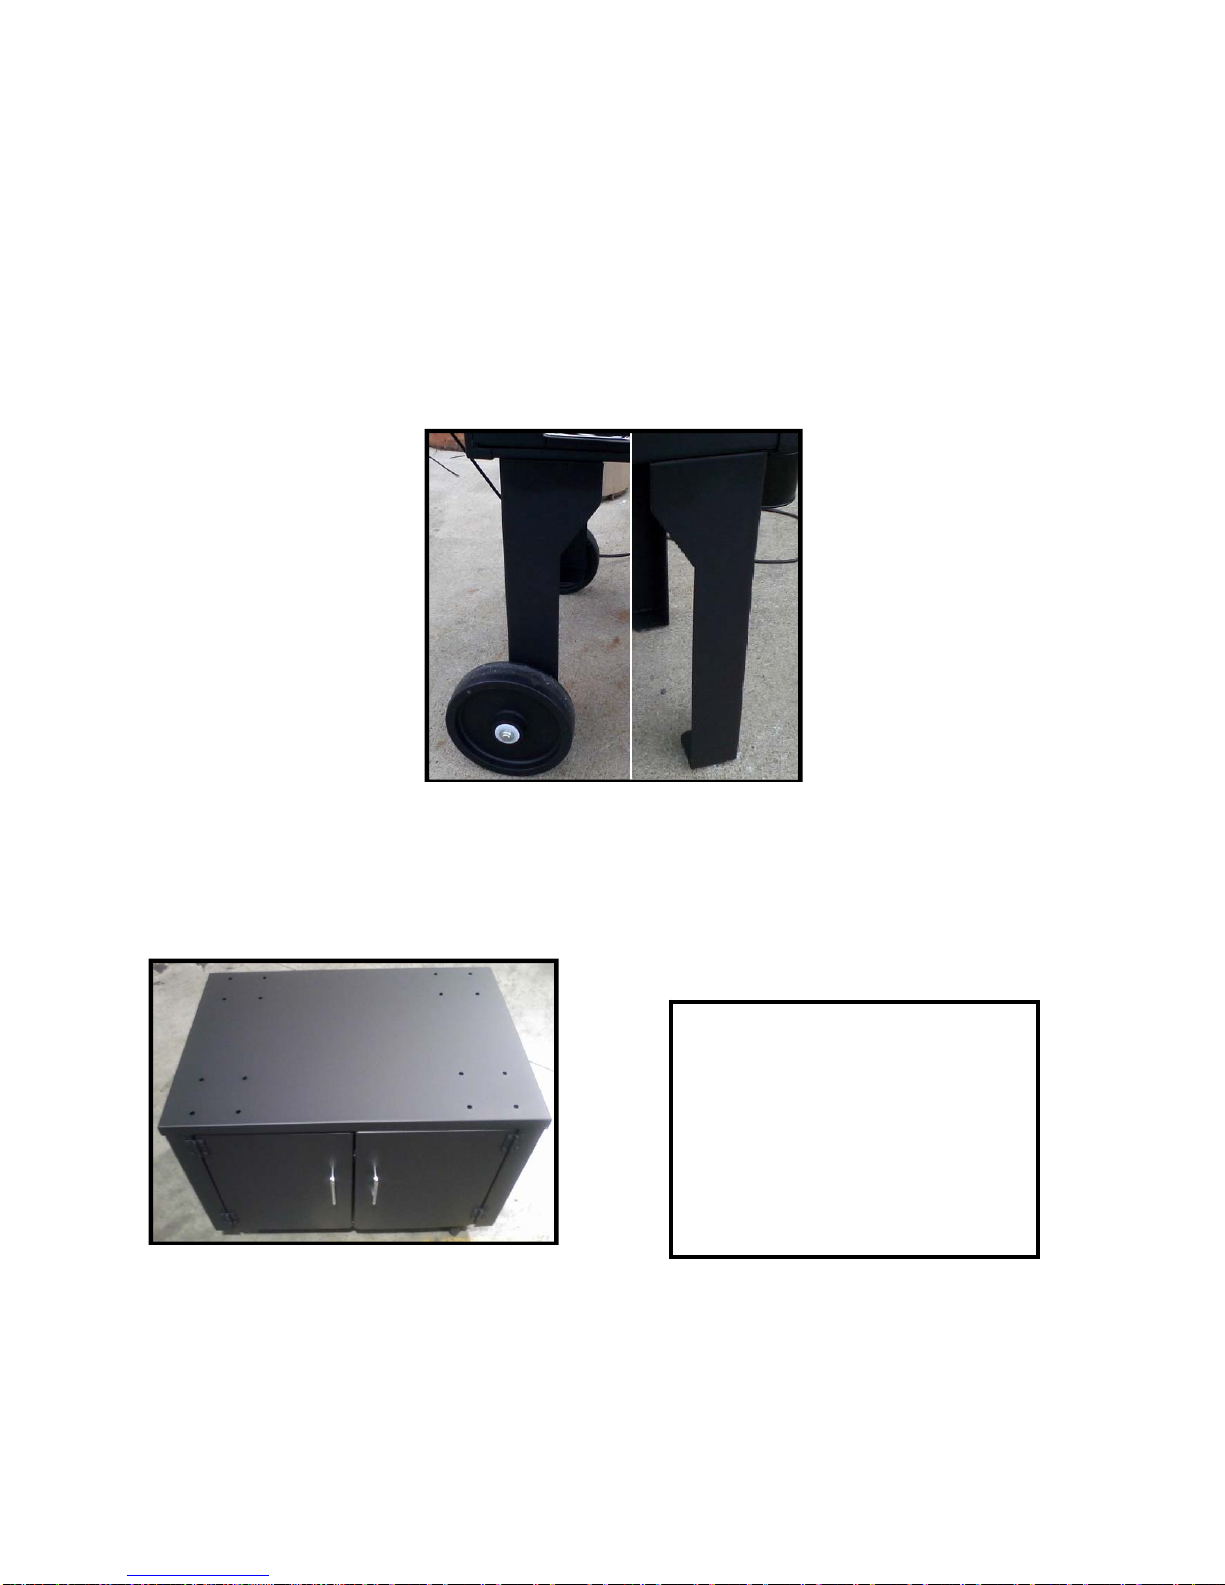
Assembly
Assembly...................................6-7
Getting Started
Starting your grill..........................8
Manual start-up.............................8
Shut-down.....................................8
Grill Operation
Pre heat..........................................9
Cook mode....................................9
Smoking........................................9
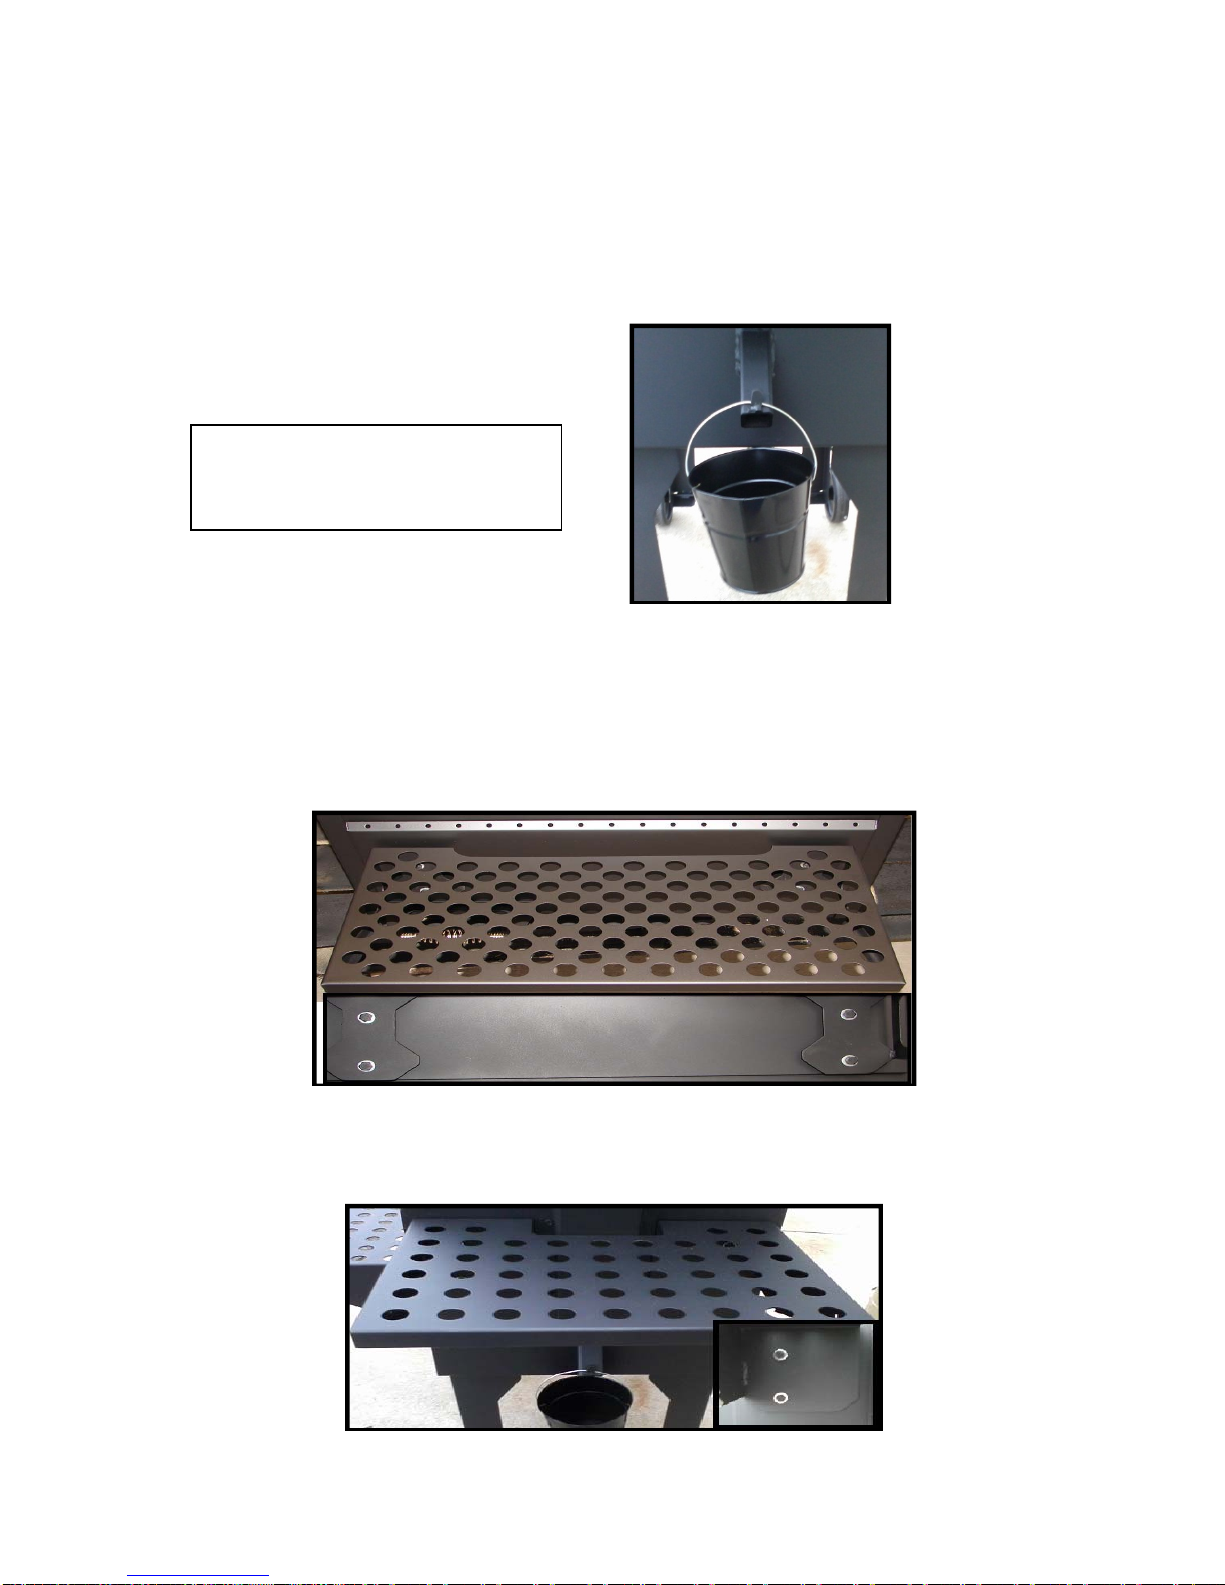
Grill Maintenance
Painted steel surfaces..................10
Burn pot and igniter....................10
Drip pan ......................................10
Grease bucket..............................10
Combustion chamber..................10
Flame deflector ...........................11
Grill interior................................11
Steel grates..................................11
Cast iron grate.............................11
Door thermometer.......................11
Grill thermocouple......................11
Disposal of ashes.........................11
Hopper and auger........................12
Exhaust hood and chamber.........12
Ash pan .......................................12
Pellet Maintenance
Pellet maintenance......................12
Cooking and Food Safety Tips
Cooking and food safety tips ......13
Recommended Smoking Temperatures
Smoking temperatures ................13
Grilling Meat Temperatures
Grilling meat temperatures .........14
Component Replacement
Cover panel.................................15
Combustion fan...........................15
Hopper lid safety switch .............15
Auger motor/Auger...............15-16
Hopper lid latches.......................16
Door thermometer.......................17
Thermocouple.............................17
Exhaust hood and chamber.........17
Burn pot ......................................18
Igniter..........................................18
Control board..............................18
Trouble Shooting
Trouble shooting.........................19
Wiring Diagram
Wiring diagram...........................20
Control Board Layout
Control board layout...................21
Exploded Diagram
Exploded diagram.......................22
Optional Parts
Optional parts..............................22
Replacement Parts
Replacement parts.................22-23
Warranty
Warranty details....................24-25
Serial Tag Sample
Serial tag sample.........................26
Warranty Registration
Warranty registration..................27
TABLEOFCONTENTS

4
INTRODUCTION
ThankyouforpurchasingthisfineproductfromEngland’sStoveWorks!
England’sStoveWorkswasstarted,andisstillowned,byafamilythat
believesstronglyina“DoItYourself”spirit;that’sonereasonyou
foundthisproductatyourfavorite“DoItYourself”store.
Weintentionallydesignedourpelletgrillssothatanyhomeownercan
maintaintheirunitwithbasictools.We’realwaysmorethanhappyto
showyouhowtodothejobaseasilyandasinexpensivelyaspossible.
Whileremainingsimple,ourgrillsaredesignedtoperformextremely
easilyandefficiently,helpingdeliveramoreenjoyablecooking
experience.
PleaselookatourvastHelpSectiononourwebsite
(www.pelletgrillsusa.com)andcallourTechnicalSupportDepartment
at(800)245‐6489ifyouneedanyhelpwithyourunit.Wearenearly
alwaysableto“walkyouthrough”anyrepairs,problemsorother
questionsthatyoumayhave.
Wishingyouyearsofenjoyable,qualityandsafecooking,
EVERYONEATENGLAND’SSTOVEWORKS!
PleaseNote:Whileinformationobtainedfromourwebsiteand
throughourTechnicalSupportlineisalwaysfreeofcharge,therewill
beaservicechargeincurredwithany“on‐site”repairsor
maintenancethatwemayarrange.

5
WARNING
Foroutdooruseonly.Donotuseinanyenclosedarea.Donotinstallundera
combustibleceilingoroverhang.
Keepgrill12inches(ormore)onthefrontandsides,18inches(ormore)inthe
rearfromanycombustiblesurface.
Topreventgreasefires,besuretocleanyourgrillonaregularbasis‐this
includestheflamedeflectorandashpan.Ifagreasefireshouldoccur,pressthe
OFFbuttononthecontrolboardandleavethedoorscloseduntilthefireisout.
DONOTunplugthegrillunlessabsolutelynecessary.Thecombustionfanwill
continuetorunfor5minutesaftertheOFFbuttonhasbeenpressed.
Donotputanythingflammablenearthegrill.Thisincludesbutisnotlimitedto:
gasoline,gascontainers,gasoline‐typelanternfuel,kerosene,propanetanks,
andcharcoal,charcoallighterfluid,lighters,butane,etc.
Donotleavefoodcontainers,plates,etc.onornearthegrill.
Alwaysoperatethegrillwithbothdoorsclosed.
Regularlycheckyourburnpotforobstructionsoranyashblockagesthatcould
preventproperairflowtothefire.RefertotheMaintenanceSectioninthis
manualforcleaningprocedures.
Donotuselavarocks,charcoaloranytypeofwoodchipsinyourgrill.
YourgrillshouldbepluggedintoaGFCI(Ground‐FaultCircuitInterrupt)outlet.
DONOTPLUGTHISUNITUPTOANEXTENSIONCORDTHATISNOTRATEDFOR
OUTDOORUSE,ORTHATISLONGERTHANFIVEFEET(5’).
Itisrecommendedthatyouunplugtheunitwhennotinuse.
Surfacetemperatureswillbeextremelyhot;werecommendtheuseofheat
resistantgloveswhenoperatingthisunit.
Donotattempttomovethegrillwhileoperating,orwhilethegrillisstillhot.
Makesurethefireisout,andthatthegrillhascooledbeforemovingor
transportingthegrill.
UseONLYfood‐gradewoodpelletsintheoperationofthisgrill(werecommend
usingflavoredpelletsfromEngland’sStoveWorks,Inc.).
NEVERputyourfingersneartheauger,evenifitisnotrotating.

6
ASSEMBLY
Whenyoureceiveyourgrill,afewpartswillneedtobeassembledbeforeyoubeginusingyour
appliance.First,removeyourmanual,drippan,thefrontandsideshelves,andthelegs.Allof
thehardwareforattachingthesewillbeincludedinthemanualpacket.Youwillneeda½”
sockettoattachtheshelves.
Thelongershelfandheatshieldmustbeattachedtothefourholesinthefrontofthegrill.
Beforetryingtoinstallthelegs/frontshelf,laythegrillonitsback.(Thiswillallowforeasier
assembly.)Firstplacetheheatshield,withtheholeslinedup,onthefrontsideofthegrill.
Thenplacetheshelfontopoftheheatshieldwiththeholesintheshelflinedupwiththe
shield.Theninsertthefour½boltsandwashersinthefourholesandtightenusinga½”
wrench/socket.
Theshortersideshelfattachestothefourholesinthesideofthegrill.Whileholdingupthe
shelf,insertandtightenthefourwashersandbolts,usinga½”socket.(Incaseoftheneedto
replacethispart,usethereverseofthisprocedure.)
Thegreasebucketwillhangjustto
thebottomrightofthegrill,on
thedraintube.

7
ASSEMBLY,CONTINUED
Toinstallthelegs,firstplacethebackofthegrillflatontheground.Eachlegattachestofour
holesinthebottomofthegrill.Whileholdingeachleg,insertandtightenthefourwashers
andbolts,usinga½”socket.(Incaseoftheneedtoreplacethispart,usethereverseofthis
procedure.)
Ifusingtheoptionalcabinet,thelegswillnotbeneeded.
Optionalcabinetinstallation:Theboltsthatareintendedforthelegswillbeusedforthe
optionalcabinet.Placethemainbodyofthegrillontothecabinetandinstallthewashersand
boltsintotheholesinthebottomofthegrill,usinga½”socket.*Thecabinetwillneedtobe
assembledfirst;thoseinstructionswillbeincludedwiththecabinet.
Thegrill’sdoorthermometerwillalsoneedtobeinstalled.Puttheprobeendof
thethermometerintheholeintherightsidedoor,andputthewingnutonand
tightenbyhand.
WARNING:NO
COMBUSTIBLESSHOULDBE
PLACEDINTHISOPTIONAL
CABINET.DOINGSOCOULD
CAUSEAFIREOR
EXPLOSIONRESULTINGIN
INJURYORDEATH.

8
GETTINGSTARTED
StartingyourGrill
Beforecookingonyourgrillforthefirsttime,werecommendthatyouallowthegrillto“cure.”
Theprocessofcuringthegrillwillallowanypaintandoilsfromthemanufacturingprocessto
burnoff.Addpelletstothehopper,thencloseandlatchthelid.(Thegrillwillnotfeedpellets
withthehopperlidopen.)PlugthepowercordintoaGFCIoutlet.PresstheONbuttononthe
controlboard,andusetheheatrangearrowtoselectthedesiredcookingtemperature.We
recommendfiringyourgrillto450Fandrunningthegrillforatleast30minuteswiththefront
doorsclosed.Afterrunningthegrillforatleast30minutes,presstheOFFbuttonandallowthe
grillandtheinsidegratestocool.Oncethegrateshavecooled,removethem,washwithhot
soapywaterandrinsethemthoroughly.Wipethegratesdown(orallowthemtoairdry)and
placethembackintothestove.Youarenowreadytocookonyourgrill.
DAILYOPERATION:Duringsubsequentstartupsafterthefirstfire,itisrecommendedthatyou
openbothdoorsforatleastfiveminutesduringstartuptoallowtheinitialsmoketodissipate
quicker.Oncethegrillhasstarted,closebothdoorsandthenallowthegrilltoreachthe
temperaturethatwasselectedbeforecooking.Untilthegrillhasignited,youwillseethelights
under“Igniter”and“Auger”illuminating.Oncethegrillhasignitedandtheigniterhasturned
off,theredlightwillnolongerilluminateunderthe“Igniter”display.The“Auger”lightwill
illuminategreeneverytimetheaugerisrunningduringacycle.Asmentionedinthe“Cooking
andFoodSafetyTips”section,usecookingoilsonthecastgratetopreventfoodsticking,
especiallyduringthefirstfewtimesyouuseyourgrill.
ManualStart‐up
Intheeventyourignitershouldfail,youmaystartyourgrillmanually.
Removethecastirongrateandflamedeflector(ontheleft,“direct”side).Checktobesurethe
burnpotisfreeandclearofanyashordebris.Placeasmallhandfulofpelletsinthebottomof
theburnpot.Werecommendaddingasmallamountofpelletstartergel,thenusingamatch,
lighterorpropanetorchtostartthefire.Oncethefirehasstartedtoburn,useheatresistant
glovesorovenmittstoputtheflamedefectorandcastirongratebackinplace,closethefront
doorsandpresstheONbutton.Selectthedesiredtemperatureandthegrillwillbegintofeed
pelletsnormally.
Shut‐Down
WhenyouarefinishedusingyourgrillyoumaypresstheOFFbuttononthecontrolboard.The
boardwillthendisplay“SHD”forshutdown.Thiswillcausetheaugertostopfeedingpellets,
andthecombustionblowerwillcontinuetorunforaperiodof5minutes.Thiswillhelpthe
remainingfuelintheburnpottoextinguishandburnout.Thisprocesswillalsohelpkeepthe
burnpotcleanerbetweenuses.Openyourdoorstoallowtheheattodissipateduring
shutdown.Makesurethegrilliscoolbeforecovering.

9
GRILLOPERATION
Pre‐Heat
“Pre‐Heat”isthestartingstageofcookingorsmokingwherethepelletfuelisfired,andthegrill
comestothesettemperaturequickly.Itcantakethegrillupto30‐45minutestocompletely
pre‐heat.*Thistimemaybelongerifyouoperateyourgrillduringthecoldermonths.
CookMode
DuringCookmode,thegrillwillmaintainthetemperatureselectedontheheatrange.Itis
normaltoseesomefluctuationupanddownofthetemperature.NOTE:Whenadding,
adjusting,orremovingfood,youmayseealargerdecreaseintemperature,butoncethedoors
areclosedagainthegrillshouldreturntosettemperature.
*Thecastgratetemperature(ontheleft,“direct”side)is100‐200degreeshotterthanthe
temperatureontheright,“indirect”side,wherethedoorthermometerislocated.Pleasebe
awarethatwhengrillingonthecastgrate,thetemperaturewillbehotterthanthedoor
thermometerindicates.Thisisapositivefeature,sinceyouwillbeabletoachievetemperatures
inexcessof600degreesforcookingsteak,etc.
Smoking
Yourgrillhasbeendesignedtoserveasanexcellentsmokeraswellasabarbecuegrill.Setting
thecontrolboardheatrangetolowertemperaturesisperfectforlong(i.e.overnight)smoking.
Thetemperatureselectedwilldependonwhatfoodsarebeingsmoked.Recommended
temperaturesfordifferentmeatsarediscussedlaterinthismanual.Differentvarietiesoffood‐
gradeflavoredpelletsmayalsobeexperimentedwith,toaccommodatedifferenttastes.Please
notethat(ingeneral)thelowerthetemperaturesetting,themoresmokethegrillwillproduce.
CAUTION:Alwaysuseameatthermometertoensuremeatsandpoultryhavebeencooked
toasafeinternaltemperature.Serioushealthrisksmayoccurwhenconsumingundercooked
meat.Werecommendusingagoodqualityprobe‐typethermometerforthemostaccurate
results.
CAUTION:Wedonotrecommendusingyourgrillasasmokerwhenoutsidetemperatures
arecoldandwindy.Atsmokingtemperatureslessthan225F,thechanceofcreosoteforming
fromsmokecondensationcouldbepossible.Also,whenoperatingduringhotweather(90
degreesorabove),itmaybehardertomaintainlowgrilltemperatures(200degreesorlower).
Creosote–Formationandneedforremoval:Whenwoodpelletsareburnedslowly,they
producetarandotherorganicvaporsthatcombinewithexpelledmoisturetoformcreosote.
Thecreosotevaporscondenseintherelativelycoolovenflueandexhausthoodofaslow
burningfire.Asaresult,creosoteresidueaccumulatesontheflueliningandexhausthood.If
ignited,thiscreosotemakesanextremelyhotfire.Whengreaseorcreosotehasaccumulated,
theyshouldberemovedtoreducetheriskoffire.
*Thereisriskofseriousinjuryordeathiftheunitisover‐fired.Ifoperatedandmaintained
properly,theunitshouldnotover‐fire.Anyselfmodificationtotheunitcouldcauseitto
over‐fire,andalsovoidsanywarranty.*

10
GRILLMAINTENANCE
BEFOREPERFORMINGANYMAINTENANCE,BESURETHEGRILLISCOMPLETELYCOOLED.ITIS
ALWAYSASAFEPRACTICETOUSEHEATRESISTANTGLOVESWHENHANDLING
SURFACES/OBJECTSTHATMAYSTILLBEHOT.
*SEE‘COMPONENTREPLACEMENT’AND‘EXPLODEDDIAGRAM’PAGESTOREFERENCETHE
LOCATIONOFTHESEPARTS
PaintedSteelSurfaces
Althoughyourgrillispaintedwithverydurablehightemperaturepaint,alwaysattempttokeep
dirtanddustofftheoutsideofthegrillbeforecooking.Dustordirtcouldbecookedintothe
metal,causingthepainttodiscolor.Thesurfacecanbecleanedwithhotwaterandamild
detergentmix.Toprolongthelifeofthepaint,agrillcoverisrecommended.Beforecovering,
makesurethegrillhascompletelycooled‐coveringwhilestillwarmcancausecondensation
underthecovering,leadingtoprematurerusting.
BurnPotandIgniter
Theburnpotairholesshouldberegularlycheckedforanyblockagesorbuildup.Theburnpot
canbecleanedusingascraper,puttyknife,orawirebrushtocleananybuilduporblockages.
Theignitershouldalsobecheckedforbuildup.Continuedburningwithbuildupontheigniter
orintheburnpotcouldcauseabnormalsmoking,delayedfiringofthegrill,andpossible
injury(andcouldshortenthelifeoftheigniter).
Drippan
Liningthedrippan(locatedontheright,“indirect”side)withaluminumfoilwillgreatlyreduce
theamountofcleaningofthedrippan.However,ifcleaningisnecessary,itcanbedonewith
hot,soapywateroracleaningdegreaser.Thisshouldbeinspectedatleasttwiceayearto
determinewhengreaseand/orcreosotebuilduphasoccurred.
GreaseBucket
Excessgreasefromcookingwilltraveldownthedrippananddraintube,andcollectinabucket
onthebottomrightsideofthegrill.Thisshouldbecheckedanddumpedregularlytoavoid
spillageontoyourdeck(orothersurface)thatcouldcausestains,attractinsectsorcause
unwantedsmells,etc.Alsocheckthedraintubeforbuildupandcleanifnecessary.
CombustionChamber
Duetothefactthatthecombustionfanforcesairintotheburnpot,theareaaroundthefan
staysrelativelycleananddoesnotrequiremuchmaintenance.Itisgoodpracticeto
occasionallyvacuumorbrushthisareaout,tocleananyashorburnpotdebristhatmayhave
fallenthrough.

11
GRILLMAINTENANCE,CONTINUED
FlameDeflector
Theflamedeflectorislocatedontheleft“direct”heatingside,underthecastirongrate.Itis
recommendedthatyouremoveanyfoodorgreasebuildupthatmayaccumulatewhencooking
onthedirectside.Also,regularlyremovetheflamedeflectorandcleanitwithascraperor
puttyknife.Thiswillgreatlyreducetheriskofgreaseflareupsduringcooking.Makesurethe
flamedeflectoriscoolbeforecleaning.Itmaybecleanedwithhot,soapywater.
GrillInterior
Althoughfood‐gradewoodpelletsburnveryefficiently,theywillstillcreateasmallamountof
ashthatwillaccumulateontheinsidegrillwalls,doors,gratesandintheashpanstoragearea.
Althoughitisnotnecessarytokeeptheseareasspotless,occasionalcleaningisrecommended.
Thiscanbedonewithascraper,puttyknife,utilityshopvacandsomesoftcloths.
SteelGrates
Alongwithscrapingthesteelgrateswithagrillbrushbeforeeachuse,wealsorecommend
periodicallycleaningthesegrateswithhot,soapywater.Thesegratesarealsodishwashersafe.
CastIronGrate
Thecastirongrateshouldbecleanedbeforeeachusewithagrillbrush.Itmayalsobecleaned
periodicallywithhot,soapywater.
DoorThermometer
Overtime,thethermometerprobemayaccumulateasmallbuildupofash.Toensurethe
thermometerisaccuratelyreadingtemperature,itisrecommendedthatyoucleantheprobe
regularlywithawetclothorpapertowel.
GrillThermocouple
Overtime,thethermocouplemayalsoaccumulateasmallbuildupofash.Toensurethe
thermocoupleisaccuratelyreadingtemperature,itisrecommendedthatyoucleanthetipoff
regularly,withawetclothorpapertowel.Ifyouractualtemperaturereadingonthecontrol
boarddifferssignificantlyfromthedoorprobe,thatisanindicationthatthethermocouple
needstobecleanedoff.
DisposalofAshes
Ashesshouldbeplacedinametalcontainerwithatight‐fittinglid.Theclosedcontainerof
ashesshouldbeplacedonanon‐combustiblefloororontheground,wellawayfromall
combustiblematerials,pendingfinaldisposal.Whentheashesaredisposedbyburialinsoilor
otherwiselocallydispersed,theyshouldberetainedintheclosedcontaineruntilallcinders
havethoroughlycooled.

12
GRILLMAINTENANCE,CONTINUED
HopperandAuger
Althoughfood‐gradewoodpelletsaretypicallycleanerthanheatingpellets,itisimportantto
monitorthesawdustinthehopperandaugersystem.Ifyoubegintonoticealarge
accumulationofsawdustinthehopperandaugerchamber,itisrecommendedthatyou
removethepelletsanduseautilityshopvactovacuumoutalloftheloosesawdust.Keeping
thehopperandaugerfreeandcleanofsawdustwillensurethegrillisfeedingpelletsas
accuratelyaspossible.Itisalsorecommendthatyoucoverthegrillwhennotinuse,toprevent
anywaterfromreachingthepelletsinthehopper.Ifthepelletsgetwet,theywillexpandand
couldpossiblyjamtheauger.
Exhausthood/chamber
Theexhausthoodandchamberareaiswheretheexhaustexitsthegrill;itislocatedonthe
rightside.Itshouldbeinspectedatleasttwiceayeartodetermineifcreosotebuilduphas
occurred.Ifthereisaheavybuildup,itshouldberemovedandcleaned.
Ashpan
Theashpanislocatedonthebottomleftofthegrill.Thisshouldbecleanedbeforeeveryuse,
topreventthebuildupofashesandpelletsthatcouldpotentiallycauseunwanted,uncontrolled
fire.
PELLETMAINTENANCE
Tohelpensurethatyourgrilloperatesproperlyandwithoutissue,itisimportantthatyoustore
pelletsinadryplace,suchasabasementoragarage(aslongastheyaren’tnearchemicals).
Cookingpelletsareaboutthethicknessofapencileraserandvaryfrom1”to1½”.Theystart
assawdustthatisfilteredandcompressed,thenfedthroughamachinethatcutsthemto
specifiedlengths.Thentheyarecooled,clearedofextradustandbagged.Nochemicalsare
added.Differentwoodscanaddextraflavortoyourfoods.**ONLYPUTTHEAMOUNTOF
PELLETSYOUINTENDTOUSEFORCOOKING,BECAUSEOVERTIMEPELLETSCANABSORBTHE
MOISTUREINTHEAIRANDSWELL,CAUSINGAUGERJAMSORFAILURETOIGNITE.USEONLY
WOODPELLETFUELSPECIFIEDBYTHEMANUFACTURER.USEONLYENGLAND’SSTOVE
WORKS,INC.BRANDWOODPELLETS.(8,500BTU/LB.<1%ASHCONTENT)DONOTUSE
PELLETFUELLABELEDASHAVINGADDITIVES.**
N
N
N
o
o
o
w
w
w
S
S
Se
e
er
r
r
v
v
v
i
i
i
n
n
n
g
g
g
.
.
..
.
..
.
.
Pellet Grills!
Proudly Made in U.S.A.
www.
p
ellet
g
rillsusa.com

13
COOKINGANDFOODSAFETYTIPS
Followingaresomebasiccookingandsafetytips.Besuretorefertoresourcessuchas
foodsafety.govforcomprehensivesafetyinformation.
Besureyourgrillisclean,hasenoughpelletsandpreheated.
Doyourprepworkaheadoftime.
Usecookingoilsonthecastirongratetopreventsticking.
Rememberthatleavingthedoorsopenforextendedperiodsorovercrowdingthe
grillingareamaycauseextendedcookingtimes.
Uselonghandledtongsforturningmeatsandaspatulaforburgers.Usingaforkcould
causeburnsandcouldallowjuicestoescapethemeat,causingdryness.
Alwaysthoroughlycookmeats,anddonotleaveoutofrefrigerationformorethantwo
hours.
Washhandsandsurfacesproperly.
Donotmixcookedanduncookedfood.
Marinatemeatsintherefrigerator.
Defrostmeatsintherefrigerator.
Donotsavemarinade.
Useameatthermometertoensureproperinternaltemperatures.
RECOMMENDEDSMOKINGTEMPERATURES
*Thetimeslistedinthechartareonlyaguide,andmayneedtobeadjustedbasedonthe
quantityand/orthicknessofthemeat.Checkallmeats’internaltemperaturesbeforeserving.
MEATSETPOINT°F AVERAGESMOKINGTIME
Brisket 22511/2hoursperpound
BeefRibs2253hours
PorkButt22511/2hoursperpound
WholeChicken2504hours
WholeTurkey24061/2hours
SpareRibs 225‐2406hours
BabyBackRibs225‐2405hours
SmokedFish 170then220 1‐2hoursat170then1‐2hoursat
220

14
GRILLINGMEATTEMPERATURES
CATEGORYMEATINTERNAL
TEMPERATURE°FRESTTIME
GroundMeat&Meat
Mixtures
Beef,Pork,Veal,Lamb160None
Turkey,Chicken165None
FreshBeef,Veal,&
LambSteaks,roasts,chops1453minutes
Poultry
Chicken&Turkey,whole165None
Poultrybreasts,roasts165None
Poultrythighs,legs,wings165None
Duck&Goose165None
Stuffing(cookedaloneorin
bird)165None
PorkandHam
Freshpork1453minutes
Freshham(raw)1453minutes
Precookedham(toreheat)140None
Seafood
FinFish
145orcookuntilfleshis
opaqueandcomes
aparteasilywithafork.
None
Shrimp,lobster,andcrabsCookuntilfleshispearly
andopaque.None
Clams,oysters,and
mussels
Cookuntilshellsopen
duringcooking.None
Scallops
Cookuntilfleshismilky
whiteoropaqueand
firm.
None
ThesearetheUS‐governmentrecommendedminimuminternaltemperaturesforlistedmeats,
fromfoodsafety.gov.Rememberthatthisisalistingofsafeminimuminternaltemperaturesonly.

15
COMPONENTREPLACEMENT
(WARNING:Aswithanymaintenanceconcerningthisunit,besuretheunitis“OFF”andhas
completedtheShut‐DowncycleBEFOREbeginning.Unplugtheunit.Beawarethatmetal
partscanremainHOTlongafterthefirehasgoneoutandEVENaftertheShut‐Downcycleis
complete.Alwaysuseextremecautionwhenhandlingpotentiallyhotparts,evenifyouthink
theyshouldbecold.)
Coverpanel
Toremovethecoverpanel:Usinga5/16”socket,loosenandremovethesixscrewsonthe
coverpanel,thenslidethepaneloutandsetaside.Whenfinishedwithanytroubleshootingor
componentreplacement,reinstallthepanelinthereverseofthismethod.
Refertothisillustrationfortheproceduresonthispage
Combustionfan
Removethecoverpanel.Unplugthewiresfromthefan.Liftthefanupandthenremove.
*Becausethegroundwireisattachedtotheunitonthecombustionchamber,itmaybe
necessarytoloosenthisscrewtoremovethecombustionfan.Toinstallthenewfan,usethe
reverseofthismethod,beingsuretoinstallthefaninthecorrectdirection(withthefan
blowingintothechamber).
Hopperlidsafetyswitch
Loosenthe½”nut,andthenremovethenutandwasher.Unplugthewiresfromtheswitch,
takingnoteofwherethewiresareconnected.Toinstallthenewswitch,connectthewiresto
thenewswitchandthenplacetheswitchbuttonintotheholeandinstallthenutandwasher,
beingcarefulnottoover‐tighten.
Augermotor/Auger
*Besuretoremoveallthepelletsfromthehopperbeforetryingtoremovetheaugerorauger
motor.*Removethecoverpanel.Unplugtheaugermotorwiresfromthewiringharness.
(Continuednextpage.)

16
COMPONENTREPLACEMENT,CONTINUED
Augermotor/Augercontinued
Loosenandremovethetwo½”boltsholdingtheaugermotorsupportshelf,thenremovethe
assembly.Youwillneeda5/16”sockettoremovethetwoscrewsthatholdtheaugermotorto
thesupportshelf(fromthebackside).Thenremovethecotterpinthatholdstheaugertothe
augermotor.Toremovetheaugerfromthesupportshelf,simplyslideitout.Toreinstallthis
assembly,slidetheaugerin,connectittothemotorusingthecotterpin,reinstallthetwo
5/16”screwsthroughtheshelfandmotor,andslidetheassembly(augerfirst)backinand
reinstallthetwo½”bolts.
Hopperlidlatches
Toadjustthelidlatch,thefollowingtoolswillbeneeded:two,½”wrenches(orawrenchanda
socket).Inordertoadjustthelatch,firstopenthehopperlidandthenlockthelatchinits
closedposition.Thentakethe½”wrenchandloosenthenutclosesttothelatch(seebelow).
Thisnutisthenadjustedclosertotheliditselftotightenthelatch.Afteradjustingthisnutto
thedesiredlocation,holdthisnutinplacewiththe½”wrench,thentightendowntheholding
nutontheendofthelatchshaftwiththe½”socketorsecondwrench,toholdthelatching
assemblyinplace.Aftertighteningthelatch,testthelatchforpropertensionbylockingthelid
downandliftingeachfrontcornerofthelid.Thelidshouldbefirmlyhelddownbythelatch.
Toreplacethelatch,removethe5/16”screwfromthebracket,usingasocketorwrench.
Removethelatchandreplacewithanewone,andreinstallthe5/16”screwandbracket.

17
COMPONENTREPLACEMENT,CONTINUED
DoorThermometer
Opentherightsidedoortothegrill.Loosenandremovethewingnutonthethermometer.
Then,pullthethermometeroutofthedoor.Toreplace,putanewthermometerinthe
openingandreinstallthewingnut.
Refertothisillustrationfortheproceduresonthispage
Thermocouple
Removethecoverpanelandthecontrolboard(seeinstructionsonPage18).Then,usinga
smallflatheadjeweler’sscrewdriver,loosenthetwoscrewsthatholdthethermocouplewires
inplace.(Notewhichcolorwiresareonwhichside.Thecontrolboardshouldalsobemarked
withan“r”anda“y”directlynexttowherethewiresareconnected.)Next,openthefront
doorsandlocatethethermocouplealongtherightsideoftherearwallofthegrill.Usingthe
5/16”socket,loosenandremovethetwoscrewsthatholdthethermocoupletothebracket.
Youcanthenpullthewiresthroughandremovethethermocouple(takenoteastowherethe
wiresfeedthrough,asyouwillneedtoputthenewwiresbackthroughthesameway).To
installthenewthermocouple,feedthewiresbackthroughandreattachthethermocouple,
usingthetwoscrewspreviouslyremoved.Thenreinstalltheendsofthewiresintothecontrol
boardinthesamepositionthattheywerepreviously.Reinstallthecontrolboard,usingthe
samescrewsthatwerepreviouslyremoved.
Exhausthoodandchamber
Theexhausthoodandchamberarelocatedontherightsideofthegrill.Toremove,usea
5/16”sockettoremovethescrewsthatsecurethehoodandchamber.Besuretocleanthe
partsandthesideofthegrillwherethechamberwasinstalled,usingaspecialtycreosote
removerandascraper.

18
COMPONENTREPLACEMENT,CONTINUED
Burnpot
Removethecoverpanelandunplugtheigniterfromthecontrolboard.Removethecastiron
grateinsidethegrill,andthenremovetheflamedeflector.Pullupontherightsideoftheburn
potandremoveitatanangle.Makesuretofeedtheendsofthewires(fortheigniter)through
theholeintheexhaustchamberwhenpullingouttheburnpot.
Igniter
Removethecoverpanelandunplugtheigniterfromthewiringharness.Then,removethe
combustionfan.Removethecastirongratefrominsidethefirechamber,andthenremovethe
flamedeflector.Removetheburnpot,makingsuretofeedtheendsofthewiresdownthrough
theholedrilledinthecombustionchamber.Loosenthe1/8”allensetscrewintheburnpot
thatsecurestheigniter.Pulltheigniterout.Toreplace,insertthenewigniterandtightenthe
setscrew.Feedthewiresbackthroughthecombustionchamberandupthroughthehole.
Plugthewiresbackintothewiringharnessandreinstallthecombustionfan.
ControlBoard
Removethecoverpanel.Detachthewiringharnessfromthecontrolboard,bysqueezingthe
armontheclipandpullingslightly.Unplugthewhiteandblackwirefromtheharnessforthe
powercord,then,usinga5/16”socket,removethetwoscrewsthatholdthecontrolboardin
place.Toreinstall,attachthetwoscrews,thenthewhiteandblackwiresforthepowercord
and,lastly,reattachtheclipwiththewiringharness.

19
TROUBLESHOOTING
ProblemCauseSolution
Grillwillnotturnon.
Grillisnotproperly
pluggedin.
EnsurethatyourgrillispluggedintoaWORKINGGFCI
outlet.
Apowersurgehasblown
thefuseonthecontrol
board.
Replacethefusewitha6amp(125volt)fuse.
Grillproducesexcess
ordiscoloredsmoke.
Pelletsmayhaveabsorbed
excessmoisture.
Cleanthehopperandburnpotofanywetpelletsand
replacewithdryones.
Burnpotiscloggedwith
ashorcarbon.
Checktheburnpotforanyashorcarbondeposits.
Cleanifneeded.
Grillunabletoreach
ormaintainstable
temperature.
Grillnotreceiving
sufficientfuel.Checkthehopper'sfuellevel,addpelletsifneeded.
Grillnotreceiving
sufficientairflowtoburn
pot.
Checktheburnpotforanyashorcarbondeposits.
Cleanifneeded.
Checktoensurethecombustionfanisinstalledinthe
properdirection(shouldblowtowardsthefire),is
pluggedinandisstilloperatingproperly.
Thermocoupleproblem.
Ifthedoortemperatureisreadingdifferentfromthe
controlboardthenthethermocouplemayneedtobe
cleanedorthereisanick/kinkinthewires.
Igniterproblem.Checktoensuretheigniterispluggedinandstartsto
glowafterpressingthe"on"button.
Frequentflame
fluctuation.
Buildupofcreosoteor
carbonmaterial.
Possiblecombustionfailure/malfunction.Check
combustionfan.
Checktheburnpotforanydepositsorbuildup.
Shouldyouhaveanissuethatisnotaddressedonthischart,orifyouneedassistancewithany
ofthesolutions,pleasecontactourTechnicalSupportlineat1‐800‐245‐6489.Ifyouneedparts
youcanorderthemonlineatwww.pelletgrillsusa.comorbycontactingusat1‐800‐245‐6489.

20
WIRINGDIAGRAM
*Acopyofthisdiagramisalsointheareathatenclosesthemotorand
fan.*
FOLLOWTHESEGUIDELINESTOPREVENTTHISCOLORLESS,ODORLESSGAS
FROMPOISONINGYOU,YOURFAMILYOROTHERS:
KNOWTHESYMPTOMSOFCARBONMONOXIDEPOISONING:HEADACHE,DIZZINESS,
WEAKNESS,NAUSEA,VOMITING,SLEEPINESS,ANDCONFUSION.CARBONMONOXIDE
REDUCESTHEBLOOD’SABILITYTOCARRYOXYGEN.LOWBLOODOXYGENLEVELSCAN
RESULTINLOSSOFCONSCIOUSNESSANDDEATH.
SEEADOCTORIFYOUOROTHERSDEVELOPCOLDORFLU‐LIKESYMPTOMSWHILE
COOKINGORINTHEVICINITYOFTHISAPPLIANCE.CARBONMONOXIDEPOISONING,
WHICHCANEASILYBYMISTAKENFORACOLDORFLU,ISOFTENDETECTEDTOOLATE.
ALCOHOLCONSUMPTIONANDDRUGUSEINCREASETHEEFFECTSOFCARBON
MONOXIDEPOISONING.CARBONMONOXIDEISESPECIALLYTOXICTOMOTHERAND
CHILDDURINGPREGNANCY,INFANTS,THEELDERLY,SMOKERS,ANDPEOPLEWITH
BLOODORCIRCULATORYSYSTEMPROBLEMS,SUCHASANEMIA,ORHEARTDISEASE.
This manual suits for next models
2
Table of contents
Popular Grill manuals by other brands

Vermont Castings
Vermont Castings Vanguard 2-Burner Barbecue Assembly manual

BORETTI
BORETTI IBRIDO TOP operating instructions

BorMann
BorMann HOME BBQ1150 owner's manual

Holstein Housewares
Holstein Housewares HH-09176003 manual

Nexgrill
Nexgrill 720-0697E user manual

Napoleon
Napoleon PRESTIGE Series owner's manual