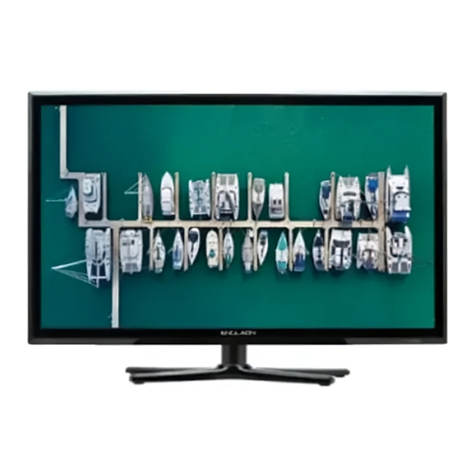
Englaon LED27M80 User manual

IMPORTANT SAFETY INSTRUCTIONSSafety InformationRead these instructions.Keep these instructions.Heed all warnings.Follow all instructions.Do not use this apparatus near water.Clean only with dry cloth.Do not block any ventilation openings. Install in accordance with themanufacture’s instructions.Do not install near any heat sources such as radiators, heat registers, stoves, orother apparatus (including amplifiers) that produce heat.Do not defeat the safety purpose of the polarized or grounding plug. A polarizedplug has two blades with one wider than the other. A grounding plug has twoblades and a third grounding prong. The wide blade or the third prong is providedfor your safety. If the provided plug does not fit into your outlet, consult anelectrician for replacement of the obsolete outlet.Protect the power cord from being walked on or pinched particularly at the plugs,convenience receptacles, and at the point where they exit from the apparatus.Only use attachments/accessories specified by the manufacturer.Use only with the cart, stand, tripod, bracket, or table specified by themanufacturer, or sold with the apparatus. When a cart or rack is used, use cautionwhen moving the cart/apparatus combination to avoid injury from tip-over.Unplug the apparatus during lightning storms or when unused for long periods oftime.Refer all servicing to qualified personnel. Servicing is required when theapparatus has been damaged in any way, such as power supply cord or plug isdamaged, liquid has been spilled or objects have fallen into the apparatus hasbeen exposed to rain or moisture, does not operate normally, or has beendropped.CAUTION: These servicing instructions are for use by qualified service personnelonly. To reduce the risk of electric shock, do not perform any servicing other thanthat contained in the operating instructions unless you are qualified to do so.WARNING:To reduce the risk of fire or electric shock, do not expose this apparatus torain or moisture. The apparatus shall not be exposed to dripping or splashing and thatobjects filled with liquids, such as vases, shall not be placed on apparatus.WARNING: The mains plug is used as disconnect device, the disconnect device shallremain readily operable.- This lightning flash with arrowhead symbol within an equilateral triangle isintended to alert the user to the presence of non-insulated “dangerous voltage”within the product’s enclosure that may be of sufficient magnitude to constitute arisk of electric shock.- Warning: To reduce the risk of electric shock, do not remove cover (or back) asthere are no user-serviceable parts inside. Refer servicing to qualified personnel.- The exclamation point within an equilateral triangle is intended to alert the user tothe presence of important operating and maintenance instructions in the literatureaccompanying the appliance.Apparatus with class I construction shall be connected to a mains socket outlet with a protective earthing connection.

Important Safety PrecautionsDo not place the power cord or other cables across a walkway in case it is trampled on. Do not overload the power cord or power socket. When the power plug is used to disconnect and connect the device, it should easily go into the power source. Do not place the LED TV on an unstable surface.Do not disassemble the back cover, as it contains high voltages inside and will cause electric shock. Only qualified professionals should conduct internal adjustments, maintenance, and checks.The TV set should not be subjected to water droplets, vapor, or splash. This equipment should not be placed on objects filled with liquids. Do not place flame sources, such as lit candles, on or near the LED TV. Please, pull out the power plug and contact after sales support if there are abnormal objects or water in the TV.Pull out the power cord and antenna cable during electrical storms so the LED TV is not damaged by electrical surges. Keep all people away from the antenna cable during electrical storms.Important Safety PrecautionsPlease, immediately pull out the AC power plug from adapter if there is an abnormal sound or smell or the LED TV has sound but no picture, and contact after sales support. The LED TV should be kept free from rain, moisture and dust to prevent electrical shock and short circuits. Do not cover the ventilation openings with table clothes, curtains, newspapers, etc.The LED TV should be kept from high temperature heating sources or direct sunlight. Good ventilation is required. Allow 10 cm. between the LED TV and other appliances or built-in cabinet walls.When you wipe the front cabinet, please make sure the power plug is pulled out and use a soft, dry, lint-free cloth and handle it with care. Do not repeatedly wipe the panel, nor scrape, tap or strike the panel with a hard object.Do not wipe the LED TV with any petrol, chemical or alcohol based solvents as it will lead to product damage of the panel and cabinet.
When the television receiver is not used for anextended period of time, it is advisable to disconnectthe AC power cord from the AC outlet.

Table of ContentsTable of Contents
12
Overview of remote control
Installing Batteries in the Remote Control
Connecting DVD Player/Set-Top Box
IntroductionFeatures Specifications General Description Overview of front and side panelOverview of back panel External Connection Connecting VCR Connecting DVD Player/Set-Top Box via HDMI Connecting EARPHONE Supporting signals Basic operation Turning the TV On and Off 345511-141112131515146Accessories 3 Antenna connection 7-9101410Assembling Stand Process623 2425
Picture defects and the reason
Main MenuPictureSoundTimeLockOSD Menu Operations16-2917-21Troubleshooting 3132222627PVRMedia Menu Operations28-29DVD30OptionSmart TV33-39

Input terminals used for external equipment connection
IntroductionFeatures
Remarks:
Introduction
Warnings
Specifications
PAL/NTSC
antenna socket 75Ω 45WColor LED displayPAL/DVB-T48.25MHz‐863.25MHz o 0C-35CoPower supply1920X1080ModelAverage Power Consumption34The above listed specifications and data are subject to change without prior notice.
Video input Format Antenna input
DC 12V 6A5.1 KgLED27M80 x x inch 25.17.916.8Two HDMI input One AV input One YPbPr input Two USB inputOne ANTENNA input One EARPHONE output One Android USB inputManualInstructions
Remote Control
Batteries (AAAx 2)SIZEHOLD
T.SHIFT

Overview of front and side panelGeneral Description
56
General Description
Assembling Stand ProcessSPEAKERREMOTE CONTROL SENSORPOWER INDICATORGreen: In power on mode.Red: In standby mode. MENU Press to see an on-screen menu of your TV's features.SOURCEChange and select the desired mode.54876
CH+ /CH- /
CH+/- Press to change channels. In the on-screen menu, use the CH +/- buttons as up/down arrow buttons. VOL+/- Press to increase or decrease the volume. In the on-screen menu, use the VOL +/- buttons as left/right arrow buttons.POWERPress this button to turn the TV on or off. PLAY Play/stop DVD (in DVD mode). EJECT Eject DVD. Screw hole A Screw hole A Screw Screw hole B Screw Screw hole BInstruction:1.Place the TV unit on a flat and clean table.2.Fix stand by 4 pcs screws via screw hole B and A.
Overview of back panel
Side portPort3
2
10111. Android USB External device interface.2. EARPHONE Connecting for headphone.3. YPbPr Connecting for the Y/Pb/Pr Input in Component mode.4. IN HDMI2 Connecting for HDMI signal.5. IN HDMI1 Connecting for HDMI signal.6. DC IN 10-32VDC input7. USB1 / USB2 IN5V 0.5A8. L/RConnect to the audio output jacks on your amplifier/home theater.9. VIDEO Connecting for VIDEO signal input in Composite mode.10.RFConnected to external antenna to receivethe ATV/DTV program in ATV/DTV mode.11.COAXIALCoaxial Digital audio output.5DC IN10-32VRLAUDIO OUTRLAV INVIDEOCOAXIAL AUDIOOUTRF IN46
1
987USB1 INUSB2 ININHDMI1PrPbCOMPONENT IN
Y
EARPHONEOUTINHDMI2AndroidUSB5V 0.5A

Overview of remote control
General Description
78
Overview of remote control
General Description
ASPECTPress this button to select the aspect ratio of the screen.Delete function button.Rename function button.Move function button.Skip function button. R (DELETE)G (RENAME)Y (MOVE)B (SKIP)FAVSelects favorite channel(s).7TEXTSwitch on/off of Teletext window.17SUBTITLEPress to select the subtitle language.EPGPress to display EPG (Electronic Program Guide).SLEEPSet the delay time for the TV to turn off automatically. Press to record the program immediately.RECTV/RADIOPress to switch between DTV and radio programsPlays the previous Media Player or DVD file/chapter.Plays the next Media Player or DVD file/chapter..PICTURESelect the picture mode.SOUNDSelect the sound mode.SIGNALThe signal model.AUTO TUNEAutomatic searching.34510No.ButtonDescriptionPOWERTurns the TV on or off to standby mode.12MUTEPress to mute the sound. Press again to regain sound.0-9Press 0-9 to select a TV channel directly. The cannel will change after 2 seconds. 68Return to the previously viewed program.9INPUTPress to select signal the source for the TV.Allows you to navigate the on-screen menus and adjust the system settings to your preference.
Press these two buttons to increase/decrease the volume.
1112EXITMENUExit from the current menu or sub-menu. Allows you to navigate the on screen menus (OSD).1314OKSelect the option.1615VOL+/-CH+/-Press these two buttons to change channels up/down.18Press to switch to REC.MENU immediately.REC MENU19BT20222426Android home screen.HOME2123252728Freeze key.FREEZE293031Zoom In or Out of the window.ZOOM3233343536373839No Function.1371115920/212225262933/34413035/364216265841013141217181924232827323139/4037/38444345464847SIZEHOLD
T.SHIFT
Fast Rewind Media-Player and DVD.Fast Forward Media-Player and DVD.MIXSets the transparency of Teletext window.Holds on the current Teletext page.HOLDZoom In or Out of the Teletext window.SIZE

Installing Batteries in the Remote Control
Installing Batteries1Open the battery compartment cover on the back side.2Insert two 1.5V AAA size batteries incorrect polarity. Don´t mix old or usedbatteries with new ones.3Closed the cover.Point the remote towards the remote control sensor of the wireless TV and use it within 7 meters.Put the used batteries into the recyc-ling bin since it can negatively affectthe environment.
General Description
BatteryCover2xsize AAA 1.5VBatteryCover
Antenna connection
Antenna input impedance of this unit is 75ohm. VHF/UHF 75ohm coaxial cable can be connected to the antenna jack directly, if the antenna cable is 300ohm parallel flat feeder cable, you need to use the 300ohm/75ohm converter to connect the antenna cable to the antenna jack. For details Please refer to the following drawing.Use a 75ohm - 300ohm converter300ohm coaxial cableAntenna feederANT IN75ohm coaxial cableAntenna cable
Antennas with 300ohm flat twins LeadsAntennas with 75ohm Round Leads
External Connection
The battery (battery or batteries or battery pack) shall not be exposed to excessive heat such as sunshine, fire or the like.109
Overview of remote control
General Description
Eject/insert disc.D.MENUQuick Teletext navigation or setup settings / DVD: VideoDVD Menu button.SETUPDVD system setup.D.DISPQuick navigation during Teletext or setup settings / DVD: DVDInformation button.Play and Pause Media-Player / DVD.Stops playback Media-Player and DVD.454344464748Brightness control.INDEXReturns to Index page by Teletext.42No.ButtonDescription4041T.SHIFTPress to switch to TIME SHIFT mode immediately.

External ConnectionConnecting VCRExternal Connection
These instructions assume that you have already connected your TV to an antenna or a cable TV system. Skip step 1 if you have not yet connected to an antenna or a cable system. Follow the instructions in Viewing a VCR or Camcorder Tape to view your VCR tape. Each VCR has a different back panel configuration. When connecting a VCR, match the color of the connection terminal to the cable. We recommend the use of cables with a Ferrite Core.1. Unplug the cable or antenna from the back of the TV.2. Connect the cable or antenna to the ANT IN terminal on the back of the VCR.3. Connect an RF Cable between the ANT OUT terminal on the VCR and the ANT IN terminal on the TV.4. Connect a Video Cable between the VIDEO OUT jack on the VCR and the VIDEO IN jack on the TV.5. Connect Audio Cables between the AUDIO OUT jacks on the VCR and the AUDIO L and AUDIO R jacks on the TV. If you have a mono (non-stereo) VCR, use a Y-connector (not supplied) to hook up to the right and left audio input jacks of the TV. If your VCR is stereo, you must connect two cables.This connection can only be made if there is a HDMI Output connector on the externaldevice.What is HDMI? HDMI, or high-definition multimedia interface, is a next-generation interface that enables the transmission of digital audio and video signals using a single cable without compression. Multimedia interface is a more accurate name for it especially because it allows multiple channels of digital audio (5.1 channels). The difference between HDMI and DVI is that the HDMI device is smaller in size, has the HDCP(High Bandwidth Digital Copy Protection) coding feature installed, and supports multi-channel digital audio. Each DVD player/STB has a different back panel configuration. We recommend the use of cables with a Ferrite Core.1. Connect an HDMI Cable between the HDMI connector on the TV and the HDMI connector on the DVD player/Set-Top Box.
Connecting DVD Player/Set-Top Box via HDMI
1112TV Rear Panel
HDMI Cable (Not supplied)
DVD Player/Set-Top BoxHDMI
VCR Rear PanelAudio Cable (Not supplied)Video Cable (Not supplied)RF Cable (Not supplied)TV Rear PanelR L VIDEO AV INRF IN

External Connection
1314
Supporting signalsConnecting EARPHONE
Plug EARPHONE out connector into EARPHONE out jack on the TV the TV speaker will
be muted. Phone OutEARPHONEOUT
External ConnectionConnecting DVD Player/Set-Top Box
The rear panel jacks on your TV make it easy to connect a DVD to your TV. and the AUDIO OUT jacks on the DVD player.the TV and the COMPONENT [Y, PB, PR] jacks on the DVD player. Component video separates the video into Y (Luminance (brightness)), Pb (Blue) and Pr (Red) for enhanced video quality. Be sure to match the component video and audio connections. For example, if connecting the video cable to COMPONENT IN, connect the audio cable to COMPONENT IN also. Each DVD player/STB has a different back panel configuration. When connecting a DVD player/STB, match the color of the connection terminal to the cable. We recommend the use of cables with a Ferrite Core.1. Connect a Component Cable between the COMPONENT IN [Y, PB, PR] jacks on 2. Connect Audio Cables between the COMPONENT IN [R-AUDIO-L] jacks on the TVComponent Cable (Not supplied)DVD Player/Set-Top Box
Audio Cable (Not supplied)
R L AUDIOOUTPrY COMPONENT INPb

Turning the TV On and OffBasic OperationOSD Menu Operations
15161. Insert the power cord plug into a polarized DC outlet.2. Press POWER button on the remote control or button on the LED TV. 3. Normal picture will be displayed on the screen after 6 seconds. If no signal input, "No Signal" will be displayed on the screen.4. If temporary POWER off is required, press POWER button on the remote control or button on the LED TV.5. If you want to completely switch off the power for this unit, unplug the power cord plug for this unit.6. After switching off the unit, you should turn on the TV again at least 5 seconds later.Status indication lampGreen: In power on mode.Red: In standby mode.Auto power-off If there is no signal input in any Mode, the TV will automatically accesses the standby state in about 15 minutes. Memory before turning TV offThe settings of picture and the preset channels will be memorized at turning off the unit.When being started up again, the unit will work according to the mode set before being turned off.How to turn the TV on or offMain Menu
First Time InstallationLanguageCountryEnergy Mode
<><><>
EnglishAustraliaStore ModeAuto TuningOK
Step one: It shows “OSD Language”for you to choose when boot for the first timeStep two: enter “Country” menuStep three: Enter “Energy” menuEnter “Tune Type” menuInput SourceThere is 9 ports at most in Input Source menu page. It supportsDTV/ATV/DVD/AV/YPbPr/SMART TV/HDMI1/HDMI2/USB.
Tuning SetupTune TypeDigital TypeScan Type
<><>
DVT + ATVDVB-TFullNetwork IDFrequencySymbol RateAutoAutoAutoStartOKBack
MENU
SMART TVHDMI2HDMI1

OSD Menu OperationsOSD Menu Operations
1718Adjust the OSD ScreenAdjust the OSD ScreenMain MenuAuto TuningUnder the Auto Tuning of CHANNEL menu, Press [LEFT]/[RIGHT]/[OK] key to enter Auto Tuning, the following prompt box will appear.Press [MENU] key to show main menu, there are five functions under main menu, they are Channel, Input Source, Application, Media Play, Setting, Press [LEFT]/[RIGHT] to select these functions.Main MenuWhen Tune Type is DTV+ATV, press OK key to enter DTV auto searching.

19
OSD Menu Operations
Adjust the OSD ScreenAdjust the OSD Screen
OSD Menu Operations
When search DTV, if you want to skip ATV and directly enter DTV, press MENU to enter the menu as follows:ATV Manual Tuning20Main MenuPress left/right key to select Yes/No, Press OK to execute. “Yes” is to skip the ATV searching and enter DTV searching. When searching, if you want to directly exit from searching, press EXIT to exit.Press [LEFT]/[RIGHT] to adjust channels, when there is signal, press OK thenbegin ATV searching.Tips:After searching the channel manually, do press red key to save the channels, or,after you switch the status, the channel you searched won't be saved.Main MenuDTV Manual TuningPress [LEFT]/[RIGHT] to adjust channels, when there is signal, press OK thenbegin DTV searching.Program Edit

2122
OSD Menu Operations
Adjust the OSD ScreenAdjust the OSD Screen
OSD Menu Operations
Channel edit function includes “Delete/Move/Rename/Skip/Fav”. Fav/Skip mark will appear only after the users have some setting on the channel(Fav and Ship can't be set together). Delete: Press [RED] key to cancel the program that the cursor is in. Move: Press [YELLOW] key, according to the prompt, execute MOVE function, move the program order. Skip: Press [BLUE] key, the program the cursor is will be marked with SKIP. When execute CH+/CH-, skip this program, and this program can't be selected even press the number key. Rename: Rename function only appear and can be used under ATV program. Press [GREEN] key under ATV, the program can be renamed. Favorite: Press [FAV] key, mark the program the cursor is in as favorite program.PVRIn CHANNEL menu, under PVR File system option, Press [LEFT]/[RIGHT]/[OK] key to enter PVR menu, as follows:PictureMain MenuPicture ModeStandard->Mild->Dynamic->User->EC O Home,Picture mode selection.Color TemperatureStandard-> Cool -> Warm -> UserColor Temperature selectionNoise ReductionOff->Low->Middle->High-> AutoNoise reduction; it is under Hide status under VGA.

2324Adjust the OSD Screen
OSD Menu Operations
TimeTime ModePress [UP/[DOWN] button to select Location, and then Press [LEFT]/[RIGHT] button to select, then press OK button to confirm.
OSD Menu Operations
Adjust the OSD ScreenSoundSound ModePress [UP/[DOWN] button to select Location, and then Press [LEFT]/[RIGHT] button to select, then press OK button to confirm.

2526
OSD Menu Operations
Adjust the OSD ScreenAdjust the OSD Screen
OSD Menu Operations
LockLock ModePress [UP/[DOWN] button to select Location, and then Press [LEFT]/[RIGHT] button to select, then press OK button to confirm.OptionLock ModePress [UP/[DOWN] button to select Location, and then Press [LEFT]/[RIGHT] button to select, then press OK button to confirm.

PVRRecordIn DTV, press [REC] button, it will display the following menu below, and start to burn the current DTV program. Press [LEFT]/[RIGHT] button to move cursor to exercise different function according to hint.PlaybackAfter burning the program, exit from Record, press [PLAY] button to implement Playback function. Different function can be implemented according to hint.TimeshiftIn DTV, press [PLAY/PAUSE] button to implement the function of Timeshift. Press [LEFT]/[RIGHT] button to move cursor to exercise different function according to hint. 27
OSD Menu Operations
Adjust the OSD ScreenPVR
Media Menu Operations
MediaMedia PlayerIn the option of Media Player on MainMenu, Press [OK] to enter the Media Player menu, see the picture as follows: Press [LEFT]/[RIGHT] to select Movie, Music or Photo。Take Movie function for example, when there is focus point on Movie function, press [OK] button to enter into File Selector menu.On FileSelector menu, select film source that needs to be play according to the hint. Press [PLAY/PAUSE] button to enter into the play mode of full screen; press [PLAY/PAUSE] to return to Media Player menu.28

29
OSD Menu Operations
MediaMedia PlayerMovieon Media Player menu, move cursor to moive, press [OK] button to enter into FileSelector menu. Select the file you want to play, press [PLAY/PAUSE] to enter into full screen play. Press [LEFT]/[RIGHT] button to move cursor, and operate according to different hint.MusicIn the same way, on Media Player menu, move cursor to Music, press [OK] button to enter into FileSelector menu. Select the file you want to play, press [PLAY/PAUSE] to enter into full screen play. Press [LEFT]/[RIGHT] button to move cursor, and operate according to different hint.Photo In the same way, on Media Player menu, move cursor to Photo, press [OK] button to enter into FileSelector menu. Select the file you want to play, press [PLAY/PAUSE] to enter into full screen play. Press [LEFT]/[RIGHT] button to move cursor, and operate according to different hint. 30
DVD

3132
Troubleshooting
CCEEEEDisconnect the power cord, wait 60 seconds then reconnect the power cord and restart the TV.No support for this function.Increase the volume.please check sound settings.
Picture defects and the reason

3334Press SOURCE button to display the input source list.Press ▼/▲button to select the input source you want to watch.Press ENTER button to enter the input source.
SMART TVHDMI2HDMI1
Other manuals for LED27M80
1
Table of contents
Other Englaon TV DVD Combo manuals

