manuals.online logo
Brands
  1. Home
  2. •
  3. Brands
  4. •
  5. Philips
  6. •
  7. TV DVD Combo
  8. •
  9. Philips 20DV693R Manual

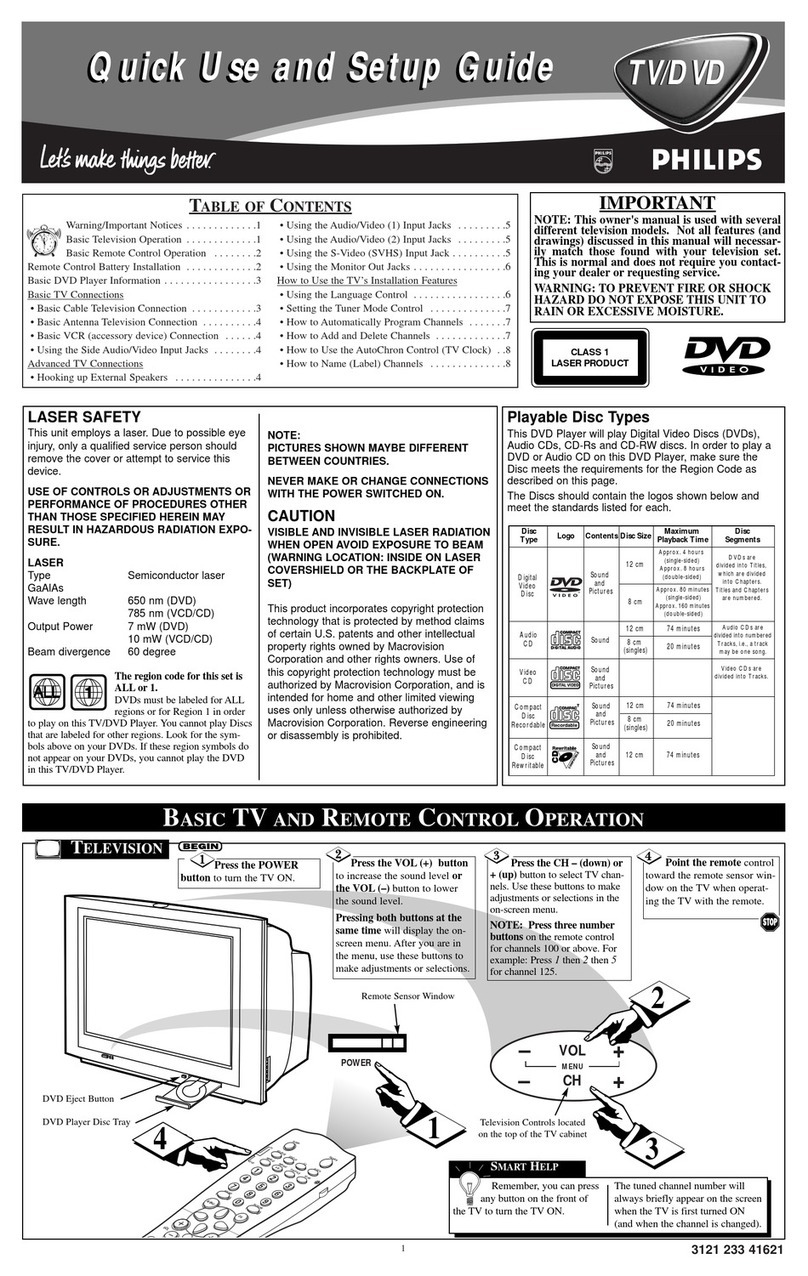
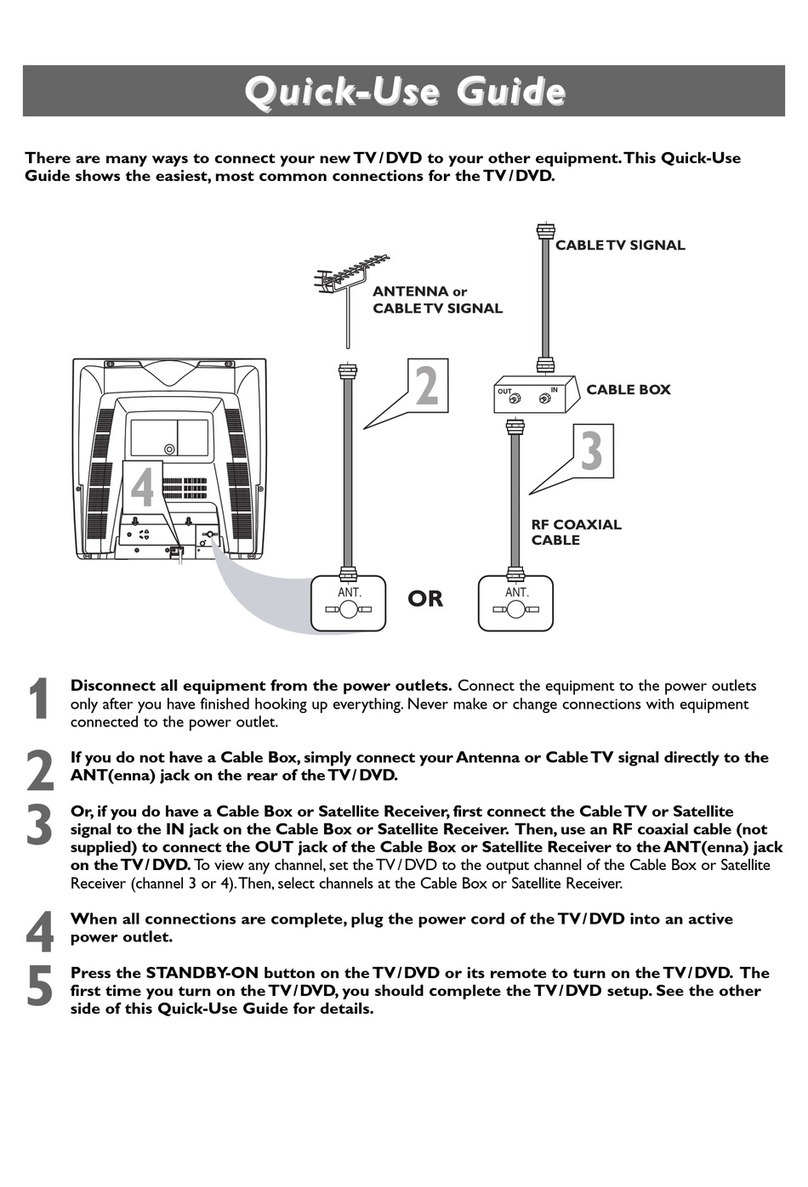
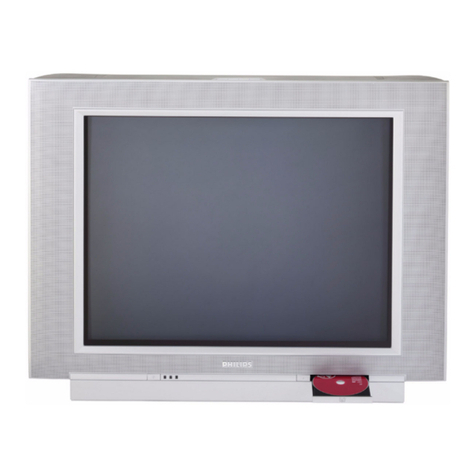
Philips 20DV693R Manual

Other manuals for 20DV693R

3

Other Philips TV DVD Combo manuals

Philips 28PD6932 User manual

Philips

Philips 28PD6932 User manual

Philips 28PD6932 User manual

Philips

Philips 28PD6932 User manual

Philips 14PT6107 - annexe 1 User manual

Philips

Philips 14PT6107 - annexe 1 User manual

Philips 14PT6107E/00 User manual

Philips

Philips 14PT6107E/00 User manual

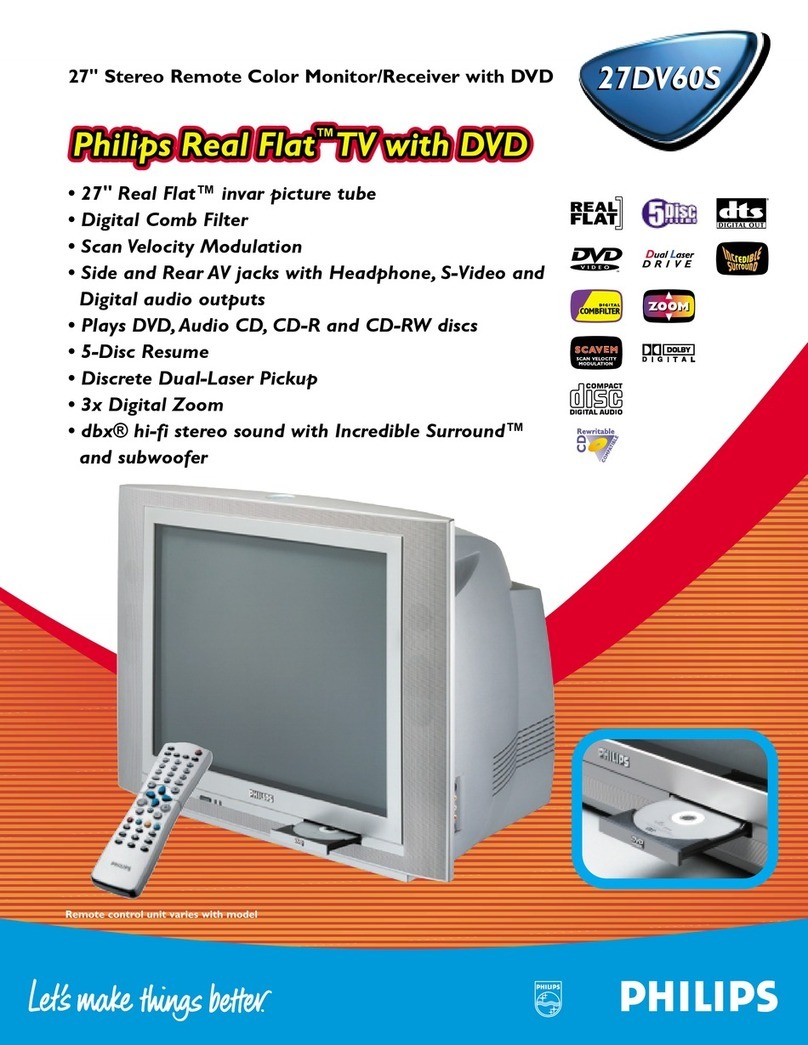
Philips 27DV60S User manual

Philips

Philips 27DV60S User manual

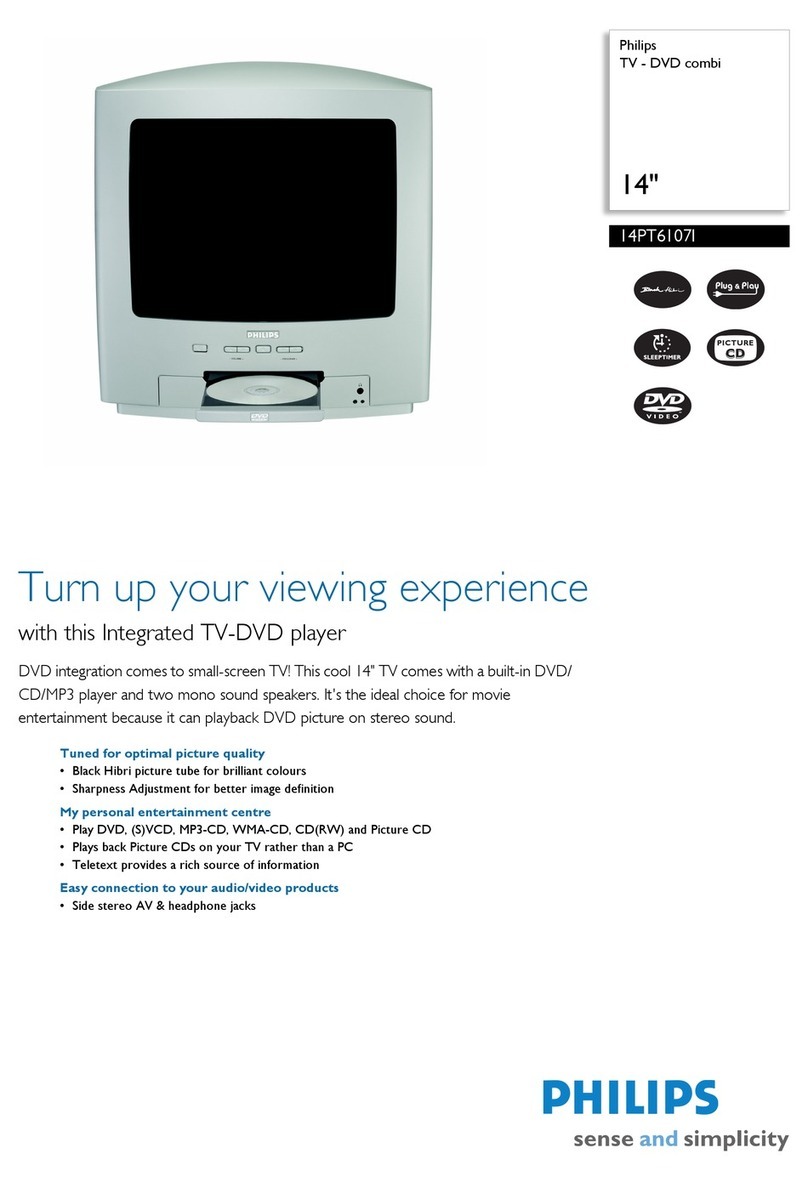
Philips 14PT6107I User manual

Philips

Philips 14PT6107I User manual

Philips 19PFL5622D/37 User manual

Philips

Philips 19PFL5622D/37 User manual

Philips TV Manual

Philips

Philips TV Manual

Philips 14PT6107B/01 User manual

Philips

Philips 14PT6107B/01 User manual

Philips 15PT6807 - annexe 2 User manual

Philips

Philips 15PT6807 - annexe 2 User manual

Philips 20DV6942 User manual

Philips

Philips 20DV6942 User manual

Philips 24MC4306/37 User manual

Philips

Philips 24MC4306/37 User manual

Philips 20DV6942/37 User manual

Philips

Philips 20DV6942/37 User manual

Philips 21PT6820 - annexe 1 User manual

Philips

Philips 21PT6820 - annexe 1 User manual

Philips 14PT6107G/00 User manual

Philips

Philips 14PT6107G/00 User manual

Philips 21PT6807 User manual

Philips

Philips 21PT6807 User manual

Philips 28PW6826 User manual

Philips

Philips 28PW6826 User manual

Philips 15PT6807N/00 User manual

Philips

Philips 15PT6807N/00 User manual

Philips 19PFL5622D User manual

Philips

Philips 19PFL5622D User manual

Philips Magnavox 13MC3206 User manual

Philips

Philips Magnavox 13MC3206 User manual

Philips 25PV720 User manual

Philips

Philips 25PV720 User manual

Philips 14PT6007/05 User manual

Philips

Philips 14PT6007/05 User manual

Philips 21PT6818 User manual

Philips

Philips 21PT6818 User manual

Philips 27DV693R User manual

Philips

Philips 27DV693R User manual

Popular TV DVD Combo manuals by other brands

Sansui HDLCDVD225 owner's manual

Sansui

Sansui HDLCDVD225 owner's manual

Memorex MVDT2002SM Service manual

Memorex

Memorex MVDT2002SM Service manual

Akai ALED2609TWE user manual

Akai

Akai ALED2609TWE user manual

Toshiba VTD1432 user guide

Toshiba

Toshiba VTD1432 user guide

RCA RLEDV2238A-B instruction manual

RCA

RCA RLEDV2238A-B instruction manual

LENCO DVT-1933 user manual

LENCO

LENCO DVT-1933 user manual

LG KU-17WDVD Service manual

LG

LG KU-17WDVD Service manual

Sylvania SKCR2706BT instruction manual

Sylvania

Sylvania SKCR2706BT instruction manual

Memorex MVDT2002A owner's manual

Memorex

Memorex MVDT2002A owner's manual

Akura AXDVD1515W-ID instruction manual

Akura

Akura AXDVD1515W-ID instruction manual

iLive ITDE2288 user guide

iLive

iLive ITDE2288 user guide

Wintal 27LDVD05 operating manual

Wintal

Wintal 27LDVD05 operating manual

Toshiba 23HLV84 owner's manual

Toshiba

Toshiba 23HLV84 owner's manual

AOC LC19W060C user manual

AOC

AOC LC19W060C user manual

JVC LT-32DM20 user guide

JVC

JVC LT-32DM20 user guide

Sylvania LD320SSX Guide d'utilisation

Sylvania

Sylvania LD320SSX Guide d'utilisation

Haier L15C10B user manual

Haier

Haier L15C10B user manual

Dynex DX-24LD230A12 user guide

Dynex

Dynex DX-24LD230A12 user guide

manuals.online logo
manuals.online logoBrands
  • About & Mission
  • Contact us
  • Privacy Policy
  • Terms and Conditions

Copyright 2025 Manuals.Online. All Rights Reserved.

Directions for Use
3139 125 31441
Once your PHILIPS purchase is registered, you're eligible to receive all the privileges
of owning aPHILIPS product So complete and return the Warranty Registration
Card enclosed with your purchase at once. And take advantage of these important benefits.
Congratulations on your purchase,
and welcome to the "family!" PHILIPS
Dear PHILIPS product owner:
Thank you for your confidence in PHILIPS. You've selected one of the best-built, best-backed [ available
today. And we'll do everything in our power to keep you happy with your purchase for many years to come.
As amember of the PHILIPS "family," you're entitled to protection by one of the most comprehensive war-
ranties and outstanding service networks in the industry.
What's more, your purchase guarantees you'll receive all the information and special offers for which you quali-
6/, plus easy access to accessories from our convenient home shopping network.
And most importantly you can count on our uncompromising commitment to your total satisfaction.
All of this isour way of sayingwelcome-and thanks for investing in a PHILIPS product.
Sincerely,
Lawrence J. Blanford
President and Chief Executive Officer
P.S. Remember, to get the most from your
PHILIPS product, you must return your
Warranty Registration Card within 10
days. So please mail it to us right now!
Know these
safetysymbols
_, This "bolt of lightning" indicates uninsulated material within your unit may cause an elec-
trical shock_ For the safety of everyone in your household, please do not remove product cor-
m'The "exclamation point" calls attention to features for which you should read the
enclosed literature closely to prevent operating and maintenance problems.
WARNING: TO PREVENTFIRE OR SHOCK HAZARD, DO NOT EXPOSETHIS EQUIP-
MENT TO RAIN OR MOISTURE.
CAUTION: To prevent electric shock, match wide blade of plug to wide slot, andfully insert.
ATTENTION: Pour _viter leschocs _lectriques, introduire la lame la pluslargede lafiche dans
la borne correspondante de la priseet pousser iusqu'aufond.
2
IMPORTANT SAFETY INSTRUCTIONS
Read before operating equipment
1. Read these instructions.
2. Keep these instructions.
3. Heed all warnings.
4. Follow all instructions.
5. Do not use this apparatus near water.
6. Clean only with a dry cloth.
7. Do not block any of the ventilation openings. Install in accordance
with the manufacturers instructions.
8. Do not install near any heat sources such as radiators, heat regis-
lets, stoves, or other apparatus (including amplifiers) that produce
heat.
9. Do not defeat the safety purpose of the polarized or grounding-
type plug. A polarized plug has two blades with one wider than
the other. A grounding type plug has two blades and third ground-
ing prong. The wide blade or third prong are provided for your
safety. When the wovided plug does not fit into your outlet, con-
suit an electrician for replacement of the obsolete outlet.
10. Protect the power cord from being walked on or pinched particu-
larly at plugs, convenience receptacles, and the point where they
exit from the apparatus.
11. Onl_use attachments/accessories specified by the manufacturer.
12. _ Use only with a cart, stand, tripod, bracket, or table
I_Ik]_ specified by the manufacturer, or sold with the app-
aratus. When a cart is used, use caution when moving
the cart/apparatus combination to avoid injury from tip-over.
13. Unplug this apparatus during lightning storms or when unused for
long periods of time.
14. Refer all servicing to qualified service personnel. Servicing is
required when the apparatus has been damaged in any way, such
as power-supply cord or plug is damaged, liquid has been spilled
or objects have fallen into apparatus, the apparatus has been
exposed to rain or moisture, does not operate normally, or has
been dropped.
15. This product may contain lead and mercury. Disposal of these
materials may be regulated due to environmental considerations.
For disposal or recycling information, please contact your local
authorities or the Electronic Industries Alliance: www.eiae.org
16. Damage Requiring Service - The appliance should be serviced
by qualified service personnel when:
A. The power supply cord or the plug has been damaged; or
B. Objects have fallen, or liquid has been spilled into the appli-
ance; or
C. The appliance has been exposed to rain; or
D. The appliance does not appear to operate normally or
exhibits a marked change in performance; or
E. The appliance has been dropped, or the enclosure damaged.
17. Tilt/Stability - All televisions must comply with recommended
international global safety standards for tilt and stability properties
of its cabinet design.
• Do not compromise these design standards by applying exces-
sive pull force to the front, or top, of the cabinet which could ulti-
mately overturn the product.
• Also, do not endanger yourself, or children, by placing eleclron-
ic equipment/toys on the top of the cabinet. Such items could
unsuspectingly fall from the top of the set and cause product dam-
age and/or personal injury.
18. Wall or Ceiling Mounting - The appliance should be mounted to
a wall or ceiling only as recommended by the manufacturer,
19. Power Lines - An outdoor antenna should be localed away from
power lines.
20. Outdoor Antenna Grounding - If an outside antenna is connect-
ed to the receiver, be sure the antenna system is grounded so as to
provide some protection against voltage surges and built up static
charges.
Section 810 of the National Electric Code, ANSI/NFPA No. 70-
1984, provides information with respect to proper grounding of
the mast and supporting structure, grounding of the lead-in wire to
an antenna discharge unit, size of grounding connectors, location
of antenna-discharge unit, connection to grounding electrodes, and
requirements for the grounding electrode. See Figure below.
21. Object and Liquid Entry - Care should be taken so that objects
do not fall and liquids are not spilled into the enclosure through
openings.
22. Battery Usage CAUTION - "Ib prevent battery leakage that may
result in bodily injury, property damage, or damage to the unit:
• Install all batteries correctly, with + and -aligned as marked on
the unit.
• Do not mix batteries (old and new or carbon and alkaline, etc.).
• Remove batteries when the unit is not used for a long time.
Note to the CATV system installer: This reminder is provided to call the CATV system installer's attention to Article 820-40 of the NEC
that provides guidelines for proper grounding and, in particular, specifies that the cable ground shall be connected to the grounding system of the
building, as close to the point of cable entry as practical.
Example of Antenna Grounding
as per NEC -National Electric Code
GROUHDCLAMP AHTEHHALEADIHWIRE
AHTEHHADISCHARGEUHIT(HECSECnO,'_810-2e)
GROUHDIHGCONDUCTORS(,_ECSECTION810-21)
GROUHDCLAMPS
Tq_...._ POWERSERVICEGROUNDINGELECTRODESYSTEM(HECART250pANTH)
ELECTRICSERVICEEQUIPMENT
3
SAFETYINSTRUCTIONS- Readbeforeoperatingequipment
Safety Precautions
Warning: To prevent fire or shock h_, do not expose this equip-
ment to rain or moisture.
Federal Communications Commission (FCC) Warning: Any
unauthorized changes or modifications to this equipment void the
user's anthorily lo operate it.
Laser Safety
This unit employs a laser. Only a qualified service person should
remove the cover or attempt to service this device, due lo possible
eye injury.
CAUTION: USE OF CONTROLS OR ADJUSTMENTS OR
PERFORMANCE OF
PROCEDURES OTHER THAN THOSE SPECIFIED HEREIN
MAY RESULT IN
HAZARDOUS RADIATION EXPOSURE.
CAUTION: VISIBLE AND INVISIBLE LASER RADIATION
WHEN OPEN AND INTERLOCK DEFEATED. DO NOT
STARE INTO BEAM. THE BEAM IS LOCATED INSIDE,
NEAR THE DECK MECHANISM.
Special Information for Canadian Users
This digital apparatus does not exceed the Class B limits for
radio noise emissions from digital apparatus as set out in the
Radio Interference Regulations of the Canadian Department of
Communications.
Radio/TV Interference
This equipment has been tested and found to comply with t?nelimits
for a Class B digital device, pursuant to Part 15 of the FCC Rules.
These limits are designed to provide reasonable proleclion against
harmful interference in a residential installation. This equipment gener-
ales, uses, and can ra_fiate radio frequency energy and, if not installed
and used in accordance with the instructions, may cause harmful inter-
ference to radio communications. However, there is no guarantee that
interference will not occur in a particular installation. If this equipment
does cause harmful interference to radio or television reception, which
can be detenninexl by taming the equipment off and on, the user is
encouraged to try to correct the interference by one or more of the fol-
lowing measures:
i) Reorient or relocate the receiving antenna.
2) Increase the separation between the equipment and the
receiver.
3) Connect the equipment into an outlet on a circuit different
from that to which the receiver is connected.
4) Consult the dealer or an experienced radio/TV technician for
help.
WARNING
To reduce the risk of fire or electric shock, do not expose this appli-
alice II3 rain or mois|ure,
CAUTION
Use of controls or adjustments or performance of procedures other
than herein may result in hazardous radiation exposure.
The set complies with the FCC-Rules, Part 15 and with 21 CFR
1040.10.
Copyright Protection
Unauthorized copying, broadcasting, public performance and lending
of Discs are prohibited.
This product incorporates copyright protection technology that is
protected by method claims of certain U.S. patents and other intel-
lectual property rights owned by Macrovision Corporation and
other rights owners.
Use of this copyright protection technology must be authorized by
Macrovision Corporation and is intended for home and other limited
viewing uses only unless otherwise authorized by Macrovision
Corporation. Reverse engineering or disassembly is prohibited.
Declaration of Conformity
Trade Name: Philips
Responsible Party: Philips Consumer Electronics North America
P.O. Box 14810
Knoxville, TN 37914-1810
(865) 521-4316
CLASS 1
LASER PRODUCT
LASER SAFETY
This unit employs alaser. Due to possible
eye injury, only a qualified service person
should remove the cover or attempt lo serv-
ice this device.
USE OF CONTROLS OR ADJUST-
MENTS OR PERFORMANCE OF
PROCEDURES OTHER THAN
THOSE SPECIFIED HEREIN MAY
RESULT IN HAZARDOUS RADIA-
TION EXPOSURE.
LASER
Type lnGalp/AIGaAs
Wave length 650 nm (DVD)
790 nm (VCD/CD)
Output Power 7 mW (DVD)
7 mW (VCD/CD)
Beam divergence 28_(DVD)
32_(VCD/CD)
The region code for
this set is ALL or 1.
DVDs must be labeled
for ALL regions or for Region 1 in order
to play on this TV/DVD Player. You can
not play Discs that are labeled for other
regions. Look for the symbols above on
your DVDs. If these region symbols do
not appear on your DVDs, you can not
play the DVD in this TV/DVD Player.
NOTE: PICTURES SHOWN MAYBE
DIFFERENT BETWEEN COUNTRIES.
NEVER MAKE OR CHANGE CON-
NECTIONS WITH THE POWER
SWITCHED ON.
CAUTION
VISIBLE AND INVISIBLE LASER
RADIATION WHEN OPEN AVOID
EXPOSURE TO BEAM (WARNING
LOCATION: INSIDE ON LASER COV-
ERSHIELD OR THE BACKPLATE OF
SET)
This product incorporates copyright protec-
tion technology that is protected by method
claims of certain U.S. patents and other
intellectual property rights owned by
Macrovision Corporation and other rights
owners. Use of this copyright protection
technology must be authorized by
Macrovision Corporation, and is intended
for home and other limited viewing uses
only unless otherwise authorized by
Macrovision Corporation. Reverse engi-
neering or disassembly is prohibited.
4
Introduction
Welcome/Registration of Your TV ...................... 2
Safety Instructions ................................ 3-4
Table of Contents ................................... 5
Features .......................................... 6
Disc Types and Disc Cleaning ......................... 6
_Install Menu
How to use the Language Control ................ 7
How to use the Tuner Mode Control .................... 8
How to Automatically Program Channels ................ 9
How to Add or Delete Channels ...................... i0
Picture Menu
How to use the Picture Adjuslment Controls ...... 11
_Sound Menu
How to Use the Sound Adjustment Controls ...... 12
DFeatures Menu
How to Use the Timer Controls ................. 13
Using the Format Control ........................... 14
Understanding the AuloLock TM Controls ............... 15
Setting up the AutoLock TM Access Code ................ 16
How to Block Channels ............................. 17
How to Clear All Blocked Channels at the Same Time .... 18
How to Block All Channels at the Same Time ........... 19
Blocking Programming Based on Movie Ratings ......... 20
Blocking Programming Based on TV Ratings ........... 21
Other AutoLock TM Blocking Options .................. 22
How to Use the Active Control ....................... 23
_Remote Control Use
Setting the Sleeptimer Control ................. 24
How to use the Closed Captioning Control .............. 25
Setting the SmartPicture TM Control .................... 26
Setting the SmartSound TM Control .................... 27
Using the QuadraSurf fMButtons (Alternate Channel)...28-29
Remote Use with Accessory Devices (Direct Method) ..... 28
_ ODeratin_ the DVD Plaver
Operating--the DVD Player - Basic Operation ...... 30
Operating the DVD Player - Menu Bar Operation ........ 31
User Preference Settings - Picture ..................... 32
User Preference Settings - Sound ..................... 33
User Preference Settings - Language ................... 34
User Preference Settings - Features .................... 35
User Preference Settings - Access Code ............... 36
Playing a Disc - Authorizing/Deauthorizing a Disc ...... 37
Playing a Disc - Playing a DVD or a Video CD ......... 38
General Features - Moving to Another Title or Track ..... 39
General Features - Moving to Another Chapter or Index . .39
General Features - Search Forward or Reverse .......... 40
General Features - Still Picture/Picture by Picture Playback .40
General Features - Repeat/Repeal A-B ................. 41
General Features - Time search ....................... 42
General Features - Enlarge Picture (Zoom) .............. 42
General Features - Favorite Track Selection - Video ...... 43
General Features - Erasing a Favorite Track Selection ..... 44
Special Features - Title/Chapter_isc Menus ............ 45
Special Features - Camera Angle ...................... 45
Special Features - Audio Language .................... 46
Special Features - Subtitles .......................... 46
Special Video CD Feature - Playback Control (PBC) ...... 47
Playing Audio CDs .............................. 47-48
General Information
Troubleshooting Tips ......................... 49
Cleaning and Care ................................. 49
Glossary of Terms ................................. 50
Index ............................................ 50
Factory Service Location ............................ 51
Warranty ......................................... 52
5
Active Control TM continuously measures and corrects all
incoming signals to help provide the best picture quality. This
feature monitors and corrects both the sharpness control and
noise reduction control.
Audio/Video Jack Panel allows direct connections with acces-
sory devices, providing quality TV piclure and sound playback.
Audio Volume Leveler (AVL) Control keeps the TV sound at
an even level. Peaks and valleys in volume that occur during
program changes or commercial breaks are reduced, making for
a more consistent, comfortable sound.
AutoLock TM allows you to block lhe viewing of certain chan-
nels or programs with certain ratings if you do not want your
children to view inappropriate malerials.
Auto Programming scans (when activated) for all available
channels from regular antenna or cable signals and slores only
active broadcast stations in the TV's memory.
AutoPicture TM allows you to change the piclare sethngs (color,
tint, contrast, etc.) for various types of programming, such as
sports, movies, multimedia (games), or weak signals wilh lhe
push of one button.
AutoSound TM allows you to select from lhree factory-set con-
trois and a personal control thai you set according to your own
preferences through the on-screen Sound menu. The lhree fac-
lory-set controls (Voice, Music, and Theatre) enable you to tai-
lor the TV sound so as to enhance lhe particular programming
you are watching.
Channel Edit allows you to add or delete channels from the
list stored in lhe TV's memory. Channel Edit makes it easy to
limit or expand the number of channels thai are available lo you
when you press the Channel (+) or (-) buttons on your remote
control.
Closed Captioning allows the viewer to read TV program dia-
logue or voice conversations as on-screen lext.
Contrast + helps you sharpen the piclure quality by making
dark portions of the piclare darker and light portions brighter.
Infrared Remote Control controls your TV and the built in
DVD player.
On-screen Menu shows helpful messages and instructions for
setting TV feature controls (can be viewed in English, French,
or Spanish).
Sleep Timer automatically lures lhe TV OFF after a set amount
of time that you choose.
Standard Broadcast (VHF/UHF) or Cable TV (CATV)
channel capability allows for viewing by antenna or cable.
Stereo capability, including a built-in audio amplifier and twin-
speaker system, allows for lhe reception of TV programs broad-
cast in stereo sound.
Surf Button allows you lo easily switch among only the chan-
nels thai are of interest to you (the ones that you have pro-
grammed into the TV's Surf control through the on-screen
menu).
Timer allows you to set your TV to tam itself ON and OFF
once or daily like an alarm clock.
DVD Player plays DVD discs, Video CDs, Audio CDs, etc.
Create Favorite Track Programs and store them in the TV/DVD
Players memory.
Playable Disc Types
This DVD Player will play Digital Video Discs (DVDs), Audio
CDs, CD-Rs and CD-RW discs. In order to play a DVD or Audio
CD on this DVD Player, make sure the Disc meets the require-
ments for the Region Code as described on page 4,
The Discs should contain the logos shown below and meet the
standards listed for each.
Disc Maximum Disc
Type Logo Contents Playback Time Segments
Dig[tat Sound
Video _. and
Disc v i D ! o_ctures
Disc Size
12cm
8 cm
_2cm
nl
Audio [0 Ill_---'_["_ Sound 8¢m
CD mmmLAmm (singles)
Approx. 4hours
(single-sided)
Approx. Shours
(double-sided)
Approx80 minutes
(single-sided)
Approx. 160minutes
(double-sided)
74minutes
DVDs are
divided into Titles,
which are divided
into Chapters.
Titles and Chapters
are numbered.
20 minutes
Video _n] _mu_ml_ s°und Video CD ....
CD L_JU_JL_ and divided into Tracks
Pictures
CompactDisc0J]_ SoUndand 12cm 74 minutes
Recordable _Pictures 8cm
(singles) 20 minutes
Compact _ Sound
Disc _/' and 12cm 74minutes
Rewritable _/ Pictures
Audio CDs are
divided it_ nu*_bered
Tracks, ie, a track
may be one song¸
Some problems occur because the disc inside the player is dirty. To
avoid these problems clean your discs regularly, in the following
way:
• When a disc becomes dirty, clean it with a CD cleaning cloth.
Wipe the disc from the center out.
Caution: Do not use solvents such as benzine, thinner, commer-
cially available cleaners, or anti-static spray intended for analog
discs.
Your new television and its packing contain materials that can be
recycled and reused. Specialized companies can recycle your prod-
uct to increase the amount of reusable materials and minimize the
amounts that need to be properly disposed.
Your product also uses batteries that should not be thrown away
when depleted, but should be handed in and disposed of as small
chemical waste.
When you replace your existing equipment, please find out about the
local regulations regarding disposal of your old television, batteries,
and packing materials.
6
Auto Lock, Auto Pictme, Auto Sound, Active Control, QuadraSurf
are all registered trademarks of Philips Consumer ELectronics Company.
Copyright © 2002 All rights reserved.
For our Spanish speaking TV owners an on-
screen LANGUAGE option is present. With
the LANGUAGE control you can set the TV's
on-screen menu to be shown hi either English
or Spanish.
3
4
Press the MENU button on the
remote to show the on-screen menu,
Press the CURSOR UP or DOWN
buttons to scroll lhroagh the on*screen
menu until the word INSTALL is
highlighted.
Press the CURSOR RIGHT button
to display the INSTALL menu features.
LANGUAGE will be highlighted.
Press the CURSOR RIGHT button
repeatedly to select ENGLISH or
ESPANOL (Spanish).
When finished, press the SYSTEM
MENU (OSD) button to remove the
menu from the TV's screen.
HELPFUL: ;
The Language control only makes the TV's
on-screen MENU items appear in English
or Spanish text,
It does not change the other on-screen text
features such as Closed Caption (CC) TV
shows.
MNn
Vpk;ture
oSound
oFeatures
o Install
[
AIBfight_less
ColOr
P_atur_
Sharpness
Tint
More...
v
O®
0000
0
IMa_ • I
o Picture Language
o Sound Tu_r Mode
oFeatures AUtOprogram
I_lnst_l _. IC_annelEd_
[-]
Install •
I,Lanqu_,e E,_qlish , I
oTuner Mode
o AutoProgram
oChanoel Edit
I - I
OR
Instatar •
I_[dioma Esp_oI I. I
o Sintonia
o Auto Programa
o EdttarCanal
I - I
7
Tehe TUNER MODE control allows you to
hange the TVs signal input to either
ANTENNA, CABLE or AUTO mode. It's
importantJbr the TV to know what type of
signal to lookJM (From a Cable TV signal or
a normal Antenna signal.) In the AUTO
mode, when the AUTO PROGRAMJkature is
activated, the "IVwill automatically choose
the correct mode.
Press the MENU button on the
remote to show the on-screen menu,
Press the CURSOR UP or DOWN
buttons to scroll lhroagh the on-screen
menu until the word INSTALL is
highlighted,
Press the CURSOR RIGHT button
to display the INSTALL menu fea-
tures.
Press CURSOR UP or DOWN but-tons to scroll the Install features until
the words TUNER MODE is high-
lighted.
Press the CURSOR RIGHT button
to select either ANTENNA, CABLE,
or AUTO mode.
When finished, press the SYSTEM
MENU (OSD) button to remove the
on-screen menu from the TV's screen,
HELPFUL: ;
When CABLE is selected, channels i- 125
are available.
When ANTENNA is selected, channels 2-
69 are available.
When AUTO is selecled, the TV will auto-
matically set itself to lhe correct mode
based on the type of signal it detects when
lhe AUTO PROGRAM feature is activated.
oSoul_d Color
oFeatures Picture
<>Insla_l Sharpness
Tint
More...
[
0000
®®®®
®®®
®®®
®®©
IMain A I
oPiclure Language
oSound TunerMode
oFeatures Auto Program
[ -¢'lnsNI I, ]Cha_oelEdit
I"I
[ InsNl • ]
o Language
rvTunerModeAntenna ,1
o AUtoProgram
ochannel Edit
[ - ]
OR
[Insl_l A ]
o Language
[ €TunerMode cable q
oAutoProgram
oChannelEdit
[ - ]
OR
[Insl_l *, ]
Language
IvTunerMode AUtO•I
<>Auto Program
o Channel Edit
[ - ]
8
your TV can automatically set itself fi)r
$_ local area (o1"Cable TV) channels. This
makes it easy fbr you to select only the TV
stations in your area when the CHANNEL
(+), (-) buttons are pressed.
Note: Make sure the antenna or eable signal
connection has been eompleted before AUTO
PROGRAM is activated.
Press the MENU button on the
remote to show the on-screen menu.
Press the CURSOR UP or DOWN
buttons to scroll lhroagh the on-screen
menu until the word INSTALL is
highlighted,
Press the CURSOR RIGHT buttonto display the INSTALL menu fea-
tures.
Press CURSOR UP or DOWN but-tons to scroll the Install features until
the words AUTO PROGRAM are
highlighted.
Press the CURSOR RIGHT button
to start the Auto Program scanning of
channels. Auto Programming will store
all available channels in the TV's
memory then tane to the lowest avail-
able channel when clone.
When finished, press the SYSTEM
MENU (OSD) button to remove file
menu from the TV's screen.
When CABLE is selected, channels i- 125
are available.
When ANTENNA is selected, channels 2-
69 are available.
When AUTO is selected, the TV will auto-
matically set itself to the correct mode
based on the type of signal it detects when
the AUTO PROGRAM feature is activated.
Main A I
,€Pickle I, ]Brightness
o Sound Oobr
o Features Piotu_
o Install Sharpness
Tint
More...
I * I
@®®
®®®
@®@
®®©
J
IMain • I
o PiOure Language
o Sound Tuner Mode
o Features AUlOProgram
I,/Install _. IChann_ Edit
[ - ]
IInstall • I
o Language
o Tuner Mode
IvAMaProgram _'I
o Channel Edit
I * I
IAuto Program I
o Channel 12
0 00000000000000004)00000
o Channel 13
©©©@©©©©©©©O@©©©@©@©©©©
o Channel 14
© @@@@©©O©©O@@@@@©O©O@O©
[ ]
9
Channel Edit makes it easy fiJr you to ADD
or DELETE channels from the list of
channels stored in the TV's memory.
Press the MENU button on the
remote to show the on-screen menu,
Press the CURSOR UP or DOWN
buttons to scroll lhroagh the on-screen
menu until the word INSTALL is
highlighted,
Press the CURSOR RIGHT button
to display the INSTALL menu fea-
tures.
Press the CURSOR UP or DOWNbuttons to scroll the Install features
until the words CHANNEL EDIT are
highlighted.
Press the CURSOR RIGHT button
to display the CHANNEL EDIT
options,
With the CHANNEL EDIT options
displayed, and CHANNEL NO. high-
lighted; enter lhe channel number (wilh
the NUMBERED or the CH + or -
buttons) you wish to add (Skipped
OFF), or delete (Skipped ON) from the
TV's memory.
Using the CURSOR DOWN button,
scroll the menu to highlight the word
SKIPPED.
Now use the CURSOR RIGHT but-
ton to toggle between ON or OFF.
If ON is selected the channel is
skipped when scrolling channels with
the CH + or - buttons. If OFF is
selected the channel is not skipped
when scrolling channels with the CH +
or - buttons.
When finished, press the SYSTEM
MENU (OSD) button to remove the
menu from the TV's screen.
o Sound Color
o Fealures Picture
o Install SI_arpn_ss
Tint
More...
I
0 ®
0000
(D@O
@
®®©
MNn A I
o Piclure Language
oScund Tuner Mode
oFeatures Auto Program
[ _ Install _, ] Channel Edit
I - I
IInstall A I
oLanguage Channel NO.
o Tuner Mode Skipped
o AutoProgram
I€c_nelEd__1
I - I
oSkipped
I
IChannel E{f_t •
oChannel No.
IvS_pp_ On•
IEdit A
oCP_annelNo.
I
I0