Entity YU004 User manual

YU004, YU005
10.1” Tablet
Instrucon Manual

02
Contents
Getting Started 03
Box Contents 03
Product Overview 04
Features 04
Device Description 05
Home Screen Layout 07
Quick Settings Menu 08
About The Screen 09
Using The Tablet 10
Before First Use 10
Starting Up 10
Tablet Power 11
Touchscreen Actions 12
Connections 13
WiFi 13
Bluetooth: 14
Computer: 14
Charging The Tablet 15
Applications 16
Moving a home screen icon 16
Removing a home screen icon 16
Uninstalling an application 16
Creating Application Folders 17
Changing your wallpaper and widgets 17
To download new apps 17
External Storage 18
Inserting a Memory Card 18
Formatting a microSD card 18
File Management & Security 20
Transfer Files To Your Tablet 20
Backing up your les 20
Syncing media automatically 21
Improving security on your tablet 21
Product Support 23
Troubleshooting 23
Specication 25
Safety Information 26
After Sales Support 28
Product Guarantee 28
Disposal Information 28

03
Getting Started
Congratulaons on choosing to buy an Enty product. All products brought to you by Enty are manufactured to the
highest standards of performance and safety. Before use, please read this manual carefully. It gives important instrucons
about safety, use and maintenance of your Tablet.
We hope you enjoy using your purchase for many years to come. Remove all packaging material. You may wish to keep the
packaging for future use or storage of your Tablet. Alternavely, dispose of accordingly.
When opening the box please ensure that the items listed below are included within. If an item is missing please contact
where you purchased the item.
• 10.1” Tablet
• Power Adaptor
• Instrucon Manual
Box Contents

04
Features
Browse the Web
Visit your favourite websites.
Check your e-mail
Keep in touch with friends and family.
Watch Youtube™ videos
Browse the world’s most popular video-sharing community.
Discover thousands of apps for Windows™
Games, applicaons and more with the installed market
place.
Enjoy your media library anywhere
Portable powerhouse plays your chosen music, videos and
photos.
microSD memory card reader
Browse the world’s most popular video-sharing community.
Built-in camera
Convenient front-facing and rear-facing cameras.
05
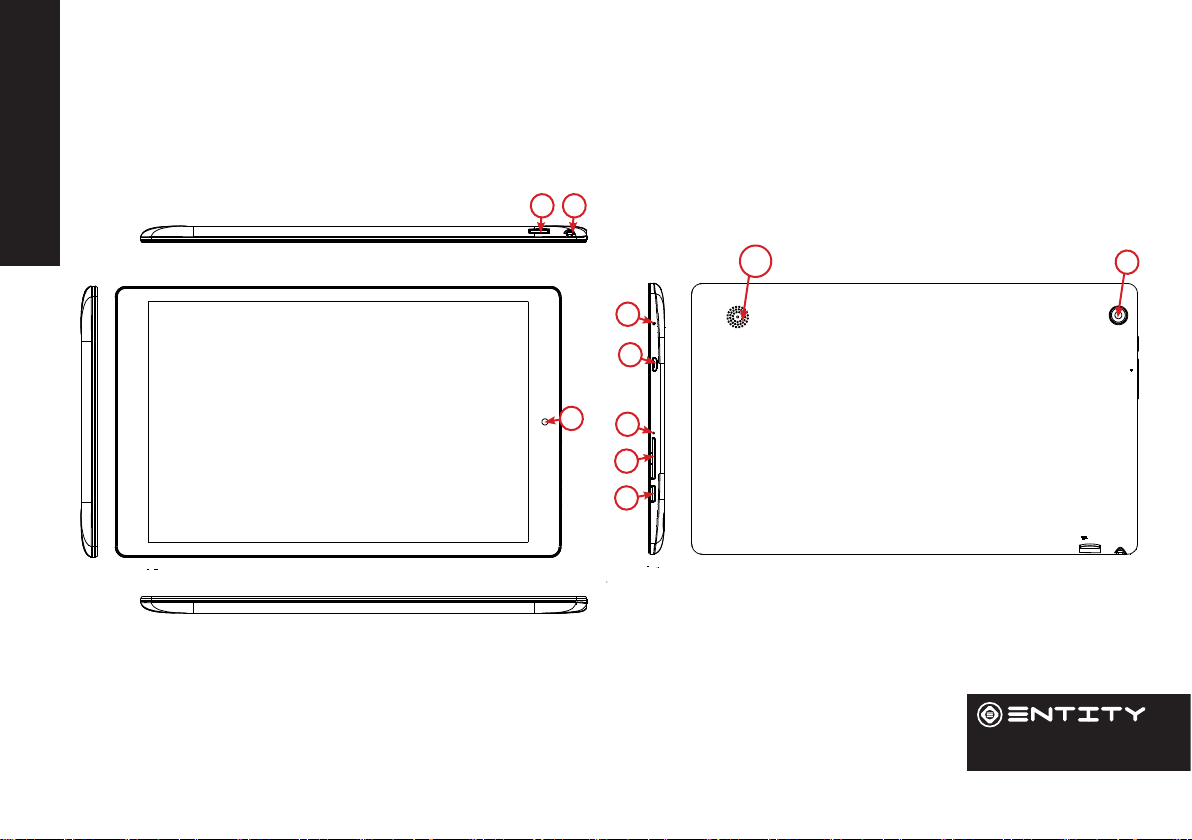
Product Overview
Device Description
3
1
2
4
5
76
8
9
10

06
Name Descripon
1Power Press to turn the unit on, or to turn the screen on or o. Press and hold to access the
Power O menu.
2Volume +/- Control device output volume.
3Mic Use internal MIC to record sound.
4Micro USB Connect to a USB device.
5Reset Reset device sengs
6Aux Jack Audio output connecon for headphones.
7SD port Insert micro SD card to expand Tablet storage.
8Camera 0.3MP Front-Facing Camera.
9Camera 2MP Rear-Facing Camera.
10 Speaker Rear Speaker for Audio output
07
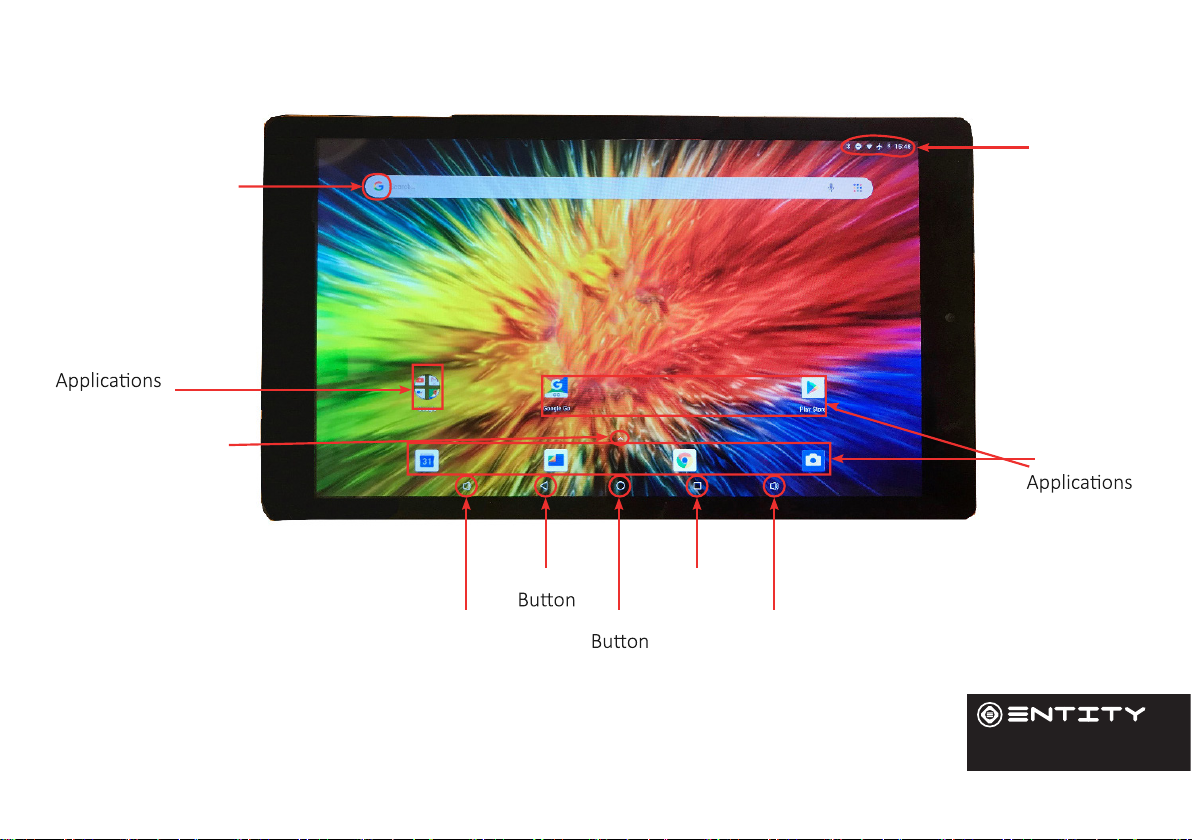
Home Screen Layout
Google
Search
Google
View All
Apps
Volume
Down
Back
Home
Recent
Apps
Volume
Up
Pre-Installed
Android
Status
Bar

08
Quick Settings Menu
1
2 3 4
5 6 7
8
9
To access the quick sengs, touch the top of the screen and pull
down to open the menu.
1. Brightness: To adjust the screen brightness.
2. WiFi - Tap on the icon to turn on/o your WiFi.
3. Bluetooth - Tap on the icon to turn on/o your Bluetooth
connecon.
4. Do Not Disturb - Turns o all nocaons excluding alarms.
5. Auto-Rotate Screen - Tap to acvate/deacvate.
6. Baery Status
7. Airplane Mode - Tap to turn on/o all data, network and
wireless
connecons.
8. Cast - Wirelessly cast your screen to another device.
9. Sengs - Access all sengs.

09
About The Screen
This tablet is equipped with an easy to use touch screen.
The mul-touchscreen tablet only requires gentle ngerp pressure on the screen to acvate the necessary feature.
Note: To avoid damage to the device touch screen, avoid using excessive force. Also this device does not support the use of
other control objects, e.g. a stylus.
Protecve Film:
A thin lm has been applied to the screen to protect it during shipping. This lm should be removed before the Tablet is
used. To remove, simply take a corner of the lm and peel away from the screen.
Note: Do not use any sharp object to remove lm as this could cause damage to the screen

10
Using The Tablet
Before First Use
• Before rst use, please make sure the tablet is fully charged. If not, connect the power adaptor or connect to a
computer by USB cable, so your tablet can charge fully.
• Charging me is at least 6 hours the rst me, 4 hours thereaer.
Note: This tablet contains a Built-in type rechargeable Liion baery, the charger must be a standard adaptor (Input:
AC100~240V 50/60Hz), this Tablet includes DC charging. USB interface can charge, choose USB interface to charge.
• Ensure that you have a good wi connecon, with your network name and password available.
Starting Up
Turn on the device by holding in the power buon for 2/3 seconds.
The rst me you use your device, the startup wizard will help you set up your device:
• Language
• Date & Time
• WiFi Connecon
• Locaon service opons
• Third-party applicaons
11
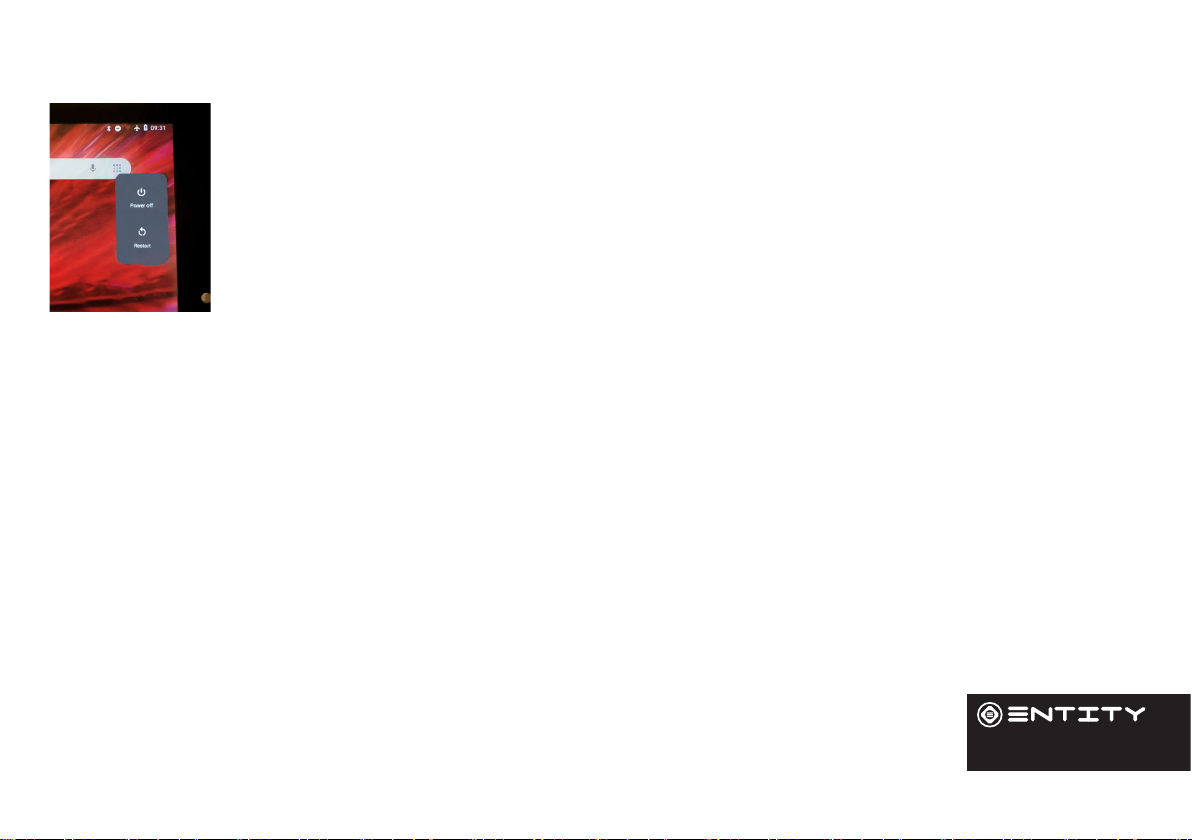
Tablet Power
Turning The Tablet On or O:
- To turn the tablet on:
Press and hold the Power ket unl the LCD screen turns on. Wait unl the Home screen
appears; the tablet is now ready for use.
- To turn the tablet o:
Press and hold the Power key unl the Device Opons menu appears. Touch the power o
opon on the screen to turn o the tablet.
Turning the Screen On or O:
When the tablet is on, you can turn o the screen to conserve baery power. Simply press the Power key once
to turn the screen o. Press the Power key again to turn the screen back on.
NOTE: To conserve baery power, the screen can be set to turn o automacally when the tablet is not in use
(between 1 and 30 minutes). The screen meout opon can be found in the Display menu.
Unlocking The Screen:
When the screens o, you will have to unlock the screen when you turn it back on. To unlock the screen, swipe
up from the lock icon.

12
It is strongly recommended that you sign into/register for a Google account (needed for the installaon of new
apps). When prompted it is also recommended that you agree to backing up your tablet to the Google account.
This creates copies of all of your les should you ever need to restore the tablet.
Touchscreen Actions
You can control the funcons of tablet using your nger with the following acons:
Touch To acvate an on-screen item (e.g. applicaons,
buons, menu items, and the leer/symbols
of the on-screen keyboard), simply touch them
with your ngerps.
Touch and Hold Some on-screen items have an alternate acon
if you touch and hold them (e.g. opening an
alternate menu or acvang the drag funcon).
To touch and hold an item, touch the item and
do not li your ngerp unl the acon occurs.
Drag Drag an on-screen item to change its posion
(e.g., an applicaon icon on the home screen).
To drag an item, touch and hold it for a moment,
then without liing your ngerp, move the
icon around the screen unl it reaches its target
desnaon.

13
Touchscreen Actions
The Nocaon bar displays icons that indicate your tablet’s Wi-Fi status.
Nocaon that an open Wi-Fi network is in range.
Connected to a Wi-Fi network (waves indicate connecon strength).
[No Icon] There are no Wi-Fi networks in range, or the Wi-Fi is turned o. Turn on the Wi-Fi if it is not already on.
To turn on the Wi-Fi:
Go to the Home screen by pressing the home key (O).
Open the Sengs menu by touching the icon on the home screen to open
the launcher, then touch the sengs icon.
Open the Wireless and Network menu and slide the tab to the on posion.
When Wi-Fi is on, the tablet will look for and display a list of available
networks.
Note: If a network that you have connected to previously is found, the tablet will connect to it.If you don’t see your
network in the list, you can force the tablet to re-scan. To scan for networks, tap the Menu key, and then touch Scan.
In the same Wi-Fi sengs menu above, touch a network in the list. If the network is open,the tablet will prompt you to
conrm connecon to the network. Touch Connect to conrm. If the network is secured (as indicated by a Lock icon), the
tablet will prompt you to enter a password or other credenals.
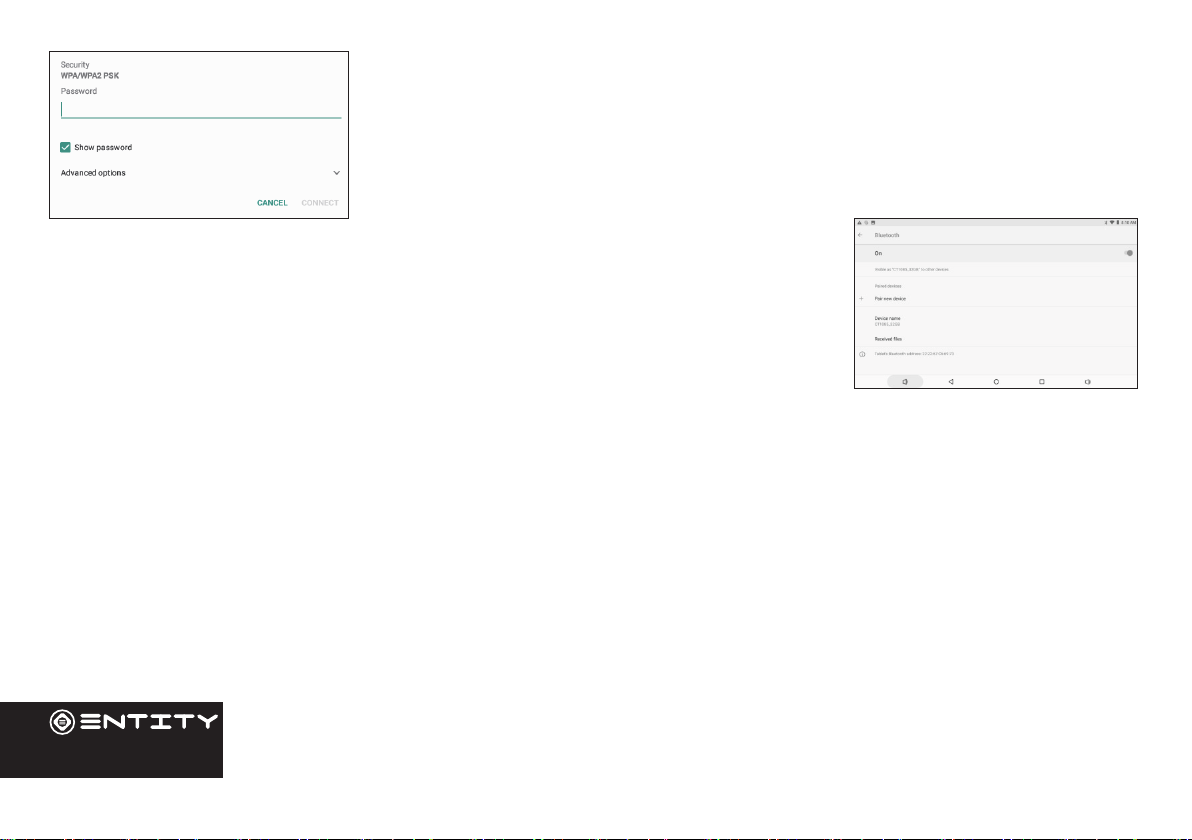
WiFi
14
Touch the Wireless password box to show the on-screen keyboard and then use it to
enter the password. Touch Connect to conrm. When you have successfully connected
to a Wi-Fi network, the Nocaon bar in the upper right of the screen will show a
Wi-Fi signal indicator.
Bluetooth:
• Turn on Bluetooth - Go to Sengs > Bluetooth.
• Tap the device that you wish to connect to in the device list, then follow the onscreen
instrucons to connect to it. The tablet must be within about 30 feet (10 meters) of the
Bluetooth device.
Computer:
Connect the tablet to a computer to transfer les.
1. Connect your tablet to the computer. Plug the small end of a micro USB cable into the USB 2.0 high speed connector of
the tablet. Plug the large end of the cable into an available USB 2.0 high speed port on the computer.
2. When your tablet is connected, slide down the USB icon then touch icon USB connected.
3. Mount the storage. Touch buon Transfer les(MTP) to mount the tablet’s built-in storage. When it is mounted, you can
copy les to or from your tablet.

15
Charging The Tablet
When the Tablet has nished charging, the baery icon will become green and stop scrolling on the screen.
In order to prolong the service life of the Tablet, we recommend using the full baery power unl at before recharging it.
• If you do not to use the Tablet for a long me, in order to avoid power damage, please charge/use the Tablet once a
month.
• When the tablet has a low baery level, a nocaon will pop up on the screen, either shutdown or plug in your charger.
• If the baery is completely at, there will be a delay between plugging the Tablet in and being able to use it.
• The Tablet should be in standby status while charging. Unless the baery has completely drained you can use the Tablet
whilst charging but the charging process will take longer.
• When the Tablet is on you can turn o the screen to conserve baery power. Simply press the Power key once to turn the
screen OFF. Press the Power key once again to turn the screen back ON.
• Charge the Tablet when:
1. The baery power icon indicates power is low
2. The system automacally shuts o.
3. Operaon buons do not respond.
16
Applications
Moving a home screen icon
Touch and hold your nger onto the icon unl a small menu appears. You can then slide it to the
desired locaon, and release your nger.
Removing a home screen icon
Touch and hold the icon unl the small menu appears and then slide it over towards the remove
icon.
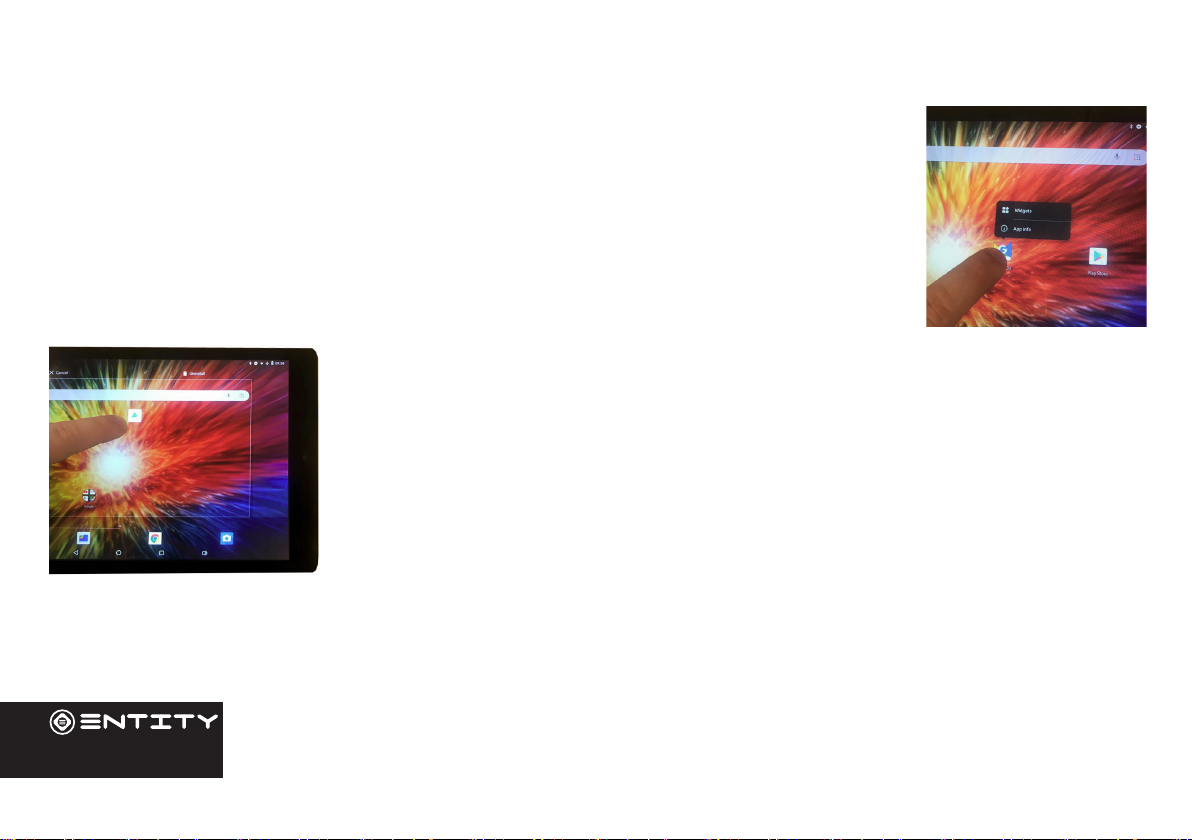
Uninstalling an application
You can only unistall third-party applicaons. Applicaons that are built into the rmware
such as some Google Apps (e.g. clock, calculator, seng etc) cannot be deleted but some
may be disabled in ‘Sengs’.
Apps downloaded since tablet set up may be deleted to free up memory space. From the
apps menu, touch and hold the app icon, slide your nger towards the top of the screen and
drop it over the uninstall bin. To check which applicaons are downloaded or built-in, go to
‘Sengs’ then ‘Apps’. You can also unistall apps in ‘Sengs’ and move them from internal
memory to SD card etc.
17
Creating Application Folders
To organise your apps, drop one app icon over another on the home screen and the two icons will create a folder. You can
add many more apps into it. To removve one app from a folder, touch, hold, and drag it to ‘Remove’ (appearing on the top
of the screen). Taap on ‘Unnamed Folder’ to name it.
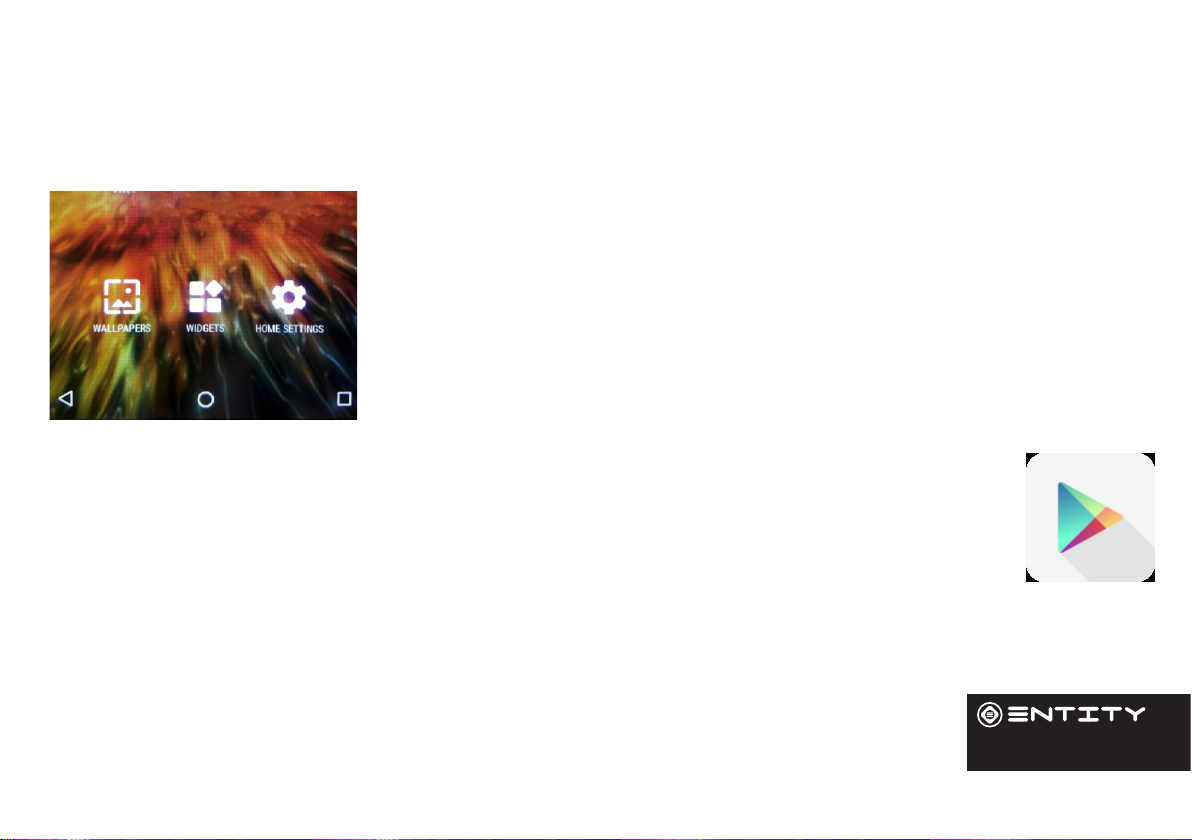
Changing your wallpaper and widgets
Hold your nger on the home screen in a space where there are no apps, then touch
‘Wallpapers’ or ‘Widgets’ and choose from the list.
To download new apps
For your tablet touch the Google Play Store icon. There you will nd over 1 million apps including many which
are free. Even if you only use free apps you will sll need to create a Google account but you dont need to
enter your credit card details to do this.

18
External Storage
Inserting a Memory Card
This tablet accepts microSD memory cards. This allows you to increase the memor capacity of your tablet and also to play
media les that are stored on the memory card (e.g. music, photos or video les).
To insert a memory card:
• Align the memory card with the microSD slot. The metal poron of the memory card should be facing away from the LCD
screen.
• Push the card into the slot, unl you hear a click. This signies that the card is clicked into place.
Do not aempt to insert objects other than a microSD card into the card slot. A compable memory card should t easily into the card slot. If the card
will not easily t, check the alignment of the card. Do not aempt to force it into the slot. Avoid touching the metallic contacts of the memory card.
Formatting a microSD card
Note: Formang an SD card will wipe any and all data from the SD card’s storage. If you wish to retain any les please
transfer then onto a computer or other device before formang.
The SD card should be specically formaed before the opon to install or transfer Apps.
• Insert a microSD card into the slot.
• Go to ‘Storage’ from tablet sengs and choose ‘SD card’.

19
• Touch ‘ ’drop down menu to choose ‘Storage Sengs’.
• Touch ‘Format as Internal’ and then follow up with ‘Erase & Format’ process to complete.
20
File Management & Security
Transfer Files To Your Tablet
From a computer, use the USB lead provided in the package box. From a USB device with a standard male USB connecon,
you will need to purchase a female USB to micro USB lead in order to connect it (e.g. USB card reader, USB connecon from
a camera etc.). Via e-mail, simply add aachments to e-mail messages and send to your Google e-mail address. Then open
Gmail, open the message and save the le from e-mail to your tablet memory.
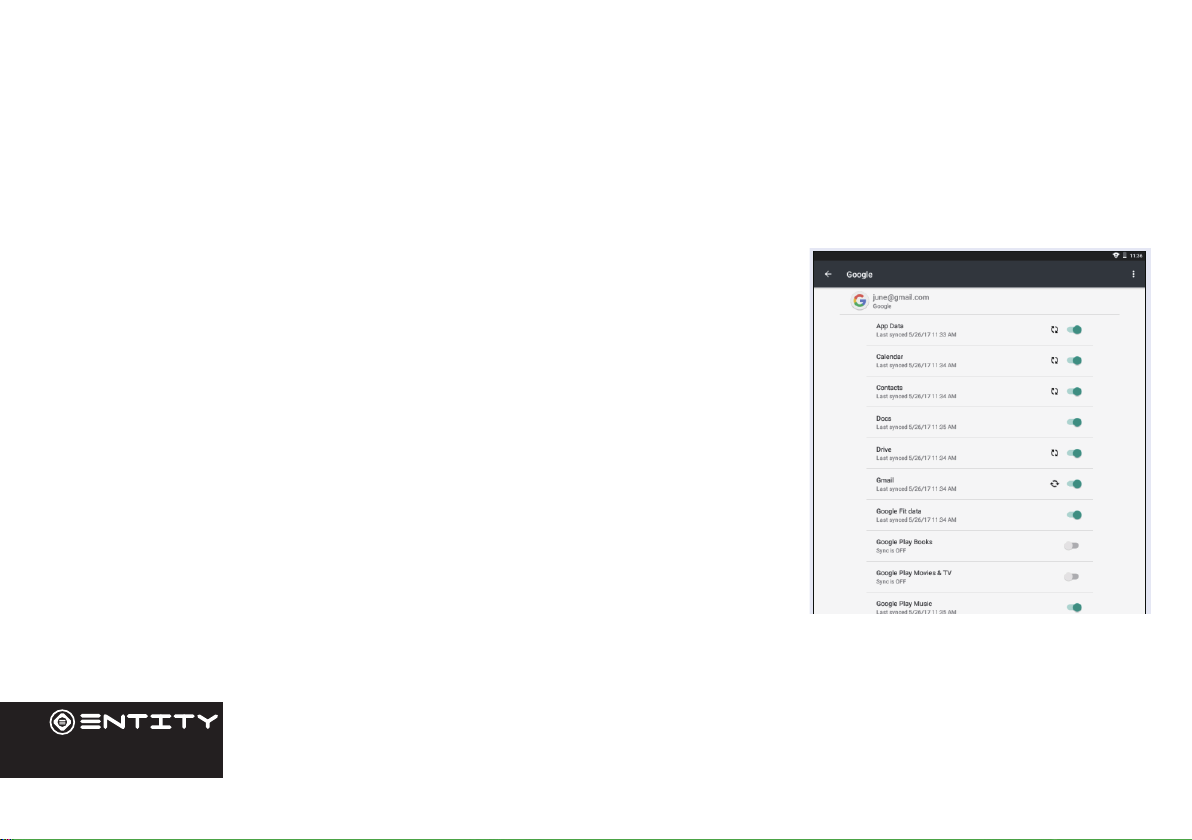
Backing up your les with your Google account
For this process to work you must be connected to a WiFi Network
• Before backing up, please download the ‘Google Drive’ App from the play store.
• Make sure the les you want to back-up are added to your Google Drive.
• Go to ‘Sengs’. Under Accounts/Google, touch your Google email address and
ck all the data you want to back up, including ‘Drive’. You can access the data from
anywhere you have access to your Google account. If your Google account has not
been set up yet, choose ‘Add account’ and proceed to set up an exisng or create a
new one. At the last set up step, choose ‘Keep this tablet backed up with my Google
account’ and all your data will be backed up.
This manual suits for next models
1
Table of contents


