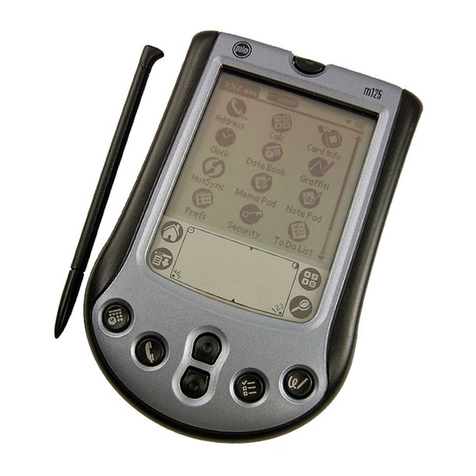
ePad EP8402 User manual

ePad
User’s guide - 1 -
ePad
User ’s guide
Model: EP8402
Version: 1.1

User’s guide - 2 -
FCC – B Radio Frequency Interference Statement
This equipment has been tested and found to comply with the limits for a class B
digital device, pursuant to part 15 of the FCC rules. These limits are designed to
provide reasonable protection against harmful interference when the equipment is
operated in a commercial environment. This equipment generates, uses and can radiate
radio frequency energy and, if not installed and used in accordance with the instruction
manual, may cause harmful interference to radio communications. Operation of this
equipment in a residential area is likely to cause harmful interference, in which case
the user will be required to correct the interference at his own expense.
Notice 1
Any changes or modifications made to this equipment that are not expressly approved
by the party responsible for compliance could void the user’s authority to operate the
equipment.
Notice 2
Shielded interface cables and A.C. power cord, if any, must be used in order to comply
with the emission limits.
ePad

User ’s guide - 3 -
Copyright Notice
The material in this document is the intellectual property of us.
Our products are under continual improvement and information in this document is
subject to change without notice. WE SHALL NOT BE LIABLE FOR TECHNICAL
OR EDITORIAL ERRORS OR OMISSIONS CONTAINED HEREIN.
Trademarks
All trademarks used in this manual are the property of their respective owners.
Strongarm is registered trademark of Intel Corporation.
Windows CE 3.0/CE .Net is registered trademark of Microsoft Corporation.
Windows 98 is registered trademark of Microsoft Corporation.
IE, Pocket Word and Inbox are registered trademarks of Microsoft Corporation.
ClearVue is registered trademark of Westtek Company.
ePad

User’s guide - 4 -
Contents
Safety Instructions............................................................................................................ 6
Ha rdware configuration .................................................................................................. 7
Top view of EP8402...................................................................................................7
Bottom view of EP8402.............................................................................................8
Getting Started ............................................................................................................... 10
Basic operations.............................................................................................................. 11
Desktop.....................................................................................................................11
Control panel ............................................................................................................ 11
Pocket Word ............................................................................................................. 11
Internet Explore........................................................................................................ 11
Inbox.........................................................................................................................11
Media Player ............................................................................................................11
Networking capability..............................................................................................11
Printing support........................................................................................................12
Battery ......................................................................................................................13
Power/Message LEDs ..............................................................................................14
On board Flash memory...........................................................................................14
Software reset ...........................................................................................................15
Buttons......................................................................................................................15
Palm-reject touch panel............................................................................................16
VGA out ...................................................................................................................16
Operation environment ............................................................................................16
ePad

Remove/insert cover.................................................................................................16
Eject/insert Back Stand ............................................................................................17
Software keyboard and Handwriting recognition program .....................................17
PC Synchronization........................................................................................................ 18
Driver/Application installation ..................................................................................... 19
OS image upgrading: ..................................................................................................... 21
QuickSetting Utility........................................................................................................ 22
Miscellaneous:..........................................................................................................22
Brightness:................................................................................................................22
Volume: ....................................................................................................................22
Backlight: .................................................................................................................22
Rotation: ...................................................................................................................23
F-keys: ......................................................................................................................23
Flash .........................................................................................................................23
Registry: ...................................................................................................................24
Information:..............................................................................................................24
Frequently Asked Questions ......................................................................................... 25
Specifications ................................................................................................................. .30
- 5 -
User’s guide
ePad

Safety Instructions
1. Always read the safety instructions carefully.
2. Keep this device (include the battery pack) away from excessive moisture and
temperature extremes. Do not expose it to liquids or precipitation.
3. Make sure the voltage of the power source matches the hardware specification
before connecting the AC adapter to the power inlet.
4. Do not disassemble, crush, puncture, short external contacts the battery pack, or
expose it to fire or water.
5. The openings on the case somewhat are for air convection hence protects the
device from overheating. DO NOT COVER THE OPENING.
6. Avoid scratching the surface of the screen and banging it against hard objects. It
would damage the cover of touch panel and cause it not response at all. Only use
the stylus provided with this device to prevent scratching the screen.
7. Prevents this device from dropping and electrical shock.
8. All caution and warnings on the device should be noted.
9. If any of the following situations arises, get the device checked by a service
personnel:
- The A.C. power adapter or its plug is damaged.
- Liquid has penetrated into the device.
- The device has not work well or you cannot get it work according to this
User’s Guide.
- The device has dropped and damaged.
- If the device has obvious sign of breakage.
10. DO NOT LEAVE THIS DEVICE IN AN ENVIRONMENT UNCONDITIONED,
STORAGE TEMPERTURE ABOVE 70 C (158 F), IT MAY DAMAGE THE
DEVICE.
- 6 -
User’s guide
ePad

Hardware configuration
1.
1.Power Jack
To A.C. power adapter
2. MIC-In Jack
Stereo Microphone input
3. Line out Jack
To earphone/ext. speaker
4. Mini IO Port
USB client– sync. to PC
VGA –Monitor/Projector.
5. Swing button
Page up/down and Enter.
6. Infra red
SIR, max. 115.2Kbps.
7. Power button
Power on/off system
8. USB Host port
USB v1.1 (12Mbps).
9. PCMCIA slot
PC card 16bit mode.
10. Cover/Stylus slot
For cover or stylus
11. Message LED
Indicates new message.
12. Function keys
Programmable Application
Buttons
Refers to “Quicksetting”.
13. Microphone
Internal mono MIC
Top view of EP8402
- 7 -
User’s guide
ePad

e11114.
14.Rear port
To Sec. battery and external k/b.
15. Main battery breaker
Break out main battery power.
Lock it on left position to enable
main battery power.
16. Hardware Reset button
Data will lose if you take this
action. Refers to “Basic
Operations, software reset “ to
learn how to do software reset.
17. Lower BackStand
Elevate EP8402 about 30 deg.
Good for taking notes.
18. Higher BackStand
Elevate EP8402 about 60 deg.
Good for browsing data.
19. Decoration/security hole
Tie your decoration or security
cable here.
20. Internal speaker
Internal mono speaker.
21. BackStand ejector
Move left to draw the Stand out.
Bottom view of EP8402
- 8 -
User’s guide
ePad

Our Shipping package should include:
ePad main set include main battery inside.
Stylus
AC adapter and its power cord
User ’s guide
Leather Cover
Carry bag
Mini port USB sync cable
Windows CE .NET Operation System
Optional Accessories are
Secondary Battery pack
Mini port 2-in-1 cable (USB + VGA)
RS-232 cable
Folder Keyboard
Name card scanner
Bluetooth adapter
GPRS cellular phone card
GPS receiver
Car adapter
802.11b WLAN card
- 9 -
User’s guide
ePad

Getting Started
Step 1,While first opening ePad gift box, please make sure that no device
damaged or components lost in this package.
Step 2, Remove the film on your ePadsurface; it’s for protecting screen.
Step 3, Built-in battery is charged to 50~80% of its capacity before shipping. Even
Step 4, Find out “Main battery breaker” on the bottom side (it is
covered by Microsoft Windows CE .NET license label),
push the bar to the left until you feel it has been locked.
so, we suggest you charge it for more than 8 hours for the first time.
Warning! Make sure this breaker bar is locked on the left hole. Uncertain lock
may cause power lose and may corrupt file storage.
Step 5, It takes 36 seconds to boot for the first time. 5 seconds for bring up to boot
loader screen, next 25 seconds for loading OS image to DRAM (process is
showed on the screen). Then 6 seconds with blank screen for bringing up
desktop. During the course of booting, the red Message LED is on till OS
brings up. Lost power or hardware reset will go through this process again.
Step 6, Set current date and time to ePad by tapping Start > Settings > Control panel
> Date/Time. This setting can be done by tap “time” on the right-bottom
corner of system tray.
Step 7, Calibrate touch panel by tapping Start > Settings > Control panel > Stylus.
Step 8, Give an asset’s name for this one by tapping Start > Settings > Control panel >
System > Device name.
- 10 -
User’s guide
ePad

Basic operations
Desktop
Looks and works the same as Microsoft Windows series classical desktop.
Tap Start on the left-bottom corner to experience Windows CE OS.
System tray is on the right-bottom corner, including Time, Input panel, power status…
Tap any task on the task bar for 1 second will prompt you to “Close” it.
Control panel
The control panel of WinCE is somewhat like that of Windows 98.
Pocket Word
It is most like MS Word of PC but only a compact editorial format.
File transferring between PC and ePad will translate autom atically.
See on-line help for more information.
Internet Explore
It is most like MS IE of PC but only supports version 5.5.
Inbox
See on-line help for more information.
Media Player
See on-line help for more information.
Networking capability
ePad joins network either with LAN or WAN by wire or wireless connection.
Within LAN environment
Connect to local area network by PCMCIA LAN card, 802.11b Wi-fi card.
Most of such kind of network environment has DHCP server take the responsibility
to dynamic assign an IP address for new attached device. That is you can bypass
-
User’s guide - 11
ePad

(click ok) the “network adapter property dialog window” if you insert a LAN card
into
ePad
Or you need to ask your network administrator to get the DNS,
network mask, gateway and IP address.
Same process as 802.11b Wi-Fi card. The only difference is that you need to select
one “network” to connect before you can use it. A “network” list will pop up if
your Wi-Fi card has been recognized by Windows CE system. The “network” here
can also be known as 802.11b access point.
Within WAN environment
Connect to WAN by 56K, v.9x modem card or GPRS modem card.
GPRS modem is known as 2.5 generation of Mobile Phone system. There are 2
approaches to get GPRS service: By GPRS PC card directly or by Bluetooth
adapter.
For 56K, V.9x modem card, it is supported by Microsoft standard driver.
For Blue tooth adapter, it is also supported by Microsoft standard driver.
For GPRS card, 3rd party driver and utility may require for proper working. Get into
our website for new updates
Use RDP program that is provide by Windows CE .NET to remote login/connect
Desktop PC via LAN or Modem connection or to simulate Windows Terminal
client.
Mapping a network resource (ex: shared drive of other PC, shared printer) can be
done by “net” command within “Command Prompt”.
NOTE: “net” command is supported by Microsoft NetBEUI network protocol. For
more descriptions, please refer to Q&A paragraph.
Printing support
support USB PCL4 Printer.
Connect to USB PCL4 printer or network printer through LAN card:
Step 1: open application that supports print function, ex: Pocket Word.
Step 2: After opening a file on the application, tap File > Print.
- 12 -
User’s guide
ePad
ePad

Step 3: in the Print window, choose your printer type (PCL Laser or Inkjet) and Port
as USB or Network. If you use network printer, enter its path in Network Path. Other
options you can set them by yourselves.
Battery
General description:
Your is equipped with a Lithium polymer battery. It’s very slim and light.
The main built-in battery has a switch locates on the bottom side and beneath Irda
cover (refer to item 15, Hardware Configuration). It is used to break away power
supply path of built-in battery to system for safety reason. Make sure it is properly
locked before you start to use it.
Discharge:
Its battery-hour is about 4 hours that is tested at situation of full charged, continuous
working and no power saving enabled.
An external secondary battery pack as an optional accessory can provide you
another 4 battery-hour while you have such demand.
If ePad is powered by battery only, OS will go off (suspend) automatically as its
capacity is going down to 10%. This is in order to keep the data of DRAM. To
release it, please have another power source in (AC or secondary battery).
A 10% capacity remained battery can keep your DRAM data for 24 hours. Please
get it charged as soon as possible. You may lose data that saved in DRAM but not
in FLASH. Refer to “On board Flash memory” section to learn how to take
advantage of it.
Charge:
According to characteristic of Lithium battery, there is almost no “memory” effect
on it. That is to say, you don’t need to discharge it before charge.
ePad allows you to charge battery as long as you plug AC adapter in, no matter it
is on or off, battery breaker is broken or not. It takes about 2.5 hours to charge it
- 13 -
User’s guide
ePad
ePad

from empty to full.
If secondary battery present, both batteries are charged at the same time. Because
charges secondary battery with only half current, it takes 5 hours to get it
full charged.
A red LED in power button lights on indicates built-in main battery is being
charged.
Secondary battery shows her charge status on its own pack.
Battery capacity shows on control panel is secondary at the first priority then main
battery .
Power/Message LEDs
The Power button is the power LED as well.
The right half of the power LED is in red when the battery is being charged by AC
adaptor no matter the system is on or off.
The left half of the power LED is in blue while the system is turned on no matter
what is its power source.
Message LED is reserved to some special applications.
On board Flash memory
Pedprovides you an on board flash memory to store files. The FLASH folder in My
Computer is what we provide to you.
To know more about FLASH folder, check it out through Start > Settings > Control panel >
Storage Manager. A name marks with star sign, “*”, in the List window indicates that
is a formatted and mounted disk partition.
Remember to change the save path to here instead of Windows folder. It could be
done by choose “save” option in “file” menu in an application, by “copy” action
in file manager or even by exploring WinCE device via ActiveSync.
It takes a little time to writing large data. Averagely, its writing speed is about
0.7MB per second.
- 14 -
User’s guide
ePad
e
ePad

Save data here can prevent data lost if EP8402 is running out of power.
Software reset
Keep F1, F4 keys being pressed then same with Power button for about one second
will cause OS reboot (software reset). This action will not turn off system power
but turn off the LCD screen (Power LED keeps on). During reboot time, Message
LED will turn on till the system has been boot again.
In the following circumstances, a soft reset is necessary:
- When system is not working normally;
- After finishing an installation of application or driver.
After soft reset, applications and data in RAM will not lose, but all the applications
that were activated before soft reset will be terminated to release the RAM.
Soft reset will clear registry keys of driver in the RAM. To keep them, save registries
every time when you add driver or applications. Refers to Quicksetting-Registry to
learn more.
Buttons
On the top-right corner is the Power button. Press it once to toggle system on or off.
In order to save battery power, Windows CE automatically goes to standby mode
if system has idled for a certain length of time. The length of time can be set from
Start – Settings – Control Panel – Power – Turn off.
For the same reason to save battery power, the Backlight of LCD will turn off if
system has idled for a certain length of time. The length of time can be set from
Quicksetting – Backlight.
To wakeup backlight, touch screen, USB mouse or USB keyboard can achieve it.
In the middle of the right side of Pad is the Swing button. It is used to “Up”,
“Down” and “Enter”.
On the bottom of top case, there are 4 programmable Function buttons. Please refer
to F-keys in the below Chapter of Quicksetting Utility for more descriptions.
- 15 -
User’s guide
ePad
e

ePad
Palm-reject touch panel
In order to provide a comfortable full-screen humanly inputting interface to users,
ePad uses palm -reject touch panel that is different from popular ones. With the
help of special driver, you can write on ePad just as you do on paper without
floating your wrist in the air in fear of malfunction the touch panel.
VGA out
Plug in the mini port cable into and CRT connector
to CRT monitor or projector.
NOTE: please turn our mini port cover to 180º to make you
plug the cable more easily
Enable VGA out from Quicksetting – Misc. and tap OK.
You will have only one displaying direction on Monitor or Projector even though
there are four directions on ePad LCD. Utilize to our hardware VGA chip
benefit, we make the LCD portrait display data to landscape direction.
Because of that, system performance may down a little slow when VGA out is
activated.
Operation environment
Operation temperature: 0~40 °C
Storage temperature: -20~70 °C
Operation humidity: 20~85% RH
Storage humidity: 20~90% RH
Remove/insert cover
The slot reserved for leather cover of Pad and also for stylus holder.
While using leather cover the upper clipping part is widened to insure the reliability.
Therefore, friction here is normal. When you want to remove the cover, we suggest
that you hold the cover directly and pull up. Do not push the clip on the top.
Because it clips so tight that is difficult to remove the cover by the clip.
- 16 -
User’s guide
e
ePad

Eject/insert Back Stand
Use our Back Stand to have good read and/or write angle. With Bigger Stand, you
can tilt the angle of 60º for reading; with smaller Stand, you can tilt 25º for writing.
Remove and insertion of Back Stand is very easy for you:
To eject Back Stand: move the Back Stand ejector to the left and draw the stand out at
the same time.
To insert Back Stand: push Back Stand firmly into the groove.
You can have a secondary (backup) battery here by replace Back Stand. The electric
connection is achieved through Rear Port.
Software keyboard and Handwriting recognition program
Your ePad has software keyboard and handwriting recognition program.
Click on the sixth icon below once and wait for 2 seconds, that’s pop up option menu
for you to select LargeKeyboard or smaller keyboard.
Double click it to toggle on/off software keyboard.
“Transcribe” is the handwriting recognition program by Microsoft.
There is a shortcut on desktop or launch it with LargeKB (hand icon on right side).
Click on the first icon below once to toggle handwriting and mouse.
In handwriting mode, tap the second icon once to prompt “Correction” window.
Tap the third icon to toggle “capital” “general” and “numeric” writing mode.
Tap the forth icon to change your writing character direction.
Tap the fifth icon to pop-up symbol pad.
1 2 3 4 5 6
- 17 -
User’s guide
ePad

PC Synchronization
Install Microsoft Active Sync and synchronize to PC.
Step 1: Get free Microsoft ActiveSync program and USB driver of ePad for PC
from CD title.
Step 2: Install ActiveSync program to your PC and extract USB Sync Driver to a
temp folder on your PC.
Step 3: Connect USB sync cable to PC and ePad. Please address to temp folder
if Windows 9X/ME/2K/XP ask you the driver for new USB device.
Step 4: If this ePad is connected to PC for the first time, you may set up a
partnership between them. Partnership will do automatically data
synchronization as they connected.
Step 5: Introducing of Microsoft ActiveSync program
Manually start/stop Sync.Explore the files/folders
This action needs Partnership. of ePad. .
Show how many items had been setup File transferring setup;
to sync. Show sync status of them. backup/restore functions.
- 18 -
User ’s guide
ePad

Driver/Application installation
Choose those accessories or application software support to
W indows CE .NET (4 .0); ARM or Strong ARM CPU; HPC or HPC pro platform .
Some shareware and freeware support PPC (Windows CE 3.0) or PPC2002 may also
run on e Pad platform. But basically, ePad is more close to HPC.
Or visit our website, we will publish our software compatibility list there.
Step 1: Choose driver or applications that match limitation list above.
Step 2: Connect ePad to your PC. Make sure they are connected.
Step 3: Run driver/application setup file on desktop PC to start install process. (If the
driver/application is a .cab file, use ActiveSync to copy/move it into ePad
Then double click on it to extract on e Pad. With this method, you may
ignore step 4-5)
Step 4: Setup program will first to retrieve
device data to check if this program
had been installed before.
Step 5: Setup wizard will ask you if you want
to install with the “default application
install directory”? Say “Yes” to save
data into DRAM or say “No” to save
to other directory.
Step 6: If you just say “No” at previous step, then a dialog window prompts you to
choose folder for saving data. We suggest you to select “FLASH” which is an
- 19 -
User’s guide
ePad

on-board non-volatile flash memory.
Step 7: File copy action is now starting.
Step 8: When file copy action finished. Check your ePad to see if additional steps
are necessary to complete this installation.
Step 8: Find out shortcut or icon on start > Program or Desktop.
Step 9: Driver installation will only copy .DLL to Windows directory. For preserving
the files form lost when out of power, please save them to FLASH folder
manually.
- 20 -
User’s guide
ePad
Table of contents
Popular Handheld manuals by other brands
Panasonic
Panasonic Toughbook CF-P1 Series Supplementary instructions

Raon
Raon Everun True2 user manual
Honeywell
Honeywell Dolphin 75e quick start guide

High Tech Computer
High Tech Computer Pocket PC Phone user manual

Casio
Casio CASSIOPEIA E-10 Getting started guide

HP
HP iPAQ Pocket PC h4350 Series overview
