manuals.online logo
Brands
  1. Home
  2. •
  3. Brands
  4. •
  5. Epson
  6. •
  7. Projector
  8. •
  9. Epson BrightLink 485Wi User manual

Epson BrightLink 485Wi User manual

Other Epson Projector manuals
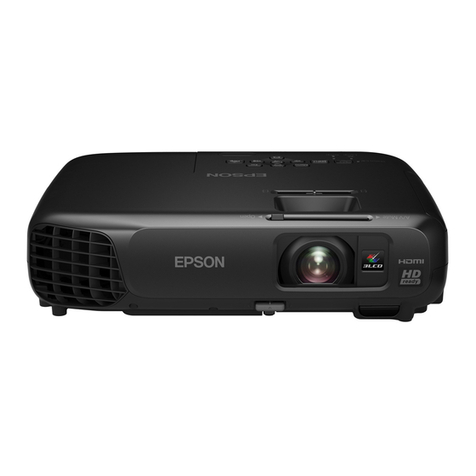
Epson PowerLite 530 User manual

Epson

Epson PowerLite 530 User manual

Epson EB-L200W User manual

Epson

Epson EB-L200W User manual

Epson EB-L1505U User manual

Epson

Epson EB-L1505U User manual

Epson EMP-7950 User manual

Epson

Epson EMP-7950 User manual

Epson EH-TW8000 User manual

Epson

Epson EH-TW8000 User manual

Epson EMP-82e User manual

Epson

Epson EMP-82e User manual

Epson PowerLite Pro Cinema 4040 User manual

Epson

Epson PowerLite Pro Cinema 4040 User manual

Epson EB-750F Specification sheet

Epson

Epson EB-750F Specification sheet

Epson PowerLite Home Cinema 8500 UB User manual

Epson

Epson PowerLite Home Cinema 8500 UB User manual

Epson EMP-52 User manual

Epson

Epson EMP-52 User manual

Epson EMP-62 User manual

Epson

Epson EMP-62 User manual

Epson EF-100 Series User manual

Epson

Epson EF-100 Series User manual

Epson PowerLite 84+ User manual

Epson

Epson PowerLite 84+ User manual

Epson 5000XB - PowerLite SVGA LCD Projector User manual

Epson

Epson 5000XB - PowerLite SVGA LCD Projector User manual

Epson powerlite home cinema 3010+ User manual

Epson

Epson powerlite home cinema 3010+ User manual

Epson EB-PU2213B User manual

Epson

Epson EB-PU2213B User manual

Epson EX6210 User manual

Epson

Epson EX6210 User manual

Epson PowerLite 62c User manual

Epson

Epson PowerLite 62c User manual

Epson 1810p - PowerLite XGA LCD Projector User manual
Epson

Epson 1810p - PowerLite XGA LCD Projector User manual

Epson PowerLite Pro Z8455WUNL Operating and safety instructions

Epson

Epson PowerLite Pro Z8455WUNL Operating and safety instructions

Epson PowerLite S4 User manual

Epson

Epson PowerLite S4 User manual

Epson EB-485Wi User manual

Epson

Epson EB-485Wi User manual

Epson PowerLite 1720 User manual

Epson

Epson PowerLite 1720 User manual

Epson PowerLite 1985WU User manual

Epson

Epson PowerLite 1985WU User manual

Popular Projector manuals by other brands

Eiki LC-X985 Specification sheet

Eiki

Eiki LC-X985 Specification sheet

InFocus LitePro 610 quick start

InFocus

InFocus LitePro 610 quick start

FOREVER MLP-100 manual

FOREVER

FOREVER MLP-100 manual

Toshiba TDP-MT8U Specifications

Toshiba

Toshiba TDP-MT8U Specifications

Mitsubishi XD500U specification

Mitsubishi

Mitsubishi XD500U specification

Kodak Ektapro 3020 Illustrated parts list

Kodak

Kodak Ektapro 3020 Illustrated parts list

Toshiba TDP-EW25U Specifications

Toshiba

Toshiba TDP-EW25U Specifications

Barco iQ PRO G500 supplementary guide

Barco

Barco iQ PRO G500 supplementary guide

NEC Showcase Series HT1100 user manual

NEC

NEC Showcase Series HT1100 user manual

Philips LC1341 user guide

Philips

Philips LC1341 user guide

MAGINON DLP 1400S user manual

MAGINON

MAGINON DLP 1400S user manual

Toshiba TLP-380 owner's manual

Toshiba

Toshiba TLP-380 owner's manual

Philips PicoPix PPX2480/EU user manual

Philips

Philips PicoPix PPX2480/EU user manual

Hitachi CP-X605 Series Specifications

Hitachi

Hitachi CP-X605 Series Specifications

Optoma TW1692 user manual

Optoma

Optoma TW1692 user manual

Kodak EKTAPRO instruction manual

Kodak

Kodak EKTAPRO instruction manual

Optoma Optoma PRO150S datasheet

Optoma

Optoma Optoma PRO150S datasheet

Light Sky IP3500BSW user manual

Light Sky

Light Sky IP3500BSW user manual

manuals.online logo
manuals.online logoBrands
  • About & Mission
  • Contact us
  • Privacy Policy
  • Terms and Conditions

Copyright 2025 Manuals.Online. All Rights Reserved.

This guide will help you with many of the basics of operation for your Epson
485wi BrightLink Projector with interactive functionality. If you need further
assistance with questions, you can refer to the end of this guide for links to online
support or contact the AV Team with GCS Technology Services.
Connections –page 1
Basic Operation –page 3
Easy Interactive Tools –page 5
Remote Control –page 16
Calibration –page 17
There are several physical connections which are vital to the normal operation of
your Epson 485wi projector. The first, and most important of these, is the VGA
connection from your PC to your projector. Below is an example of a VGA cable.
There will most likely be several VGA cables installed behind the Instructors PC
going to a couple of locations. The AV Team has to split the video signal among
two pieces of equipment (Your projector and in most cases a mounted Television)
and in order to do this a splitter is installed.
-1-
The splitter allows the video signal to appear on both the PC’s monitor, the
projector and the TV. Below are several examples of the splitters that the AV
Team installs.
Once the signal is split to the PC’s monitor, the video signal needs to travel
through in-wall cabling to the projector. This is done by connecting a VGA cable
from the splitter to the AVP, which is a wall plate located near the PC.
None of the connections beyond this point are accessible by anyone other than a GCS Technician.
The second connection that is required for the interactive function of your Epson
485wi is a standard USB cable.
-2-
In most cases, this USB cable has been installed by the AV Team and will be green
in color. The ‘A’end of the cable will plug into any available USB port on your PC.
The other end of the cable, the ‘B’end, will plug into a wall plate located near the
AVP.
From this point the signal travels over in-wall cabling to the projector. Again, only
a GCS Technician will be able to access the connection points either in the wall or
at the projector.
If you have issues with your projector not displaying the image from your PC, or
your interactive pen stops working, check these connections behind your PC and
at the wall prior to opening a ticket. If these connections are secured properly
and you still have issues, please open a ticket with the AV Team with Technology
Services.
Listed below are the steps necessary to operate your Epson 485wi in a classroom
environment.
Step 1 –Power on the projector. You can reach up and push the power button on
the projector or you can use the power button located on the remote. In either
case, you should hear the projector beep and the amber light should turn green
and start blinking while the power up cycle runs its course.
-3-
This process takes under a minute and once complete, you should have an image
from whatever source you have connected to the projector provided that source
is active (powered on and not in sleep mode).
There are two locations on the displayed image where you can see which input
you have selected. Once an image from your source appears, the upper right
hand corner will have information on what input you have selected. If you have a
blue screen with no image from your PC or source device, look in the bottom left
hand corner to determine which input you have selected.
Step 2 –Use your interactive pen(s). Once you have the image from the PC
displayed on the viewing surface, you will need to retrieve and power on your
interactive pen(s). You have two interactive pens that come with the Epson
485wi. Each is marked with either a blue or orange end-cap. The power switch is
located on the underside of the back end of the pen(s). See the pen image below
for details.
Once the pen has been powered on, it will take a few seconds for the projector
and pen to communicate and activate the interactive functionality. You will know
that the interactive functions are active when you approach the board with the
pen and the cursor moves towards the pen tip.
-4-
Your interactive pen(s) work just like a mouse when controlling your desktop
functions on your PC. The cursor works in exactly the same way when
manipulated with the pen as it does when using the mouse with the following
exceptions:
-To double click you simply double tap the pen tip on the icon you wish to
activate.
-Right clicking is achieved by pressing the pen tip on the board and holding for
about three seconds.
Step 3 –Activate any software packages that you wish to use interactively. You
are able to control any functions of your PC with your pen(s) from the board so
you can maintain a front-of-classroom presence during the entire lesson. Please
see the following section for details on Easy Interactive Tools.
The Easy Interactive Tools software package that comes with your Epson 485wi
projector has many great tools for a classroom environment. To open these tools,
first go to your start menu.
-5-
Once you have your Start Menu open, go to your Programs (or All Programs) list
and select the Epson Projector folder.
You should see the Easy Interactive Tools program listed under the Epson folder.
-6-
The Toolbar will appear either on the left or right side of your desktop and will
look like the following image.
There will also be an arrow on your desktop which appears on the opposite side
than the toolbar. This arrow allows you to easily switch the toolbar from one side
of your desktop to the other if any of the images from your desktop are blocked
for any reason.
-7-
The following is a list of the icons on the toolbar and what each icons function is.
Switch to Interactive mode
Switch to Whiteboard mode
Toggle between Mouse and Pen modes
Save the current screen
Undo multiple operations (one at a time)
Redo multiple operations (one at a time)
Page up in a browser or other software program
Page down in a browser or other software program
Display the image from a document camera connected to the PC via USB
Use an on-screen keyboard to enter text
Use the magnifier to display an enlarged view of the image at the center of the screen
Display additional tools for saving, printing and more
Insert a circle, square, triangle or other shape
-8-
Change custom pen color and width
Write or draw with custom pen
Change highlighter pen color and width
Write or draw with transparent highlighter pen
Write or draw with black pen (fine point on left, thick point on right)
Write or draw with red pen (fine point on left, thick point on right)
Write or draw with blue pen (fine point on left, thick point on right)
Use the eraser (thin width on left, thick width on right)
Clear all annotations (select Undo to restore annotations)
Toggle between hiding the toolbar after use and showing it continuously
Minimize the toolbar
Exit Easy Interactive Tools
-9-