Esco Medical ART Workstation User manual

User Manual
ART Workstation
Esco MEDICAL
Version 1.4

User Manual ART Workstation
2
Esco Medical Ltd.
21 Changi South Street 1
Singapore 486777
Tel.: +65 6542 0833
Fax: +65 6542 5732
Mail:
Web:
www.medical.escoglobal.com
Service address: Please contact your local distributor for details.
Users of Esco Medical products should not hesitate to contact us if there are any
unclear points or ambiguities in this manual.
CAUTION: If the equipment is used in a manner not specified in this manual,
the safety of the user may be at risk and the equipment may be damaged.
Always use the equipment as outlined in this instruction manual.
COPYRIGHT
This manual contains information that is subject to copyright. All rights reserved.
This manual should not be photocopied, otherwise copied or distributed,
completely or in part, without the approval of Esco Medical Ltd.
Caution: Federal law restricts this device to sale by or on the order of a
licensed healthcare practitioner.

User Manual ART Workstation
3
Unpacking and Inspection
Follow standard receiving practices upon receipt of the instrument. Check the shipping carton for damage. If
damage is found, stop unpacking the instrument. Notify the freight carrier and ask for an agent to be present
while the instrument is unpacked. There are no special unpacking instructions, but be careful not to damage
the instrument when unpacking it. Inspect the instrument for physical damage such as bent or broken parts,
dents, or scratches.
Claims
Our routine method of shipment is via common carrier. Upon delivery, if physical damage is found, retain all
packing materials in their original condition and contact the carrier immediately to file a claim.
If the instrument is delivered in good physical condition but does not operate within specifications, or if there
are any other problems not caused by shipping damage, please contact your local sales representative or Esco
Medical immediately.
Standard Terms and Conditions
Refunds &Credits
Please note only serialized products (products labelled with a distinct serial number) and accessories are
eligible for partial refund and/or credit. Non-serialized parts and accessory items (cables, carrying cases,
auxiliary modules, etc.) are not eligible for return or refund. In order to receive a partial refund/credit, the
product must not have been damaged, and must be returned complete (meaning all manuals, cables,
accessories, etc.) within 30 days of original purchase and in “as new”and resalable condition. The Return
Procedure must be followed.
Return Procedure
Every product returned for refund/credit must be accompanied by a Return Material Authorization (RMA)
number, obtained from EscoMedical Customer Service. All items being returned must be sent prepaid (freight,
duty, brokerage and taxes) to our factory location.
Restocking Charges
Products returned within 30 days of original purchase are subject to a minimum restocking fee of 20% of the
list price. Additional charges for damage and/or missing parts and accessories will be applied to all returns.
Products which are not in “as new”and resalable condition, are not eligible for credit return and will be
returned to the customer at their expense.
Certification
This instrument was thoroughly tested and inspected and found to meet EscoMedical´s manufacturing
specifications when it was shipped from the factory. Calibration measurements and testing are traceable and
done according to EscoMedicals ISO certification.
Warranty and Product Support
Esco Medical warrants this instrument to be free from defects in materials and workmanship under
normal use and service for two (2) years from the date of original purchase, providing the instrument is
calibrated and maintained in accordance with this manual. During the warranty period EscoMedical will, at our option,
either repair or replace a product at no charge that proves to be defective; provided you return the product (shipping, duty,
brokerage and taxes prepaid) to EscoMedical. Any and all transportation charges
incurred are the responsibility of the purchaser and are not included within this warranty. This warranty
extends only to the original purchaser and does not cover damage from abuse, neglect, accident or misuse or

User Manual ART Workstation
4
as the result of service or modification by other than EscoMedical.
IN NO EVENT SHALL EscoMedical Ltd. BE LIABLE FOR CONSEQUENTIAL DAMAGES.
No warranty shall apply when damage is caused by any of the following:
! Power failure, surges, or spikes,
! Damage in transit or when moving the instrument,
! Improper power supply such as low voltage, incorrect voltage, defective wiring or inadequate fuses,
! Accident, alteration, abuse or misuse of the instrument,
! Fire, water damage, theft, war, riot, hostility, acts of God, such as hurricanes, floods, etc.
Only serialized products (those items bearing a distinct serial number tag) and their accessory items are
covered under this warranty.
PHYSICAL DAMAGE CAUSED BY MISUSE OR PHYSICAL ABUSE IS NOT COVERED
UNDER THE WARRANTY. Items such as cables and non-serialized modules are not covered under this warranty.
This warranty gives you specific legal rights and you may have other rights, which vary from province to
province, state to state, or country to country. This warranty is limited to repairing the instrument to Esco
Medical's specifications.
When you return an instrument to EscoMedical for service, repair or calibration, we recommend shipment using
the original shipping foam and container. If the original packing materials are not available, we recommend
the following guide for repackaging:
! Use a double-walled carton of sufficient strength for the weight being shipped.
! Use heavy paper or cardboard to protect all instrument surfaces. Use non-abrasive material around all
projecting
parts.
! Use at least four inches of tightly packed, industrial-approved, shock-absorbent material all around the
instrument.
Esco Medical will not be responsible for lost shipments or instruments received in damaged condition due to
improper packaging or handling. All warranty claim shipments must be made on a prepaid basis (freight,
duty, brokerage, and taxes). No returns will be accepted without a Return Materials Authorization ("RMA”)
number. Please contact EscoMedical to obtain an RMA number and receive help with shipping/customs
documentation.
Re-calibration of instruments, which have a recommended annual calibration frequency, is not covered under
the warranty.
Warranty Disclaimer
Should you elect to have your instrument serviced and/or calibrated by someone other than EscoMedical Ltd.
and their representatives, please be advised that the original warranty covering your product becomes void
when the tamper-resistant Quality Seal is removed, or broken without proper factory authorization.
In all cases, breaking the tamper-resistant Quality Seal should be avoided at all cost, as this seal is the key
to your original instrument warranty. In the event that the seal must be broken to gain internal access to the
instrument you must first contact EscoMedical Ltd.
You will be required to provide us with the serial number for your instrument as well as a valid reason for
breaking the Quality Seal. You should break this seal only after you have received factory authorization. Do
not break the Quality Seal before you have contacted us! Following these steps will help ensure that you will retain the
original warranty on your instrument without interruption.
WARNING
Unauthorized user modifications or application beyond the published specifications may result in electrical
shock hazards or improper operation. Esco Medical will not be responsible for any injuries sustained due to

User Manual ART Workstation
5
unauthorized equipment modifications.
Esco Medical Ltd. DISCLAIMS ALL OTHER WARRANTIES, EXPRESSED OR IMPLIED, INCLUDING ANY WARRANTY OF
MERCHANTABILITY OR FITNESS FOR A PURPOSE OR APPLICATION.
THIS PRODUCT CONTAINS NO USER-SERVICEABLE COMPONENTS.
UNAUTHORIZED REMOVAL OF THE INSTRUMENT COVER SHALL VOID
THIS AND ALL OTHER EXPRESSED OR IMPLIED WARRANTIES.

User Manual ART Workstation
6
Table of contents
1 Welcome ................................................................................................................................................ 9
2 Reading instructions for the manual. ......................................................................................10
3 Explanation of Symbols Used in Manual ...............................................................................10
4 About the product...........................................................................................................................11
5 Accessories supplied.......................................................................................................................12
6 Manuals supplied .............................................................................................................................13
6.1 The user manual .......................................................................................................................13
6.2 The validation manual............................................................................................................13
6.3 The Maintenance manual .....................................................................................................14
7 Safety symbols...................................................................................................................................14
8 Important Safety Instructions and warnings ........................................................................16
8.1 Pre-installation...........................................................................................................................16
8.2 During installation....................................................................................................................17
8.3 Post installation.........................................................................................................................17
9 Getting started ..................................................................................................................................18
10 Mains connection ..........................................................................................................................19
11 Gas connection and the humidification system...............................................................20
Gas in compartments .........................................................................................................................25
12 User Interface ..................................................................................................................................26
12.1 Activating the heat and gas flow controls..................................................................27
12.1.1 Temperature Set point.................................................................................................28
12.1.2 Gas flow Set point.........................................................................................................29
12.2 Surface Temperatures...........................................................................................................33

User Manual ART Workstation
7
Example: How to calibrate the temperature ...............................................................34
12.3 Menu Options .........................................................................................................................35
12.4.1 Main Menu .......................................................................................................................35
12.4.2 Sub menus........................................................................................................................36
12.4.2.1 Temperature sub menu .......................................................................................36
........................................................................................................................................................39
12.4.2.2 Service sub menu ..................................................................................................39
13 Alarms.................................................................................................................................................39
13.1 Temperature alarms ..............................................................................................................40
13.2 Gas pressure alarms..............................................................................................................41
13.3 Multiple alarms .......................................................................................................................42
13.4 Loss of power alarm.............................................................................................................42
4 Pressure of the CO2gas ................................................................................................................43
15 Firmware ............................................................................................................................................43
16 Cleaning instructions....................................................................................................................44
16.1 Considerations about a sterile device ..........................................................................44
16.2 The manufacturers recommended cleaning procedure........................................45
17 Heat optimization plate. .............................................................................................................46
18 Humidification.................................................................................................................................47
19 Temperature validation................................................................................................................47
20 All in one PC....................................................................................................................................48
21 Maintenance.....................................................................................................................................55
22 Emergency Procedures ................................................................................................................56
23 User Troubleshooting...................................................................................................................57
4 Specifications......................................................................................................................................60

User Manual ART Workstation
8
25 Electromagnetic Compatibility .................................................................................................61
26 Technical assistance ......................................................................................................................65

User Manual ART Workstation
9
1 Welcome
Congratulation with the acquisition of your ART Workstation.
Esco MEDICAL is proud that you have chosen ourproduct to
serve your needs. We hope to hear from you with feedback
on this product that can benefitfuture product developments.
We will strive to serve you well.
Thank you.

User Manual ART Workstation
10
2 Reading instructions for the manual.
Individual sections can be read and the information about the subject can stand
alone. This means, that if the manual is read from start to finish, there will be
some overlap. A recommended way to read the manual is to familiarize oneself
with the safety instructions first. Then progress to the basic user functions, that
are needed on a day to day basis. Then the alarm functions. The menu function of
the user interface details information that is needed for the more advanced level
of users only.
3 Explanation of Symbols Used in Manual
NOTE
Used to direct attention to a specific item.
DANGER
Used when caution is needed.

User Manual ART Workstation
11
4 About the product
The Esco MEDICAL ART Workstation is a new generation of Vertical laminar
airflow workstations with a heated table top and provisions for a built-in
microscope. The product is mainly developed for the use in the Artificial
reproduction techniques area –but can be used for any purpose where the
combination of an aseptic working area with a heated work surface and a stereo
microscope is utilized.
The 12-zone heating system (8 x table plate and 4 x compartments) gives
superior temperature conditions in comparison to conventional layouts.
For maximum performance, the system has 12 separate temperature controllers,
controlling and regulating the temperature in each zone.
The workstation has been primarily developed and optimized for tissue culturing
with an overlay of either Paraffin or Mineral oil.
If open culture is used the user can utilize the humidified gas system that built
into the table top. The dish is placed under the gas hood where the pH
conditions in a buffered media without oil overlay can be maintained.
Open culture may lead to evaporation and a change in pH. If the correct
conditions are not maintained
.
An integral part of the ART Workstation is the All-in-one PC that is running the
Esco MEDICAL workstation logger software. The software functions as a constant
surveillance system that will give the user early warnings if any parameter drifts
beyond safe limits. The monitor can be used for a microscope camera image, as

User Manual ART Workstation
12
any warning will still be brought to the attention of the user and an easy
possibility to toggle the modes presented. The software includes data logging,
data storage and report functions for ISO quality management compliance.
The device is manufactured under a full EU certified ISO quality management
system.
This product fulfils the requirements of EN60601-1 3rd edition standards as a Class
I type B equivalent device suited for continuous operation. It also conforms to the
requirements of the EU Council directive 93/42/EEC concerning medical devices
and is classified as a Class IIa device under rule II.
5 Accessories supplied
1 HEPA filter for input gas supply.
1 USB key containing Esco MEDICAL data logging software and the
manuals as PDF files
1 Gas hood
1 CarryTray
1 Humidification flask
1 Medical grade Mains cord (for the table top)

User Manual ART Workstation
13
6 Manuals supplied
The ART Workstation comes with 3 manuals as standard.
1. The User Manual (this manual)
2. The Validation Manual
3. The Maintenance Manual
Each manual has a specific purpose.
6.1 The user manual
Is intended to provide the user with the information that is necessary for using
the device.
The user manual cannot stand alone or replace user training
.
6.2 The validation manual
Is intended to provide the trained technical personnel that is performing the
installation, the procedures and specifications, for making sure the device is safe,
so that it can be taken into clinical use. The manual can also be used as a guide
for the validation tests that should be performed regularly.

User Manual ART Workstation
14
6.3 The Maintenance manual
Is intended to provide the schedules and the
methods for the trained technical personnel that ensures that the device
is running optimally and safely during its entire lifespan.
The maintenance specified in the maintenance manual cannot replace
the regular maintenance/validation that user must perform.
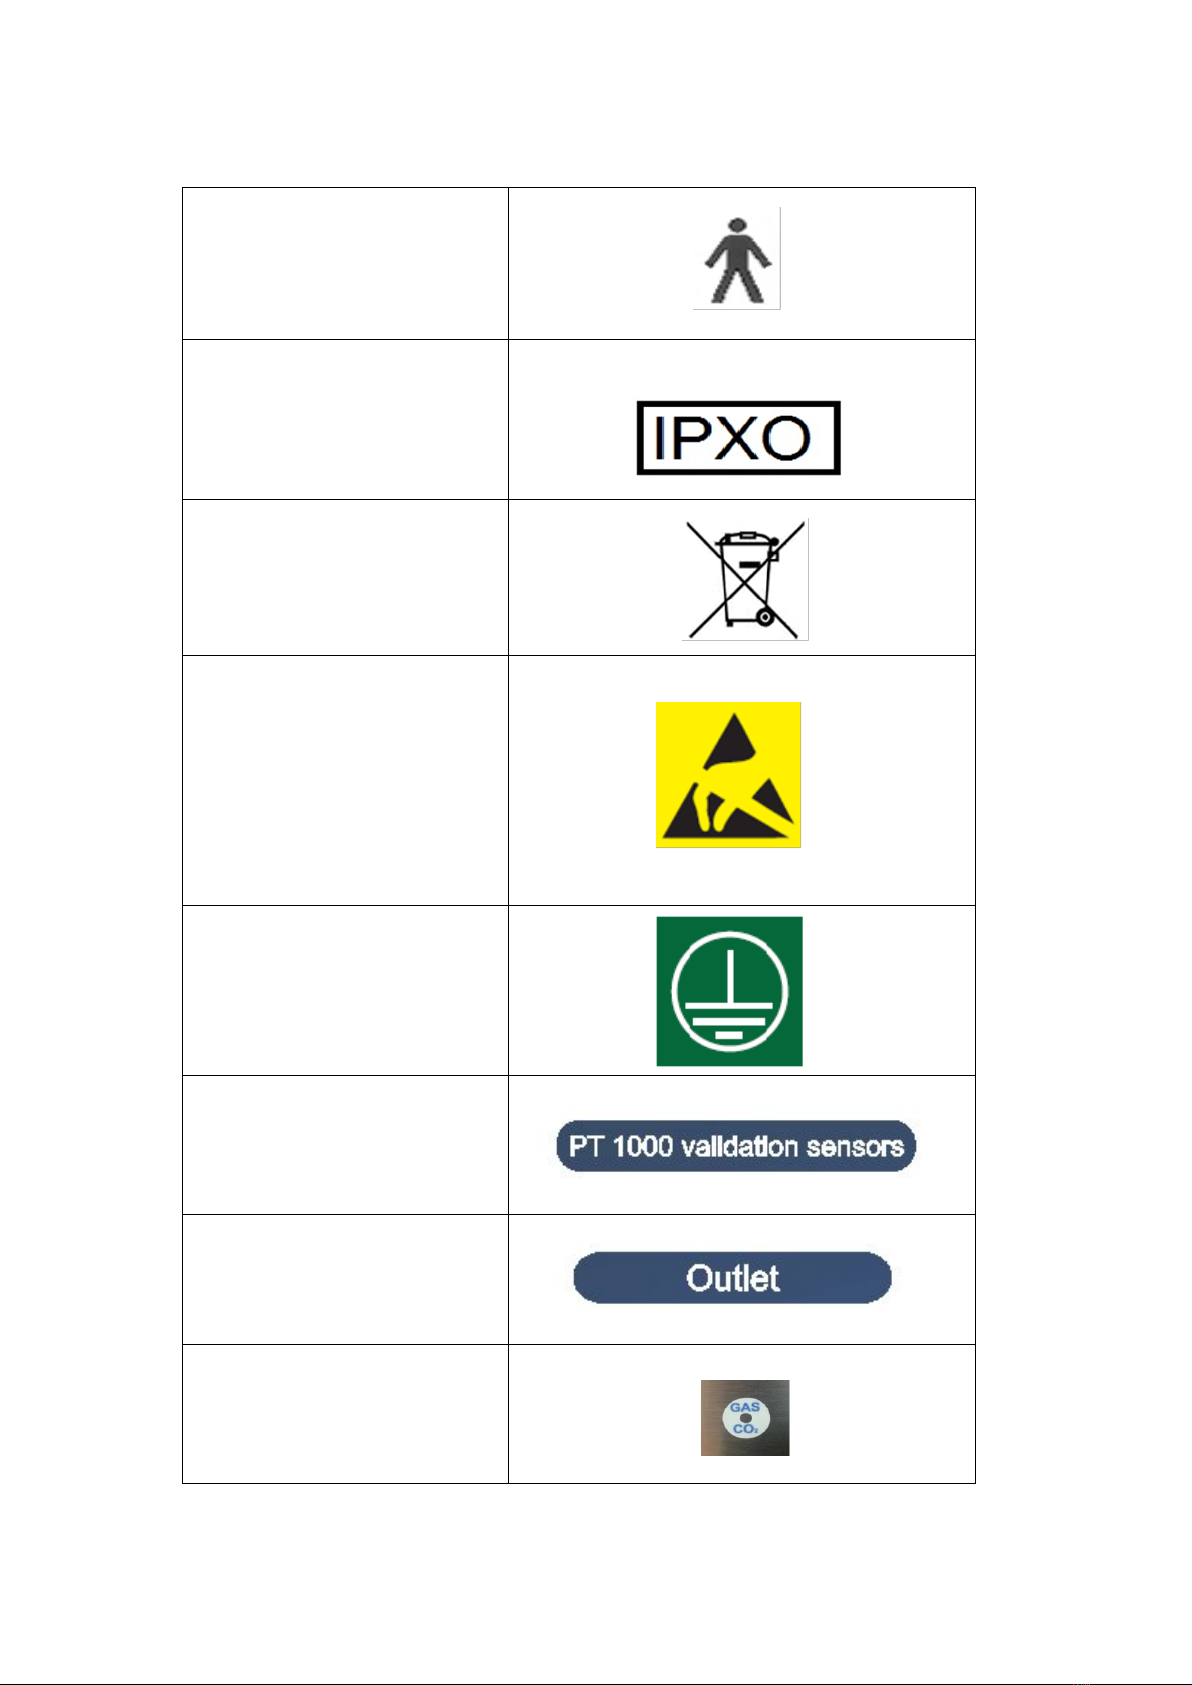
7 Safety symbols
There are several labels to guide the user on the ART Workstation.
A complete list of labels is shown below.
Warning on the type label
indicates that an earth
connection is needed, mains info
and “ON/OFF” push-push
button.
„Bolt of lightning‟ indicates the
potential risk of electrical shock.
Never remove any covers.
User Manual ART Workstation
15
Protection against electric shock.
Type B.
Not protected against ingress of
water.
Caution when discarded.
Observe WEEE.
The symbol indicates that
the unit contains high sensitive
electronic components which
can be damaged by static
electricity.
Internal label placed next to the
earth wires.
PT1000 sensor input. 5 x
connectors for a PT1000 signal.
Gas output. From the external
bottle to the humidification
system.
Gas outlet in the table top

User Manual ART Workstation
16
Esco MEDICALBrand logo
8 Important Safety Instructions and warnings
8.1 Pre-installation
◦Do not use product if package is damaged.
◦Read the user manual completely before use.
◦Always keep these instructions at hand near the device.
◦The ART workstation is heavy and can present a life-threatening danger
if it tips over or drops during installation.
◦Use ample personal for any manual lift.
◦If a forklift is used only lift on the custom-built pallet. The table top
itself cannot withstand any lifting in the middle. Permanent damage will
occur. Warranty void if this happens.
◦Electronics box under the table top is not flush with the rest of the
underside. Any blows can result in permanent damage. Warranty void if
this happens.

User Manual ART Workstation
17
8.2 During installation
◦Never place this unit on top of other equipment that might heat it up
◦Place this unit on a flat, hard and stable surface.
◦Never place the unit on a carpet or similar surfaces.
◦Do not defeat the safety purpose of the grounding-type plug.
◦A grounding type plug has two blades and a third prong is provided for
your safety. If the provided plug does not fit into your outlet, consult an
electrician for replacement of the obsolete outlet.
◦Always connect power cord to a proper grounded outlet and only use
the cord that came with the device.
◦Do not install near any heat sources such as radiators, heat registers,
stoves or other apparatus that produce heat.
◦Do not use this device near water.
◦Always use external HEPA filter for input CO2 gas.
◦Do not use this product at temperatures exceeding 30oC.
◦Place this unit in a location with adequate ventilation to prevent internal
heat build-up. Allow at least 10 cm clearance from the rear, 30 cm from
the top and 20 cm from left and right to prevent overheating
◦This unit is intended for indoor purposes only.
8.3 Post installation
◦Refer all servicing to qualified service personnel.
◦Servicing is required according to service manual or if the apparatus has
been damaged in any way, such as if the apparatus have been dropped,
exposed to rain or moisture, or does not operate normally. The ART

User Manual ART Workstation
18
Workstation contains high voltage components that may be hazardous.
◦Unplug this apparatus during lightning, storms or when unused for a
long period.
◦Protect the power cord from being walked on or pinched, particularly at
plugs, convenience receptacles, and the point where they exit from
apparatus.
◦Perform temperature calibrations in the intervals described in the
manuals.
◦NEVER block the gas supply hole in table top.
◦Make sure that CO2 gas supply pressures are kept stable at 0.6 bar.
9 Getting started
The ART Workstation must be installed by authorized and trained
personnel only.
1. Follow the guidelines in the safety instructions and warnings section
2. Connect the mains cable to the top of the Workstation for the fan unit to
work.
3. Connect the mains cable to the underside of the table top for the PC and
table top heating system to work.
4. Connect the gas line for the CO2 5 or 6 % premixed gas.
5. Set the gas pressure on the external gas regulator at 0.6 Bar.
6. Switch on the ART Workstation on with the on/off switch under the table
top (next to the mains cable).
7. Power up the PC by pressing the button in the middle of the inner wall
work area.
8. Observe for normal functionality.

User Manual ART Workstation
19
9. Let the unit warm up and stabilize for 20 min.
10. Follow the guidelines in the Validation Guide.
11. Complete user training and instructions.
12. After a burn in phase of 24 hours the unit is ready for use IF the testing is
successful.
Clean the device before use. It is not delivered sterile or in
clinicallyacceptable cleanliness state. Consult the cleaning instructions
section in thismanual for the manufactures recommended guidelines.
10 Mains connection
The ART Workstation comes with a detachable mains power cord. The power cord
is prepared for the country in which the unit is intended to be used.
Do not defeat the safety purpose of the grounding-type plug.
A grounding type plug has two blades and a third prong is provided for your
safety. If the provided plug does not fit into your outlet, consult an electrician
for replacement of the obsolete outlet.
The power requirement is: 230V 50 Hz OR 115V 60Hz.
The built-in power supply is of a switch mode type that automatically adjust to
the correct mains power between 100V-250V AC 50-60 Hz.
User Manual ART Workstation
20
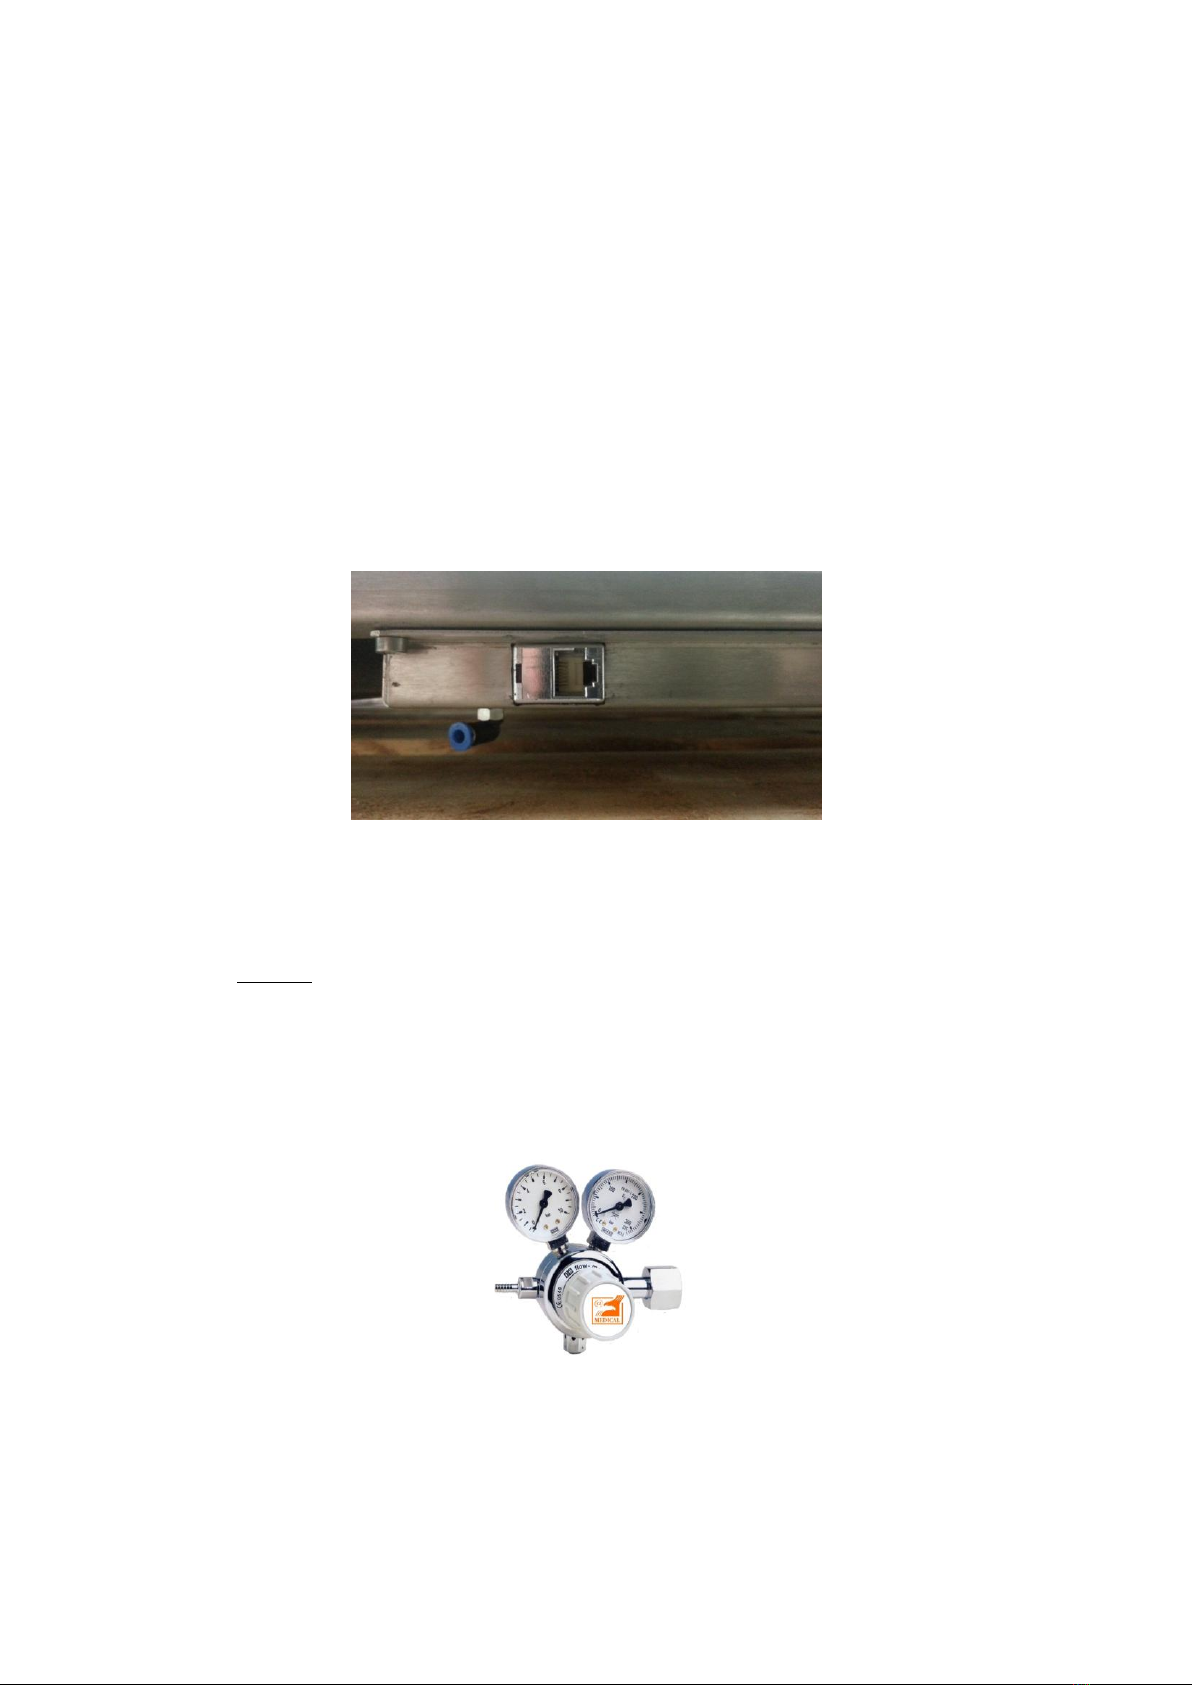
11 Gas connection and the humidification system
Under the table top one single gas input (black and blue) is located.
Gas pressure for on the external source should be 0.6 bar and must
be kept stable.
Always use a high-quality pressure regulator for the gas that can be set with the
required precision.
Connect the CO2 gas to the CO2 inlet with a suitable tube. Make sure the tube is
Table of contents


