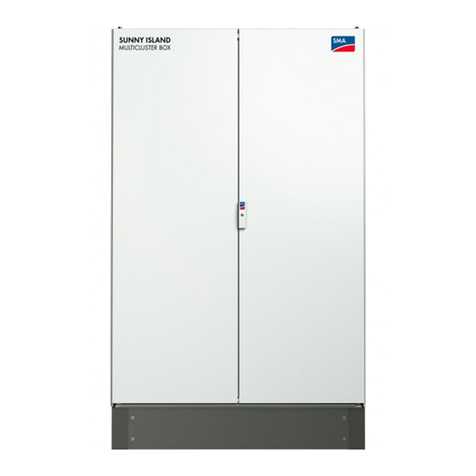
ETA Systems CPC Series User manual

Conditioned Power Center 1
CPC Series
Conditioned Power Center
RoHS Compliant

Conditioned Power Center
2
SM5505 - March 1, 2006—Rev. A

Conditioned Power Center 3
Caution Notice...............................................................................................................5
Section 1-General .........................................................................................................6
Section 2 – Safety
2.1 ANSI Warning Notices ..............................................................................7
2.2 Inherent Hazards.......................................................................................7
2.3 Alerts and Labels.......................................................................................7
2.4 Safety Interlocks........................................................................................9
2.5 Lockout/Tagout..........................................................................................9
2.6 Conformance with Regulations ...............................................................10
2.7 Product Liability .......................................................................................10
2.8 Emergency Contact Information .............................................................10
Section 3 – Product Overview
3.1 Product Purpose......................................................................................11
3.2 Standard Features...................................................................................12
3.3 Optional Features....................................................................................12
3.4 Feature/Model Matrix ..............................................................................13
Section 4 – Preparation
4.1 Unpackaging ...........................................................................................14
Section 5 – Installation
5.1 Location ...................................................................................................17
5.2 Conduit Landings ....................................................................................17
5.2.1Top Feed................................................................................17
5.2.2 Bottom Feed .........................................................................17
5.3 Outer Panel Removal..............................................................................18
5.4 Alternate Conduit Landing Locations ......................................................18
5.5 Main Input Circuit Breaker.......................................................................18
5.5.1 Fixed Input Circuit Breaker ...................................................18
5.5.2 Programmable Circuit Breaker .............................................19
5.6 Isolation Transformer ..............................................................................19
5.6.1Transformer Primary Voltage Adjustment .............................20
5.6.2 Output Voltage Fine Adjustment...........................................21
5.7 Grounding................................................................................................21
5.8 Lockout/Tagout........................................................................................22
5.9 Input Power Connections ........................................................................23
5.10 Output Power Connections ...................................................................23
5.11 Optional Line Cord/Receptacles ...........................................................23
Section 6 - Operation
6.1 Restoring for Service...............................................................................24
6.2 Energizing the Power Conditioner ..........................................................24
6.3 Energizing the Load ................................................................................25
6.4 Orderly Shutdown....................................................................................25
Section 7 - Options
7.1 Passive Harmonic Filter ..........................................................................26
7.2 Basic Power Metering .............................................................................26
7.3 Power Management ................................................................................26
7.4 Phase Loss - Low Voltage Detect...........................................................27
7.5 External EMO Connector ........................................................................27
7.6 Seismic Anchorage .................................................................................27
7.7 SEMI S2-0200 .........................................................................................28
7.7.1 Input Power Conductor Restraints.......................................28
7.7.2 SEMI S2-0200 Compliant EMO...........................................28
Table of Contents

Conditioned Power Center
4
Section 8 - Troubleshooting/Maintenance
8.1 Troubleshooting Conditions ....................................................................30
8.1.1 Source Circuit Breaker Trips Out .........................................30
8.1.2 Input Circuit Breaker Trips Out.............................................30
8.1.3 TVSS Fault LEDs Illuminate.................................................31
8.1.4 Harmonic Filter Circuit Breaker Trips Out ............................32
8.2 Rountine Maintenance ............................................................................32
Section 9 - Service and Support
9.1 Technical Service Assistance .................................................................33
9.2 Customer Service ...................................................................................33
9.3 Product Warranty ....................................................................................33
Section 10 - Specifications
10.1 System Schematic ................................................................................34
10.2 Standard EMO Circuit ...........................................................................35
10.3 Semi S2-0200 Compliant EMO Circuit .................................................36
10.4 Output Voltage Fine Adjustment...........................................................37
Document Revision History ..........................................................................................38
Detailed Specifications .................................................................................................39
Table of Contents

Conditioned Power Center 5
P L E A S E !
For maximum safety, reliability, and user satisfaction,
please read all of the following important information
carefully. When finished, If you are in doubt about any
phase of the installation, operation, maintenance or use
of this product contact the manufacturer immediately
for additional assistance.

Conditioned Power Center
6
This manual describes the installation, connection, adjustment and operation of electrically powered equipment.
For your convenience, this document has been divided into the following nine sections.
Section 1 - General: The section which your are currently reading describes the manual’s structure and the
location of pertinent information required to install, operate, troubleshoot, repair, and maintain the product.
Section 2 - Safety: This section provides information on the safe installation and use of the product.
Section 3 - Product Overview: This section describes the product’s function and purpose, gives examples of
some applications where it may be used, and describes the both standard and optional product features. It also
gives details on unpacking and inspecting the product on arrival and preparing it for installation.
Section 4 - Preparation: This section provides information on unpacking and moving the conditioner.
Section 5 - Installation: This section provides details on locating and leveling the product, landing conduits,
grounding, connecting input and output wiring, configuring operating voltages, and preparing the unit prior to
energizing and putting into service.
Section 6 - Operation: This section of the manual provides the information required to operate the product and
its controls.
Section 7 - Optional Equipment: This section gives detailed information on features which are available as
options. Your particular product may be equipped with one or more options. If so, this section will provide the
information necessary to use the options.
Section 8 - Troubleshooting and Maintenance: This section provides all the information necessary to maintain
the product, troubleshoot a failure or malfunction, and to repair the product when possible.
Section 9 - Service and Support: This section provides the information necessary to obtain service and support
on the product.
Section 10 - Technical Specifications: This section provides complete technical specifications. Consult the
information in this section for detailed information on conduit landings and electrical parameters for the specific
model you are installing.
As you use this manual for the installation, operation, and maintenance of the product, you may be
required to consult different sections of this manual in the process of completing specific tasks.
Section 1 - General

Conditioned Power Center 7
- IMPORTANT SAFETY INSTRUCTIONS -
- SAVE THESE INSTRUCTIONS -
CAUTION indicates a
potentially hazardous
situation which, if not
avoided, could result in
m inor or m oderate injury.
It may also be used to
alert against unsafe
practices.
W A R N IN G indicate s a
potentially hazardous
situation which, if not
avoided, could result in
death or serious injury.
DANGER indicates an
imminently hazardous
situation which, if not
avoided, will result in
death or serious injury.
2.1 ANSI Warning Notices
Failure to observe reasonable precautions in the use of this product may result in fire, injury, electrocution and/or
death. Please observe all notices and warnings. This equipment must be installed in accordance with all
applicable national, state, county, and/or municipal codes. If you are in doubt about any phase of installation or
operation, contact the manufacturer immediately for assistance. While this entire document is important, certain
portions may require your special attention. These passages are clearly marked with the notices shown below.
Please observe all safety notices carefully. Each has a specific meaning.
2.2 Inherent Hazards
This product uses electricity and high voltages are present inside the cabinet. This product is equipped with a
lockout/tagout feature on the input circuit breaker to prevent accidentally energizing the product during installa-
tion, maintenance, and/or repair. This product is also equipped with safety interlock circuits, which will de-
energize the product when a cover is removed. In all such cases, hazardous touch voltages will still be present
at the rear of the product’s input circuit breaker where input power feeds are attached. Working on the product
under such circumstances is classified under SEMI S2-0200 as a Type 4 Task. This may be changed to a Type
1 task and complete safety may be assured by disconnecting power to the product (and locking and tagging out)
at the source.
Failure to follow proper safety precautions as well as intentionally defeating the safety interlocks built into the
product’s design will negate the safety features designed into this product and may subject the user to death or
serious injury.
2.3 Alerts and Labels
This product’s enclosure is provided with warning labels in appropriate locations to call your attention to important
user information. The labels and their locations include the following:
Section 2 - Safety

Conditioned Power Center
8
On both removable side panels, near the top of the panel and approximately in the middle are the following warn-
ings. Each calls attention to a specific hazard requiring special attention.
With the front panel circuit breaker of the power conditioner turned off and locked out, potentially hazardous
touch voltages are confined to the input power conductors at the rear of the circuit breaker. Entering the cabinet
under these circumstances is classified as a Type 4 task under SEMI S2-0200 guidelines. This hazard label
alerts personnel to the need to turn off and lock out power to the power conditioner at the facility source. Doing
so will eliminate all potentially hazardous voltages inside the enclosure. Entering the enclosure under these cir-
cumstances if a Type 1 task under SEMI S2-0200.
PLEASE NOTE: After extended operation, internal parts of the power conditioner may become very hot.
This hazard label calls attention to the need for protective gear when entering the equipment enclosure.
Inside the power conditioner enclosure another warning similar to the one
shown at the left warns once again of the presence of very hot surfaces
and the potential for injury and burns. This warning is accompanied by
the legend “CAUTION - HOT SURFACE” and is attached to the upper steel
frame of the isolation transformer on the primary side.
Section 2 - Safety
WARNING
LINE VOLTAGE PRESENT
WITH MACHINE POWER OFF.
Risk of electric shock or burn.
Turn off and lock out facility power before
servicing.
WARNING
Hot surface inside.
Contact may cause burn.
Do not touch.
Wear protective gear before
servicing internal parts.

Conditioned Power Center 9
2.4 Safety Interlocks
This product incorporates a safety interlock circuit that functions as a
secondary means of protection for personnel. Protective side panels and
hazard warning labels provide primary protection. However, in the event one
or more side panels are removed from the product prior to being de-
energized, the safety interlock system will de-energize the power conditioner.
The circuit consists of two safety interlock switches (one per each side access
panel) located in the center of the top side frame of the power conditioner.
The switches operate as a normally open circuit connected to the shunt trip
coil of the input circuit breaker. See Figure A. Activating either of these safety
interlock switches causes a 24 VDC signal to energize the shunt trip coil of the breaker. The 24 VDC signal is
derived from a low voltage, fused tap on the transformer secondary. The shunt trip circuit also uses stored
energy from a capacitive circuit to ensure that the shunt trip mechanism will function even in the event of a power
outage. The safety interlock switches are shown on the general circuit diagram found in subsection 10.1 of
Section 10 of this manual.
If the power conditioner shunt trips as a result of removing the side panels, hazard-
ous voltages will remain at the input voltage connection to the rear of the main cir-
cuit breaker. Entering the enclosure under these conditions is classified as a Type
4 task under SEMI S2-0200 guidelines. This can be changed to a Type 1 task by disconnecting power at
the source before entering the enclosure.
2.5 Lockout/Tagout
The rotary handle of the main breaker is equipped with a
hinged center insert clearly identified with an arrow. The
rotary handle of the main breaker must be in the horizontal
position to proceed. See Figure B. Depress the insert on
the arrow on the left hand side causing the insert to extend
on the right revealing a slot to accommodate a locking
device as shown in Figure C. The lockout/tagout feature is
designed to prevent personnel from accidentally energizing
the power conditioner while maintenance, service or repair
is being performed. With the lockout/tagout engaged, hazardous voltages are still present at the rear of the input
circuit breaker where input power feeds connect to the power conditioner. Entering the enclosure under these
circumstances is classified as a Type 4 Task under SEMI S2-0200. Entering the enclosure may be classified as
a Type 1 Task if power is disconnected from the power conditioner at the source.
Figure B Figure C
Section 2 - Safety
Figure A

Conditioned Power Center
10
2.6 Conformance with Applicable Laws and Regulations
This equipment must be installed and used in accordance with all applicable local, county, state, provincial, and
federal regulations. In the United States, these regulations include, but may not be limited to, those of the NFPA,
NEC, and other regulating bodies. Outside of the United States, other specific laws and regulations may apply.
Compliance with applicable regulations is the responsibility of the installer, user, or owner of the power
conditioner.
2.7 Product Liability
Product liability refers to the liability of any or all parties along the chain of manufacture of any product for
damage caused by the product. Product defects may include inherent design defects, manufacturing defects,
and defects in marketing. The manufacturer of this product has taken every possible precaution to ensure that
design defects do not exist and that manufacturing defects will not occur. Marketing defects generally result from
a lack of proper instructions or failures to warn of latent dangers associated with the product. The manufacturer
has taken great care in preparing this manual to ensure that the documentation is proper, correct, and complete.
However, the manufacturer cannot control how the product documentation is used or how well it is read and
understood. It remains the sole responsibility of the installer, user, and owner of this product to thoroughly review
and understand the documentation that accompanies the product. Those installing, using, servicing, and
maintaining the product should observe all warning notices in both the documentation and on the product and
contact the manufacturer if any part of the installation, use, or service procedures of this product are unclear.
Statutory product liability provisions can be, geographically speaking, very diverse. In the United States, the
Department of Commerce has created a Model Uniform Products Liability Act (MUPLA) for voluntary use by the
states. However, there remains no federal product liability law. For further information consult the products
liability statutes that may apply for the state or country where you reside. Also consult the manufacturer’s
warranty statement in Section 9.3 of this manual concerning implied and expressed warranties of merchantability
and fitness for purpose.
2.8 Emergency Contact Information
In an occurrence requiring emergency assistance from the manufacturer, please call (800) 321-6699. Normal
business hours are 8 am to 5 pm, Central Time. In EMEA, emergency calls should be directed to +44 (0) 1793
553980. Normal business hours for our European operations are 8:00 to 17:00 GMT. Outside of normal
business hours, the manufacturer’s phone systems provide an emergency after hours phone number.
Section 2 - Safety

Conditioned Power Center 11
Welcome to the world of conditioned power. Electrical power users from around the world benefit from the use of
clean, quality power. That's why we developed the Conditioned Power Center (CPC). The CPC Series is a low-
impedance power conditioner that provides high peak-load capability. You'll find that we've engineered these
products to provide features not readily available as standard equipment on other three-phase power line
conditioning products. The CPC series of products provide the functionality and flexibility that your business
needs in a power quality solution-both now and in the future.
3.1 Product Purpose
The CPC is designed to eliminate high-frequency noise and high-voltage impulses (also known as spikes or
surges) from the AC power that runs your electronic equipment. The power conditioner installs between the
power source and the critical load. And because it is a three-phase device, the CPC provides protection for all
transformer phases that power a large system. Sophisticated electronic systems contribute to the profitability of
your business, and clean power is an essential element in their reliable operation. Each electronic system
responds to power-quality problems differently, but properly protected systems benefit in a variety of ways. These
benefits include fewer hardware failures, fewer "no problem found" service calls, less system downtime, higher
manufacturing yield, better image quality and longer equipment life.
The CPC power conditioning series incorporates these three important power quality elements:
1. A low-impedance isolation transformer - The transformer is the "heart" of the power conditioning system. It
provides unequaled protection against common mode (neutral to ground) disturbances and voltages. In addition,
it provides all the criteria necessary to meet National Electrical Code 250-5d requirements for a "separately
derived power source." The isolation transformer can be specified to accommodate the variety of electrical supply
voltages and frequencies that are encountered throughout the world.
2. A low pass filter - The filter is responsible for removing normal mode (phase to neutral and phase to phase)
noise components from the electrical power. These power disturbances are the ones that are caused by your
system's "electrical neighbors" (i.e. elevators, copy machines, motors, HVAC equipment and even other
computer systems).
3. A surge diverter - The surge diverter is part of the input (primary) circuit of the isolation transformer. This
ensures that any voltage impulses generated within the facility (our outside of it due to occurrences like lightning
and utility activities) do not interfere with the connected system. Although the surge diverter is designed to
handle substantial energies, catastrophic events may occur, which damage one or more of the circuit’s protective
elements. If such damage occurs, one or more of the TVSS Fault LEDs on the power conditioner’s front panel
will illuminate. Consult Section 8.1.3 for instructions on how to proceed if a TVSS Fault LED illuminates.
Section 3 - Product Overview

Conditioned Power Center
12
Section 3 - Product Overview
3.2 Standard Features
These include a “power on “ LED, TVSS Fault LEDs (one per phase), a lockout/tagout provision for the front
panel input circuit breaker, safety interlocks, casters, and leveling feet. In addition, the CPC offers a range of
options as described below.
3.3 Optional Features
Input line cord - This option is available on models 45 kVA and smaller.
Output receptacles - This option is available on all models. A range of different receptacle styles (each with
over-current protection) may be added to the CPC power conditioner.
Distribution panels - This option is available only on models 85 kVA and larger. It provides a standard 42 circuit
Square D panelboard from which the conditioner’s power may be distributed to individual branch circuits each
with their own dedicated circuit breaker.
External EMO connector - This optional connector (if so equipped) is part of the power conditioner’s EMO
(emergency machine off) circuit. It provides a point for connecting the power conditioner’s EMO circuit to an
external control or the master EMO circuit of a computer room or similar facility. See Section 7.3
Seismic anchorage brackets - This options permits stabilization of the power conditioner in seismically active
(earthquake prone) areas. Seismic design data is included in the specification sheet found in Section 10.
A 5th harmonic filter - The GPI Series 2000 may be ordered with an optional passive 5th harmonic filter. When
so equipped, the CPC will significantly reduce the fifth odd order harmonic current regardless of origin (line or
load). Passive harmonic filters tuned to other order harmonics are available special order. Consult the
manufacturer for more information. If the CPC you are installing is equipped with an optional harmonic filter,
consult Section 7.1 of this manual for complete information regarding it’s location and operation.
Zig-Zag transformer - This option is only available on models 85 kVA and larger. Special transformers with
zigzag secondary windings for the elimination of harmonic currents are available as a special order from the
manufacturer.
Basic metering/Power management package - All CPC models may be equipped with basic metering
functions using Power Measurements Limited 6200 ION monitor. A full power management package is available
on models 85 kVA and larger. This package uses a Power Measurements ION 7500 monitor and provides
multiple functions including low voltage/phase loss/phase reversal detection and protection.

Conditioned Power Center 13
Section 3 - Product Overview
complete monitoring of three phase voltages, currents, phase angles, power factor, demand, energy usage,
event logs and more. If the CPC is equipped with the power management option, documentation prepared by
Power Measurements Limited will accompany this manual. The table below illustrates a matrix of standard
equipment and options for each model of GPI Series 2000.
ABC10.0-XDXY S S O S S S S O O NA O O NA NA O NA
ABC15.0-XDXY S S OS S S S O O NA O O NA NA O NA
ABC20.0-XDXY S S O S S S S O O NA O O NA NA O NA
ABC25.0-XDXY S S O S S S S O O NA O O NA NA O NA
ABC30.0-XDXY S S O S S S S O O NA O O NA NA O NA
ABC35.0-XDXY S S O S S S S O O NA O O NA NA O NA
ABC45.0-XDXY S S O S S S S O O NA O O NA NA O NA
ABC55.0-XDXY S S O S S S S NA O NA O O NA NA O NA
ABC65.0-XDXY S S O S S S S NA O NA O O NA NA O NA
ABC75.0-XDXY S S O S S S S NA O NA O O NA NA O NA
ABC85.0-XDXY S S O S S S S NA O O O O O O O O
ABC100.0-XDXY S S O S S S S NA O O O O O O O O
ABC125.0-XDXY S S O S S S S NA O O O O O O O O
ABC150.0-XDXY S S O S S S S NA O O O O O O O O
ABC175.0-XDXY S S O S S S S NA O O O O O O O O
ABC200.0-XDXY S S O S S S S NA O O O O O O O O
ABC230.0-XDXY S S O S S S S NA O O O O O O O O
ABC250.0-XDXY S S O S S S S NA O O O O O O O O
ABC300.0-XDXY S S O S S S S NA O O O O O O O O
Power On LED
3.4
Feature
Matrix
S= Standard
O= Option
NA = Not Available
TVSS Fault LEDs
Lockout/Tagout
Safety Interlocks
Casters
Leveling Feet
Input Line Cord
Output Receptacles
Distribution Panel
Ext. EMO Contacts
Seismic Anchorage
Harmonic Filter
Zig Zag Transformer
Basic Power Meter
Power Management
EMO Pushbutton

Conditioned Power Center
14
Section 4 - Preparation
IMPORTANT ! Each unit is fully inspected and tested prior to leaving the factory. CPC series products
are packed carefully in approved shipping crates. However, since we cannot control handling during
shipping, damage in transit is possible. Please retain all packing materials until the power conditioner is
installed and operating satisfactorily. If damage to the shipping container is evident, you may file a claim
with the shipper. Concealed damage can also be claimed with the shipper within fifteen (15) days.
Immediately contact the shipping company to arrange for any visual inspection or report. Contact the
manufacturer if you require assistance. Do not install or apply power to units if there is external damage
or if internal components or connections are loose or "rattle." Always check all electrical connections
during installation to verify a tight connection.
4.1 Unpackaging
The CPC series is packaged in a sturdy shipping container. For models 20 kVA and smaller, the container
consists of a shipping pallet/skid with an outer cardboard housing. For models 25 kVA and larger, the shipping
container consists of a bottom pallet/skid, a packing block, four wooden sides, and a top.
For 20 kVA and smaller conditioners, perform the following five steps to remove the power conditioner from the
packaging crate.
Step 1 - Remove the outer cardboard carton from the shipping pallet.
Step 2 - The power conditioner is attached to the shipping pallet with metal bands. Using a metal snips or band
cutter, cut the metal bands and remove them from the packing crate.
The metal bands are under tension. When cut, they may spring out of control if not
held securely. The bands may be very sharp. Gloves and eye protection are rec-
ommended before cutting and removing the metal bands. Failure to follow this pre-
caution may result in injury to eyes or other body parts. Wear protective gear.
Step 3 - Remove the protective plastic bag and foam cushion wrap and dispose of appropriately.
Step 4 - Consult Figure D on Page 16. Remove the 2 x 4 cleat at the front of the pallet by removing the lag
screws.
Step 5 - Remove the front 4 x 4 shipping skid by removing the lag screws. The shipping pallet may now be
“rocked” forward on the center skid allowing the power conditioner to roll off the pallet onto the floor.
Refer to the diagram in Figure E on page 16 for unpacking power conditioners 25 kVA and larger. You will need
a Phillips screwdriver (preferably power) and a band cutter or metal snips. Follow these seven steps.
Step 1 - Remove the top of the packing crate by removing the screws that secure the top to the four sides of the
crate. Once the screws are removed the top may be lifted off the crate and set to one side.

Conditioned Power Center 15
Step 2 - A packing block assembly rests on top of the power conditioner to secure it tightly inside the packing
crate. Remove the packing block assembly by removing the screws that are driven through the crate front and
back panels into the ends of the wooden struts. The packing block may now be removed and set to one side.
Step 3 - The front and back panels of the packing crate should be removed next. The front and back panels are
secured to the side panels and to the shipping pallet with screws along the edges and bottom of the panels.
Remove the screws from one panel at a time. Remove the panels and set them to one side.
Step 4 - The side panels are removed next by removing the screws that secure them to the pallet. Remove the
screws from the bottom of the side panels and set the panels to one side.
Step 5 - The power conditioner is attached to the shipping skid with metal bands. Using a metal snips or band
cutter, cut the metal bands and remove them from the packing crate.
Step 6 - The power conditioner is wrapped in foam cushion wrap and then enclosed in a protective plastic bag to
prevent moisture from entering the enclosure. Remove the outer plastic bag and foam cushion wrap from the
power conditioner and dispose of them appropriately.
Depending on the rating, the CPC power conditioner may weigh as much as 3000
pounds (1500 kg.). The next steps involve removing the power conditioner from the
shipping skid. Carelessness may result in injury.
Step 7 - The power conditioner is now free of the shipping container and bottom pallet/skid. A fork truck with
sufficient fork length and height and a minimum rating of two tons may be used to raise the power conditioner a
few inches off the bottom pallet.
IMPORTANT ! Never lift the power conditioner with the forklift from the front. Doing so may damage the
front bezel. Always lift the power conditioner with the forklift on the side or back.
Once raised clear of the bottom pallet, pull the pallet away from the power conditioner and set it off to the side
with the rest of the shipping container panels. The power conditioner is shipped with the threaded leveling feet
extended for stability. Retract the leveling feet by turning them in a sufficient number of turns. This will allow the
power conditioner to rest on its casters when lowered to the floor. The power conditioner may now be lowered to
the floor and the fork lift removed.
Take a few minutes to inspect the unit for any visible damage. If damage is present, contact the carrier for an
inspection before proceeding. If no damage is present, move the power conditioner to its installation location on
its casters. Once placed into its final position, make sure the unit is leveled and stabilized using the leveling feet.
Section 4 - Preparation

Conditioned Power Center
16
Section 4 - Preparation
Figure D - Shipping Crate Disassembly - 10 to 20 kVA
Figure E—Shipping Crate Disassembly - 25 kVA to 300 kVA
IMPORTANT ! Retain all parts of the shipping container and packaging material until after the CPC series
has been installed and proper operation verified. Once installed and operational integrity is verified, the
packaging material may be discarded.
1. Crate Top
2. Packing Block
3. Front Side
4. Back Side
5. Right Side
6. Left Side
7. Shipping Pallet/Skid
Shipping crate should be dis-
assembled in the numerical
order shown. Removing pan-
els 1 through 7 will provide
total access to the power con-
ditioner, which is enclosed in
foam wrap and plastic and
banded to shipping skid #7.
1
2
3
4
5
6
7
1
2
3
4
1. Cardboard outer carton
2. Shipping pallet
3. 2 x 4 front cleat
4. Front skid
After removing the front
cleat and front skid, the
pallet may be rocked for-
ward on the middle skid
and the power conditioner
may be easily rolled off the
pallet and onto the floor.

Conditioned Power Center 17
Section 5 - Installation
5.1 Location
For best performance, the CPC series should be installed within fifty (50) wire feet maximum of the protected
load. Refer to the dimensional information shown in the specifications sheet accompanying this document. Allow
six inches of free space on all sides of the CPC series to provide for proper air circulation. The unit is designed to
operate at high efficiency and is convection cooled. If the unit is installed in a facility that has a raised flooring
system, ensure that the flooring system can support the weight of the ETA power conditioner. Consult the
specification sheet found in Section 10 of this manual for dimensions and weights.
The power conditioner is not weatherproof and must be installed in a dry location.
During winter months, the transition from cold temperatures to a warm indoor
climate may result in significant condensation. Make sure that the power
conditioner has been given enough time to acclimate to its environment and that condensation has
evaporated before installing and energizing the conditioner.
5.2 Conduit Landings
The power conditioner is designed to accept conduit landings on the top panel, rear panel and on the unit bottom
(for raised floor applications). It is not possible to land conduits on the side panels due to interference with the
ventilation slots and/or the internal frame components.
5.2.1 Top Feed
Conduit holes may be punched or cut anywhere in the top panel except within 3” of any edge. It is important to
avoid landing conduits within 3” of the panel edges to prevent interference with the frame of the power
conditioner. Consult the specification sheet in Section 10 of this manual for additional guidance.
5.2.2 Rear Feed
Consult the specification sheet in Section 10 of this manual for allowable rear conduit landing locations.
Prior to drilling or cutting any top or rear panel, the panel must be removed.
Drilling or cutting conduit access holes with panels mounted on the conditioner
may result in metal shavings or other debris falling into or on the transformer or
other system components resulting in damage when power is applied to the system. The manufacturer
is not responsible for damage caused by improper or careless installation. Please take proper
precautions by removing panels before drilling, cutting, or punching conduit access holes. Failure to
follow this precaution will void the product warranty.
5.2.3 Bottom Feed
Consult the specification sheet in Section 10 of this manual for allowable bottom conduit landing locations.

Conditioned Power Center
18
5.3 Outer Panel Removal
The side panels, the back panel, the top panel and the front panel have all been designed for easy removal prior
to installation. The side panels must be removed first. Turn the quarter turn fasteners counterclockwise and
remove the side panels.
A bonding strap is attached to the bottom of each side panel with a hand fastener
and lock-washer. The bonding strap electrically grounds the side panel to the
frame during normal operation. This bonding strap must be disconnected for
complete removal of the side panel taking care not to misplace the fastener and lock-washer. It is
extremely important that the bond strap be reconnected to the side panel when the side panel is
replaced. Failure to reconnect the ground strap may result in an electrical shock hazard in the event of
an electrical fault.
The back panel, top panel and front panel are held in place by threaded fasteners, which are accessible once the
side panels have been removed. Removing these fasteners will allow the top, back, and front to be removed.
5.4 Alternate Conduit Landing Locations
In the event, it is not possible to land conduits on the power conditioner top, rear, or bottom panels, consult with
the manufacturer. Although less desirable, alternate conduit landings can be accommodated. The manufacturer
can provide information, detailed drawings, and instructions for landing conduits at alternate locations.
5.5 Main Input Circuit Breaker
Depending on the primary voltage configuration of the power conditioner’s isolation transformer, the conditioner
will be equipped with one of two types of circuit breakers. If the power conditioner uses a single voltage primary
(i.e. 480 volts) the power conditioner will come equipped with a circuit breaker rated at the proper amperage to
accommodate the power conditioner’s power rating at the specified input voltage. If the isolation transformer has
a primary voltage configuration capable of accepting multiple input voltages through the use of changeable taps,
the power conditioner will be equipped with a programmable circuit breaker. Prior to being shipped, a tag is
attached to the main circuit breaker of each power conditioner on the front panel. The tag indicates the
transformer primary configuration, breaker type, and input voltage setting. Based on the type of circuit breaker
shown on the tag, consult either Sec. 5.5.1 or 5.5.2 for more information
5.5.1 Fixed Input Circuit Breakers
Before beginning installation, check the tag on the circuit breaker. The power conditioner has been
manufactured and shipped according to the input voltage specified at the time the order was placed. If the input
voltage information shown on the tag does not match the voltage available at your site and if the tag indicates the
transformer in the power conditioner has a single voltage primary, then the input circuit breaker will have a fixed
value. Under the circumstances, you will not be able to proceed with the installation. Contact the company who
Section 5 - Installation

Conditioned Power Center 19
5.5.2 Programmable Circuit Breakers
Before beginning installation, check the tag on the circuit breaker. The power conditioner has been
manufactured and shipped according to the input voltage specified at the time the order was placed. If the input
voltage information shown on the tag does not match the voltage available at your site, check the tag to
determine the transformer primary configuration and circuit breaker type. If equipped with a programmable circuit
breaker and a transformer with a multiple voltage primary, it will be necessary to adjust the transformer’s primary
taps. Transformer primary tap connections are included in the specification sheet found in Section 10 of this
manual.
Breaker operating parameters such as input current, inrush characteristics, and time delay may all be
programmed to make it easier to adapt the power conditioner in the field to a full range of site installation
voltages. In order to reprogram the circuit breaker, it is necessary to gain access to the front of the breaker itself.
This is accomplished by removing the side panels as described previously in Sec. 5.3. Once the side panels
have been removed, proceed as follows:
1. The front bezel is attached to the frame of the power conditioner with screws on each side of the conditioner
frame. Remove the screws on each side of the front bezel, and remove the bezel from the power conditioner. (If
equipped with optional power management package or basic metering package, it will also be necessary to
unplug the wiring harness connecting the power management computer to the power conditioner before
removing the bezel. This is done by disconnecting at the Molex connector).
2. The front control panel is now accessible. It is hinged on the left side. Undo the screw on the right side of the
control panel and swing the control panel out to the left exposing the front of the breaker.
3. A hinged cover protects the breaker DIP switches. Raise the cover to gain access to the DIP switches.
Change DIP switch settings using the instructions included in the specifications sheet found in Section 10 of this
manual. Consult the manufacturer if you have any questions or difficulties.
5.6 Isolation Transformer
NOTE: CPC series power conditioners utilize a low-impedance isolation transformer. When first
energized, transformers of this kind typically exhibit a high "inrush" current that may approach 10-15
times the nominal rating. While inrush currents quickly decay to nominal, it is possible to experience
"nuisance" tripping of the source circuit breaker. If this occurs consult the manufacturer for options.
Section 5 - Installation

Conditioned Power Center
20
Section 5 - Installation
Transformers are designed to meet a variety of requirements. Some locations (Europe, for example) have
standardized on a single input voltage. In other cases customers may specify multiple input voltages to
accommodate the variety of voltages commonly found in the United States. The CPC series conditioner can
accommodate either style of transformer - single voltage or multiple voltage primary.
The conditioner is a "delta-wye" system. The input or primary side of the transformer accepts power from either a
delta or wye power system at the voltages for which the transformer has been designed. Delta feeds are
desirable because they reduce wiring and installation costs by eliminating the neutral conductor from the input
wiring arrangement. In addition, feeding the CPC series with a higher input voltage reduces input amperage and
further reduces installation costs by allowing the use of less expensive, smaller gauge electrical conductors and
conduits. Consult the tag on the input circuit breaker. If the power conditioner you are installing has a single
voltage primary, the site voltage must match the transformer primary voltage. Power conditioners with multiple
voltage primaries may be changed to accommodate a variety of site voltages.
The secondary configuration of the transformer is a five wire wye requiring three phase conductors, a neutral,
and a safety ground.
5.6.1 Transformer Primary Voltage Adjustment
Depending on the design of the isolation transformer, the
power conditioner may accommodate different input voltages.
The voltages are selected by changing primary taps. If
necessary, changes may be made to the input voltage setting
by changing connections on the transformer primary windings
at the locations shown in Figure F to the left. Most voltage
changes can be accomplished in 15 minutes or less. Consult
the specification sheet found in Section 10 of this manual for
detailed information on the specific connections required to
accommodate any of the allowable input voltages. In the event
that the voltage adjustment information in this manual is
missing, input voltage configuration information is also shown
on a data plate attached to the top of the transformer as shown
in Figure G to the left.
Figure F
Figure G
Table of contents
Other ETA Systems AC Power Distribution manuals
ETA Systems
ETA Systems ETA-S15L User manual

ETA Systems
ETA Systems ETA-PD8LA User manual
ETA Systems
ETA Systems ETA-S20RT User manual

ETA Systems
ETA Systems ETA-20SH User manual
ETA Systems
ETA Systems ETA-S15 User manual
ETA Systems
ETA Systems ETA-C15D User manual
ETA Systems
ETA Systems ETA-PD8A User manual

ETA Systems
ETA Systems ETA-S15 User manual
ETA Systems
ETA Systems PD11VBC User manual
ETA Systems
ETA Systems ETA-ECM20 Manual

