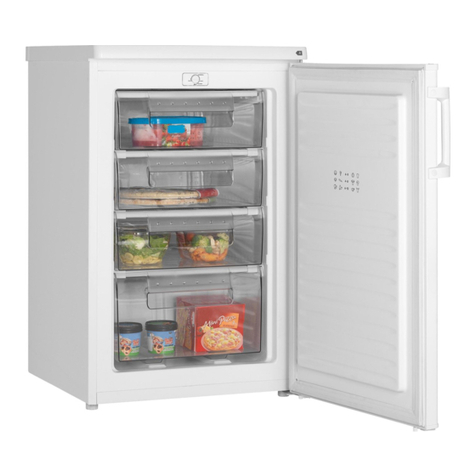
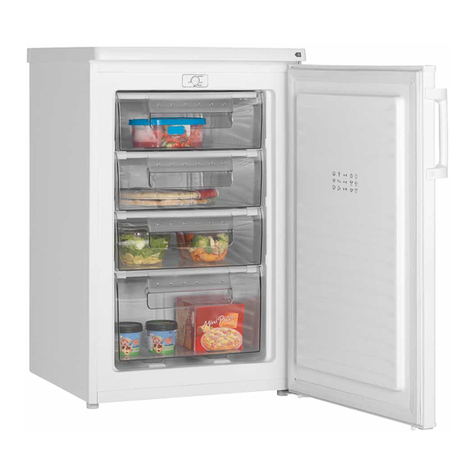
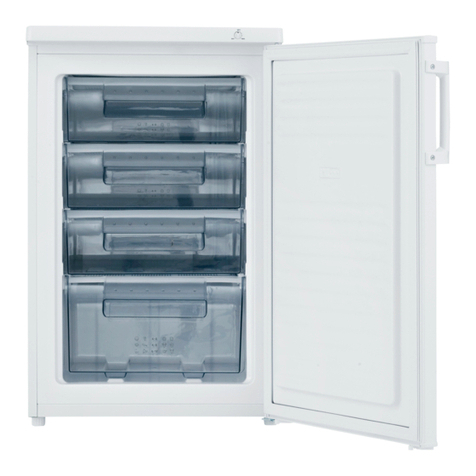
ETNA EVV1441WIT/E01 User manual

Houd, wanneer u contact opneemt met de serviceafdeling, de productiecode (PCODE)
en het volledige itemnummer (ITEMNR) bij de hand.
En cas de contact avec le service après-vente, ayez auprès de vous
le code de production (PCODE) et le numéro complet de l’article (ITEMNR).
Halten Sie den Produktionscode (PCODE) und die vollständige Itemnummer (ITEMNR)
bereit, wenn Sie mit der Kundendienstabteilung Kontakt aufnehmen.
When contacting the service department, have the production code (PCODE)
and complete item number (ITEMNR) to hand.
Adressen en telefoonnummers van de serviceorganisatie vindt u op de garantiekaart.
Les adresses et les numéros de téléphone du service après-vente se trouvent sur la carte de garantie.
Adressen und Telefonnummern der Kundendienstorganisation finden Sie auf der Garantiekarte.
You will find the addresses and phone numbers of the service organisation on the guarantee card.

Handleiding
Manual
EVV0851WIT
EVV1441WIT
700003750000

Toestelbeschrijving
34
21
1
EVV0851WIT EVV1441WIT
1bedieningspaneel met thermostaatknop,
snelvriesknop en indicatielampjes:
- bedrijfslampje groen licht op als de
vrieskast aangesloten en in bedrijf is
- snelvrieslamp geel licht op als de
vrieskast aangesloten en in bedrijf is in
de stand snelvriezen
- alarmlampje rood licht op als de
temperatuur in de vriezer te hoog is
2vriesvak met klep
3vrieslade
4stelvoeten
2
3
4
1
2
3
4
TOESTELBESCHRIJVING

1
Inleiding
Uw nieuwe vrieskast is bestemd voor
huishoudelijke doeleinden. Het toestel
is geschikt voor het bewaren van
levensmiddelen.
De bewaartijden zijn sterk afhankelijk van de
kwaliteit van de levensmiddelen.
Het “Voorlichtingsbureau voor de voeding” in
Den Haag kan u informatie verschaffen over
het bewaren van levensmiddelen.
In deze handleiding vindt u informatie over de
installatie, veiligheid, bediening en onderhoud
van uw toestel.
Als u de informatie doorleest, bent u snel op
de hoogte van alle mogelijkheden van het
toestel.
Bewaar dit boekje. Een eventueel volgende
gebruiker van dit toestel kan daar zijn
voordeel mee doen.
Inhoud
Inleiding . . . . . . . . . . . . . . . . . . . . . . . . . . . . . 1
Veiligheid . . . . . . . . . . . . . . . . . . . . . . . . . . . . 2
Voor uw veiligheid . . . . . . . . . . . . . . . . . . . . . 2
Ingebruikname . . . . . . . . . . . . . . . . . . . . . . . . 3
Voor u het toestel kunt gebruiken. . . . . . . . . 3
Tips . . . . . . . . . . . . . . . . . . . . . . . . . . . . . . . . . 4
Bewaartips . . . . . . . . . . . . . . . . . . . . . . . . . . . 4
Energietips . . . . . . . . . . . . . . . . . . . . . . . . . . . 4
Storingen. . . . . . . . . . . . . . . . . . . . . . . . . . . . . 5
Storingen zelf verhelpen . . . . . . . . . . . . . . . . 5
Onderhoud. . . . . . . . . . . . . . . . . . . . . . . . . . . . 6
Ontdooien . . . . . . . . . . . . . . . . . . . . . . . . . . . . 6
Reinigen. . . . . . . . . . . . . . . . . . . . . . . . . . . . . . 6
Wijzigen van de draairichting van de deur . 7
Milieuaspecten . . . . . . . . . . . . . . . . . . . . . . . 8
Afvoeren verpakking en toestel . . . . . . . . . . 8
INLEIDING

2
Voor uw veiligheid
■De huisinstallatie waarop u het toestel
aansluit moet voldoen aan de nationale en
lokale voorschriften.
■Sluit het toestel aan op een volgens de
geldende voorschriften geïnstalleerde
wandcontactdoos.
■Houd voldoende afstand tussen de vriezer
en een hittebron. De mantel mag niet
warmer dan 75 °C worden.
■Koelleidingen nooit verbuigen.
■Om beschadigingen aan het koelsysteem te
voorkomen het toestel nooit reinigen met
scherpe voorwerpen. Bij beschadigingen
aan het koelsysteem, waarbij koelvloeistof
vrijkomt, de ruimte ventileren. Waarschuw
onmiddellijk de Servicedienst!
■Gebruik de plint, laden en schappen nooit
als opstapje.
■Laat kinderen nooit met het toestel spelen.
■Reparaties mogen alleen door een bevoegd
servicemonteur worden uitgevoerd.
■Neem contact op met uw leverancier als u
beschadigingen aantreft.
■Laat het toestel aansluiten/repareren door
een erkend installateur.
■Gebruik geen verlengsnoer voor het
aansluiten van de vriezer.
■Trek de stekker nooit aan het snoer uit het
stopcontact. Pak altijd de stekker zelf vast
en trek deze recht uit het stopcontact.
■Bewaar geen explosieve en licht
ontvlambare stoffen in de vriezer.
Alcohol en vloeistoffen met een hoog
alcoholpercentage alleen afgesloten en
staand bewaren.
■Geen flessen met vloeistof die bevriest
in de vriezer bewaren, ze kunnen kapot
vriezen.
■Heeft u uw oude diepvrieskast nog in huis
en gebruikt u deze niet meer, verwijder
dan de deur(en). Dit om te voorkomen dat
kinderen zichzelf kunnen opsluiten en in
levensgevaar komen.
VEILIGHEID

3
Voor u het toestel kunt gebruiken
Opstellen
Het toestel is geschikt voor klimaatklasse SN
(omgevingstemperatuur 10 - 32 °C).
Plaats het toestel op een vlakke, stabiele
ondergrond.
Zorg voor voldoende ventilatie, houd rondom
het toestel minimaal 10 cm ruimte vrij.
Met de stelvoeten kunt u het toestel waterpas
zetten.
Laat het toestel nadat het geplaatst is
minimaal 3 uur staan voordat u de stekker in
het stopcontact steekt.
Reinigen
Maak eerst het interieur schoon en droog.
Gebruik voor het schoonmaken een sopje van
een neutraal schoonmaakmiddel (allesreiniger
of afwasmiddel). Het interieur na het
schoonmaken afnemen met schoon water en
droogwrijven.
Laat het toestel 1 à 2 uur drogen.
Stel de thermostaat in op stand 2,5. Steek de
stekker in het stopcontact. Het toestel koelt
nu continu tot de ingestelde temperatuur is
bereikt.
Instellen van de temperatuur
De knopaanduiding is voorzien van een “nul”
of “stop” stand en van de cijfers 1 (minst
koud) t/m 4 (meest koud).
Snel invriezen
Met de snelvriesknop kunt u grotere
hoeveelheden verse producten snel invriezen.
Zet de snelvriesknop weer uit zodra het
voedsel ingevroren is.
Indicatielampjes
Alarmlampje rood licht op als de temperatuur
in de vriezer te hoog is. Dit kan gebeuren:
– als de vrieskast aangesloten wordt;
– tijdens het invriezen van verse producten;
– als de deur te lang open staat of als de kast
defect is.
Bedrijfslampje groen licht op als de vrieskast
aangesloten en in bedrijf is.
Snelvrieslamp geel licht op als de vrieskast
aangesloten en in bedrijf is in de stand
snelvriezen
INGEBRUIKNAME

4
Bewaartips
Koop uitsluitend levensmiddelen in een
onbeschadigde verpakking.
Leg diepvrieslevensmiddelen zo snel mogelijk
na de aankoop in de vriezer. Zorg ervoor dat
ze tijdens het transport niet ontdooien.
Plaats nooit producten te dicht bij elkaar
en zorg voor voldoende afstand voor een
optimale luchtcirculatie in de koelkast.
Energietips
Opstelling
Hoge omgevingstemperaturen beïnvloeden
het energieverbruik nadelig. Ook direct
zonlicht of andere warmtebronnen in de buurt
van de vriezer hebben een ongunstige invloed
op het energieverbruik.
Ventilatie-openingen vrijhouden. Afgedekte
(vervuilde) openingen geven een hoger
energieverbruik.
Gebruik
Open de deur van de vrieskast niet vaker dan
nodig is. Dat geldt in het bijzonder bij warm
en vochtig weer. Zorg er ook voor dat de
vrieskast maar zo kort mogelijk open is.
Controleer af en toe of het apparaat
voldoende koelt (vrije circulatie van de lucht
achter het apparaat).
Draai de thermostaatknop van een hogere op
een lagere stand wanneer het gebruik van het
apparaat en de omstandigheden dit toelaten.
Alvorens levensmiddelen in de vrieskast te
leggen, moeten deze tot kamertemperatuur
worden afgekoeld.
Rijp of ijslagen doen het stroomgebruik
toenemen, verwijder deze daarom regelmatig
zodra ze 3-5 mm dik zijn.
Een verkeerd of niet afdichtend deurrubber
kan het stroomverbruik verhogen, daarom
moet het tijdig en vakkundig worden
vervangen.
De condensor aan de achterkant van de
kast moet altijd schoon en vrij van stof of
ongerechtigheden worden gehouden.
Elke instructie uit de hoofdstukken installatie
en energiebesparing die niet wordt nageleefd,
kan leiden tot een hoger stroomverbruik.
TIPS

Remedie
Steek de stekker in het
stopcontact.
Vervang de zekering(en).
Stel de thermostaat goed in.
Plaats de levensmiddelen op
de juiste wijze in de vriezer.
Verplaats het voorwerp.
Oorzaak
Stekker niet in het
stopcontact.
Zekering in meterkast defect.
Thermostaat foutief
ingesteld.
Onjuiste opstelling
levensmiddelen in de vriezer.
Er ligt een voorwerp tegen
het toestel.
Storing
Toestel doet niets.
Temperatuur in vriezer te
hoog of te laag.
Toestel maakt lawaai.
5
Storingen zelf verhelpen
STORINGEN

6
Ontdooien
Ontdooi de vriezer wanneer de ijslaag een
dikte van 5 mm bereikt heeft.
Verwijder het vriesgoed.
Schakel de vriezer uit.
Ontdooi de vriezer.
Maak de vriezer schoon en droog.
Schakel de vriezer weer in.
Plaats het vriesgoed weer in de vriezer als de
vriezer op temperatuur is.
U kunt het ontdooien versnellen door een
schaal met heet water in de vriezer te
plaatsen.
Bewaar het vriesgoed op een koele plaats
ingepakt in dekens of kranten.
Waarschuwing
Verwijder ijsaanslag nooit met scherpe
voorwerpen, ontdooisprays, een föhn, een
straalkacheltje of iets dergelijks. Dit kan tot
onveilige situaties leiden en onherstelbare
schade aan het toestel veroorzaken.
Reinigen
Waarschuwing
Trek voor het schoonmaken de stekker uit het
stopcontact. De stekker nooit aan het snoer
uit het stopcontact trekken!
Gebruik voor het schoonmaken een sopje
van een neutraal schoonmaakmiddel
(allesreiniger of afwasmiddel). Het toestel na
het schoonmaken afnemen met schoon water
en droogwrijven. Laat het toestel 1 à 2 uur
drogen.
De mantel kunt u eventueel behandelen met
een onderhoudsmiddel voor lakken.
Waarschuwing
Gebruik nooit een stoomreiniger voor het
reinigen van de vriezer. Dit is gevaarlijk.
Gebruik niet te veel vocht.
Vermijd het binnendringen van vocht in
elektrische componenten.
ONDERHOUD

7 ONDERHOUD
Wijzigen van de draairichting van
de deur
1. Schroef de 2 stelvoeten helemaal uit.
Kantel de koelkast achterover en laat hem
ergens op rusten. Let op: de koelkast niet
helemaal plat neerleggen, hierdoor kan het
koelsysteem beschadigd raken.
2. Draai de 3 schroeven los en verwijder het
onderste scharnier.
3. Schuif de deur ongeveer 15 cm naar
beneden totdat hij loskomt van het
bovenste scharnier en verwijder de deur.
4. Verwijder de afdekplaatjes van de
schroeven van de handgreep. Draai de
schroeven los en verwijder de handgreep.
5. Verwijder de afdekplaatjes aan de andere
kant van de deur.
6. Bevestig de handgreep aan de andere kant
van de deur met de 2 schroeven. Plaats
alle afdekplaatjes terug.
7. Draai met een platte schroevendraaier de
pin uit het bovenste scharnier. Draai de pin
in het bovenste scharnier aan de andere
kant.
8. Verwijder de schroef van de plek waar
het onderste scharnier moet komen en
bevestig de schroef aan de andere kant.
9. Schuif de deur in het bovenste scharnier,
zodanig dat de pin van het bovenste
scharnier in het gat bovenin de deur past.
10.Bevestig het onderste scharnier aan de
andere kant.
11.Controleer of de deur horizontaal en
verticaal goed uitgelijnd is en of hij goed
sluit voordat u het onderste scharnier
helemaal vastdraait. Zet het toestel weer
waterpas met de stelvoeten.

8MILIEUASPECTEN
Afvoeren verpakking en toestel
De verpakking van het toestel is recyclebaar.
Voor de verpakking kunnen gebruikt zijn:
■karton
■poly-ethyleenfolie (PE)
■CFK-vrij polystyreen (PS-hard-schuim)
Deze materialen op verantwoorde wijze en
conform de overheidsbepalingen afvoeren.
Op het typeplaatje is het symbool van een
doorgekruiste vuilnisbak aangebracht:
Dit betekent dat het apparaat aan het einde
van zijn levensduur niet bij het gewone
huisvuil mag worden gevoegd, maar naar
een speciaal centrum voor gescheiden
afvalinzameling van de gemeente moet
worden gebracht of naar een verkooppunt dat
deze service verschaft.
Het apart verwerken van een huishoudelijk
apparaat voorkomt mogelijk negatieve
gevolgen voor het milieu en de gezondheid
die door een ongeschikte verwerking ontstaat
en zorgt ervoor dat de materialen waaruit
het apparaat bestaat teruggewonnen kunnen
worden om een aanmerkelijke besparing van
energie en grondstoffen te verkrijgen.
Om op de verplichting tot gescheiden
verwerking van elektrische huishoudelijke
apparatuur te wijzen, is op het product het
symbool van een doorgekruiste vuilnisbak
aangebracht.

9

10 APPLIANCE DESCRIPTION
Appliance description
34
21
1
EVV0851WIT EVV1441WIT
1control panel with thermostat knob, fast
freeze switch and indicator lights:
- green indicator light, lights up when the
freezer is switched on and operational
- yellow indicator light, lights up when
the fast freeze button is switched on
- red alarm light, lights up if the
temperature in the freezer is too high
2freezer compartment with flap
3freezer drawer
4adjustable feet
2
3
4
1
2
3
4

11
Introduction
Your new freezer is intended for household
use. The appliance is suitable for keeping
food.
The length of time you can keep food depends
very much on the quality of the food.
These instructions for use contain information
about the installation, safety, control and
maintenance of your appliance.
The installation instructions are intended for
the installer, who can install the appliance
safely for you.
By reading the other information, you
will quickly become familiar with all the
appliance’s features.
Please keep this book safely for future use.
Table of contents
Introduction . . . . . . . . . . . . . . . . . . . . . . . . . 11
Safety. . . . . . . . . . . . . . . . . . . . . . . . . . . . . . . 12
For your safety . . . . . . . . . . . . . . . . . . . . . . . 12
Preparing for use . . . . . . . . . . . . . . . . . . . . . 13
Before you can use the appliance . . . . . . . 13
Tips . . . . . . . . . . . . . . . . . . . . . . . . . . . . . . . . 14
Tips on keeping food . . . . . . . . . . . . . . . . . . 14
Energy tips . . . . . . . . . . . . . . . . . . . . . . . . . . 14
Faults . . . . . . . . . . . . . . . . . . . . . . . . . . . . . . . 15
Trouble shooting. . . . . . . . . . . . . . . . . . . . . . 15
Maintenance. . . . . . . . . . . . . . . . . . . . . . . . . 16
Thawing. . . . . . . . . . . . . . . . . . . . . . . . . . . . . 16
Cleaning. . . . . . . . . . . . . . . . . . . . . . . . . . . . . 16
Changing the direction in which the door
opens . . . . . . . . . . . . . . . . . . . . . . . . . . . . . . . 17
Environmental aspects . . . . . . . . . . . . . . . . 18
Disposal of packaging and appliance . . . . 18
INTRODUCTION

12
For your safety
■The house mains to which you should
connect the appliance should comply with
national and local regulations.
■Connect the appliance to a wall socket
which has been fitted in accordance with
the current regulations.
■Ensure there is a sufficient distance
between the freezer combination and a
heat source. The temperature of the mantle
must not exceed 75 °C.
■Never bend refrigerant pipes.
■To avoid damaging the cooling system,
never clean the appliance with sharp
objects. In the event of damage to the
cooling system resulting in leakage of
refrigerant, ventilate the area. Warn the
Service department immediately.
■Never use the plinth, drawers and shelves
as a step.
■Never let children play with the appliance.
■Repairs should only be carried out by a
recognised service engineer.
■Contact your supplier if you discover any
damages.
■Have the appliance connected/ repaired by
a qualified fitter.
■Do not use an extension lead to connect up
the refrigerator.
■Never pull the plug out of the socket by the
cable. Always grasp the plug firmly and
remove it straight from the socket.
■Do not store any explosive or highly
inflammable substances in the freezer.
Alcohol and liquids with a high percentage
of alcohol should only be stored in closed,
upright containers.
■Do not keep in the freezer any bottles
containing fluids which will freeze. The
freezing may cause the bottles to break.
■If you still have your old freezer at home
and no longer use it, remove the door(s).
This will prevent children shutting
themselves inside and endangering their
lives.
SAFETY

13
Before you can use the appliance
Position
The appliance is suitable for climat
classification SN (ambient temperature
10 - 32 °C).
Place the appliance on a flat and stable
surface.
Make sure that there is sufficient ventilation,
leave a space of 10 cm around the appliance.
You can level the appliance using the
adjustable feet.
Leave the appliance to stand for at least
3 hours before you insert the plug into the
socket.
Cleaning
First, ensure that the interior is clean and
dry. For cleaning, use the suds of a neutral
cleansing agent (a general detergent or
washing-up liquid). After cleaning, rinse the
interior with clean water and rub dry.
Leave the appliance to dry for 1 or 2 hours.
Set the thermostat in the middle position.
Insert the plug into the socket. The appliance
now cools continuously until the set
temperature has been reached.
Setting the temperature
The knob is marked with a ‘zero’ or ‘stop’
setting and with the figures 1 (least cold) to
4 (coldest).
Fast freezing
If you want to freeze large amounts of food
at the same time, you can use the fast freeze
switch.
Turn off the fast freeze switch when the food
is frozen.
Indicator lights
Red alarm light lights up if the temperature in
the freezer is too high.
This can happen:
– when the freezer is being connected up;
– when fresh products are being frozen;
– if the door has been open too long or if the
appliance is defective.
Green operational light lights on when the
freezer is switched on and operational.
Yellow operational light lights up when the
fast freeze button is switched on.
PREPARING FOR USE

14
Tips on keeping food
Only buy food in undamaged packaging.
Place deep-frozen food in the freezer as soon
as possible after purchase. Make sure that it
doesn’t defrost during transport.
Never storage product’s too close together
and ensure a sufficient distance for optimum
air circulation in the freezer.
Energy tips
Position and arrangement
High ambient temperatures have a negative
effect on energy use. Keep the freezer in a
position away from direct sunlight or other
sources of heat.
Keep ventilation openings free. Clogged (dirty)
openings lead to higher use of energy.
Use
Try not to open the door too often, especially
when the weather is wet and hot. Once you
open the door, mind to close it as soon as
possible. This is especially important if you
have an upright model.
Every now and then check if the appliance
is sufficiently ventilated (adequate air
circulation behind the appliance).
Turn the thermostat knob from higher to
lower setting as soon as possible (depends
on how loaded the appliance is, ambient
temperature...).
Before loading the appliance with fresh
food, make sure it was cooled to ambient
temperature.
Ice and frost layer increase energy
consumption, so do clean the appliance as
soon as the layer is 3-5 mm thick.
If the gasket is damaged or if it turns out that
the sealing is poor, the energy consumption
is substantially higher. To restore efficiency,
replace the gasket.
The condenser on the rear wall should be
always clean, free of dust or any impurities.
Always consider instructions stated in
sections ‘Positioning and Energy Saving
Tips’, otherwise the energy consumption is
substantially higher.
TIPS

15
Remedy
Put the plug in the socket.
Change the fuse(s).
Set the thermostat correctly.
Place the food correctly in
the freezer.
Move the object.
Cause
The plug is not in the socket.
Defective fuse in the fuse-
box.
Thermostat has been set
incorrectly.
Food has been placed
incorrectly in the freezer.
Object touching the
appliance.
Problem
Appliance is not doing
anything.
Temperature in freezer is too
high or too low.
Appliance is making a noise.
Trouble shooting
FAULTS

16
Thawing
Defrost the freezer when the layer of ice
reaches a thickness of 5 mm.
Remove the contents of the freezer.
Switch the freezer off.
Defrost the freezer.
Clean and dry the freezer.
Switch the freezer on again.
When the freezer reaches its correct
temperature, replace the freezer’s contents.
You can speed up the defrosting process by
placing a bowl of hot water in the freezer.
Keep the contents of the freezer in a
cool place and wrapped in blankets or
newspapers.
Attention
Never remove the ice with the aid of sharp
objects, defrost sprays, a hair-drier, a radiant
heater, or the like. This may lead to unsafe
situations and may cause irreparable damage
to the appliance.
Cleaning
Attention
Before cleaning the appliance, disconnect the
plug from the wall socket. Never disconnect
the plug from the wall socket by pulling on the
lead!
For cleaning, use the suds of a neutral
cleansing agent (a general detergent or
washing-up liquid). After cleaning, rinse the
interior with clean water and rub dry. Leave
the appliance to dry for 1 or 2 hours.
You may, if you wish, clean the mantle with an
enamel cleaner.
Attention
Never clean the refrigerator with the aid of a
steam cleaner. This is dangerous.
Do not use too much moisture.
Avoid any moisture getting into electrical
components.
MAINTENANCE

17 MAINTENANCE
Changing the direction in which
the door opens
1. Adjust the two levelling feet to their
highest position. Tilt the refrigerator
backwards and rest it on something solid.
Attention: Do not lay the refrigerator
completely flat as this may damage the
coolant system.
2. Undo the 3 screws and remove the lower
hinge.
3. Slide the door down about 15 cm until it
comes loose from the upper hinge and
remove the door.
4. Remove the blanking plates covering the
handle screws. Remove the screws and
then remove the handle.
5. Remove the blanking plates from the
opposite side of the door.
6. Fit the handle to the other side of the door
with the 2 screws. Replace all the blanking
plates.
7. Using a flat bladed screw driver remove
the pin from the top hinge. Replace it in the
hinge on the opposite side.
8. Remove the screw from the side of the
refigerator where the hinge is to be
re-fitted and replace it on the other side.
9. Slide the door back on to the top hinge,
making sure that the upper hinge pin fits
into the upper hole of the door.
10.Fit the lower hinge to the other side of the
refrigerator.
11.Check that door is aligned horizontally and
vertically and that the seals are closed
on all sides before finally tightening the
bottom hinge. Level the appliance with the
adjustable feet.
This manual suits for next models
2
Table of contents
Languages:
Other ETNA Freezer manuals

ETNA
ETNA VVO682 User manual

ETNA
ETNA EVV0842WIT User manual

ETNA
ETNA VV856 Series User manual

ETNA
ETNA KVV7154 Series User manual

ETNA
ETNA VS6088 User manual

ETNA
ETNA EVV0852WIT User manual

ETNA
ETNA VV655 Series User manual

ETNA
ETNA VV849WIT User manual

ETNA
ETNA VV555WIT User manual

ETNA
ETNA VV655WIT User manual