ETT Distribution Rolf KERN! Smart-Pro User manual
Item number: 1453164
Instruction manual
Status: 01/2024
Made by ETT Distribution GmbH, Schmalbachstraße 16, 38112 Braunschweig
Reprinting or reproduction only with expressed permission.
EN
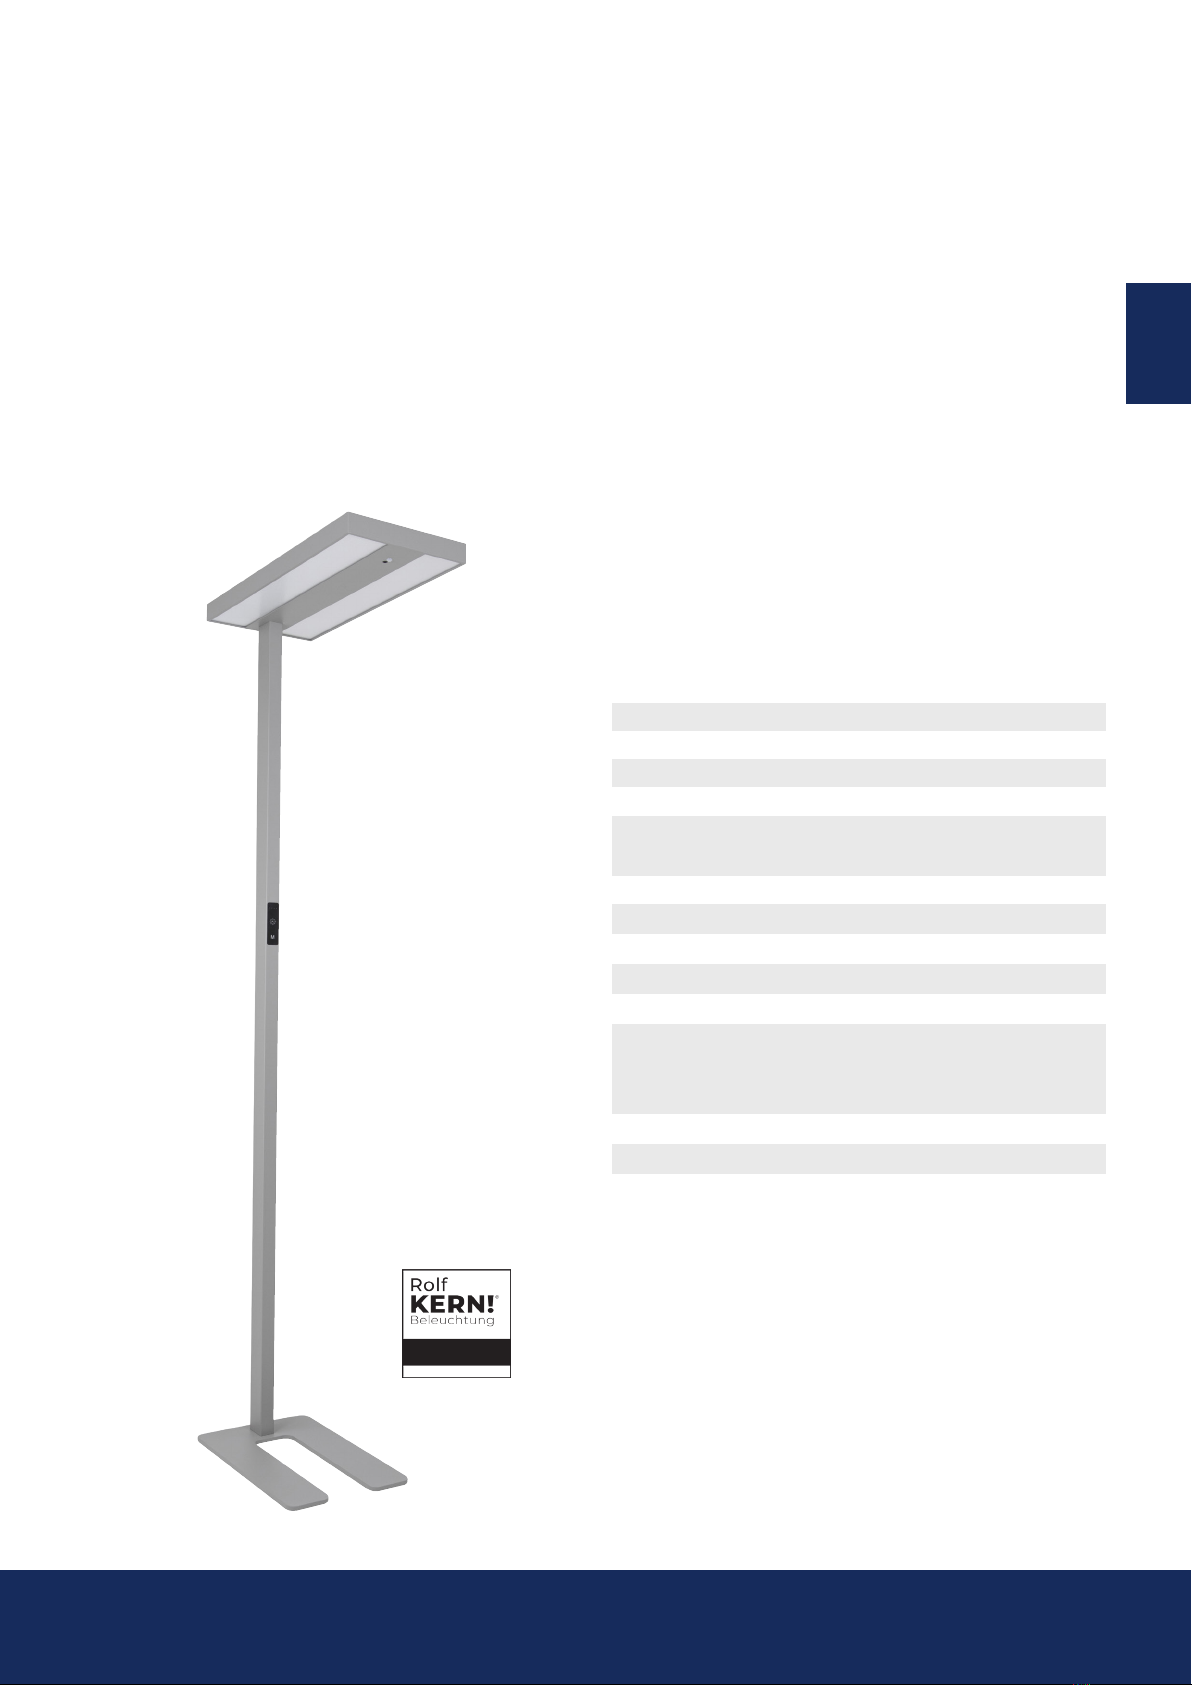
LED standing desk lamp
ROLF KERN „Smart-Pro“
with touch display, PIR & daylight sensor
TECHNICAL DETAILS
Operating voltage: 220 – 240 V
Light color: neutral white
Color temperature: 4000 K
Absorbed power: 60 W
Power consumption in
standby mode: 0,5 W
Lifetime: 36000 h
Illumination technology: LED
Length: 610 mm
Width: 280 mm
Higth 1968 mm
Energy efciency class: This product contains a
light source of
Energy effciency class E.
Dimmable: yes - via touchdisplay
Unied Glare Rating: <19
Item number: 1453164
Status: 01/2024
Made by ETT Distribution GmbH, Schmalbachstraße 16, 38112 Braunschweig
Reprinting or reproduction only with expressed permission.
EN
DISPOSAL INSTRUCTIONS
By separating materials, recycling and disposing of old
equipment in this way, you are making an important
contribution to protecting our environment.
Packaging can be returned to appropriate
collection points for free.
WEEE disposal note
According to the European WEEE Directive, electrical and
electronic WEEE Directive, electrical and electronic
equipment must not be disposed of with household waste.
Their components must be recycled or disposed of
separately, because toxic and hazardous components can
cause lasting damage to health and the environment if
disposed of improperly.
As a consumer, you are obliged under the Electrical and
Electronic Equipment Act (ElektroG) to return electrical and
electronic equipment free of charge at the end of its service
life to the manufacturer, the point of sale or to public
collection points set up for this purpose.
Details are regulated by the respective state law.
The symbol of the wheeled garbage can on the product,
the operating instructions and/or the packaging refers to
these regulations.
CARE INSTRUCTIONS
• Do not use damaged cables. New cables must have
the same characteristics as the original.
• Do not connect to power when cleaning the lamp.
• Clean only with a soft cloth and neutral detergent.
Avoid using alcohol or cleaning agents containing acetone,
sulfur, beryllium, ammonia or other solvents.
• Avoid mechanical pressure and heavy contamination.
• The replacement of the lamp can only be provided by
the manufacturer.
INTENDED USE
• The product is only suitable for indoor use.
• The product must only be used for its intended purpose,
as per this user manual!
• Ensure that the lamp is only positioned vertically,
with the base on the oor.
GENERAL NOTES
• Use only original parts supplied
• The product has no replaceable parts.
• Do not attempt to open or repair the product.
SAFETY INSTRUCTIONS
• Before commissioning, check the device for damage.
If this is the case, please do not put the device into
operation.
• Please note: If you make any technical modications to the
device, the guarantee of the device will expire immediately.
• Keep the operating instructions of the device.
• Please do not look directly into the light source in order
to avoid injury to the eye.
• Do not drop the device. It could be damaged if it hits a
hard surface.
• Avoid installing the unit in places with high
temperature differences or high humidity.
• Repair and maintenance work on the appliance may only
be carried out by trained specialist personnel!
• Do not carelessly leave the packaging material lying
around, Plastic foils/ bags, polystyrene parts, etc., could
become a dangerous toy for children.
• The device does not belong in children‘s hands,
it is not a child‘s toy!
SCOPE OF DELIVERY

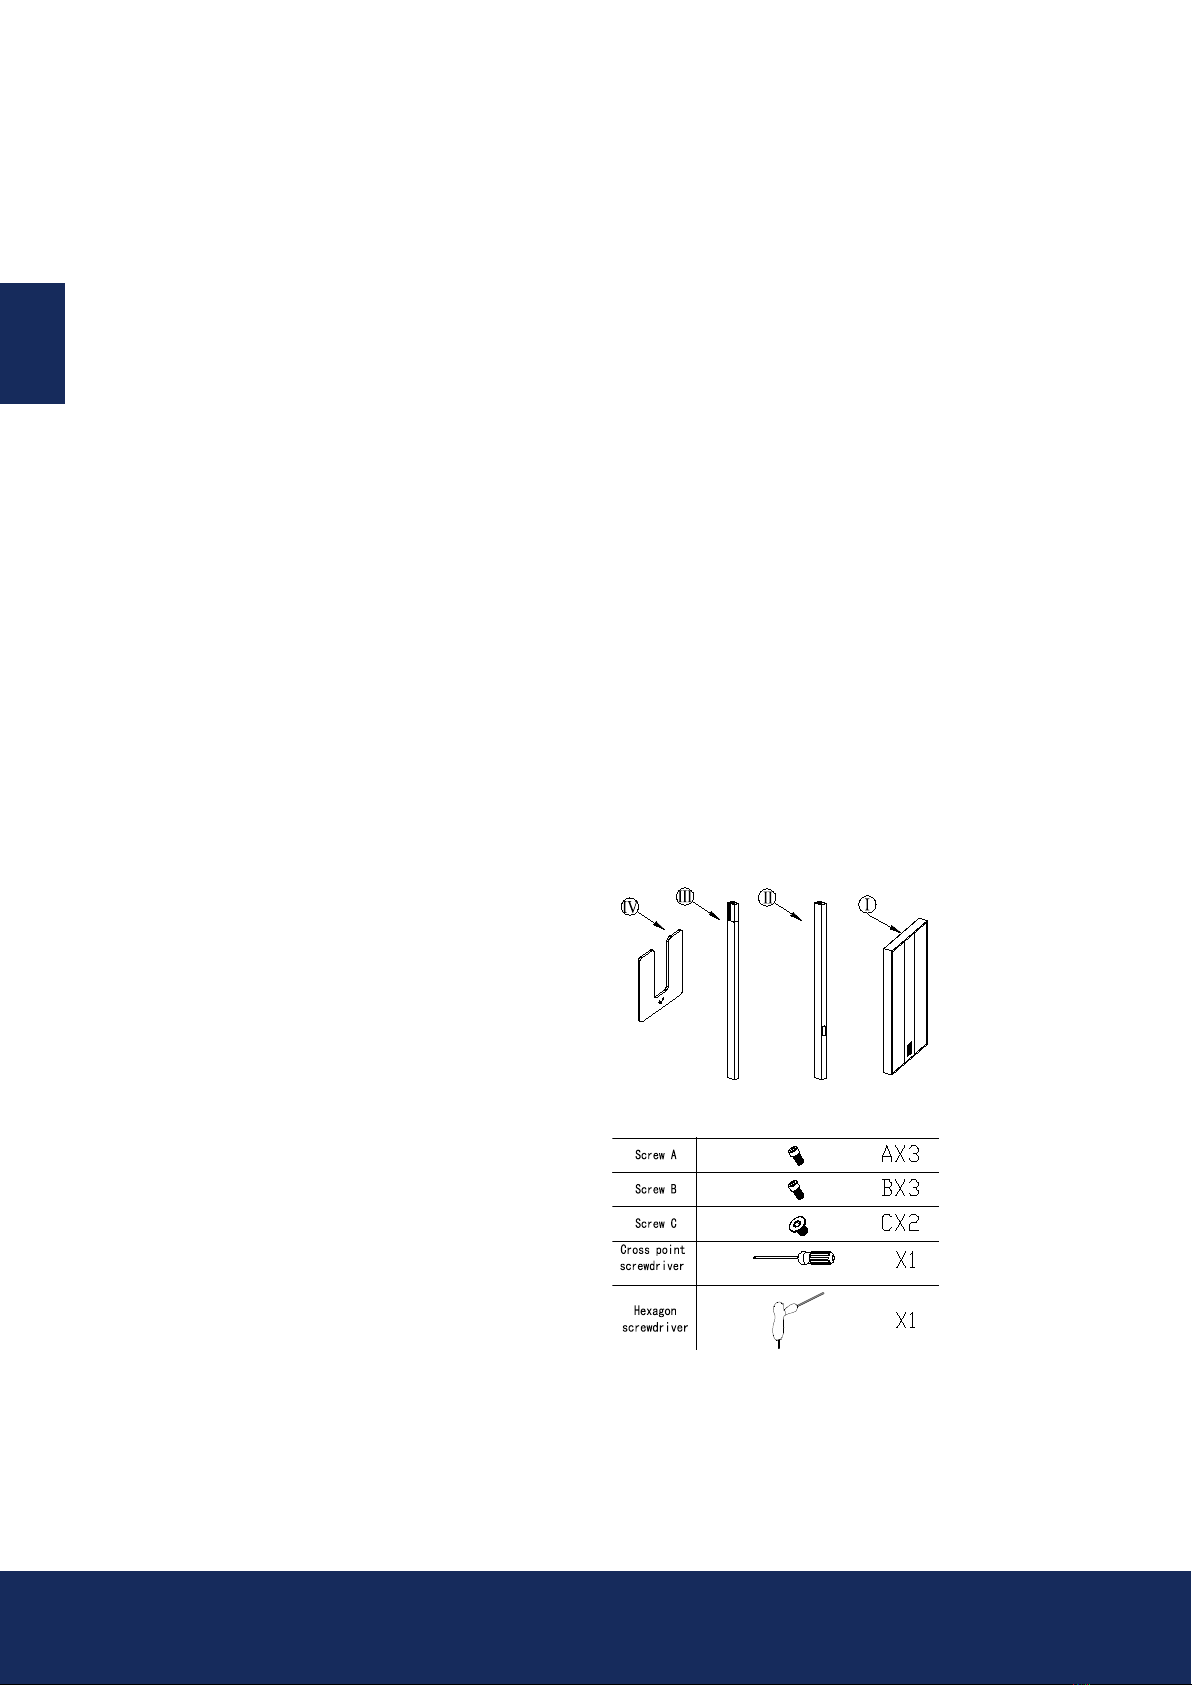
ASSEMBLY
Note: Assembly instructions can be found on the last page.
• Check if all parts in the delivery are included.
• Connect the connectors of Part 2 and 3 to each other.
• Insert Part 2 and 3 into the guide rail. Secure the parts
with the C-screws.
• Use the A-screws to connect the base of the lamp (Part 4)
to Part 3.
• Open the small ap on the top of the lampshade (Part 1)
to later place the screws underneath.
• Connect the connectors of Part 1 and 2.
• Then, insert the base into the designated slot on
the bottom of the lampshade.
• Now, at the location where you opened the ap, secure
the connection between the lampshade and base
with four B-screws.
• Close the ap, upright the lamp, and connect the power
plug to the lamp and the socket.
• Finally, test the functionality.
Item number: 1453164
Status: 01/2024
Made by ETT Distribution GmbH, Schmalbachstraße 16, 38112 Braunschweig
Reprinting or reproduction only with expressed permission.
EN
Mode indicator
ON/OFF-switch
Mode selector switch
SETTINGS
The lamp has four different modes:
Mode 1: Brightness adjusts automatically,
no sensor intervenes.
Mode 2: You set a specic brightness. The motion sensor
turns on the light as soon as motion is detected.
After 8 minutes without movement,
the light dims to 10%. Another 8 minutes later,
the lamp turns off. If motion is detected again,
the light goes back to 100%.
Mode 3: You rst set a brightness level. The light sensor
ensures a consistent brightness by dimming the
light based on the surrounding environment.
Mode 4: Combines Mode 2 and 3.
• You can turn the lamp on and off using the ON/OFF switch.
• Using the touch panel labeled M, you can set the mode.
• The active mode is indicated by a blue light
in the upper row.
• You can also individually dim the lamp in any mode using
the ON/OFF switch.
• Simply press and hold the touch panel, and the lamp will
dim up or down from the set brightness level.
• Repeat the process until the brightness matches your
desired level.
This manual suits for next models
1


