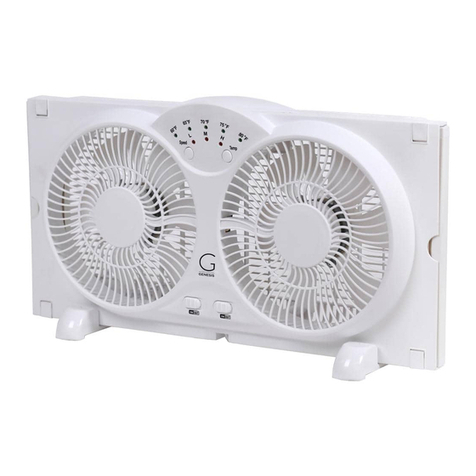
evatronic FSD-40A User manual

1/21
MANUEL D’UTILISATION
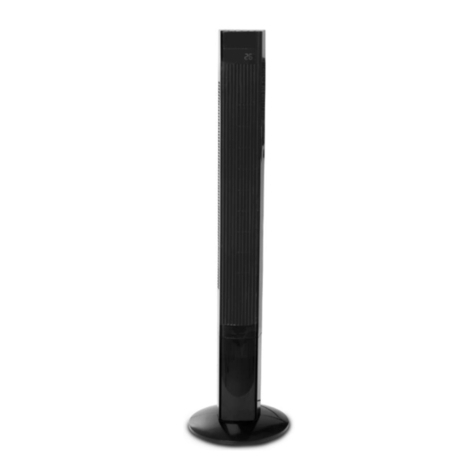
FR VENTILATEUR 5 PALES
EN FAN 5 BLADES
NL 5-BLADIGES FAN
Modèle : FSD-40A
REF. 001710
Photo non contractuelle
Importé par :
Euro-tech Distribution
37A rue César Loridan
59 910 Bondues
FRANCE

2/21
FR
CONSIGNES IMPORTANTES DE SECURITE
Lisez attentivement cette notice avant la première utilisation de cet
appareil et conservez-la pour tout usage ultérieur.
-Cet appareil peut être utilisé par des enfants âgés d'au moins 8
ans et par des personnes ayant des les capacités physiques,
sensorielles ou mentales réduites ou dénuées d’expérience ou de
connaissance, s’ils (si elles) sont correctement surveillé(e)s ou si
des instructions relatives à l’utilisation de l'appareil en toute
sécurité leur ont été données et si les risques encourus ont été
appréhendées.
Les enfants ne doivent pas jouer avec l’appareil.
Le nettoyage et l’entretien par l'usager ne doivent pas être
effectués par des enfants sans surveillance.
-Conservez l’appareil et son câble hors de portée des enfants âgés
de moins de 8 ans.
-Si le câble d'alimentation est endommagé, il doit être remplacé par
le fabricant, son service après-vente ou des personnes de
qualification similaire afin d'éviter un danger.
CONSIGNES GENERALES DE SECURITE
- Ce produit ne doit être qu’utilisé uniquement dans le but pour
lequel il a été conçu. Toute utilisation non conforme aux
instructions données dans cette notice est considérée comme
inappropriée et dangereuse.
- Ce produit ne doit pas être utilisé dans un environnement explosif
(en présence de produits inflammables tels que le gaz, vapeur,
poussières ….qui dans certaines conditions atmosphériques et
après départ de feu, peuvent se propager dans l’air).
-Tous les éléments de l’emballage (plastique, polystyrène…)
doivent être mis hors de portée des enfants et des personnes
handicapées car peuvent présenter une potentielle source de
danger.

3/21
-Avant de brancher l’appareil, vérifiez que la tension du réseau
électrique correspond à celle mentionnée sur la plaque signalétique
de celui-ci. L’appareil ne doit être branché que sur un réseau
électrique dont l’installation est conforme aux normes de sécurité.
- Ne pas brancher cet appareil sur une multiprise. Si possible il faut
éviter l’utilisation de rallonge. Si cela est inévitable, il faut utiliser
des produits qui respectent les normes électriques applicables.
- Ce produit ne doit pas être raccordé à une minuterie externe ou à
un système de contrôle à distance.
- Ce produit ne doit pas être utilisé ou stocké près de sources de
chaleur (chauffages, poêles …)
- Ne jamais immerger l’appareil et son cordon d’alimentation dans
de l’eau ou tout autre liquide.
-Ne jamais brancher l’appareil avec des mains mouillées ou
humides car vous risquez un choc électrique.
-Avant utilisation, merci de vérifier que le produit, son câble et la
prise ne sont pas endommagés.
- Avant la première utilisation, veillez à bien retirer tous les
éléments de l’emballage qui pourraient nuire au bon
fonctionnement du produit.
- Avant de brancher le produit, assurez-vous que le bouton de
démarrage est bien sur « off ».
-Toujours bien débrancher l’appareil après utilisation pour éviter
une surchauffe.
-Ne pas plier et tirer sur le câble. Ne déplacez jamais l’appareil en
tirant sur le cordon d’alimentation. Ne pas placer le câble sur une
surface abrasive ou coupante ou dans une position qui pourrait
l’endommager.
-Ne pas boucher totalement ou partiellement les entrées d’air et ne
pas insérer d’objets dedans.
-Pendant le fonctionnement, ne pas toucher le produit si vous êtes
mouillés.
-Si vous constatez la moindre anomalie dans le fonctionnement de
l’appareil, éteignez et débranchez de suite l’appareil.

4/21
-Ne pas placer le ventilateur à un endroit où des rideaux pourraient
se prendre dedans.
- Ne laissez jamais l’appareil sans surveillance à la portée des
enfants, qu’il soit en fonctionnement ou à l’arrêt.
- Avertissement ! Une fois l’installation terminée, il est strictement
interdit de retirer les grilles de protection du ventilateur pour le
nettoyage ou la maintenance.
- Assurez-vous que le ventilateur est débranché de la prise avant
de retirer les grilles de protection.
- Eteignez et débranchez toujours votre appareil après utilisation et
avant de le nettoyer.
- Votre appareil est destiné à un usage domestique à
l’intérieur de votre habitation.
- Ne pas suspendre le ventilateur aux murs ou aux plafonds.
- Placez ce ventilateur à une certaine distance des objets qui
l’entourent pour vous assurer que le fonctionnement du ventilateur
ne cause pas de dégâts accidentels.
-Ne pas placer ce ventilateur à proximité de rideaux ou d’autres
parties textiles qui pourraient se prendre dans le ventilateur.
-Ne pas couvrir le ventilateur pendant son fonctionnement.
- Ne pas insérer d’objets ou des parties de son corps ( doigts,
cheveux …) dans la grille de protection du ventilateur.
- Ne pas laisser ce ventilateur sans surveillance pendant une longue
période de fonctionnement.
- Ne pas vous exposer trop longtemps à l’air donné par le
ventilateur, cela risque de nuire à votre santé.
-En ce qui concerne les explications détaillées pour l'installation de
votre ventilateur, référez-vous aux paragraphes correspondants de
votre notice.

5/21
DESCRIPTION DETAILLEE
1.Grille avant
2.Cercle de fixation pour les grilles
3.Ecrou de fixation pour l’hélice 5 pales
4.Hélice
5.Ecrou de fixation pour grille arrière
6.Grille arrière
7. Sortie tige moteur
8.Axe moteur
9. Boitier contenant le moteur

6/21
10.Bouton d’oscillation
11. Point de fixation
12. Partie principale avec panneau de contrôle
13. Ecrou de verrouillage pour fixer la partie principale
14. Molette pour régler la hauteur du tube métallique
15. Base
16. Affichage Led
17. Bouton Marche ( ON)/ Arrêt (OFF) et minuterie
18. Tube métallique
19. Tube fixe
20. Support pour la base pour stabiliser le ventilateur
21. Plaque ronde
22.Vis en forme de L
ASSEMBLAGE DU VENTILATEUR
Déballez toutes les parties du ventilateur and enlevez tous les éléments de l’emballage
en veillant à ne pas jeter les petites pièces.
Etape n°1 : Assemblage du support (base et pied)
1. Assemblez la base (partie n°15) avec le support (partie n°20), fixez le tube fixe et
métallique dans le trou de la base, pour fixer le tube et la base avec le support, serrez la
plaque ronde (partie n°21) avec la vis en L ( partie n°22)
2. Installez la partie principale avec le moteur sur le tube métallique en serrant la vis
n°13.
Etape n°2 : Assemblage de l’hélice à 5 pales sur la partie moteur
1. Assemblez la grille arrière sur la partie moteur en vissant la pièce n° 5 pour fixer la
grille.
2. Positionnez l’hélice à 5 pales (partie n°4) sur la tige n°7 et vissez la pièce n°3 pour
verrouiller l’hélice.
3. Positionnez l’anneau (partie n°2) sur la grille arrière (partie n°6), une fois l’anneau
bien positionné sur la grille arrière, venir poser la grille avant (pièce n°1) et serrez
l’attache du cercle à l’aide d’un tournevis pour bien fixer les grilles avant et arrière
ensemble.
UTILISATION
Placez le ventilateur sur une surface plane, sèche et stable.
Branchez le ventilateur une prise.
Appuyez sur On/Off pour démarrer le ventilateur :
Le ventilateur se met en vitesse lente (L).
Si vous souhaitez changer de vitesse, appuyez une seconde fois pour atteindre la vitesse
moyenne (M), une troisième fois pour obtenir la vitesse rapide (H).
Si vous appuyez une quatrième fois sur le bouton off/off, le ventilateur s’arrêtera.
Les voyants lumineux L H R s’allument en fonction de la vitesse sélectionnée.

7/21
Pour faire osciller le ventilateur de gauche à droite, appuyez sur le bouton (10). Pour
stopper l’oscillation, il faut remonter le bouton.
Pour régler l’orientation verticale du ventilateur, il suffit d’incliner le ventilateur vers le
haut ou vers le bas jusqu’à obtention de l’orientation souhaitée.
Ce ventilateur a une fonction minuterie : appuyez sur le bouton TIMER (
= Minuterie) de façon successive afin d’atteindre le temps souhaité. Vous pouvez
programmer le ventilateur jusqu’ à 7 heures. Les voyants 1 2 4 s’allument en fonction
de la durée définie. Quand les voyants 1 2 4 sont tous allumés, vous atteignez la durée
de 7 heures.
NETTOYAGE ET ENTRETIEN
Eteindre et débrancher l’appareil de la prise avant assemblage ou
démontage.
Nettoyez uniquement l’extérieur du ventilateur avec un chiffon
doux et sec.
Ne pas plonger le ventilateur dans de l’eau ou tout autre liquide,
protégez le également des éventuelles éclaboussures d’eau.
Ne pas utiliser de solvants ou tout autre produit chimique pour le
nettoyage.
Après nettoyage, si vous n’utilisez pas le ventilateur, merci de le
ranger dans un endroit sec.
CARACTERISTIQUES TECHNIQUES
Alimentation : 220-240 V~, 50-60 Hz
Puissance : 50W
Classe II
Classe climatique T

8/21
GARANTIE
Ce produit est garanti pour une durée déterminée avec le distributeur à partir de
la date d’achat contre toute défaillance résultant d’un vice de fabrication ou de
matériau. Cette garantie ne couvre pas les vices ou les dommages résultant d’une
mauvaise installation, d’une utilisation incorrecte ou de l’usure anormale du
produit.
L’appareil doit être rendu dans son emballage d’origine et accompagné du ticket
de caisse sous réserve d’une manipulation conforme. Respectez donc bien les
conseils d'utilisation et les consignes de sécurité énoncées ci-dessus. Par ailleurs,
nous ne pourrons garantir votre appareil si vous ou une tierce personne avez
procédé à des modifications ou réparations.
COLLECTE SELECTIVE DES DECHETS ELECTRIQUES ET
ELECTRONIQUES
Les produits électriques ne doivent pas être mis au rebus avec les
produits ménagers. Selon la Directive Européenne 2012/19/EU pour le
rebus des matériels électriques et électroniques et de son exécution dans
le droit national, les produits électriques usagés doivent être collectés
séparément et disposés dans les points de collecte prévus à cet effet.
Adressez-vous auprès des autorités locales ou de votre revendeur pour
obtenir des conseils sur le recyclage.

9/21
EN
IMPORTANT SAFETY INSTRUCTIONS
Read this manual carefully before using this product for the first
time and keep it for future use.
-This device may be used by children aged 8 years and over and by
persons with reduced physical, sensory or mental abilities or
without experience or knowledge, if they are properly supervised or
if instructions on the safe use of the device have been given to
them and the risks involved have been understood.
Children should not play with the device.
Cleaning and maintenance by the user must not be carried out by
unattended children.
-Keep the device and its cable out of the reach of children under 8
years of age.
-If the power cable is damaged, it must be replaced by the
manufacturer, its service department or persons of similar
qualification to avoid danger.
GENERAL SAFETY INSTRUCTIONS
- This product may only be used for the purpose for which it was
designed. Any use not in accordance with the instructions given in
this manual is considered inappropriate and dangerous.
- This product must not be used in an explosive environment (in
the presence of flammable products such as gas, steam, dust, etc.
which, under certain atmospheric conditions and after the start of a
fire, may spread through the air).
-All packaging components (plastic, polystyrene, etc.) must be kept
out of reach of children and people with disabilities as they may
present a potential source of danger.
-Before connecting the appliance, check that the voltage of the
electrical network corresponds to that indicated on the appliance's
nameplate. The device may only be connected to an electrical
network whose installation complies with safety standards.

10/21
- Do not connect this unit to a power strip. If possible, the use of
extension cords should be avoided. If this is unavoidable, products
that meet the applicable electrical standards should be used.
- This product must not be connected to an external timer or
remote control system.
- This product must not be used or stored near heat sources
(heaters, stoves, etc.)
- Never immerse the unit and its power cord in water or any other
liquid.
-Never connect the unit with wet or damp hands as this may cause
an electric shock.
-Before use, please check that the product, its cable and plug are
not damaged.
- Before first use, be sure to remove all parts of the packaging that
could affect the proper functioning of the product.
- Before connecting the product, make sure that the start button is
set to "off".
-Always disconnect the unit after use to avoid overheating.
-Do not bend and pull the cable. Never move the unit by pulling the
power cord. Do not place the cable on an abrasive or cutting
surface or in a position that could damage it.
-Do not block all or part of the air inlets and do not insert objects
into them.
-During operation, do not touch the product if you are wet.
-If you notice any malfunction in the operation of the unit, turn off
and unplug the unit immediately.
-Do not place the fan in a place where curtains could get caught in
it.
- Never leave the appliance unattended within reach of children,
whether it is running or not.
- Warning! Warning! Once installation is complete, it is strictly
forbidden to remove the fan protection grids for cleaning or
maintenance.
-Ensure that the fan is switched off from the supply mains before
removing the guard.

11/21
- Always turn off and unplug your device after use and before
cleaning it.
- Your appliance is intended for domestic use inside your home.
- Do not suspend the fan from walls or ceilings.
- Place this fan at a distance from surrounding objects to ensure
that the operation of the fan does not cause accidental damage.
-Do not place this fan near curtains or other textile parts that could
get caught in the fan.
-Do not cover the fan during operation.
- Do not insert objects or parts of your body ( fingers, hair, etc.)
into the fan protection grid.
- Do not leave this fan unattended for a long period of time.
- Do not expose yourself to the air from the fan for too long, as this
may damage your health.
-For detailed explanations on how to install your fan, refer to the
corresponding paragraphs.

12/21
DETAILED DESCRIPTION
1.Front grill cover
2.Grill ring
3.Fastener nut for Fan blade
4.Fan blade ( 5 blades)
5.Fastener nut for back grill
6.Back grill cover
7. Output motor shaft
8. Motor shaft pin
9. Cabinet with motor
10.Swing button

13/21
11. Connection pole
12. Cabinet with control panel
13. Locknut for cabinet
14. Locknut for lifting
15. Base Stand
16. LED diode panel
17. Controls buttons ( ON/OFF and timer)
18. Lift tube
19. Stand post tube
20. Heavy base
21. Press plate
22.Bend bolt
FAN ASSEMBLY
Unpack all parts of the fan and remove all parts of the packaging, taking care not to
throw away small parts.
Step n°1: Assembly of the support (base and foot)
1. Assemble the base (part n°15) with the heavy base (part n°20), set the fixed and
metallic tube in the hole of the base, to fix the tube and the base with the heavy base,
tighten the round plate (part n°21) with the L-shaped screw ( part n°22)
2. Install the main part with the motor on the metal tube by tightening screw n°13.
Step n°2: Assembly of the 5-blade propeller on the engine part
1. Assemble the rear grille to the engine part by screwing part No. 5 to fix the grille.
2. Put the 5-blade fan (part 4) on output motor shaft ( part 7) and screw part 3 to lock
the 5-blade fan.
3. Position the ring (part #2) on the rear grid (part #6), once the ring is properly
positioned on the rear grid, place the front grid (part #1) and tighten the circle clamp
with a screwdriver to secure the front and rear grids together.
USE
Place the fan on a flat, dry and stable surface.
Connect the fan to an outlet.
Press On/Off to start the fan:
The fan switches to slow speed (L).
If you want to change gears, press a second time to reach the average speed (M), a
third time to get the fast speed (H).
If you press the off/off button a fourth time, the fan will stop.
The LEDs L H R light up according to the selected speed.
To swing the fan from left to right, press the button (10). To stop the oscillation, the
button must be raised again.

14/21
To adjust the vertical orientation of the fan, simply tilt the fan up or down until the
desired orientation is achieved.
This fan has a timer function: press the TIMER button ( = Timer) successively to reach
the desired time. You can program the fan for up to 7 hours. The LEDs 1 2 4 light up
according to the set time. When all LEDs 1 2 4 are lit, you reach the 7-hour duration.
CLEANING AND MAINTENANCE
Switch off and disconnect the unit from the socket before assembly or disassembly.
Clean only the outside of the fan with a soft, dry cloth.
Do not immerse the fan in water or any other liquid, also protect it from possible water
splashes.
Do not use solvents or any other chemical products for cleaning.
After cleaning, if you do not use the fan, please store it in a dry place.
TECHNICAL SPECIFICATIONS
Power supply: 220-240 V~, 50-60 Hz
Power: 50W
Class II
Climate class T
WARRANTY
This product is guaranteed for a fixed period of time with the distributor
from the date of purchase against any failure resulting from a manufacturing
or material defect. This warranty does not cover defects or damage resulting
from improper installation, improper use or abnormal wear and tear of the
product. The device must be returned in its original packaging and
accompanied by the receipt, subject to proper handling. Therefore, observe
the operating instructions and safety instructions given above. In addition,
we cannot guarantee your device if you or a third party has made any
modifications or repairs.
COLLECTION OF WASTE ELECTRICAL AND ELECTRONIC
EQUIPMENT
According to European Directive 2012/19/EU on waste electrical
and electronic equipment (WEEE), used electronic and electrical appliances
must be disposed of separately from household waste material and should
be handed in at the appropriate collection and disposal points.

15/21
NL
BELANGRIJKE VEILIGHEIDSINSTRUCTIES
Lees deze handleiding zorgvuldig door voordat u dit product voor
de eerste keer gebruikt en bewaar het voor toekomstig gebruik.
-Dit apparaat mag worden gebruikt door kinderen van 8 jaar en
ouder en door personen met verminderde fysieke, zintuiglijke of
mentale vermogens of zonder ervaring of kennis, indien zij naar
behoren worden begeleid of indien hun instructies voor het veilig
gebruik van het apparaat zijn gegeven en de risico's ervan zijn
begrepen.
Kinderen mogen niet met het apparaat spelen.
Schoonmaak en onderhoud door de gebruiker mag niet worden
uitgevoerd door kinderen zonder toezicht.
-Houd het apparaat en de kabel buiten het bereik van kinderen
onder de 8 jaar.
-Als de stroomkabel beschadigd is, moet deze worden vervangen
door de fabrikant, de serviceafdeling of personen met een
vergelijkbare kwalificatie om gevaar te voorkomen.
ALGEMENE VEILIGHEIDSINSTRUCTIES
- Dit product mag alleen worden gebruikt voor het doel waarvoor
het is ontworpen. Elk gebruik dat niet in overeenstemming is met
de instructies in deze handleiding wordt als ongeschikt en
gevaarlijk beschouwd.
- Dit product mag niet worden gebruikt in een explosieve omgeving
(in de aanwezigheid van brandbare producten zoals gas, stoom,
stof, enz. die zich onder bepaalde atmosferische omstandigheden
en na het begin van een brand door de lucht kunnen verspreiden).
-Alle onderdelen van de verpakking (plastic, polystyreen, enz.)
moeten buiten het bereik van kinderen en personen met een
handicap worden gehouden, aangezien zij een potentiële bron van
gevaar kunnen vormen.

16/21
-Voordat u het apparaat aansluit, moet u controleren of de
spanning van het elektrische netwerk overeenkomt met de
spanning die op het typeplaatje van het apparaat staat
aangegeven. Het apparaat mag alleen worden aangesloten op een
elektrisch netwerk waarvan de installatie voldoet aan de
veiligheidsnormen.
- Sluit dit toestel niet aan op een stekkerdoos. Indien mogelijk
moet het gebruik van verlengsnoeren worden vermeden. Als dit
onvermijdelijk is, moeten producten worden gebruikt die voldoen
aan de geldende elektrische normen.
- Dit product mag niet worden aangesloten op een externe timer of
afstandsbediening.
- Dit product mag niet worden gebruikt of opgeslagen in de buurt
van warmtebronnen (kachels, kachels, kachels, enz.).
- Dompel het apparaat en het netsnoer nooit onder in water of een
andere vloeistof.
-Sluit het apparaat nooit aan met natte of vochtige handen, omdat
dit een elektrische schok kan veroorzaken.
-Controleer voor gebruik of het product, de kabel en de stekker niet
beschadigd zijn.
- Verwijder voor het eerste gebruik alle onderdelen van de
verpakking die de goede werking van het product kunnen
beïnvloeden.
- Voordat u het product aansluit, moet u zich ervan vergewissen
dat de startknop op "off" staat.
-Koppel het apparaat na gebruik altijd los om oververhitting te
voorkomen.
-Buig en trek niet aan de kabel. Verplaats het apparaat nooit door
aan het netsnoer te trekken. Plaats de kabel niet op een schurend
of snijvlak of in een positie die hem zou kunnen beschadigen.
-Blokkeer niet alle of een deel van de luchtinlaten en steek er geen
voorwerpen in.
-Raak het product tijdens het gebruik niet aan als u nat bent.
-Als u een storing in de werking van het apparaat opmerkt,
schakelt u het apparaat uit en trekt u de stekker onmiddellijk uit
het stopcontact.

17/21
-Plaats de ventilator niet op een plaats waar de gordijnen erin
kunnen blijven hangen.
- Laat het apparaat nooit onbeheerd achter binnen het bereik van
kinderen, of het nu in werking is of niet.
- Waarschuwing! Zodra de installatie voltooid is, is het ten
strengste verboden om de ventilatieroosters te verwijderen voor
reiniging of onderhoud.
- Zorg ervoor dat de ventilator losgekoppeld is van de uitlaat
voordat u de beschermroosters verwijdert.
- Schakel het apparaat altijd uit en trek de stekker uit het
stopcontact na gebruik en voor het reinigen.
- Uw toestel is bestemd voor huishoudelijk gebruik in huis.
- Hang de ventilator niet op aan muren of plafonds.
- Plaats deze ventilator op een afstand van de omringende
voorwerpen om ervoor te zorgen dat de werking van de ventilator
niet per ongeluk schade veroorzaakt.
-Plaats deze ventilator niet in de buurt van gordijnen of andere
textieldelen die in de ventilator zouden kunnen bekneld raken.
-Dek de ventilator niet af tijdens het gebruik.
- Steek geen voorwerpen of lichaamsdelen (vingers, haren, enz.) in
het ventilatierooster.
- Laat deze ventilator niet voor langere tijd onbeheerd achter.
- Stel uzelf niet te lang bloot aan de lucht van de ventilator, omdat
dit uw gezondheid kan schaden.
-Gedetailleerde uitleg over de installatie van uw ventilator vindt u in
de betreffende paragrafen.
GEDETAILLEERDE BESCHRIJVING

18/21
1.Front grilldekking
2.Grill ring
3. Bevestigingsmoer voor ventilatorblad
4.Fan blad (5 bladen)
5.Fastener moer voor achtergrill
6.Back grill deksel
7.Uitgaande motoras
8. Motoraspen
9. Kast met motor
10.Swing knoop
11. Aansluitpool
12.Kast met bedieningspaneel
13.Borgmoer voor kast
14. Borgmoer voor heffen
15. Basisstandaard
16. LED-diodepaneel
17. Bedieningsknoppen (AAN/UIT en timer)
18. Hefbuis
19. Standaardbuis

19/21
20. Zware basis
21. Persplaat
22.Bend bout
VENTILATOR ASSEMBLIEK
Pak alle onderdelen van de ventilator uit en verwijder alle onderdelen van de
verpakking, waarbij u erop let dat u geen kleine onderdelen weggooit.
Stap 1: Montage van de steun (voet en voet)
1. 1. Monteer de basis (onderdeel nr. 15) met de beugel (onderdeel nr. 20), bevestig de
vaste en metalen buis in het gat van de basis, bevestig de buis en de basis met de
beugel, draai de ronde plaat (onderdeel nr. 21) vast met de L-vormige schroef
(onderdeel nr. 22).
2. 2. Installeer het hoofddeel met de motor op de metalen buis door schroef nr. 13 aan
te draaien.
Stap n°2: Montage van de 5-blads propeller op het motorgedeelte
1. 1. Monteer het achterste rooster aan het motorgedeelte door onderdeel nr. 5 te
schroeven om het rooster te bevestigen.
2. 2. Plaats de 5-bladige propeller (deel 4) op stang 7 en schroef deel 3 om de propeller
te vergrendelen.
3. 3. Plaats de ring (onderdeel #2) op het achterste rooster (onderdeel #6), zodra de
ring goed op het achterste rooster is geplaatst, plaats het voorste rooster (onderdeel
#1) en draai de cirkelklem vast met een schroevendraaier om het voorste en achterste
rooster aan elkaar te bevestigen.
GEBRUIK
Plaats de ventilator op een vlakke, droge en stabiele ondergrond.
Sluit de ventilator aan op een stopcontact.
Druk op On/Off om de ventilator te starten:
De ventilator schakelt over op lage snelheid (L).
Als u wilt schakelen, drukt u een tweede keer op de gemiddelde snelheid (M) en een
derde keer op de snelle snelheid (H).
Als u een vierde keer op de uit/uit-knop drukt, stopt de ventilator.
De LED's L H H R lichten op volgens de gekozen snelheid.
Om de ventilator van links naar rechts te draaien, drukt u op de knop (10). Om de
oscillatie te stoppen, moet de knop weer omhoog worden gebracht.
Om de verticale oriëntatie van de ventilator aan te passen, kantelt u de ventilator
gewoon omhoog of omlaag tot de gewenste oriëntatie is bereikt.
Deze ventilator heeft een timerfunctie: druk achtereenvolgens op de TIMER-knop ( =
Timer) om de gewenste tijd te bereiken. U kunt de ventilator tot 7 uur programmeren.

20/21
De LED's 1 2 2 4 lichten op volgens de ingestelde tijd. Wanneer alle LED's 1 2 4
branden, bereikt u de duur van 7 uur.
REINIGING EN ONDERHOUD
Schakel het apparaat uit en haal de stekker uit het stopcontact voor de montage of
demontage.
Maak alleen de buitenkant van de ventilator schoon met een zachte, droge doek.
Dompel de ventilator niet onder in water of een andere vloeistof, maar bescherm hem
ook tegen mogelijke waterspatten.
Gebruik geen oplosmiddelen of andere chemische producten voor het reinigen.
Als u de ventilator na het schoonmaken niet gebruikt, bewaar hem dan op een droge
plaats.
TECHNISCHE SPECIFICATIES
Voeding: 220-240 V~, 50-60 Hz
Vermogen: 50W
Klasse II
Klimaatklasse T
GARANTIE
Dit product beschikt over een garantie, die geldt bij een defect dat het gevolg is van een
fabricagefout of het materiaal, met een duur die bepaald wordt door de verdeler vanaf
de aankoopdatum. Deze garantie dekt geen gebreken of schade die het resultaat zijn
van een slechte installatie, onjuist gebruik of abnormale slijtage van het product .
Het toestel dient opgeborgen te worden in zijn originele verpakking en dient vergezeld
te worden van het kassaticket onder voorbehoud van een juist gebruik. Leef dus alle
gebruiksadviezen en veiligheidsinstructies die hierboven vermeld worden na. Bovendien
kunnen we geen garantie geven op het toestel wanneer u of een derde wijzigingen of
herstellingen heeft uitgevoerd aan het toestel.
SELECTIEVE OPHALING VAN ELEKTRISCHE EN ELEKTRONISCHE
APPARATEN
De elektrische producten mogen niet bij het huishoudelijk afval gezet worden.
Volgens de Europese Richtlijn 2012/19/EU betreffende afgedankte elektrische
en elektronische apparatuur en de nationale toepassing ervan moeten
versleten elektrische producten apart worden gesorteerd en naar de daarvoor
voorziene inzamelpunten worden gebracht. Richt u tot de lokale overheid of
uw verkooppunt voor informatie over recycling.
This manual suits for next models
1
Table of contents
Languages:

