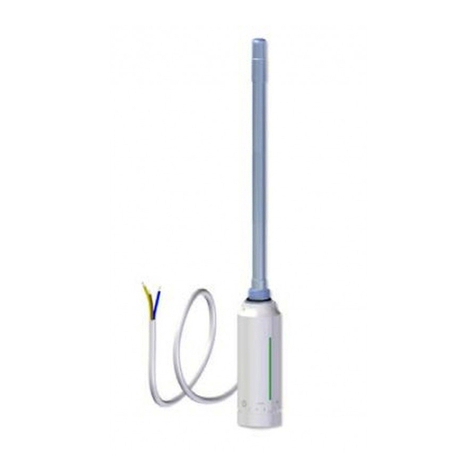
Evinox ModuSat TP 40-10 User guide

ModuSat TP Twin Plate
Satellite Heating Unit
Installation, Commissioning and
Servicing Instructions
Evinox Ltd T. +44 (0)1372 722277 E. technical@evinox.co.uk W. www.evinox.co.uk
2551390A

2
Contents
1GENERALINFORMATION………………………………………………………………………………………………4
1.1Warnings………………………………………………………………………………………………………….4
1.2Symbols……………………………………………………………………………………………………………4
1.3SafetyInstructions…………………………………………………………………………………………...4
2TECHNICALFEATURES…………………………………………………………………………………………………..6
2.1TypicalSchematicPrinciple(AllTopConnections………………………………………………6
2.2Connectionconfigurations…………………………………………………………………………….…7
2.3Dimensions……………………………………………………………………………………………………...10
2.4TechnicalFeatures…………………………………………………………………………………………...14
3INSTALLATION………………………………………………………………………………………………………………15
3.1Recommendedhandlingprocedure………………………………………………………………….15
3.2ModuSatTPpositioning……………………………………………………………………………………15
3.3ChecksbeforeconnectingtheModuSatTP……………………………………………………….15
3.4HydraulicConnections………………………………………………………………………………………17
3.5UseofPre‐installationRig………………………………………………………………………………..18
3.6WallFixing……………………………………………………………………………………………………….19
3.7PressureIndependentControlValve(PICV)Adjustment……………………………………21
4PRIMARYANDSECONDARYCIRCUIT…………………………………………………………………………….24
4.1Watertreatment……………………………………………………………………………………………..24
4.2Cleaning…………………………………………………………………………………………………………..24
4.3Precautions………………………………………………………………………………………………………25
4.4Bionibal……………………………………………………………………………………………………………26
4.5FlushingBypass………………………………………………………………………………………………..27
5ELECTRICCONNECTIONS……………………………………………………………………………………………….28
5.1ModusatWiringConnections……………………………………………………………………………29
5.2ModuSatConnectionBoard(Visibleoncethecoverisremoved)……………………….31
5.3Roomcontrollerconnections…………………………………………………………………………….32
5.4TypicalModuSatElectricWiringDiagram(SingleRoomController)………………….34
5.5TypicalModuSatElectricWiringDiagramwith2ZoneControl
(2RoomControllers)…………………………………………………………………………………………35

3
5.6TypicalWiringDiagramwith3rdPartyRoomStat……………………………………………36
6COMMISSIONING………………………………………………………………………………………………………..37
6.1InitialCommissioningProcedure………………………………………………………………………37
6.2ApartmentCircuitBalancing…………………………………………………………………………….38
6.3Useofthecommissioningswitch……………………………………………………………………..39
6.4AdjustmentofTMV………………………………………………………………………………………….40
6.5PumpStart‐up‐WiloPWMPump…………………………………………………………………….41
6.6Warranty…………………………………………………………………………………………………………42

4
1 GENERAL INFORMATION
1.1 Warnings
The ModuSat unit requires mains electrical connections and connection to the primary, low
temperature hot water system and mains cold water supply to function.
A pre-installation rig is available to the installer to help position and space the pipe
connections to the unit during first fix, prior to the ModuSats being delivered to site.
Installation must be carried out by a competent engineer in line with current regulations.
Failure to read and follow the instructions provided within this document may cause
potential injury or failure of the equipment.
Therefore it is advised that the installer reports any equipment faults or defects to an
authorised Evinox representative.
Any modifications or adjustments carried out without EVINOX official authorisation will
invalidate the warranty and absolves Evinox from any liability.
Evinox has the right to make any changes or modifications to the products without prior
notice.
1.2 Symbols
Follows a list of symbols used in this manual:
IMPORTANT NOTE REGARDING CORRECT
INSTALLATION
IMPORTANT NOTE REGARDING PERSONAL SAFETY
AND CARE
CAUTION !
DANGER OF ELECTRICAL SHOCK!
CAUTION !
1.3 Safety Instructions
All installation and maintenance operations must be carried out by competent engineers
according to current regulations
In case of water leaks:
Disconnect the electric power supply
Slowly close the main water isolation valves to the unit
Inform Evinox or approved Evinox engineer
We recommend the unit is checked at least once a year by an authorised
maintenance engineer. If the unit is subject to excessively heavy usage or non
domestic installations (for example in a light commercial environment), we
recommend having it checked more than once per year.
Disconnect the electrical supply prior to starting any work on a ModuSat
TP.

5
ModuSat TP – Top
Connections

6
2 TECHNICAL FEATURES
2.1 Typical Schematic Principle (All Top Connections)
ModuSat TP 40-10, 50-10 & 60-10
Note: Other connection arrangements
are available on request
The cabinet is constructed from painted steel in white
Components
APrimary / DH flow
BPrimary / DH return
CDomestic cold water Inlet
DDomestic hot water outlet
ESecondary / Apartment
heating flow
FSecondary / Apartment
heating return
G Connection for safety
discharge
Primary Circuit Side
1Insulated plate heat exchanger
(Heating)
2Heating Pressure Independent
Control Valve with actuator
3Insulated plate heat exchanger
(Domestic Hot Water)
4 DHW Pressure Independent
Control Valve with actuator
5Heat meter
6Non-return valve
DHW Secondary Side Circuit
7Lime scale reducer (Optional)
8 Blending valve
Heating Secondary Side Circuit
9 Heating expansion vessel
10 Low pressure switch
11 Safety relief discharge
12 Manometer
13 Heating circulation pump
14 Safety thermostat (Optional)
Controls & Other Items
15 Wireless RS 485
16 Electronic control board
17 Room control unit
18 Strainer & IV assembly
19 Filling loop (External)

7
2.2 Connection configurations
Various connection configurations are available; a few of them are detailed here below.
Please contact Evinox for further information.
Legend: PF primary flow, PR primary return, SF secondary flow, SR secondary return
DR drain, CW cold water, HW domestic hot water
TL1TL2
T1T2T3T4T5T6 T7 T1 T2 T3T4T5 T6 T7
PFPRCWHW SF SR PF PR CW SF SR
DR HWDR
B1B2B3B4B5B6 B7 B1 B2 B3B4B5 B6 B7
TL3TL4
T1T2T3T4T5T6 T7 T1 T2 T3T4T5 T6 T7
PFPRHW SF SR PF PR SF SR
CWDR CWHWDR
B1B2B3B4B5B6 B7 B1 B2 B3B4B5 B6 B7
TL5TL6
T1T2T3T4T5T6 T7 T1 T2 T3T4T5 T6 T7
PFPRCWHW PF PR CW
DR SF SR HWDR SF SR
B1B2B3B4B5B6 B7 B1 B2 B3B4B5 B6 B7

8
TL7TL8
T1T2T3T4T5T6 T7 T1 T2 T3T4T5 T6 T7
PFPRHW PF PR
CWDRSF SR CWHWDR SF SR
B1B2B3B4B5B6 B7 B1 B2 B3B4B5 B6 B7
BL1BL2
T1T2T3T4T5T6 T7 T1 T2 T3T4T5 T6 T7
CWHW CW
PFPR DRSF SR PF PR HWDR SF SR
B1B2B3B4B5B6 B7 B1 B2 B3B4B5 B6 B7
BL3BL4
T1T2T3T4T5T6 T7 T1 T2 T3T4T5 T6 T7
HW
PFPRCW DRSF SR PF PR CWHWDR SF SR
B1B2B3B4B5B6 B7 B1 B2 B3B4B5 B6 B7

9
BL5BL6
T1T2T3T4T5T6 T7 T1 T2 T3T4T5 T6 T7
CWHW SF SR CW SF SR
PFPR DR PF PR HWDR
B1B2B3B4B5B6 B7 B1 B2 B3B4B5 B6 B7
BL7BL8
T1T2T3T4T5T6 T7 T1 T2 T3T4T5 T6 T7
HW SF SR PF PR
PFPRCW DR CWHWDR SF SR
B1B2B3B4B5B6 B7 B1 B2 B3B4B5 B6 B7

10
2.3 Typical Dimensions (Typical connection configurations shown)
TL1 - TP 40-10 & 50-10 All Top Connections
BL4 TP 40-10 & 50-10 All Bottom Connections
Note: For clarity, safety drain connections are not shown. Please refer to hydraulic arrangements.
Additional connection configurations available as detailed on pages 7-9 of this manual. For specific
hydraulic arrangements for other connection configurations please contact the Evinox Technical
Department on 01372 722277.

11
TL5 TP 40-10 & 50-10 Secondary Heating Flow & Return Connections at the Bottom
BL5 TP 40-10 & 50-10 Primary Flow & Return Connections at the Bottom
Note: For clarity, safety drain connections are not shown. Please refer to hydraulic arrangements.
Additional connection configurations available as detailed on pages 7-9 of this manual. For specific
hydraulic arrangements for other connection configurations please contact the Evinox Technical
Department on 01372 722277.

12
BL7 TP 40-10 & 50-10 Primary Flow & Return and DCW Inlet Connections at the
Bottom
TL6 TP 40-10 & 50-10 Secondary Flow & Return and DHW Outlet Connections at the
Bottom
Note: For clarity, safety drain connections are not shown. Please refer to hydraulic arrangements.
Additional connection configurations available as detailed on pages 7-9 of this manual. For specific
hydraulic arrangements for other connection configurations please contact the Evinox Technical
Department on 01372 722277.

13
TP 60-10
Note: For clarity, safety drain connections are not shown. Please refer to hydraulic arrangements.
Additional connection configurations available as detailed on pages 7-9 of this manual. For specific
hydraulic arrangements for other connection configurations please contact the Evinox Technical
Department on 01372 722277.

14
2.4 Technical features
Electrical
MTP 40-10 & 50-10 MTP 60-10
Electric supply 220 / 240 Volt (AC)
Frequency 50 Hz
Current absorption 0,6 Amps
Hydraulic connections
Primary circuit supply ¾” ext. thread 1” ext. thread
Primary circuit return ¾” ext. thread 1” ext. thread
Apartment circuit supply ¾” ext. thread ¾” ext. thread
Apartment circuit return ¾” ext. thread ¾” ext. thread
DHW supply ¾” ext. thread 1” ext. thread
DCW inlet ¾” ext. thread 1” ext. thread
Drain ¾” ext. thread ¾” ext. thread
Hydraulic characteristics
Primary circuit max pressure 10 bar Standard / 16 Bar Optional
Apartment heating circuit
recommended cold fill pressure 1.5 bar
DHW max static pressure 4 bar
DCW min static pressure 0,5 bar
Max supply temperature (Primary) 90 °C
Min supply temperature (Primary) 70 °C
Recommended primary flow rate 800 l/h
Secondary heating circuit
expansion vessel size 8 litres
Weight
Dry Shipping
Weight 40-10 32 kg 33 kg
Weight 50-10 34 kg 35 kg
Weight 60-10 TBC TBC
Part number
The part number identifies the unit model and the components fitted on board, for instance
MTP40-10 means
MTP: ModuSat Twin Plate
40: number of DHW plates (and also nominal capacity) of plate heat exchanger
10: number of Heating plates (and also nominal capacity) of plate heat exchanger

15
3 INSTALLATION
The installation and commissioning of the units should be carried out only by competent
and qualified personnel according to the current regulations and standards.
3.1 Recommended handling procedure
The unit should be moved into position still within its packaging to prevent any damage
whilst being positioned. Once safely in its install position, the unit should be removed from
its packaging and lifted into position.
After removing all packaging, check the unit to ensure that all joints are tight and there is
no damage. In cases of damage please contact Evinox immediately. Packaging materials
must be properly disposed of in line with current environmental guidelines.
It is recommended that at least two people perform any lift. Clear the route of the
carton from point of delivery to point of installation. Take care to avoid trip
hazards, slippery or wet surfaces and where possible climbing steps and stairs.
Always seek assistance if required. If a sack truck is used it is recommended that the
carton is strapped to the truck, to prevent the unit from falling.
When unpacking the unit from the carton, it is recommended that at least two people
perform any lift.
Ensure the protective cover over the ModuSat TP pipe connections are kept in place to
prevent ingress of any debris.
Take care when lifting this appliance and ensure your back is kept straight at all
times. Avoid twisting at the waist - reposition the feet instead.
Avoid upper body bending when holding the appliance and keep the ModuSat TP
as close to the body as possible. Safety footwear and gloves are recommended.
PPE should be used when lifting this appliance - to protect against any injury
caused by possible sharp edges and also to ensure a good grip.
3.2 ModuSat TP positioning
There are no specific requirements with regards to location and venting / airflow.
However, to ensure the correct operation the temperature of the location of the
unit should, whilst running, not exceed 40 °C with the humidity between 15% to
85% RH.
The unit must be sheltered from the extremes of weather and temperature; it
should therefore not be installed or stored outdoors. The ModuSat TP is
designed to be used internally and within a well protected area.
Ensure that the environment where the ModuSat TP is to be installed complies with
current regulations and guidelines.
3.3 Checks before connecting the ModuSat TP
Before connecting the ModuSat TP the primary and secondary system
must be thoroughly flushed to remove all residues, dirt etc, that may be
present and would compromise / cause damage to the appliance.
The system should also be thoroughly rinsed to ensure all cleaning
products used are fully removed.

16
Disconnect the electrical power before any installation works.
The unit requires a 220/240Volt (AC) – 50Hz supply, check the Line and Phase
polarity. Protect the cables to prevent any damage.
Make sure that there is an efficient, reliable earth connection to protect against possible
electric shocks, in line with current electrical regulations.
All electrical wiring should be installed / checked by qualified personnel in line
with current regulations. EVINOX are not liable for damage caused by incorrect
electric connections or faulty wiring.
The ModuSat should be provided with additional fused protection. This will be via
a suitable rated fused switch adjacent to the HIU position.

17
3.4 Hydraulic connections
The ModuSat TP is designed to be wall mounted with the typical primary circuit and
domestic water hydraulic connections as shown here below. (Other configurations are
available; please refer to pages 10-13).
In order to ease the installation
and maintenance of the unit, it is
recommended to follow the
instructions about minimum
spacing.
The safety valve drain
must be connected to a
tundish that allows a
visual check, in the event of a
system issue or valve discharge.
This must be installed in such a
way so as to prevent damage or
risk of injury to occupants,
children or animals. Evinox
cannot be held responsible for
any damage caused by incorrect
installation.
The unit must be
connected to a suitable
primary network that
provides sufficient flow
and temperature as per
the system design.
The system must be fully cleaned and treated in line with the requirements detailed
in section 3 of this manual.
Minimum space requirements for access and servicing:
Front: 700 mm
Side: 50 mm
Bottom: 400 mm

18
3.5 Use of Pre-installation Rig
A pre-installation rig is available upon request on a sale or return basis. It consists of a
back panel constructed of steel. This will enable the installer to arrange the piping entering
and leaving the unit during first fix prior to the unit being delivered / installed. The
configuration of the pre-installation rig will be as per the unit being supplied and the project
requirements.
HOW TO INSTALL PRE-
INSTALLATION RIG
STEP1: Securely fix the
mounting bracket to the wall in
the required position. Hang the
ModuSat TP Pre-Installation Rig
on the bracket.
STEP2: Fit the Evinox Flushing
Bypass & Valve Kit to the rig and
then make final connections to
the pipework running to the HIU.
STEP3: Shut off isolation valves,
pressure test pipework and then
disconnect the valve unions and
lift away the Pre-Installation Rig
leaving the valves ready for the
ModuSat arrival.
STEP4: Take the Pre-
Installation Rig to the next
apartment and repeat the
process.
NB: Please take care of the Pre-
Installation Rig as this is typically
purchased on Sale and Return
basis. Damaged pre-installation
rigs cannot be returned for
credit.
Please refer to section 2.3 for the relevant model dimensions and typical connection
configuration.
Typical Evinox Valve Kit Installation

19
3.6 Wall fixing
The ModuSat TP is designed for wall mounting using brackets to be screwed to the wall as
shown below.
33,5 60 60 60
120
60
427
11
144,5 144,5
166
143
42,5
710
Please note – Weights of the units are shown in the technical table on page 14.

20
The wall that the ModuSat is being fixed to must be suitable for bearing the unit weight.
Where the wall is not load bearing an optional support frame is available on request. The
details of this frame are as follows:-
This manual suits for next models
2
Table of contents
Popular Heating System manuals by other brands
Daikin
Daikin VRV EMERION REYQ-AATJA Service manual
Vent-Axia
Vent-Axia HR200V Installation and maintenance instructions
REMKO
REMKO HTL 400 Operation Technology
Healthy Climate
Healthy Climate HRV Series installation instructions and home owner's guide

NuAire
NuAire Passivhaus BPS Installation & user guide

Heat King
Heat King IDF1000 Operation manual

System air
System air SAVE VTC 700 with reheater installation instructions
System air
System air SAVE VTR 700 user manual

System air
System air fantech SHR200R installation manual

OEM Tools
OEM Tools 87009 Operating instructions and parts manual

System air
System air fantech SHR450 installation manual
Bartec
Bartec PSB Design guide
