EYEZONE OP191080P-1 User manual

EYEZONE OP191080P-1/ 3
User Manual
Jan 31, 08
34488F00
1. Package Contents………………………………………….. 1
2. Introduction………………………………………………... 1
3. Features…………………………………………………… 2
4. Hardware Overview………………………………………... 3
5. Remote Control…………………………………………….. 4
5.1 Entering Text or IP Address………..…………………… 4
6. Attaching Brackets……….…………………………………. 5
7. Connect the IR Cable/ PIR Sensor…………………………. 5
8. Start the OP191080P…………….…………………………. 6
9. Setting Up…………………..………………………………. 7
9.1 Network Setup.…………………………………………
9.2 FTP Setup………………………………………………
7
9
9.3 Video Setup…………………………………………….. 10
9.4 Other Setup…………………………………………….. 10
10. Using the OP191080P…………..………………………... 12
10.1 Play Media Files on the CF Card…..…………………. 12
10.2 Download Function……..……………………………. 15
10.3 Play the Media Files on the PC……..………………… 18
10.4 Download/ Upload Media Files…..…………………… 21
10.5 RS-232 Function……………..……………………….. 24
11. Http Command Function…..…….……………………….. 25
11.1 Player Control………….…….……………………….. 26
11.2 Network Setup………….…………………………….. 27
11.3 Timer Setup……………….………………………….. 28
12. Using the PIR Sensor……..…….…..……..……………….. 29
12.1 Motion Detection Function…..…..……..…………….. 29
13. Troubleshooting……………………………………………. 30
CONTENTS

1
1. OP191080P 4. Power Adapter (DC 12V, 4.16A)
2. User Manual 5. Brackets & Screws
3. Remote Control 6. IR Cable/ PIR Sensor (optional)
The Eyezone OP191080P is designed for commercial application. With the extremely
versatile open-frame chassis, the Eyezone OP191080P can be used for special mounting
applications, especially as part of decoration.
The Eyezone OP191080P is a network digital media player that plays picture, music,
movie and WMV9 without a computer. It uses media files from CF memory card and displays
then on a 19” TFT-LCD with audio-out from the built-in speakers.
The Eyezone OP191080P can connect to a wired network at speed up to 100Mbps.
This function provides you with maximum throughput for sharing and transferring digital
media.
2. INTRODUCTION
1. PACKAGE CONTENTS
2
Supports multiple file formats:Music, Picture, Movie and HD WMV9.
Built-in 19” TFT-LCD display and stereo speakers.
Supports resolution up to 1280x1024.
Supports RS-232 port for computer control with ASCII command (play, stop, pause…etc).
Connect using an Ethernet network cable at up to 100Mbps.
Supports CF memory cards. (Suggest using the high speed (150X) CF card)
Supports HTTP Control Function
Supports Auto Key Lock Function
Exports the Configuration Value: You can export the configuration value to the CF card. The
configuration value can be modified on your PC, and can be applied to the OP191080P or
others.
Compatible with Windows Media Player 11: Play media files stored in a network computer.
Supports FTPAuto Download Function: Connect to Remote FTP server and download data
to the CF card automatically.
Supports Download Pause / Resume Function: Continue unfinished downloads upon next
session.
Embedded FTP Server.
Supports NTP Network (G.M.T) Timer.
Supports Universal Plug and Play (UPnP) and DHCP.
Supports SLIDE SHOW Function (interval time with 10/ 15/ 30/ 60 seconds).
HTTP Command Function Exports the Configuration Value
(modifyonyourPC)
3. FEATURES

3
Control Buttons of the Panel
-Power: Press the button to turn on/ off the panel.
-Auto (Up): To obtain the best display efficiency.
Move the cursor up in setup menu of the panel.
-Color (Down): To adjust the color automatically.
Move the cursor down in setup menu of the panel.
-Menu: To open the OSD menu of panel.
-Source: No function.
4. HARDWARE OVERVIEW
4
1
2
3
4
5
6
7
8
9
10
11
12
13
14
15
16
17
18
19
20
21
22
23
24
Power on/ off
Select the output mode
Numeric Key
Delete last entry
Select a function or to play the selected file
Open the setup menu Mute sound
OSD display function on/ off
Auto-play function on/ off
Mute sound
Volume up/ down
Move the cursor
Confirm the selection/ entry
Go back one layer
Select the TV type (NTSC/ PAL)
Shuffle on & off
Play the file selected
View the previous/ next file
Play the previous/ next file if in playback
Select the repeat mode
Rewind/ forward movie or music files
Stop playback
Show the information of the file selected
Search video (movie) timeframe
Zoom in/ out on the movie or picture
Pause the playback or play frame by frame
5.1 ENTERING TEXT OR IP ADDRESS
Keys need to be pressed multiple times to enter the letter corresponding to that key.
For Example: To enter the letter “a”, you would press the “2” button twice.
Enter The IPAddress
For Example:To enter the IP address”192.168.100.100”,.
Step 1:Press “1” once, then “1” is displayed, and the color of “1” is orange.
Step 2:When the color of “1”turns white, press “9” once, then “9” is displayed.
Step 3:Repeat steps 1 and 2 to enter and complete the IP address.
5. REMOTE CONTROL

5
Use the screws to fasten the brackets to the screw holes as shown below.
If you want control or set up the OP191080P by remote control, the IR Cable or PIR Sensor
(receive the signal of remote control) must be connected first.
7. CONNECT THE IR CABLE/ PIR SENSOR
6. ATTACHING BRACKETS
6
Power On
zInsert the CF memory card that has Picture, Music, Movie or WMV9 files.
zPress the “POWER” button on the remote control to power on the Eyezone OP191080P.
(confirm the power switch on the left side is turned on first)
Status After Power On
zStatus 1:If the “AUTOPLAY (Movie or Picture)” function is enabled and there are movie
or picture files in the CF card, the Eyezone OP191080P will auto play movie or picture
files on the CF card after power on.
zStatus 2:If the “AUTOPLAY” function is disabled, after power on the main menu will
appear as shown in the following figure. There are two groups in the main menu
(“/mnt/CF” and “SETUP”).
NOTE:The pop-up window that shows the IP address will appear later, if DHCP mode is selected
when the Eyezone OP191080P is turned on.
Power Off:Press the “POWER” button again to power off.
8. START THE OP191080P

7
In the main menu, please using the “▼” button on remote control to select the “SETUP”
item, then press the “ENTER” button. You will be presented with the Eyezone OP191080P
settings screen.
You can also press the “SETUP” button on remote control to directly open the settings
screen. (If there is file that is being play, please stop first.)
There are four groups of sub-menu in the main menu (“Network Setup”, “FTP Setup”,
“Video Setup” and “Other Setup”).
In the settings screen, you can use the “▲、▼、
▲
、
▼
” buttons to select an item, and press
the “ENTER” button to confirm the selection.
Press the “SETUP” button on remote control to save and quit the settings screen.
9.1 NETWORK SETUP
Network with:Select your network connection Disable/ RJ45.
IPAssigned by DHCP:If you have a DHCP-enabled router, please select “On”, then the
router will automatically assigns an IP address to the Eyezone OP191080P. If you don’t have
a DHCP –enabled router, select “Off” and type the network information in “Assign IP
Address”.
9. SETTING UP
8
9.1 NETWORK SETUP (continued)
Assign IPAddress:If the Eyezone OP191080P is connected to a network without a DHCP
server or you want to use Local FTP Server function, type the fixed IP address, Mask,
Gateway and DNS for the Eyezone OP191080P.
PS. Refer to 5.1 for how to enter IP address by remote control.
NOTE:Before setting the IP address, Mask, Gateway and DNS, check the network information
of your PC. Please follow the steps below to get the network information of your PC.
Step 1:Click on “Start“ →“Run“ and type in ”command“, then press “ENTER”.
The MS-DOS window will appear, type in “ipconfig” and then press “ ENTER “
togetthenetworkinformation.
Step 2:Assign IP Address, Mask (Subnet Mask) and Gateway (Default Gateway)
for the Eyezone OP191080P.
Enter the same values of the Subnet Mask and Gateway, and be careful not to enter
the values of IP address that are already used by other devices on the network.
Media Player 11 Server:Enable/ disable the Media Player 11 server.

9
9.2 FTP SETUP
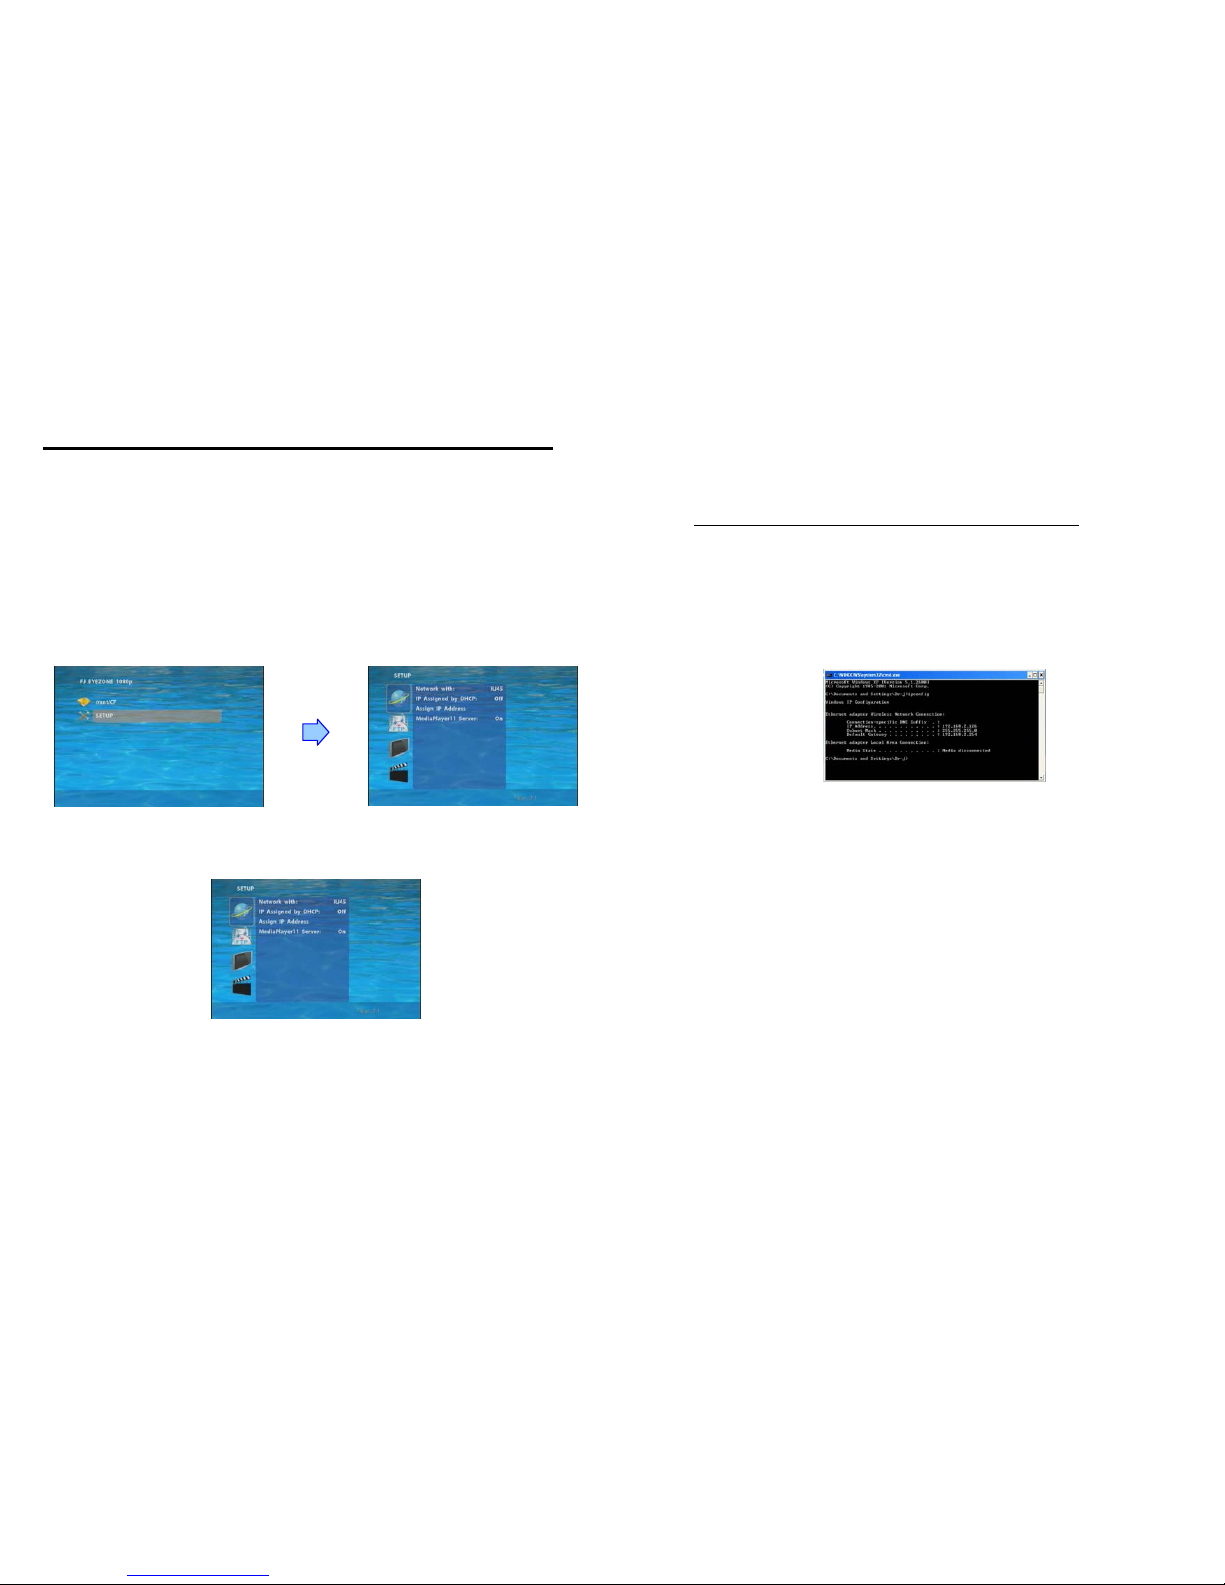
Local FTP Server:Turn on/ off the Eyezone OP191080P server.
(If you use the Eyexone OP191080P server, please disable the DHCP function and input a
fixed IP address, Mask, Gateway and DNS of the Eyezone OP191080P)
Local FTP Server Setup:To set the “Port”, “User ID” and “Password” of the Eyezone
OP191080P.
(The Default Port:21, User ID:root, Password:admin)
FTPAuto Download:Enable/ Disable the FTP auto download function.
Remote FTPDownload Setup
- Server IP:Type in the domain name of the FTP site or IP address as was given to you by
your Web hosting provider.
- Port:The default port for FTP is 21. In most cases you should not change this number.
If the FTP site uses a port other than 21, you should enter the correct port.
- User ID:Type the user name of the Remote FTP server.
- Password:Type the Password of the Remote FTP server.
- FTP Path:Enter the folder path that you want to share.
NTP Server: Enable/ Disable the NTP server function.
Timer Setup: Set the NTP Server and Auto Download Time here. (the Local Time is no use)
1. It is recommended to use 204.152.184.72 as the IP address for the NTP server.
2. Time Zone must be set properly for the auto-download function.
Local HTTP Server:Enable/ Disable the HTTP command function.
Local HTTP Server Setup:To set the “Port”, “User ID” and “Password” of the Eyezone
OP191080P. (The Default Port:80, User ID:root, Password:admin)
NOTE:Press the “SETUP” button on the remote control to save the settings, and it
will auto exit the settings screen, then restart the Eyezone OP191080P.
10
9.3 VIDEO SETUP
TV Standard: Select the output TV video format (NTSC / PAL).
Aspecl-ratio:Select TV mode 4:3 or 16:9.
VGA 60Hz:Select the VGA output resolution.
(640*480 / 800*600/ 1024*768/ 1280*1024/ 1360*768)
NOTE: The Eyezone OP191080P supports VGA output only, the NTSC Active Output/HDMI/
SD Video/HD Y.Pb.Pr 60Hz items are no function.
9.4 OTHER SETUP
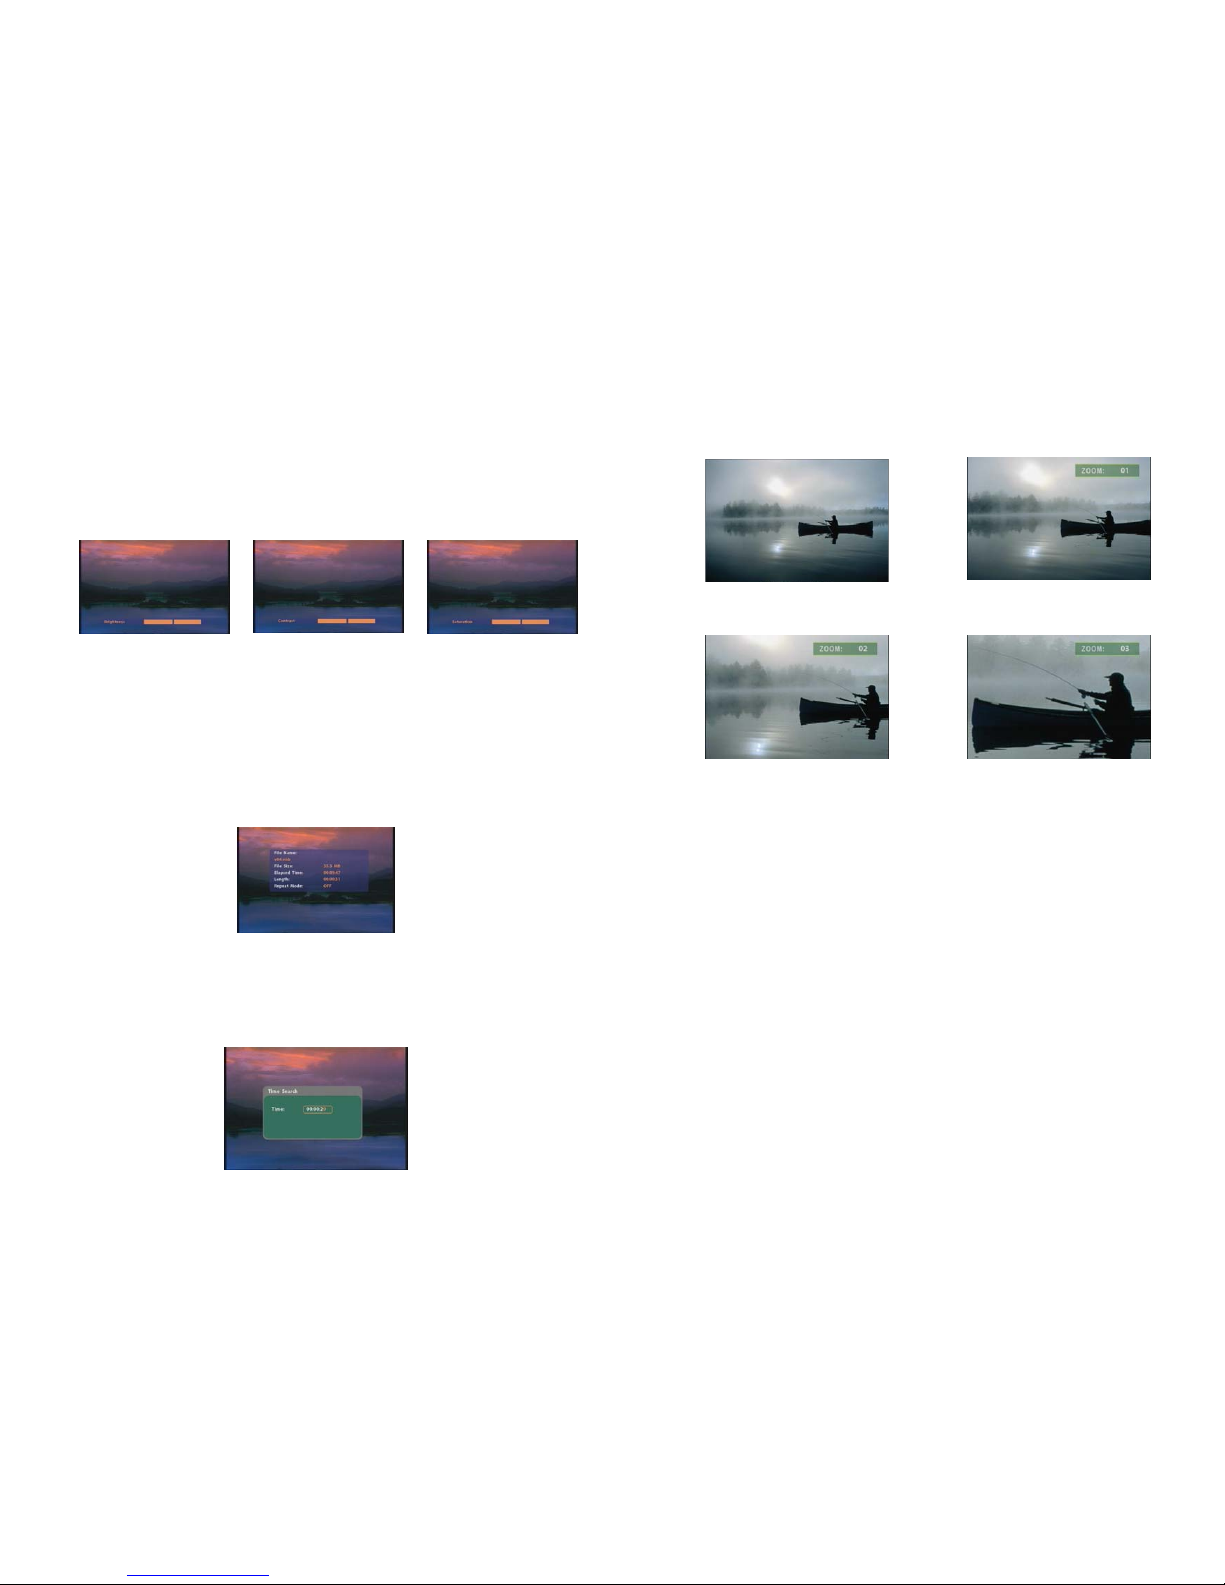
Play OSD Display:Enable or disable the OSD display.
Auto Play
-Movies:Auto play movie files on the CF card after power on.
- Pictures:Auto play picture files on the CF card after power on. (slideshow function)
- Off:Turn off the Auto Play function.
SlideShow Interval: Set the time each photo is shown to 10, 15, 30 or 60 seconds.
SPDIF Out:Supports Analog / DPCM audio output.
Speakers Out:Supports 2 channel amplifier output.
Lock Remote Controller:Enable/ disable the auto key lock function. (The OP191080P will
auto lock when there is no further input for 1 minute.)

11
9.4 OTHER SETUP (continued)
Lock Password Setup:Press the “Enter” button to open the “Set Password” window. Enter
the password with numeric buttons and press the “Enter” button to save the new password
(The default password: 123).
Export Setting File:Press the “Enter” button to export the configuration value to the CF
card.
zCopy the file “HDPlayerSetting.txt” on CF card to your PC. Use the “Wordpad” to open
the file, and you can see all the configuration value of OP191080P.
zYou can modify directly the configuration value on your PC.
Example.
[AutoPlay] Off Options: Movies, Pictures, Off
The “Auto Play” function is turned off, you can change directly the mode to Movies or
Pictures.
zCopy the completed file “HDPlayerSetting.txt” from PC to CF card. Insert the CF card to
the OP191080P, the OP191080P will apply the new settings automatically.
Play Button:Only for used with play buttons. The Eyezone OP191080P supports two
options (Repeat Default / Repeat All) when the demo file finishes playing.
12
10.1 PLAY MEDIA FILES ON THE CF CARD
Step 1:Insert the CF card with media files (picture, music, movie), then turn on the Eyezone
OP191080P and press the “ENTER” button on the remote control when “’mnt/CF” is
highlighted to take you into the CF card.
Step 2:Select the type of data (VIDEO/ AUDIO/ PICTURES) you want to play, and then press
the “ENTER” button on remote control to take you into the “VIDEO LIBRARY”,
“AUDIO LIBRARY” or “PICTURE LIBRARY”.
PS. If the symbol (return) appears on the screen, you can use “RETURN” button of
the remote control to go back one layer.
Step 3:Select the file you want to play, and press “ENTER” or “PLAY” button on the remote
control to play the file.
VIDEOLIBRARY AUDIO LIBRARY PICTURE LIBRARY
10. USING THE OP191080P
RETURN

13
10.1.1 Using the Remote Control When Media File Is Playing
SETUP:Press the button to adjust the brightness, contrast or saturation while the movie or
picture is playing. With the “+ VOLUME –” button.
- First Press:Adjust the brightness.
- Second Press:Adjust the contrast.
- Third Press:Adjust the saturation.
Brightness Contrast Saturation
MUTE:Mute the sound while the movie or music is playing.
+ VOLUME -:Increase/ decrease the volume while the movie or music is playing.
SHUFFLE:Turn on/ off the shuffle function.
PREV / NEXT:Play the previous/ next file.
REPEAT:Select the repeat mode.
REV / FWD:Rewind/ forward movie or music file.
STOP:Stop playing, and go back one layer.
INFO:Display the file information.
File Information
SERACH:Search video (movie) timeframe
Press the “SEARCH” button, and enter the initial time that you want to start at, then press the
“ENTER” button to play.
14
PAUSE/STEP:Pause the playback or play frame by frame.
ZOOM:Zoom in/ out on the movie or picture.
OriginalSize FirstPress:ZOOM 01
Second Press:ZOOM02 ThirdPress:ZOOM 03

15
10.2 DOWNLOAD FUNCTION
Before it downloading files from the FTP server, Eyezone OP191080P will delete all contents on CF
card except the file on the CF card and the FTP server are the same.
10.2.1 Manual Download Function
Please confirm that the Eyezone OP191080P is already connected to the network. (Refer to 9.1
Network Setup)
Please use the“▼"button to select the “DOWNLOAD” item, and press “ENTER” button.
The Eyezone OP191080P will connect to the FTP server and download files automatically.
Before download files, Eyezone OP191080P will delete all contents on CF card first.
The pop-up window that shows the status of download and the screen saver will appear while
the Eyezone OP191080P is downloading files. After finishing downloading files, the Eyezone
OP191080P will display the files automatically.
ScreenSaver
10.2.2 Auto Download Function
If there are more than one Eyezone OP191080P is, you can use ftp tools to divide them into
different regional group.
16
For example.
- Use the ftp tool “Serv-U” to divide into three groups, and setup the “User name”, “Password” and
“FTP port number” of three groups for login ftp server.
Group 1:User name:ipmedia Password:0000 FTP port number:21
Group 2:User name:ipmedia2 Password:1111 FTP port number:21
Group 3:Username:ipmedia3 Password:2222 FTP port number:21
FTP tool:Serv-U Setup “User name”, “Password” and “FTP port number”
- Enter the “Remote FTPDownload Setup” window of Eyezone OP191080P, and then type
the same “User name (User ID)”, “Password” and “Port”.
The Eyezone OP191080P in group 1, please type the “User ID:ipmedia”, “Password:0000”
and “Port:21”.
- Please enter the “Network Timer NTP” window of Eyezone OP191080P and set up the
“Download Time”, then the Eyezone OP191080P will download all the files from the FTP
server at the designated time.
NOTE:The filename of the media files in FTP server cannot have any spaces.

17
10.2.3 Download Pause / Resume
The Eyezone OP191080P supports download pause/resume. You can press the “STOP” button to
pause downloading media files. The Eyezone OP191080P can continue unfinished downloads upon
next session.
NOTE:If the network connection is unstable or broken, a pop-up window will appear as shown
below. The Eyezone OP191080P will attempt to resume downloading in 2 minutes. The user can
terminate the download by pressing the “RETURN” button.
18
10.3 PLAY THE MEDIA FILES ON THE PC
Using Windows Media Player Version 11 ( Windows XP/ Vista only )
Step 1:Please download and install Windows Media Player Version 11 on your PC first.
Step 2:Launch the Windows Media Player Version 11 and the window below will appear.
Step 3:Click the “Library” tab, and then click “Add to Library”.
Step 4:Click “Add” and select the folder containing the media files you want to share, then click
“OK”.

19
Step 5:Click the “Library” tab, and then click “Media Sharing”.
Step 6:Select the “Share my media”, and click “OK”.
Step 7:In the Media Sharing dialog box, select the “Share my media” check box.
20
Step 8:Confirm that the Eyezone OP191080P is connected to the network.
In the list of devices below the “Share my media to” check box, select the device ( Eyezone
OP191080P), and click “Allow” to share the media files.
Step 9:The shared folder will appear on the screen of the Eyezone OP191080P.
Select the folder and click the “ENTER” button on remote control to go into the
folder.
Step 10:Please select the type of data (VIDEO/ AUDIO/ PICTURES) you want to play, and then
press the “ENTER” button on remote control.

21
Step 11:Select the file you want to play, and press “ENTER” or “PLAY” button on the remote
control to play the file.
NOTE:If the media files shared from PC are not listed on screen, restart your PC.
10.4 DOWNLOAD / UPLOAD MEDIA FILES
Method 1:Connect by IE Browser
Step 1:Confirm the “IP Assigned by DHCP” has been disabled, then enter the “Eyezone Network
Setup” item, and type IP Address (example. 192.168.1.100), Mask and Gateway for the Eyezone
OP191080P (refer to 9.1).
Step 2:Confirm the “Local FTP Server” function has been enabled (refer to 9.1).
22
Step 3:Please setup your router or firewall, and open a port 21 for the Eyezone OP191080P.
The following figure is an example, please refer to your user’s manual of router for opening
ports.
Step 4:Start IE on PC and type the FTP site or IP:
InthelocalPC,pleasetype“ftp://192.168.1.100”.
IntheremotePC,pleasetype“ftp://61.30.13.40:21”.
Step 5:Then type the “User Name” and “Password” and click “Log On” to log on to the
Eyezone OP191080P Server.
(DefaultUserName:root Default Password:admin)
Step 6:After logging on, all the media files in the CF card on the Eyezone OP191080P will
be listed. You can download and upload the media files between CF card and your PC.
NOTE:After file being download/ upload will stop playing. After downloading files, the Eyezone
OP191080P will display the movie files automatically.

23
Method 2:Connect by FTP Tools
For example.
- If there are multiple Eyezone OP191080P, you can use the “CuteFTP” tool to connect and manage
files easily.
CuteFTP
- You can create all the Eyezone OP191080P, and only select the Eyezone OP191080P that you want
to connect in the list.
- Select the files you want upload to the Eyezone OP191080P, or download the files to your PC.
NOTE:After file being download/ upload will stop playing. After downloading files, the Eyezone
OP191080P will display the movie files automatically.
24
10.5 RS-232 FUNCTION (RS-232 cable is optional)
Use the tool “Hyper Terminal” or other tools to control the Eyezone OP191080P with ASCII
command.
NOTE. 1.Baud Rates:
- Firmware Updating: Set up the baud rate as “115200”.
- ASCII Command: The available baud rates is 38400.
2. The reaction time of OP191080P is around three seconds.
Keyboard Layout
q:POWER -:VOL - w:SLOW
R:RETURN *:MUTE >:NEXT
!:REPEAT S:SELECT <:PREW
~:SETUP A:Auto Download u:UP
#:TV MODE p:PLAY d:DOWN
%:AutoPlay P:PAUSE/STEP l:LEFT
i:INFO x:STOP r:RIGHT
m:NTSC/PAL f:FFW s:ENTER
$:SEARCH b:REW C:CLEAR
+:VOL + (XXXXX.XXX):Play The File (xxxxx.xxx is the file name)
NOTE:Must include the round brackets.
﹝number﹞: Play the file by index. (numbers < lowercase letter < upper case letters)
Pin Assignment
D Sub 9Pin Female D Sub 9Pin Female
Pin 1 Pin 4
Pin 2 Pin 3
Pin 3 Pin 2
Pin 4 Pin 1
Pin 5 Pin 5
Pin 6 Pin 6
Pin 7 Pin 8
Pin 8 Pin 7
Pin 9 Pin 9

25
Confirm that the Eyezone OP191080P is already connected to the network. (Refer to 9.1)
Confirm the “Local HTTP Server” function has been enabled, and the “Local HTTP Server
Setup” set has been completed (refer to 9.2).
Set your router or firewall, and open a port 80 for the Eyezone OP191080P. The following
figure is an example, please refer to your user’s manual of router for opening ports.
Start IE on PC and type the HTTP site or IP:
In the local PC, please type “http://192.168.1.100”.
In the remote PC, please type “http://61.30.13.40:80”.
Type the “User Name”, “Password” and click “OK” to log on. (Default User Name: root
Default Password: admin)
There are three items: “Player Control”, “Network Setup” and “Timer Setup” in the window.
11. HTTP COMMAND FUNCTION
26
11.1 PLAYER CONTROL
Check State: Check the current state of OP191080P.
Playback Control: Control the OP191080P to play file/ stop playback/ pause the playback/
play the previous file/ play the next file/ rewind movie/ forward movie.
Play File: Enter the file name that you want play, and click “Send” to play the file immediately.
Repeat File: Select the repeat mode.
Auto Download: Click “Send” to execute the auto download function immediately.
Note: The “FTP Auto Download” function must be turned on and completed set.
Stop Auto Download: Click “Send” to stop the auto download function immediately.
Connect FTP Server: Click the FTP server address to connect to the OP191080P, and enter the
user name and password (Default User Name: root, Default Password: admin) to log on.
After logging on all the media files in the CF card on the Eyezone OP191080P will be listed.
You can download and upload the media files between CF card and your PC.
Volume Control: Enter the value for volume (0-30).
Auto Play: Select the auto play mode (movies/ pictures/ off).
Reboot System: Click “Send” to reboot the OP191080P immediately.

27
11.2 NETWORK SETUP
Network Interface: Select your network connection Disable/ RJ45 (Wi-Fi function not support).
DHCP: Enable/ Disable the DHCP function.
IP Address: Enter the fixed IP address, Mask, Gateway and DNS for the Eyezone OP191080P.
FTP Server: Enable/ Disable the FTP Server function. You can also change the User ID,
Password and port of the FTP Server.
HTTP Server: Enable/ Disable the HTTP Server function. You can also change the User ID,
Password and port of the HTTP Server.
Media Player 11: Enable/ disable the Media Player 11 server.
The “WiFi Encryption Mode” and “WiFi SSID” items are not support.
Reboot System: After setting, click “Send” to reboot the OP191080P.
28
11.3 TIMER SETUP
NTP Server: Set the NTP Server.
Auto Download: Set the auto download time.
Remote FTP: Set the Remote FTP Server.
Reboot System: After setting, click “Send” to reboot the OP191080P.

29
Application 1: The Eyezone PIR is an external remote control receiver.
Application 2: The Eyezone PIR is a motion detector.
12.1 MOTION DETECTION FUNCTION
Step 1:Insert the CF card to the Eyezone OP191080P, and the Eyezone OP191080P will play the
default file automatically while powered on.
Step 2:After sensing approaching subjects, the Eyezone OP191080P will play the first demo file.
Step 3:The Eyezone OP191080P supports two options (Repeat Default / Repeat All) when the demo
file finishes playing. The functions can be set in the setup menu. (Other Setup →Play Button)
- Repeat Default:The Eyezone OP191080P will automatically play the default file when the
demofilefinishesplaying.
- Repeat All:The Eyezone OP191080P will automatically play all the demo files when the demo
filefinishesplaying.
NOTE: The sensing distance is up to 3 meters with an angle of 45°.
12. USING THE PIR SENSOR
(
o
p
tional
)
30
Situation Check Point
No Picture
1. Check power cable and power switches.
2. Ensure the video cables are connected between the player and
the Eyezone OP191080P.
3. Press the “TV MODE” button on the remote control to select the
VGA output mode.
4. Make sure the file format on the CF card is correct.
5. Check if the display device is switched to correct video input
source.
No Response From
the Remote Control
1. Ensure that there are 2 batteries (AAA size) in the remote
control and they are inserted the correctly.
2. Check for any barrier between the remote control and the
product.
No sound
1. Check if the mute function is on.
2. Check if the volume is set properly.
3. Check if audio cable has been connected correctly.
Network Not Working
1. Check your IP settings on the Network Setup page. (refer
to 9.1)
2. If using wired network, make sure the network cable is
plugged in on both the Eyezone OP191080P and your
network hub.
13. TROUBLESHOOTING
This manual suits for next models
1
Table of contents
Other EYEZONE Monitor manuals
Popular Monitor manuals by other brands

Sony
Sony SDM-HS74 Service manual

Austin Hughes Electronics
Austin Hughes Electronics CyberView RP-1020QD brochure

Orion Technology
Orion Technology LS2600 instruction manual

Voxx Electronics
Voxx Electronics Rostra Accessories 250-8222 installation guide

Westinghouse
Westinghouse L1916HW - 19" LCD Monitor user manual

ViewSonic
ViewSonic VP2365-LED user guide