EzCAP ezcap313 User manual

manual
Camera Link
Model number: ezcap313

1
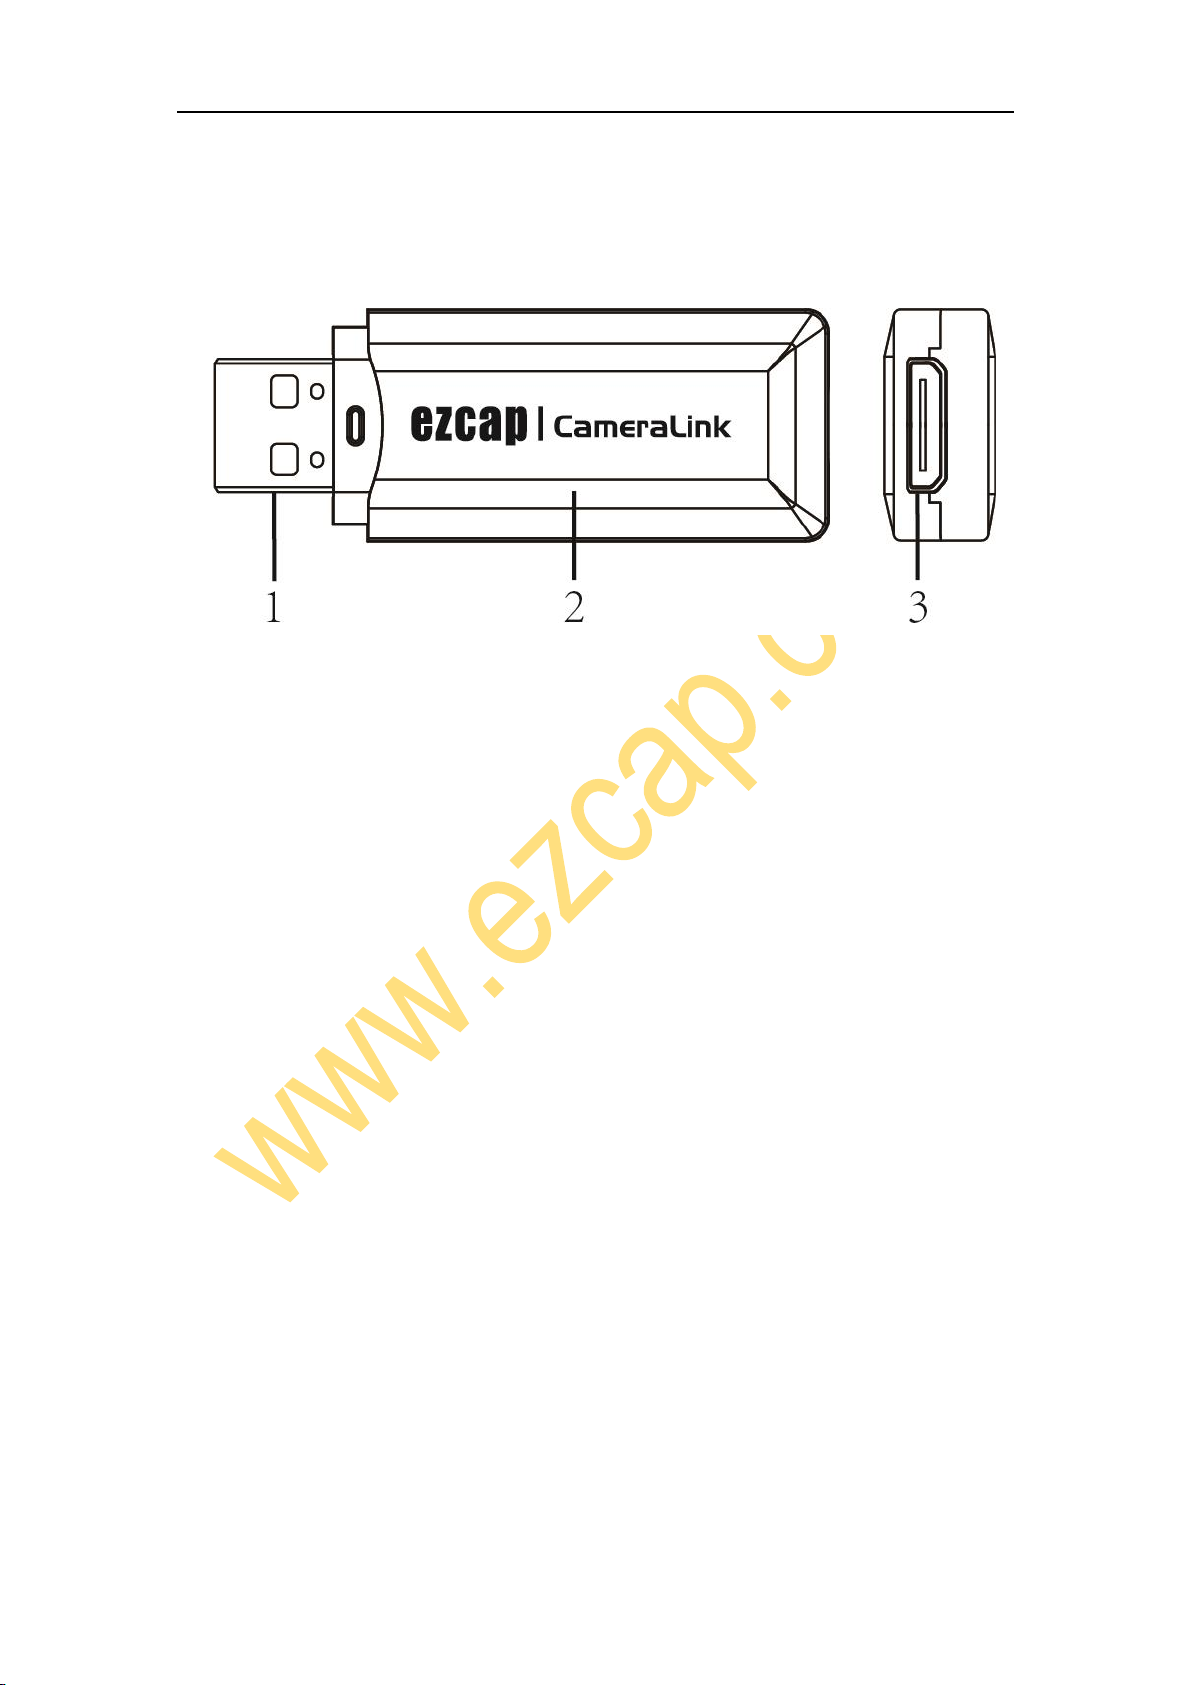
Overview
1, USB: Connect to USB port of your computer
2, LED indicator: Red LED Indicator, when the power is on. Green LED Indicator, when
software (e.g. OBS) detected the capture device.
3, Mini HDMI: To connect HDMI output of your camera with included HDMI to Mini
HDMI adapter. (If there is the Mini HDMI output of your video source device, you can
connect to ezcap313 Camera Link directly, no need the HDMI adapter.)
In the Box
ezcap313 Camera Link x1, Manual x1, HDMI female to Mini HDMI male adapter x1
Hardware

2
Connect your device to the USB port of the computer, wait a moment, the system will
automatically recognize the camera link device, and you will find the device name -
“ezcap CamLink”in “Cameras”catalog and “Sound, video, and game
controllers”catalog in the device manager, which means the device is ready to work.
Software
For professional live streaming or recording, we suggest use OBS, download link:
https://obsproject.com/
Note: ezcap Camera Link device also can work with Mac OS X, and please download
OBS Mac version. The operation is similar as working under Windows as below.
Work with OBS
Select Device
After download and installation, double click OBS Studio icon on desktop to run OBS.
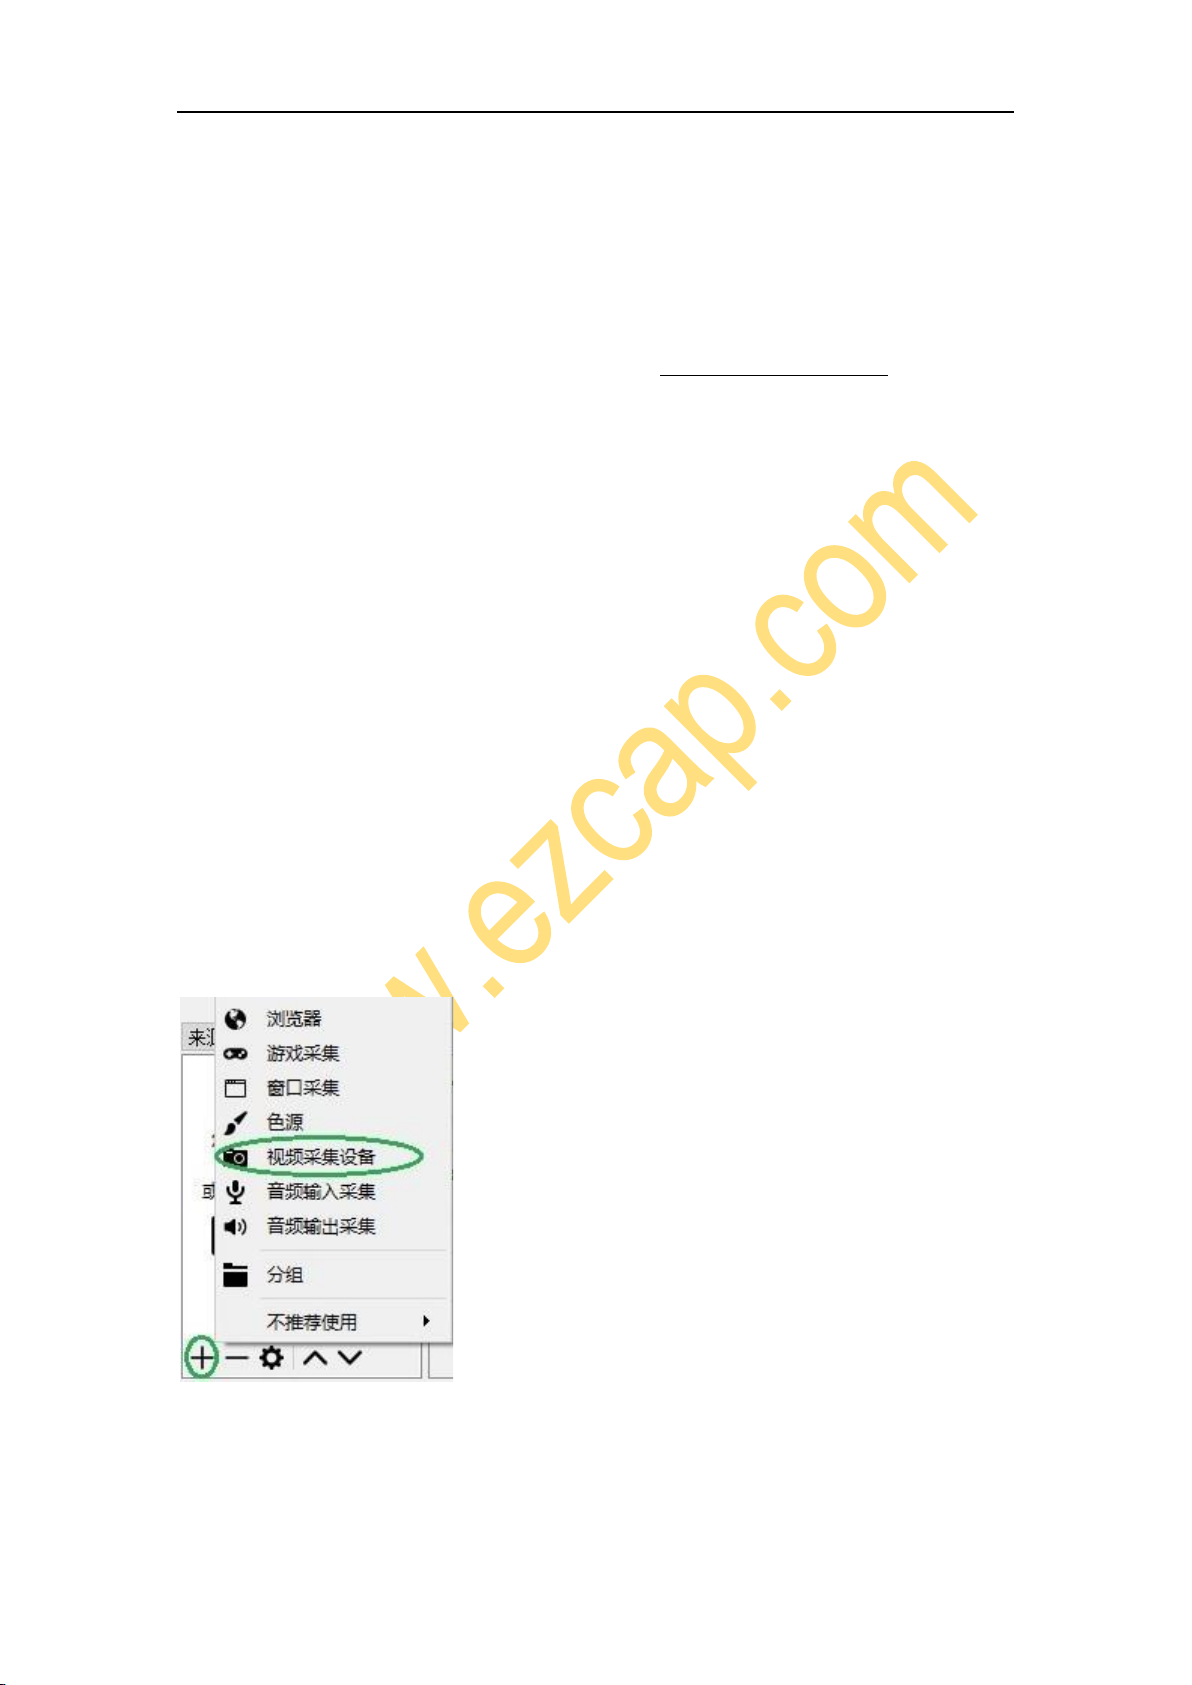
Click icon +under Sources window at the bottom left of OBS panel, and select Video
Capture Device. Click OK in the new pop-up window. You also can insert a name you
want to create for the device. One window will appear you after above. Please click the
drop-down box next to Device and select ezcap CamLink.

3
Video Setting
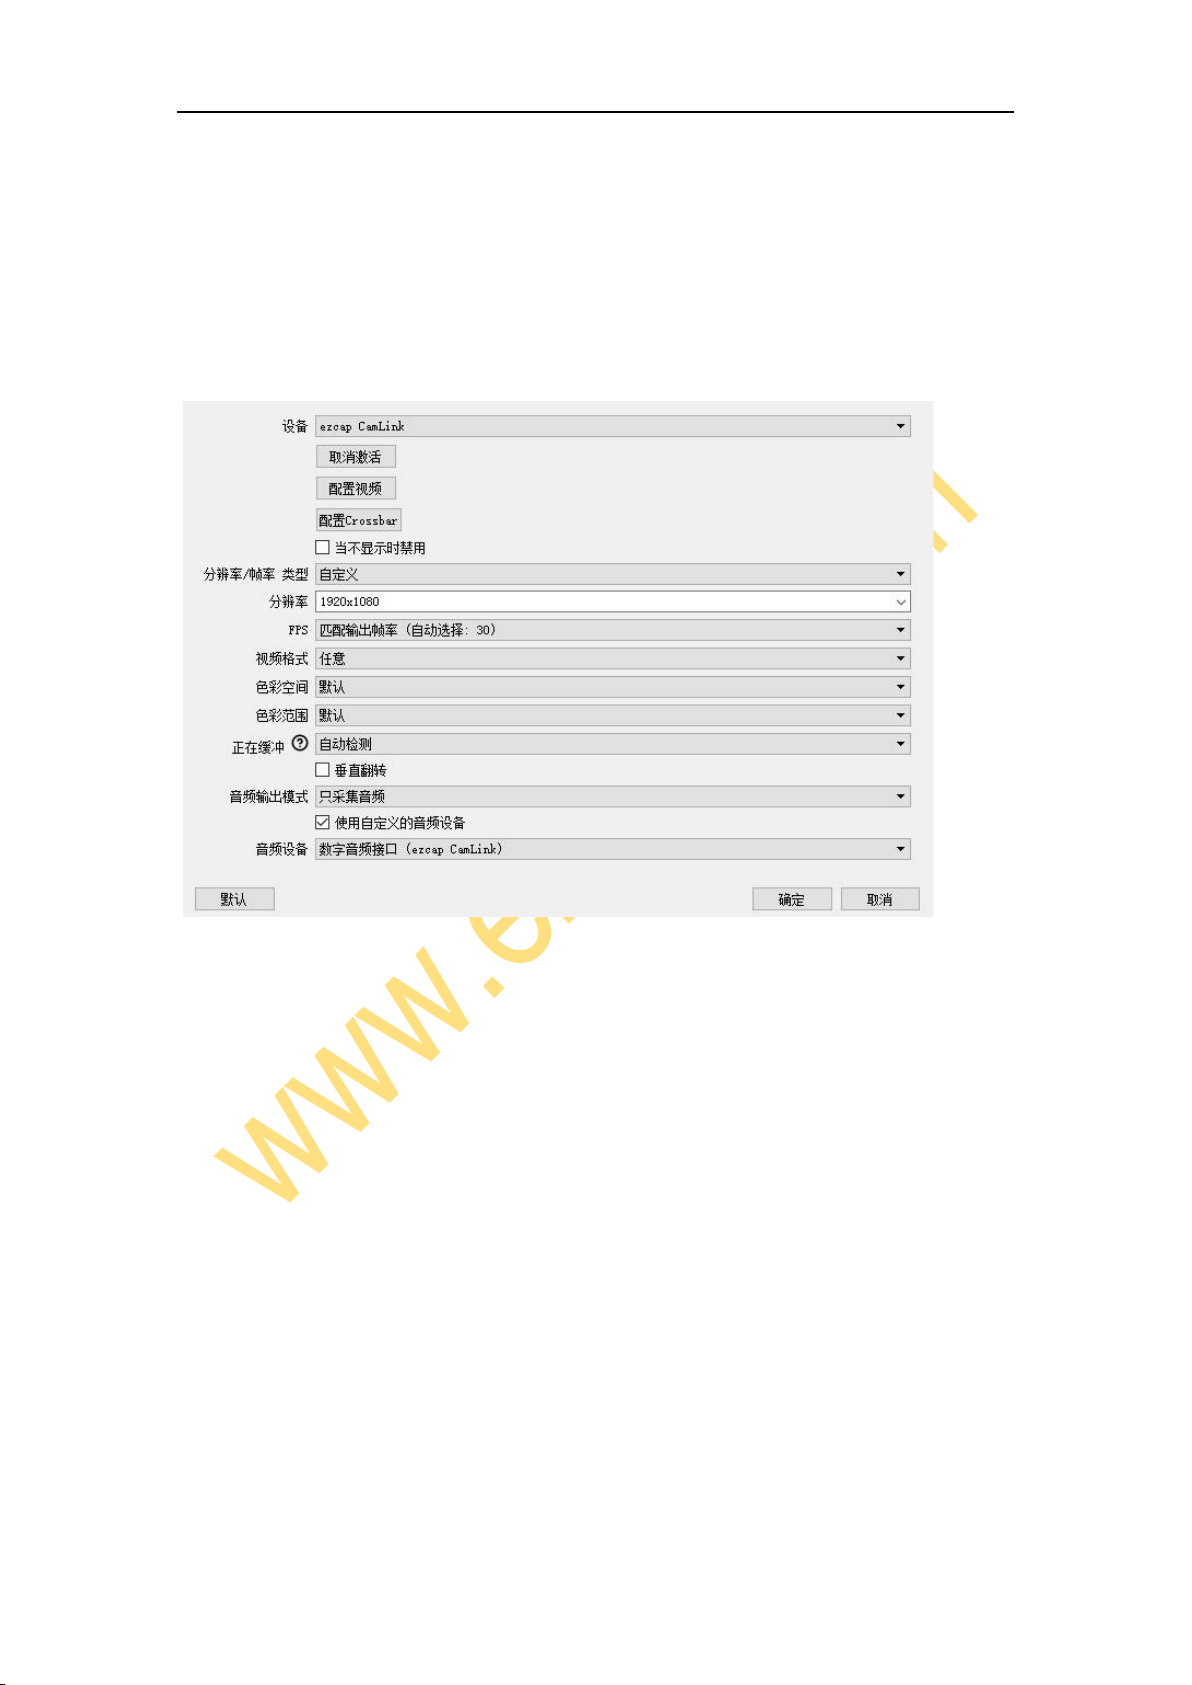
You should get the video in window. If you want to set the video resolution, click the
drop-down box next to Resolution/FPS Type and select Custom, then click the
drop-down box next Resolution to select one resolution.
You can click the drop-down box next to FPS to select the appropriate FPS - 30,60,
Highest FPS, or Match Output FPS, and click the drop-down box next to Video
4
Format to select the video format.
Audio Setting
You may not be able to hear the sound after you finish above settings. Please tick Use
custom audio device, and click the drop-down box next to Audio Device and select
HDMI (ezcap CamLink). Then click the drop box next to Audio Output Mode, and
select desktop audio (WaveOut).You will hear the sound now.
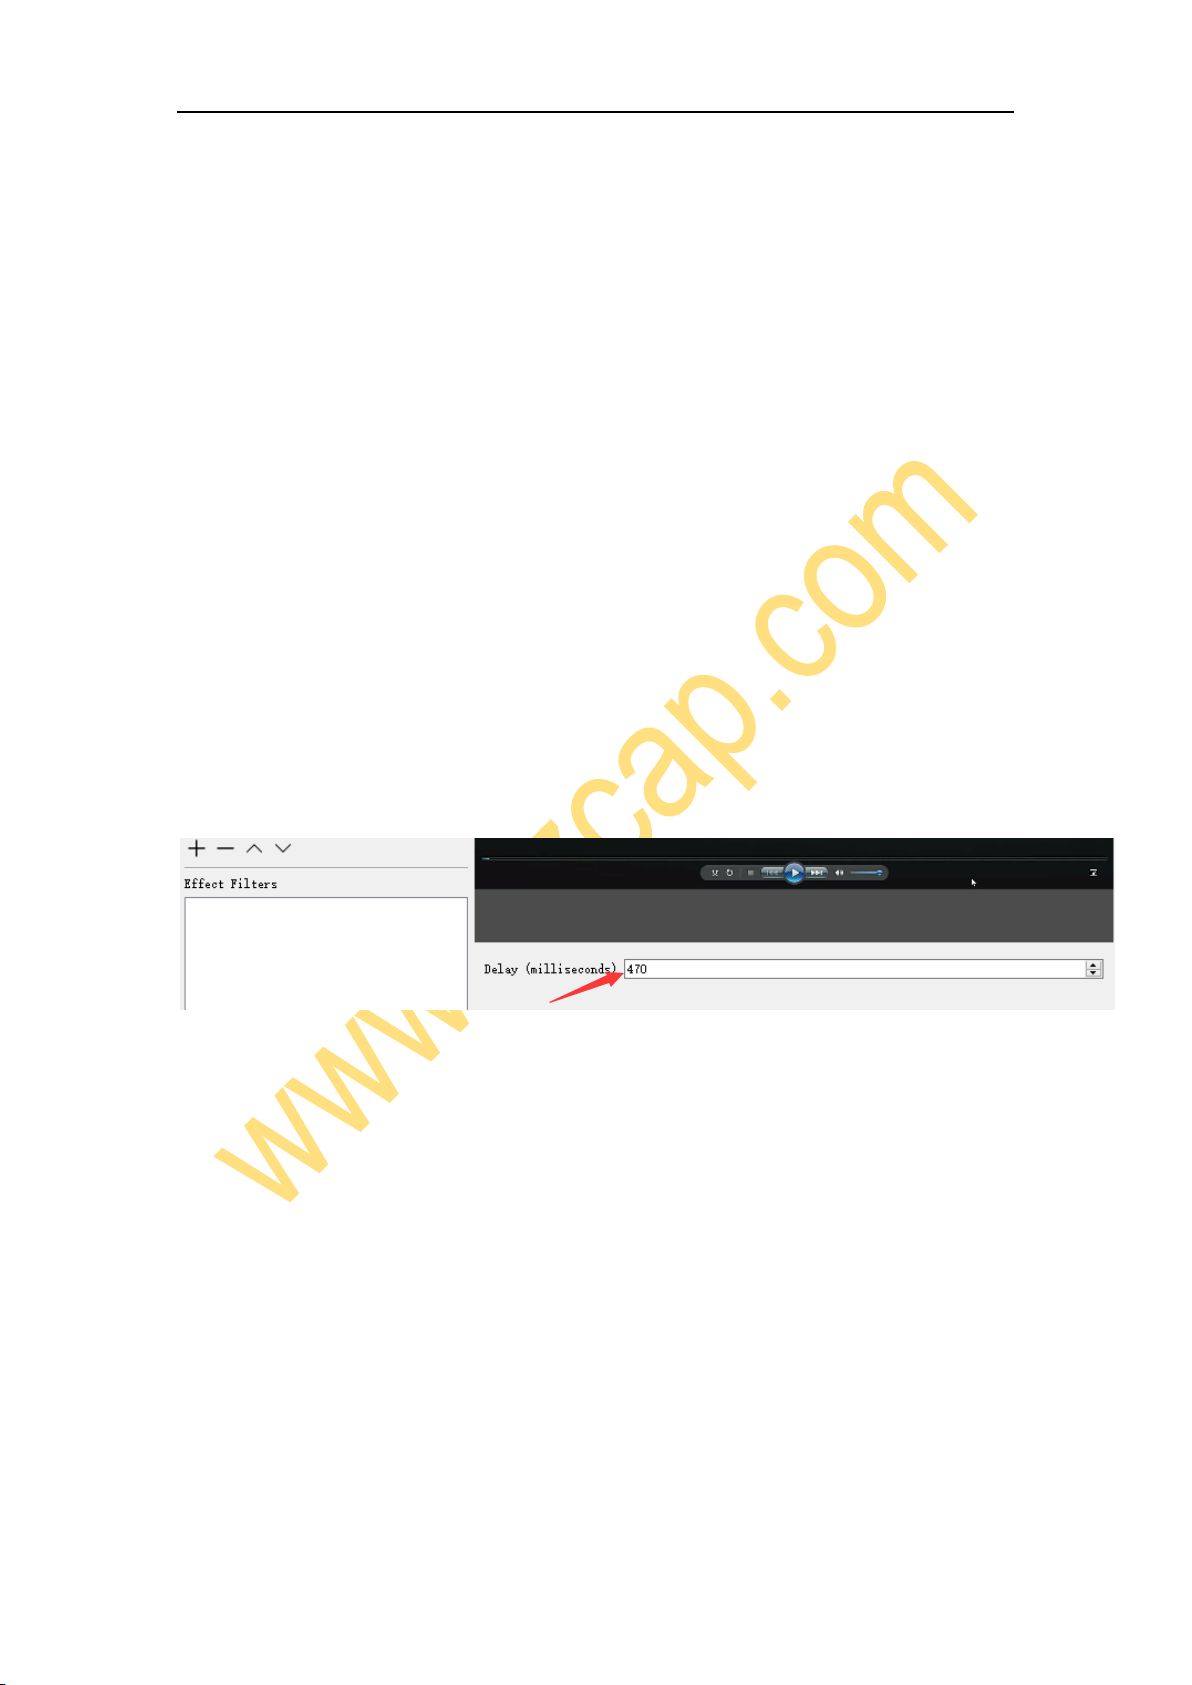
Setting for audio and video synchronized
Right click Video Capture Device then click Filters. Click to add Video Delay (Async).
Set it to 470ms (You can adjust it smaller or bigger until you found the audio and video
synchronized).
Recording
Click Settings in the low right corner of OBS panel, and click Video on the left in the
pop-up Settings window. Click the drop-down box next to Base (canvas) Resolution to
select the appropriate resolution, and click the drop-down box next to Output (Scaled)
Resolution to select the output resolution. Click the drop-down box next to Common
FPS Values to select the FPS values.
Click Output on the left of Settings window as above, in Recording column, you can set

5
Recording Path, Recording Quality, Recording Format, Encoder.
After setting, click Apply and Ok in the low right corner of Settings panel, then simply
click Start Recording in the low right corner of OBS panel to start recording videos, and
click Stop Recording to stop recording.
Streaming
Click Output in the Settings panel, in the Streaming column, set video quality for
streaming (adjust depends your computer, network speed), then click icon Apply and
OK in the Settings panel. Click Stream in the Settings panel, then you can click the
drop-down box next to Service to choose the software platform you want, then click
icon Apply and OK in the Settings panel.
Click Start Streaming in the low right corner of OBS panel to start streaming, and click
Stop Streaming to stop streaming.
Note: Please click the help at the top of the OBS panel, and learn more about OBS in
the link that pops up.
Specifications
Interface
USB 2.0
Video Input
HDMI(HDMI Mini)
Audio Input
HDMI

6
Resolution
HDMI Input: 720 x 480 (60p), 720 x 576 (50p), 1280 x 720p (50p), 1280
x 720p(60p), 1920 x 1080 (24p), 1920 x 1080 (25p), 1920 x 1080 (30p),
1920 x 1080 (50p), 1920 x 1080 (60p), 3840 x 2160 (30p),3840 x 2160
(60p). Max USB output 1920 x 1080 (60p).
Record Quality
Max 1080P 60fps
Dimensions
55 (L) x 20 (W) x 9(H)mm (Not include HDMI adapter)
Weight
10g
Operating System
Windows 7,8,10, OS X 10.9 or later, USB 2.0/3.0 port X 1.
Desktop: Intel Core i5-3400 + NVIDIA GT630. Laptop: Intel Core i7-3537U 2.0 GHz +
NVIDIA GT735. VGA card supporting DirectX 10, Sound card, 4GB RAM
Mac: i5 quad-core or later
7
概览
1、USB:连接到电脑的 USB 接口
2、LED 指示灯:连接电脑 USB,红色指示灯亮起。当软件(例如 OBS)捕获设备时,绿色指
示灯闪烁。
3、Mini HDMI:使用随附的 HDMI 转Mini HDMI 适配器连接相机的 HDMI 输出。 (如果您
的视频源设备有 Mini HDMI 输出,可以直接连接 ezcap313 Camera Link,
无需 HDMI 适配器。)
包装内容
ezcap313 CameraLink 视频采集卡 x1, 说明书 x1,HDMI 母头转 Mini HDMI 公头适配器
x1
硬件
将设备连接到电脑的 USB 端口,稍等片刻,系统会自动识别该游戏采集卡,你会在设备管理器看
8
到设备名称 ezcap CamLink,则表示设备已经可以工作了.
软件
我们推荐免费的专业直播及录制软件 OBS, 下载地址:https://obsproject.com/
注: ezcap Camera Link 视频采集卡也可在 Mac 系统下使用,下载 OBS Mac 版本即可.操作与下
面在 Windows 下使用说明类似.
配合 OBS 使用
设备选择
下载并安装后,双击桌面上的 OBS Studio 图标以运行 OBS。单击 OBS 面板左下角的图标+,
然后选择视频采集设备。在弹出的窗口中单击确定,在这个窗口你也可以为设备改写新的名称。
点击确定之后,在弹出的窗口中单击设备旁边的下拉框,然后选择 ezcap CamLink。
视频设置
9
这些设置完成后,应该能在软件捕获窗口中看到视频。如果你需要设置视频分辨率, 单击分辨
率/ FPS 类型旁边的下拉框,然后选择自定义,然后单击分辨率旁边的下拉框,选择一种你需要
的分辨率。
您可以点击 FPS 旁的下拉框以选择适当的帧率– 30,60,最高 或匹配输出帧率。还可点击视频
格式旁的下拉框以选择适当的视频格式。
音频设置
完成以上设置后,你可能听不到声音。请在上述视频设置的界面下勾选使用自定义的音频设备,
然后单击音频设备旁边的下拉框,并选择 HDMI (ezcap CamLink)。然后单击音频输出模式
旁边的下拉框,并选择桌面音频(WaveOut)。你应该能听到声音。单击窗口右下角的确定按
键完成设置。
Table of contents


