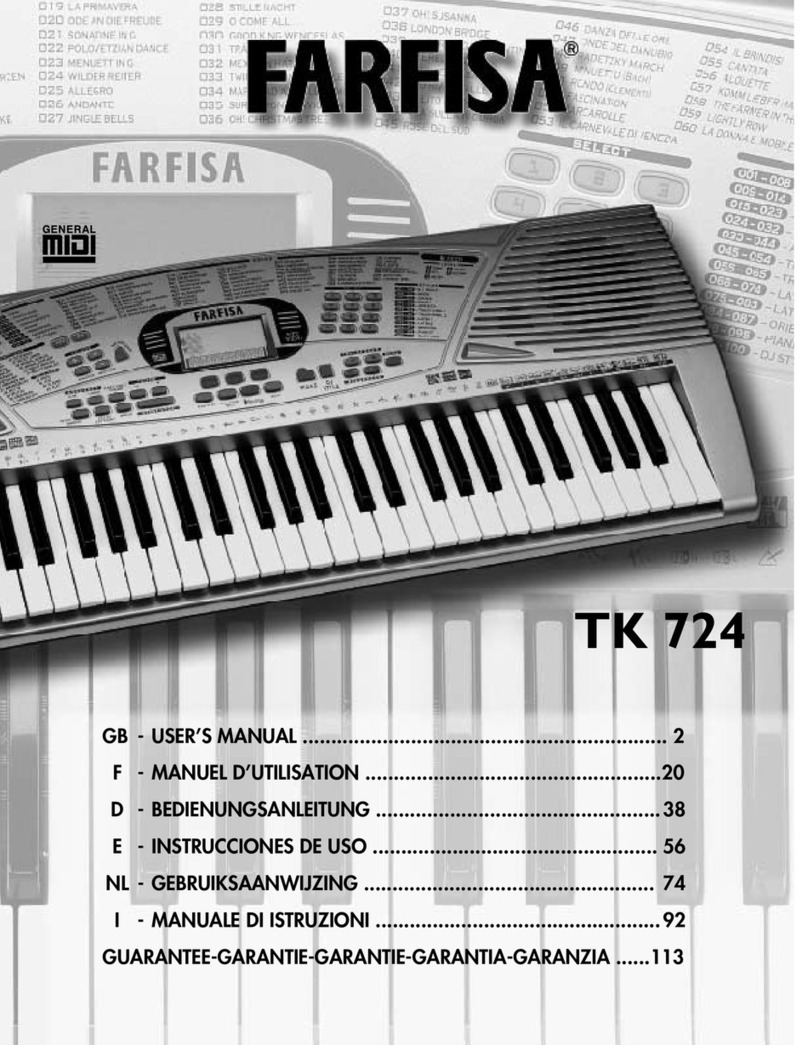
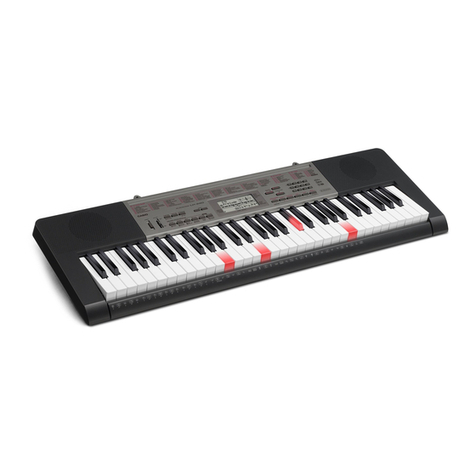
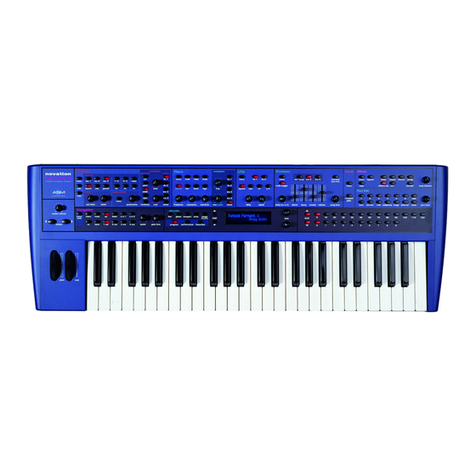
Farfisa TK 628 User manual

GB - USER’S MANUAL ................................................................ 2
F - MANUEL D’UTILISATION ....................................................16
D - BEDIENUNGSANLEITUNG .................................................. 30
E - INSTRUCCIONES DE USO .................................................. 44
I - MANUALE DI ISTRUZIONI .................................................. 58
GUARANTEE-GARANTIE-GARANTIE-GARANTIA-GARANZIA ........76
TK 628

BONTEMPI S.p.A. - Viale Don Bosco, 35 - 62018 Potenza Picena (MC) - Italy
-***&%) $'"&$-$"#"%!&&%) $'"&$
cod. 20116490

2
INTRODUCTION
1.TECHNICAL CARACTERISTICS . . . . . . . . . . . . . . . . . . . . . .2
2. INTRODUCTION . . . . . . . . . . . . . . . . . . . . . . . . . . . . . . . . . .3
MUSIC-STAND . . . . . . . . . . . . . . . . . . . . . . . . . . . . . . . . . . . .3
POWER SUPPLY . . . . . . . . . . . . . . . . . . . . . . . . . . . . . . . . . . . .3
MAINS SUPPLY . . . . . . . . . . . . . . . . . . . . . . . . . . . . . . . . . . .3
BATTERY SUPPLY . . . . . . . . . . . . . . . . . . . . . . . . . . . . . . . . .3
BONTEMPI OPTIONAL ACCESSORIES . . . . . . . . . . . . . . . . . .3
3. CONTROL PANEL . . . . . . . . . . . . . . . . . . . . . . . . . . . . . . . . . .4
4. SOCKETS . . . . . . . . . . . . . . . . . . . . . . . . . . . . . . . . . . . . . . . . . .4
5. DIRECTIONS ON THE KEYBOARD . . . . . . . . . . . . . . . . . . .5
THE RHYTHM INSTRUMENTS OF THE MANUAL DRUM . . .5
LETTERS ON THE LEFT . . . . . . . . . . . . . . . . . . . . . . . . . . . . . .5
DJ STYLE SECTIONS . . . . . . . . . . . . . . . . . . . . . . . . . . . . . . . .5
THE DICTIONARY CHORDS . . . . . . . . . . . . . . . . . . . . . . . . .5
6.THE DISPLAY . . . . . . . . . . . . . . . . . . . . . . . . . . . . . . . . . . . . . . .5
7. HOW TO USE THE KEYBOARD . . . . . . . . . . . . . . . . . . . . . .6
SWITCH ON AND SWITCH OFF . . . . . . . . . . . . . . . . . . . . .6
DEMO – CHOSEN EXCERPT . . . . . . . . . . . . . . . . . . . . . . . . .6
VOLUMES . . . . . . . . . . . . . . . . . . . . . . . . . . . . . . . . . . . . . . . .6
SONGS . . . . . . . . . . . . . . . . . . . . . . . . . . . . . . . . . . . . . . . . . . .6
THE SOUNDS . . . . . . . . . . . . . . . . . . . . . . . . . . . . . . . . . . . . .7
THE TRANSPOSER . . . . . . . . . . . . . . . . . . . . . . . . . . . . . . . . . .7
THE PIANO . . . . . . . . . . . . . . . . . . . . . . . . . . . . . . . . . . . . . . .7
THE METRONOME . . . . . . . . . . . . . . . . . . . . . . . . . . . . . . . . .7
THE KEYBOARD . . . . . . . . . . . . . . . . . . . . . . . . . . . . . . . . . . .8
THE SOUNDS OF THE LEFT PART OR LOWER
. . . . . . . . . . . .8
THE STYLES . . . . . . . . . . . . . . . . . . . . . . . . . . . . . . . . . . . . . .8
TEMPO . . . . . . . . . . . . . . . . . . . . . . . . . . . . . . . . . . . . . . . . . . .8
INTRO / ENDING . . . . . . . . . . . . . . . . . . . . . . . . . . . . . . . . . .9
KEY START/FILL IN . . . . . . . . . . . . . . . . . . . . . . . . . . . . . . . . .9
KEY START/FILL IN . . . . . . . . . . . . . . . . . . . . . . . . . . . . . . . . .9
FUNCTIONS . . . . . . . . . . . . . . . . . . . . . . . . . . . . . . . . . . . . . .9
MIDI IN OFF/ON . . . . . . . . . . . . . . . . . . . . . . . . . . . . . . .9
ARRANGER OFF / ON . . . . . . . . . . . . . . . . . . . . . . . . . . .9
INDEX
SPLIT/FULL KEYB. . . . . . . . . . . . . . . . . . . . . . . . . . . . . . . . . .9
EASY CHORD . . . . . . . . . . . . . . . . . . . . . . . . . . . . . . . . . . .9
FREE CHORD . . . . . . . . . . . . . . . . . . . . . . . . . . . . . . . . . . . .9
MEMORY OFF/ON . . . . . . . . . . . . . . . . . . . . . . . . . . . . . . . .9
ALARM ON/OFF . . . . . . . . . . . . . . . . . . . . . . . . . . . . . . . . .10
MEDLEY ON / OFF . . . . . . . . . . . . . . . . . . . . . . . . . . . . . . .10
DICTIONARY . . . . . . . . . . . . . . . . . . . . . . . . . . . . . . . . . . .10
SPLIT 19 or SPLIT 24 . . . . . . . . . . . . . . . . . . . . . . . . . . . . .10
REVERB ON/OFF . . . . . . . . . . . . . . . . . . . . . . . . . . . . . . . .10
SUSTAIN ON/OFF . . . . . . . . . . . . . . . . . . . . . . . . . . . . . . .10
RESET . . . . . . . . . . . . . . . . . . . . . . . . . . . . . . . . . . . . . . . . .10
MANUAL DRUM ON / OFF . . . . . . . . . . . . . . . . . . . . . . . .10
SEQUENCER . . . . . . . . . . . . . . . . . . . . . . . . . . . . . . . . . . . . . . .10
MAESTRO . . . . . . . . . . . . . . . . . . . . . . . . . . . . . . . . . . . . . . . . .11
DISPLAY DIRECTIONS . . . . . . . . . . . . . . . . . . . . . . . . . . . . . . .11
1ST LEVEL:TEMPO OF THE TUNE . . . . . . . . . . . . . . . . . . . . . . .11
2ND LEVEL:THE NOTES OF THE MELODY . . . . . . . . . . . . . . . .11
3RD LEVEL:THE SONG MELODY . . . . . . . . . . . . . . . . . . . . . . . .12
4TH LEVEL:THE SONG CHORDS . . . . . . . . . . . . . . . . . . . . . . . .12
5TH LEVEL:ACCOMPANIMENT WITH ORCHESTRA. . . . . . . . .12
USING THE NUMBERS AND LETTERS ON THE KEYBOARD .12
9. MAINTENANCE AND REMARKS . . . . . . . . . . . . . . . . . . . . .13
10.TROUBLE SHOOTING GUIDE . . . . . . . . . . . . . . . . . . . . . . .13
11. CONNECTION TO A PERSONAL COMPUTER . . . . . . . .14
12.
FREE MUSICAL SOFTWARE DOWNLOADABLE FROM INTERNET
.15
13. DETAILED MIDI IMPLEMENTATION . . . . . . . . . . . . . . . . . .72
14. SONGS LIST . . . . . . . . . . . . . . . . . . . . . . . . . . . . . . . . . . . . . . .72
15.ACCOMPANIMENT SOUNDS . . . . . . . . . . . . . . . . . . . . . . . .72
16. SOUNDS LIST . . . . . . . . . . . . . . . . . . . . . . . . . . . . . . . . . . . . . .73
17. STYLES LIST . . . . . . . . . . . . . . . . . . . . . . . . . . . . . . . . . . . . . . .74
18. DICTIONARY . . . . . . . . . . . . . . . . . . . . . . . . . . . . . . . . . . . . . .75
19. GUARANTEE . . . . . . . . . . . . . . . . . . . . . . . . . . . . . . . . . . . . . .76
TECHNICAL CARACTERISTICS
Controls:Volume of Accompaniment,ARRANGER ON/OFF, Split
19 / 24, Full Keyb./Split
General controls: ON/OFF, Master Volume, Select, Easy Play,
Style, Song, Sound
DICTIONARY: Chord dictionary on the display
DEMO: Demo song
SONGS: 32 pre-recorded songs with Medley ON/OFF
MAESTRO: 5 learning levels
AMPLIFICATION: Stereo 2+2 watt (RMS)
Two high efficiency Ø100 mm speakers
POWER:8x 1,5 Volt IEC R14/C batteries
AC/DC Adapter – Input Vdc= 12 V / I = 500 mA
PHONES/AUX-OUT: Output for headphones and external
amplification.
USB-MIDI: Computer connection point for data receipt
and transmission
DIMENSIONS: (918 x 320 x 105) mm
WEIGHT: 4,4 Kg
KEYBOARD: 61 professional keys (C-C)
POLYPHONY: maximum 16 notes
DISPLAY: LCD 80 x 40 mm
BASIC SOUNDS: 100 polyphonic tones
TRANSPOSER: range +/– 6 semitones
PIANO: immediate selection of the piano tone
SOUNDS FOR ACCOMPANIMENT: 6 polyphonic tones
EFFECTS: REVERB and SUSTAIN
STYLES: 64 rhythms
DJ STYLES: 6 styles with 13 effects
Controls: START/STOP, DOWN BEAT,TEMPO +/–,
KEY START/FILL IN, INTRO/ENDING
METRONOME: with immediate control
MANUAL DRUM: 36 rhythm percussions on the keyboard, with
25 effects
SEQUENCER: RECORD and PLAY to record and listen
AUTOMATIC ACCOMPANIMENT: Free Chord, Easy Chord
SIGMA S.p.A. reserves all rights to modify specifications of this product without notice
8
4
8
4
8
4
8
4
8
4
8
5
8
5
8
5
8
5
8
6
8
6
8
7
8
7
8
8
8
8
8
8
8
9
8
9
9
0
91
9
2
9
2
9
2
9
3
9
4
9
5
9
6
istr
TK628
GB
12 09 2007
11:31
Pagina
2

ENGLISH
INTRODUCTION
3
MUSIC-STAND
Insert the music-stand in the special holes located on the back-
side of the keyboard.
POWER SUPPLY
This electronic keyboard can function with mains or battery.
MAINS SUPPLY
The instrument can be
supplied by the AC/DC
“AD 177” (Vdc =12V
/ I = 500mA) positive
central adapter con-
forms to national and international safety regulations covering
electrical appliances.
RECOMMENDATIONS: The socket (1) for the adapter plug
must be easily accessible. Inserting the plug into the socket at
the back of the instrument automatically cuts off supply from
the batteries. Ensure that the adapter is sufficiently ventilated
and that the ventilation slits are not covered with objects such
as newpapers, tablecloths, curtains, etc. Do not expose the
adapter to drops or splashes of water.
WARNING:All batteries or transformers with safety insulation
must be checked regularly for faults in cable, wire, or plug insu-
lation or other parts.
BATTERY SUPPLY
This instrument works with eight 1.5V IEC R14/C batteries
(not supplied) which are
inserted in the housing at the
bottom.
To open press on the part of
the lid marked OPEN. Fit
the batteries as shown at the
bottom of the housing.
ADVICE ON USING THE BATTERIES
• Take worn batteries out.
• Avoid using batteries of different types at the same time.
• Do not use combinations of new and worn batteries.
• Do not shortcircuit the power supply terminals.
INTRODUCTION
WASTE DISPOSAL STANDARDS
For information regarding the disposal of the items mentioned
here below, please refer to Council Administration office regar-
ding specialised waste collection centres.
1. DISPOSAL OF BATTERIES
Protect the environment by disposing of bat-
teries in the special containers provided for
this use.
2- PACKAGING DISPOSAL
Take the paper, cardboard and corrugated board to the appro-
priate waste collection centres. Plastic material must be placed
in the relevant collection containers.
The symbols indicating the various types of plastic are:
Key for the different types of plastic materials:
PET= Polyethylene terephtalate
PE= Polyethylene, code 02 for PE-HD, 04 for PE-LD
PVC=Polyvinyl chloride
PP= Polypropylene
PS= Polystyrene, Polystyrene foam
O= Other polymers (ABS, Laminates, etc.)
3 - WASTE DISPOSAL OF USED ELECTRICAL AND ELEC-
TRONIC APPLIANCES
All articles displaying this symbol on the body, packa-
ging or instruction manual of same, must not be
thrown away into normal disposal bins but brought
to specialised waste disposal centres. Here, the various mate-
rials will be divided by characteristics and recycled, thus making
an important contribution to environmental protection.
INSTRUMENT IDENTIFICATION
Always quote the serial
number on the bottom of
the keyboard in any corre-
spondence.
BONTEMPI OPTIONAL ACCESSORIES
LE127 - Metal legs
SI G MA S.p.A.
VIALE DON BOSCO, 35
62018 POTENZA PICENA (MC)
ITALY
MODEL
TK 628
RATING
..............................
SER. N°.
..............................
01
PET
02
PE
03
PVC
05
PP
06
PS
07
O
LE 127
+
_
INPUT
D C 1 2 V
OFF ON
(1)
istr
TK628
GB
12 09 2007
11:31
Pagina
3

4
INTRODUCTION
DJ STYLE – Enables the DJ STYLE rhythm with the “com-
plex harmonies” and effects on the right side of the key-
board..
INTRO/ENDING – Prepares a musical intro or plays an
ending when the rhythm is on.
KEY START/FILL IN – Allows rhythm to be enabled by
pressing one or more keys or enables changes while rhythm
is on.
PAUSE/CONTINUE – Allows you to interrupt the perfor-
mance and start again from the same point.
START/STOP-PLAY/STOP – Starts/Stops a rhythm style
or a song.
STYLES – Selects the rhythm styles.
SONGS – Selects the pre-recorded songs.
SOUNDS – Selects the right-hand sound.
TRANSPOSER +/– - Allows pitch of notes to be changed.
SEQUENCER RECORD – Records what is being played.
SEQUENCER PLAY – Plays what has been recorded.
ON/OFF – Turns the instrument on and off.
VOLUME MASTER – Selects the master volume.
VOLUME ACCOMP. – Selects the accompaniment volume.
TEMPO +/– - Sets the tempo for style performance, songs
or metronome.
SELECT 0-9 and +/– - Selects functions, rhythms, songs
and sounds.
EASY PLAY – Depending on the style, selects right-hand
and left-hand tone, the best tempo for the performance and
sets the FREE CHORD setting on the keyboard. In the 32
songs, it selects the sound and the tempo connected to the
songs.
METRONOME – Switches on and off the metronome beat.
PIANO – Enables PIANO tone and identification of chords
across the whole keyboard.
MAESTRO – Enters the 5 levels learning mode.
DEMO SONG – Plays the demo song.
CONTROL PANEL
SOCKETS
PHONES / AUX-OUT – Socket for headphones and Hi-Fi;
output impedance 150 Ohm – To play without disturbing
and/or being disturbed, you can use a stereo headphone.When
the cable is inserted the speaker is automatically excluded and
all sections of the keyboard can be heard in the headphone.The
socket also allows an additional stereo amplifier, a recorder,
etc. to be connected.
Warning: only connect stereo cables to the “PHONES/ AUX-
OUT” socket.
USB-MIDI – Point for connecting the keyboard to a compu-
ter with the cable supplied.
PHONES
AUX. OUT +
_
INPUT
D C 1 2 V
USB
OFF ON
INPUT DC 12 V - Switches the instrument on with an
AC/DC adapter.
OFF/ON – Switch for turning the instrument on and off.
istr
TK628
GB
12 09 2007
11:31
Pagina
4

ENGLISH
INTRODUCTION
1) Indicates the name
of sounds, rhythm
styles, volumes and
other functions.
2) Indicates the selec-
tion for the tone of
the left side of the
keyboard or Lower.
3) Shows the selection
of the sound.
4) Indication of
“Intro”, ”Ending”,
”KeyStart” controls
for the rhythm
style.
5) Indication of enabled SEQUENCER: “Record” or
“Play”.
6) Indication of active automatic accompaniment.
7) Indicates “PIANO” function is active.
8) Indicates “DJ STYLE” function is active.
9)Indicates “TRANS-
POSER” is active
(transposition high
or low).
10) Metronome icon,
shows beat tempo.
11) Indicates the tempo
of the rhythm style,
of the song or of
the metronome.
12) 61 key keyboard sho-
wing notes that are
pressed or that have
to be pressed if in
MAESTRO mode.
13) Indication of Split point (19 or 24).
14) Indication of the identified chord and EASYCHORD
function.
15) Pentagram with notes displayed.
16) Indicates an octave higher for the last 5 keys.
5
The rhythm instruments of the MANUAL DRUM
When the MANUAL DRUM function is active, each key corresponds to a percussion instrument, and the DJ STYLE characteristic
effects are activated in the right part.
Letters on the left
Indicate the basic note for the name of the chord.
Numbers on the right
Indicate the keys to press to perform the melody with the simplified musical scores.
DJ STYLE sections
The DJ CHORD is on the left side of the keyboard and is used to play the tonality.The DJ LOOP is in the centre and is used to
play the complex harmonies.The DJ STYLE characteristic effects are on the right side.
The DICTIONARY chords
When function 78 DICTIONARY is enabled, the display shows name and composition of chords.
THE DISPLAY
DIRECTIONS ON THE KEYBOARD
15
14 7
1
8
9
2 3 4 5
6
101112
13
16
istr
TK628
GB
12 09 2007
11:31
Pagina
5

SWITCH ON AND SWITCH OFF
Move on and off to switch the instrument on and off. The switch is at the back
of the instrument. When turned on, the keyboard is set to operate with the
STAGE P. sound, the Pop Hit rhythm and the song La Cucaracha.
DEMO SONG – Chosen excerpt
Switching on the DEMO SONG button, a melody that will emphasise the charac-
teristics of the keyboard will play. To turn off the melody press the DEMO SONG
button.
VOLUMES
To regulate the volume of the instrument you must use buttons MASTER VOLU-
ME + (to turn up) or MASTER VOLUME – (to turn down). By holding the but-
ton pressed down, the variation becomes continuous.
To restore the standard volume press both MASTER VOLUME + and MASTER
VOLUME – buttons together.
SONGS
The instrument contains 32 classic repertoire songs.
To select the songs, enter a three digit number according to the SONGS list.
Example: for song 003 Jingle Bells,
• press the SONGS button (light on);
• enter SELECT, 0, 0, 3 on the numerical keyboard;
• press the PLAY/STOP button to start or stop the musical performance.
When a song is being played, you can immediately listen to other songs by entering the number of the song you have chosen or by
using the SELECT “– / +” buttons.
The PAUSE/CONTINUE button allows you to interrupt the performance and start again from the same point.
The EASY PLAY control sets the melody of the song and the standard TEMPO on the keyboard.
6
HOW TO USE THE KEYBOARD
HOW TO USE THE KEYBOARD
istr
TK628
GB
12 09 2007
11:31
Pagina
6

THE SOUNDS
The keyboard features 100 sounds divided into 7 families (e.g. 067-077 STRINGS).
They are selected when the SOUNDS button is on by entering a three digit number between 001 and 100 of the SOUNDS list
you will find at the end of this Instructions Manual.
Example: for VIOLIN type in number 067 (0,6,7with the SELECT keyboard.)
If the display shows “Disable”, this means an incorrect number has been typed in.
Sounds can be selected also by using the SELECT “+ / –” buttons.
IMPORTANT:With some sounds you might notice a slight difference of volume or sound quality when playing them in different areas of the key-
board.This is an inevitable consequence of multiple sampling and not a technical problem.
The TRANSPOSER
The TRANSPOSER +/– controls shift the whole keyboard tonality by +/– 6 semitones.
By pressing one of the two buttons, the display temporarily shows the current value.
The TRANSPOSER variation is always indicated on the display by the “< Tr “ or “ Tr > “ signs.
By simultaneously pressing the “+/–“ buttons of TRANSPOSER, you will return to the standard
00 value.
The PIANO
With the PIANO button, the PIANO sound and the chord identifier will be immediately enabled on the whole keyboard.
The METRONOME
The metronome helps you to learn the music, giving the beat during musical exercises and simulating
the traditional time-marking instrument.
It can be turned on and off with the METRONOME button.To change the tempo, use the “TEMPO
+/–“ buttons. To set the volume, press the STYLES or SONGS button and use the VOLUME
ACCOMP. +/– button.
Chart of general BEATS for the METRONOME.
7
HOW TO USE THE KEYBOARD
ENGLISH
TEMPO
40 - 60
60 - 66
66 - 76
76 - 108
108 - 120
120 - 168
168 - 200
200 - 240
Voice in musical scores
Largo
Larghetto
Adagio
Andante
Moderato
Allegro
Presto
Prestissimo
067
Violin
068
Violoncello
069
Strings
070
Slow Strings
071
Crazy Strings
072
Sweet Strings
073
Chamber
074
Viole
STRINGS
067 - 077
FAMILY SOUNDS LIST
istr
TK628
GB
12 09 2007
11:31
Pagina
7

THE KEYBOARD
It has 61 professional pace keys and can be used in the following ways:
1.When simply turned on, one single sound is enabled over the whole keyboard, together with the chord identifier.
2.The keyboard can be divided into two sections: one dedicated to accompaniment to form chords (keys on the left) and the other
one to play the melody (keys on the right).
It is possible to set the point where the keyboard will be divided into two modes:
a. by entering 79, the display indicates “Split 19”; this
means that the left part of the keyboard goes from the first
to the nineteenth key.
b. by entering 80, the display indicates “Split 24”; this
means that the left part of the keyboard goes from the first
to the twenty-fourth key.
The keyboard on the dis-
play shows the division
point with an arrow.
Chords can be played in the FREE CHORD mode, which means in the traditional way, or in the EASY CHORD mode, which
means in the simplified mode (see the EASY CHORD paragraph).
THE SOUNDS OF THE LEFT PART OR LOWER
When the rhythm is still, type in a number between 85 and 90 to select the ACCOMPANIMENT sounds.
To set the volume of the accompaniment section, use
the VOLUME ACCOMP. + / – buttons;
The display shows “Acc Vol” and the value of the
volume. By keeping the button pressed, the variation
will continue.
To return to the standard volume, simultaneously
press the +and –buttons of the VOLUME ACCOMP.
THE STYLES
The keyboard has 70 rhythmic styles enriched by automatic accompaniments and completed by drums.
They are sub-divided into 8 families (e.g. 033-040 SWING) , see
the list at the end of this Instructions Manual.
To select them press the STYLES button and then a 3 digit figu-
re from the STYLES list.
Example: to select Shuffle rhythm, digit number 039 (0,3,
and 9).
You can also select rhythms using buttons “+ / –” of SELECT.
To start or to stop a rhythm press the START/STOP button.
To increase or decrease the speed of the song press the two buttons TEMPO + and TEMPO – .
By holding the button pressed down, the variation becomes continuous.
To go back to standard rhythm press buttons TEMPO + and TEMPO – together.
The metronome icon of the display shows the musical quarters and the beginning of every beat or
measure. When a rhythm is on function and you select a new style this latter starts at the end of the
previous rhythm pattern. To adjust the volume of the accompaniment section, use the VOLUME
ACCOMP. + / – buttons.The display will show “Acc. Vol.” with the value of the volume. By hol-
ding the button pressed down, the variation becomes continuous. To restore the standard volume
press together buttons VOLUME ACCOMP. + and VOLUME ACCOMP. –.
TEMPO
The “ + / – ” TEMPO buttons can be used to set the tempo of the rhythm or of a song.
8
HOW TO USE THE KEYBOARD
24 37
G
FEDC AB GABCDEF 21
1+
3
2+
4
4+
5
5+
6
6+
78
8+
9
9+
10 11
18+
19
19+
20
20+
21 22
11+
12
12+
13
13+
14 15
15+
16
16+
17 18
19 42
G
FEDC AB GABCDEF 21
1+
3
2+
4
4+
5
5+
6
6+
78
8+
9
9+
10 11
18+
19
19+
20
20+
21 22
11+
12
12+
13
13+
14 15
15+
16
16+
17 18
ACCOMP. SOUNDS
85
86
87
88
89
90
Piano
Hammond
Jazz Guitar
Strings
Trumpet
Slow Strings
SWING
033 - 040
033
Big Band
034
Swing
035
Slow Swing
036
Fast Swing
037
Jazz Trio
038
Bep Bop
039
Shuffle
040
Jazz Waltz
FAMILY STYLES LIST
istr
TK628
GB
12 09 2007
11:32
Pagina
8

INTRO / ENDING
When a rhythm is stopped, by pressing the INTRO button the display will show “Intro” and a rhythm style is
predisposed, and a preliminary music sequence will then starts when you press the START / STOP or KEY
START buttons.When a rhythm is on, by pressing the ENDING button, a final musical sequence stars.
KEY START / FILL IN
When a rhythm is on function and you press the FILL IN button you produce a rhythmic variation of the drums.
The KEY START function can be switched on when the rhythm is not playing; the display shows “Key Start”.
If the keyboard is split, you can activate the rhythm by playing a chord in the left part of the keyboard.
If it is not split, play a chord including at least three keys anywhere on the keyboard.
DJ STYLE
The DJ STYLE control activates the DJ effects in the last 25 keys on the keyboard, a DJ rhythm style and particular
complex harmonies.The keyboard splits automatically into three sectors: playing a key on the left side, select the
tonality and the rhythm automatically starts, in the centre of the keyboard “complex harmonies” can be played and
on the right side DJ Style characteristic effects can be played.They are selected by pressing the DJ STYLES but-
ton and then a number from 065 to 070. (See STYLES list at the end of this manual).
FUNCTIONS
Midi in Off / On
Deactivates or reactivates the MIDI data input coming from other equipment. It can be
activated or deactivated with number 70 Midi in Off/On (it is normally active).
Arranger Off / On
When a rhythm is functioning it starts or stops the arrangement of the rhythm.
To stop or start press number 71 Arranger Off/On (usually on).
Split /Full Keyb.
To split the keyboard with two sounds or set a single sound.
Number 72 activates Full Keyb, i.e. a single sound on the entire keyboard, or Split with the keyboard split to use two different
sounds.
Easy Chord
This function allows you to compose chords on the left side of the
keyboard with the simplified mode:
one key will provide a major chord,two keys a minor chord and
three keys a dominant 7th chord.
To start press number 73 Easy Chord; the display shows “Easy
Chord”.
The fundamental note of the chord (the most important one and
the one that gives the name to the chord) is represented by the key pressed on the far left. For example, by pressing simultaneously
C, D and E, you will get a C7 dominant chord.
Free Chord
Chords are played in the traditional way and all the main chords are identified.
Standard setting is active.To start press number 74 Free Chord; the display shows “Free Ch 74”.
EASY PLAY enables Free Chord automatically.
The FREE CHORD mode works across the whole keyboard too when FULL KEYBOARD is on.
The display shows the name of the chord in the Anglo-Saxon notation.
Memory Off / On
With a rhythm running, the played chord remains memorized even if the key is released.
It is deactivated and activated by typing number 75 Memory Off/On. It is normally active.
9
HOW TO USE THE KEYBOARD
ENGLISH
MAJOR
CHORD
G
FED ABBA
MINOR
CHORD
G
FED ABBA
SEVENTH
CHORD
G
FED ABBA
istr
TK628
GB
12 09 2007
11:32
Pagina
9

Alarm On / Off
This function activates or deactivates the acoustic alarm (“Save Power Alarm” device) which signals that the keyboard has not been
used for more than two minutes. It can be activated or deactivated with number 76 Alarm Off/On (it is normally active).
Medley On / Off
This function allows you to listen to all the songs one after the other, starting with the one you selected. It can be enabled or dis-
abled by entering 77 Medley Song On/Off. It is normally active.
Dictionary
The DICTIONARY function shows the name of a chord, the notes that it includes on the pentagram and the keys required to com-
pose the chord on the display. (See table at the end of this manual).
It can be enabled by entering 78; the display shows “Dictionary”. By pressing a key within the first two octaves on the left, you
can choose the basic tonality C, D, E, F, G,A or B with the corresponding “ ” (flats) or “ ” (sharps) and the kind of chord in the last
octave on the right.
Split 19 or Split 24
It is possible to set the point where the keyboard will be divided in two ways:
a. by entering 79, the display indicates “Split 19”; this means that the left side of the keyboard goes from the first to the nine-
teenth key.
b. by entering 80, the display indicates “Split 24”; this means that the left side of the keyboard goes from the first to the twenty-
fourth key.
The keyboard on the display shows the division point with an arrow.
Chords can be played in the FREE CHORD mode, which means in the traditional way, or in the EASY CHORD mode, which means
in the simplified mode (see the EASY CHORD paragraph).
Reverb on / off
This creates an effect as if you were playing music in an large empty room.
To switch on digit number 81 REVERB ON, and to switch off digit number 82 REVERB OFF.
Sustain on / off
This prolongs the sound of a note after the key is released.
To switch on, digit number 83 SUSTAIN ON, and to switch off number 84 SUSTAIN OFF.
Reset
Resets all the standard functions of the switch-on. It is enabled with number 99 Reset.
MANUAL DRUM ON / OFF
The MANUAL DRUM allows you to play rhythm patterns using the keys indicated with the percussion instrument symbols.
This function is activated by pressing the SOUNDS key and typing in number 101 MANUAL DRUM ON/OFF. To adjust the
volume of the rhythmic instruments, use ACCOMP. VOLUME.
The rhythm elements come out of the right or left speaker, with a stereophonic mix.
SEQUENCER
The sequencer section allows you to record and listen to everything you play.
It can be enabled by pressing the RECORD button.The display shows “Rec seq”
to show that the Sequencer is active.
Press RECORD again to stop recording and then press PLAY to listen to what has
been recorded.
Press PLAY again to stop listening. You can memorize up to 120 events.
10
HOW TO USE THE KEYBOARD
istr
TK628
GB
12 09 2007
11:32
Pagina
10

When the memory is full, the display temporarily shows “Full” and the “Record” sign vanishes.
After a recording session, while PLAYis active, variations made on the control panel can alter recorded events.
Recorded data is memorised as long as the keyboard is switched on. If nothing has been recorded in the Sequencer, by pressing PLAY
the display will temporarily show “Empty”.
MAESTRO
The
MAESTRO
section helps you in the music learning process just as if a real musical teacher were there with you, teaching you five
fundamental aspects:
1.Tempo 2. Notes 3. Melody 4. Chords 5. Accompaniment
DISPLAY DIRECTIONS
Press a key on the keyboard, e.g. number “8”.The display shows which key you are pressing and
the relative note will be shown on the pentagram.
1st level:Tempo of the song
At the 1st level, you can become familiar with the melody notes and learn the tempo of the song.
=== How to do it:
After having chosen a tune, select level 1first by pressing the MAESTRO button and then, when the
display shows Level ?, number 1on the numerical keyboard SELECT.
Use the control PLAY/STOP to start and stop the performance.
When the introduction touches are complete try playing the melody by pressing one or more keys and
keeping time with the orchestra.
During your performance, the display will show the correct notes of the melody.The accompaniment
will automatically follow you.
You can quicken or slow down the tempo by using the TEMPO + / – buttons.
You will be able to change tune by pressing the corresponding button on the SONGS list. If you wish
to listen to the whole song, press PLAY/STOP, then press SONG and then PLAY/STOP again.
2nd level:The Notes of the melody
When you are able to keep time you can try the 2nd level, which means playing the correct keys to perform the correct melody.
=== How to do it:
After having chosen a tune, select the 2nd level by pressing the MAESTRO button and then number 2on the numerical keyboard
SELECT. Use the control PLAY/STOP to start and stop the performance.
When the introduction touches are complete try playing the melody; this time you will have to press the correct buttons for the other
ones not to play.The display will help by showing you the correct melody keys in advance.
The accompaniment will automatically follow your performance.
11
HOW TO USE THE KEYBOARD
ENGLISH
istr
TK628
GB
12 09 2007
11:32
Pagina
11

12
Scripted using the
simplified method
Traditional scripting
10 10 11 12 12 11 10 9 8 8 9 9 910 10
E E E EE
F F
G G
D D
C C D
D
C G C G
10 10 11 12
C
left hand
Chords
Key numbers
for tune with
right hand
Line showing
how long the
chord lasts
10 10 11 12
C
3rd level:The song Melody
This time the accompaniment will play normally, without waiting for you.This means you will have to perform the melody with the
right keys while keeping time, or else the song will sound out of tune.
=== How to do it: After having chosen a song, select the 3rd level by pressing the MAESTRO button and then the number 3on the
numerical keyboard SELECT. Use the control PLAY/STOP to start and stop the performance.When the introduction touchesa-
re complete try playing the melody of the song.The display will help by showing notes and keys for the melody.
4th level:The song Chords
At this level the song will be played with the rhythm section and the melody; you will be able to play the accompaniment chords using
the left side of the keyboard.
If you do not play the right chord, the rhythm part will keep on going with the last chord and the melody will stop.
=== How to do it: After having chosen a song, select the 4th level by pressing the MAESTRO button and then number 4on the
numerical keyboard SELECT. Use the control PLAY/STOP to start and stop the performance.
When the introduction touches are complete play the first chord and then the others, following the directions shown on the display.
If you play a wrong chord, the melody will not play, and if you play it at the wrong time, accompaniment and melody will
be out of tempo.To make the first lessons easier, try slowing the tempo of the song, using the TEMPO + / – button.
The display will help by showing the name of the chord, the keys and the notes on the pentagram in advance.
There are two ways of playing chords:
• Free Chord for playing chords in the traditional way. • Easy Chord for playing simplified chords.
To choose the desired mode, see the “FUNCTIONS” paragraph.
5th level:Accompaniment with orchestra
At this level the song will be played with the drums rhythm section together with the melody and you will be able to play
the accompaniment. Rhythm and melody will keep going so you will have to play the right chord in time, or else it will be
out of tune.
=== How to do it: After having chosen a song, select the 5th level by pressing the MAESTRO button and then the number 5 on the
numerical keyboard SELECT. Use the control PLAY/STOP to start and stop the performance.
To start the complete accompaniment, play the first chord following the directions shown on the display.
The display will help by showing the name of the chord, the keys and the notes on the pentagram.
There are two ways of playing chords:
• Free Chord for playing chords in the traditional way. • Easy Chord for playing simplified chords.
To choose the desired mode, see the “FUNCTIONS” paragraph.
USING THE NUMBERS AND LETTERS ON THE KEYBOARD
To play the tune, read the numerical sequence contained in the blue songs strip (grey in this explanation) and press the black and
white keys that correspond to the same numbers on the keyboard.
The letters beneath the continuous blue line (grey in this explanation) indicate the accompaniment chords that can be played
using the simplified mode (the line to the right indicates how long the chord should be held).
N.B.: In the scores, including the MUSIC BOOK ones, the numbers above the blue band (grey in this explanation) show which chords should be played
using the 6 CHORD PROGRAM keys present in other keyboards models.
istr
TK628
GB
12 09 2007
11:32
Pagina
12

ENGLISH
13
When using electrical products, basic precautions must be fol-
lowed, including the following:
1. Read all the instructions before using the product.
2. When the product is used by children, supervision by an
adult is advised.
3. Do not use the product near water, for example near a
bath tub, washbowl, kitchen sink, or near a swimming pool
etc., or in a wet or humid basement.
4. When connecting to the mains supply
ensure that:
a) your hands are not wet (to
avoid electric shocks);
b) do not pull on the cable.
5. This product, either by itself, or when connected to an
external amplifier and headphones or speakers, is capable
of producing sound levels that can cause damage to hea-
ring. Do not operate it for a long period of time at high
volume levels or in any case at an uncomfortable volume
level.
6. The product should be positioned
so that it’s location will provide ade-
quate ventilation.
7. The product should be positioned
away from heat sources such as
radiators, heaters or other products
that produce heat.
8. This product should only be connected to a power supply
of the voltage corresponding to that shown on the label on
the instrument using an AC/DC adaptor.This label, contai-
ning all electrical data, relevant warning messages and the
instrument identification data, can be found on the under-
side of the product.
9. If the product is not used for long periods, the AC/DC
adaptor should be unplugged from mains.
10. The adaptor must be connected directly to the mains
supply without any other plugs.
11. Do not obstruct the air entry points of
the feeder with objects such as cur-
tains, cloths, etc.
12. Do not place sticky or adhesive objects on the keyboard,
such as burning candles.
13. Care should be taken to avoid foreign objects falling into or
liquid being splilt into the inside of the instrument through
any of the slots or openings in the case.
14. Ensure that the adapter is sufficiently ventilated and that
the ventilation slits are not covered with objects such as
newpapers, tablecloths, curtains, etc..
15. Do not expose the adapter to drops or splashes of water.
16. This product should be referred to an approved service
centre when: a) It has been exposed to rain. b) It appears
to operate incorrectly or shows a marked change in per-
formance. c) It has been dropped or if the case has been
damaged. d) Objects have fallen into the instrument or
liquid has been spilt into or over it. e) The AC/DC adaptor
has been damaged.
17. Never attempt to repair your instrument yourself. Any
operation should be referred to authorized personnel,
otherwise the guarantee will be declared void.
18. Do not use alcohol, solvents or similar chemical substances
for cleaning. Use a soft cloth dampened in a bland solution
of water and neutral detergent. Dip the cloth in the solu-
tion and then wring it until it is nearly dry.
MAINTENANCE AND REMARKS
• Keep this manual for future reference. •
PROBLEM
It does not switch on
No sound when the keyboard is played.
The automatic accompaniment does not play.
No sound is produced when the MIDI data are reproduced
from a computer.
Reproduction on the keyboard produces an unnatural sound
when the keyboard is connected to a computer.
When a mobile phone is used you can hear a noise.
No sound is produced even when the keyboard is played or
reproducing a song.
The sound of the voice changes from note to note.
Any other anomalies.
POSSIBLE CAUSE AND SOLUTION
Problem with the power supply.
Connect the adaptor correctly. Ensure that the battery poles (+/-) are facing the correct
direction, and control that the batteries are charged.
The volume is set at a level that is too low.
Use the VOLUME MASTER keys to raise the volume.
The accompaniment volume is set at 0.
Use the VOLUME ACCOMP. keys to raise the volume.
The USB-MIDI cable is not connected properly.
Connect the USB-MIDI cable properly.
The MIDI THRU function of the computer is activated.
Deactivate the MIDI THRU function of the computer.
The use of a mobile phone near to the computer may cause interference.To prevent this
problem, switch the mobile phone off or use it at a distance from the keyboard.
Control that the headphones are not connected to the PHONES/OUTPUT socket of
the rear panel.When headphones are connected to this socket, no sound is trans-
mitted.
The method of sound generation uses multiple recordings (samples) of one instrument
on the whole extension of the keyboard. It is therefore normal that the sound of the voice
differs slightly from note to note.
Switch off and then switch back on after a few seconds
TROUBLE SHOOTING GUIDE
istr
TK628
GB
12 09 2007
11:32
Pagina
13

14
HOW TO USE THE KEYBOARD
What is MIDI?
The acronym MIDI is the abbreviation of "Musical Instrument Digital Interface" and represents a standard for the transmission of data
via cables between an electronic musical instrument and a personal computer or another electronic musical instrument.
The Midi system
This keyboard adopts the Midi system, a standard which allows users to receive or send data in MIDI format to a personal compu-
ter or to another keyboard without compatibility problems between musical instruments of different brands.
The TK628 keyboard is equipped with a USB-MIDI plug for connection to the personal computer.
The connection takes place using the cable supplied as shown in the figure:
Minimum system requirements
Personal computer with Pentium 3 800Mhz processor equipped with USB plug.Windows XP or later operating system.
Procedure for connection to the computer
Prior to connecting the keyboard, make sure that the computer is switched on and the keyboard switched off.
Carry out the connection with the cable supplied. Switch on the instrument.
After a few seconds, a series of messages will appear on the computer:
At this point, the keyboard is correctly connected and recognised by the computer.
Note:The recognition of the keyboard by the computer takes places during the first connection; in subsequent connection no mes-
sage will appear. Only the characteristic sound produced by the computer to indicate the insertion of a USB device will be heard..
Attention:
• If the keyboard is not recognised by the computer and a USB device not recognised error message appears, repeat the operation.
If the problem persists, check that the minimum requirements are respected.
• if the operating system is later than Windows XP (Vista ...), it is necessary to download the respective drivers from the internet,
using the site www.bontempi.com.
CONNECTION OF THE KEYBOARD TO A PERSONAL COMPUTER
New hardware found New hardware found New hardware found
The new hardware has been installed and is ready for use
USB Speakers
istr
TK628
GB
12 09 2007
11:32
Pagina
14

15
HOW TO USE THE KEYBOARD
ENGLISH
Reproduction of a Midi file using Windows Media Player
“Windows Media Player” is included in the Windows packet. It is a program that can read Midi files and send the notes to the
keyboard connected to the computer.
To perform a MIDI file using “Windows Media Player” follow the operations below:
• Open the “Windows Media Player” program
• In the most recent versions the program does
not have the “Open file” option. In this case,
press CTRL M (Control M).This control shows
a classical menu in which the open file option is
displayed.
• Select File | Open | nomefile.mid where “nome-
file.mid can be any MIDI file (as for example the
file C:\WINDOWS\Media\fluorish.mid, present
in Windows XP can be selected) and send it to
be executed.
• To listen to the piece, press the Play () button
situated in the lower centre; Press the Stop but-
ton () to stop it.
• The keyboard will play the selected sequence.
Usable Programmes
In addition to WINDOWS Media Player, many other computer programmes are commercially available.They offer the possibility to
expand the range of functions of the keyboard. Some allow the registration of pieces in Midi format. In other cases, it is possible to
register on the computer what is being played on the keyboard. Later, the piece can be replayed, and its musical score can be visua-
lised or printed. It is also possible to correct errors, change sounds, etc.
Many of these software programmes are also available on the Internet in Demo or Shareware format.
How to find the Midi Files
On the Internet or in music stores, countless Midi Files can be found for modern or classical music of all kinds.They can be
played with the keyboard, or used as an orchestral base to play a melody.
Note: The Midi Files available on the Internet have sometimes been made for specific instruments. Some are Midi devises
that do not respect the MIDI standard, others have their own specific additional functions. In such cases, it is possible that
the musical piece will not be played with the same sounds and effects that are supposed to be used. In any event, the key-
board respects the standard MIDI, and has many commonly used functions that can be seen on the map on the instrumen-
t’s manual.
Attention:
• If the keyboard or the computer freeze, switch off both devices and then switch on the keyboard again.
• Correct operation cannot be guaranteed if the instrument is switched off or the USB cable disconnected while a MIDI applica-
tion is operational.
• Leave at least 10 seconds between switching off and switching on the keyboard and between the disconnection and connection
of the USB cable.
• Make sure that the Midi application is closed prior to switching off the instrument of disconnecting the USB cable. If this should
happen, close the Midi application, switch off instrument then switch it back on again and restart the Midi application.
On the www.bontempi.com site, free musical software is available, with instructions in various languages, to down-
load onto your computer to record, modify and listen to MIDI musical tracks again using the keyboard.
FREE MUSICAL SOFTWARE DOWNLOADABLE FROM INTERNET
istr
TK628
GB
12 09 2007
11:32
Pagina
15

72
Midi Message
NOTE OFF
NOTE ON
PROGRAM CHANGE
CTRL 07
CTRL 10
CTRL 120
CTRL 121
CTRL 123
Description / Notes
Midi channel n(0-15) - Note OFF #kk(1-127) - vv is don’t care.
Midi channel n(0-15) - Note ON #kk(1-127) - Velocity vv(1-127). vv=0 means NOTE OFF
Program (patch) change. Please refer to sounds list
Volume (default=100)
Cc = Pan (default=64 center)
All sounds off
Reset all controllers
All notes off
Hex code
8nH kk vv
9nH kk vv
CnH pp
BnH 07H cc
BnH 0AH cc
BnH 78H 00H
BnH 79H 00H
BnH 7BH 00H
SONGS LIST
0
001
002
003
004
005
006
007
008
009
010
011
LA CUCARACHA
AURA LEE
JINGLE BELLS
HAPPY BIRTHDAY
MOZART op. 40
CAN CAN
PERFIDIA
CARIOCA
ALOUETTE
ROMANZE IN F op.50
LA PRIMAVERA
012
013
014
015
016
017
018
019
020
021
022
MINUETTO (Bach)
LONDON BRIDGE
OH! SUSANNA
MARY HAD A LITTLE LAMB
TWINKLE TWINKLE LITTLE STAR
WHEN THE SAINTS . . .
MY DARLING CLEMENTINE
WALTZ FROM SWAN LAKE
RADETZKY MARCH
JOHN BROWN'S BODY
ODE TO JOY
023
024
025
026
027
028
029
030
031
032
FRÈRE JACQUES
CIELITO LINDO
DANZA DELLE ORE
SILENT NIGHT
ROSE DEL SUD
IL BRINDISI
FASCINATION
YANKEE DOODLE
SANTA LUCIA
RONDÒ (Clementi)
DETAILED MIDI IMPLEMENTATION
ACCOMPANIMENT SOUNDS
ACCOMP. SOUNDS
85
86
87
88
89
90
Piano
Hammond
Jazz Guitar
Strings
Trumpet
Slow Strings
Istr2
TK628
pag
72 79
24 10 2007
10:56
Pagina
72

73
SOUNDS LIST
FAMILY SOUNDS
PIANO &
PERCUSSION
001 - 030
ORGAN
031 - 050
001
002
003
004
005
006
007
008
009
010
011
012
013
014
015
016
017
018
019
020
021
022
023
024
025
026
027
028
029
030
031
032
033
034
035
036
037
038
039
040
041
042
043
044
045
046
047
048
049
050
Piano
Honky Tonky
Grand Electric
Octave Piano
Stage Piano
El Piano
Cool Piano
Synth Piano
Warm Electric
Digital Piano
Stage El Piano
Chorused Electric
Electric Ensamble
Wha El Piano
New Age
Wood Piano
Trio Jazz
Harpsy
Barocco
Vibes
Marimba
Xilophone
Carillon
Steel Drum
Toy Piano
Warm Vibes
Space
Stage Vibes
Maribumba
Tubolar
Hammond
Perc Organ
Blues Organ
Full Organ
Theatre Organ
Jazz Organ
Ring Organ
Warm Organ
Big Perc
Sixty Organ
Gospel
Church Organ
Liturgic
Cathedral
Notre Dame
Accordion
Musette
Tango Accordion
Armonium
Harmonica
FAMILY SOUNDS
GUITAR
051 - 066
SYNTH
091 - 100
MANUAL DRUM
WIND
078 - 090
STRINGS
067 - 077
051
052
053
054
055
056
057
058
059
060
061
062
063
064
065
066
067
068
069
070
071
072
073
074
075
076
077
078
079
080
081
082
083
084
085
086
087
088
089
090
091
092
093
094
095
096
097
098
099
100
101
Jazz Guitar
Steel Guitar
Guitar 12
Mute Guitar
Clean Guitar
Phasing
Banjo
Mandolino
Stage Guitar
Repeat Guitar
Space Steel
Wha Guitar
Bass
Synth Bass
Pick Bass
Harp Sinth
Violin
Violoncello
Strings
Slow Strings
Crazy Strings
Sweet Strings
Chamber
Viole
Viole Orch.
Space Violin
Tremolo Strings
Trumpet
Saxophone
Clarinet
Flute
Oboe
Paradise
Oboe Ensamble
Brass
Fanfare
Trombone
Duo Saxophone
Saxophone Orch.
Space Flute
Square
Saw
Warm Synth
Poly Synth
Perc Synth
Echo
Sound Track
Trailer
Ecstasy
Power Synth
Manual Drum
Istr2
TK628
pag
72 79
24 10 2007
10:56
Pagina
73

74
STYLES LIST
FAMILY STYLES
8-16 BEAT
001 - 010
DANCE
011 - 018
ROCK
019 - 025
AMERICA
026 - 032
001
002
003
004
005
006
007
008
009
010
011
012
013
014
015
016
017
018
019
020
021
022
023
024
025
026
027
028
029
030
031
032
Easy Beat
Soft Beat
Easy Groove
Miami Beat
Classic 8 Beat
Pop Ballad
Cool Beat
Pop Hit
Pop 16 Beat
British Pop
Dance
Dance 80
Disco
Disco 70
Tribe
House
Rap
Garage
New Age
Rock
Slow Rock
Pop 60
Funky
Acid
Soul
Blues
Twist
Rock & Roll
Boogie
Dixie
Country
Country Blues
FAMILY STYLES
SWING
033 - 040
LATIN
052 - 064
DJ STYLES
065 - 070
TRADITIONAL
041 - 051
033
034
035
036
037
038
039
040
041
042
043
044
045
046
047
048
049
050
051
052
053
054
055
056
057
058
059
060
061
062
063
064
065
066
067
068
069
070
Big Band
Swing
Slow Swing
Fast Swing
Jazz Trio
Bep Bop
Shuffle
Jazz Waltz
Waltz
Folk Waltz
Mazurka
March
Polka
Tango
Beguine
Foxtrot
Paso Doble
Hully Gully
Tarantella
Samba
Bossa1
Bossa2
Cha cha cha
Mambo1
Mambo2
Salsa
Merengue
Bachata
Rhumba
Calypso
Cumbia
Reggae
DJ Trance
DJ Hip Hop
DJ Techno
DJ House
DJ Acid
DJ Garage
Istr2
TK628
pag
72 79
24 10 2007
10:56
Pagina
74

75
DICTIONARY
GB- This will show you the keys to press to play chords you do not know.
F- La fonction Dictionary indique les touches à presser pour jouer les accords que l’on ne connaît pas.
D- Die Funktion Dictionary zeigt Ihnen an, welche Tasten Sie drücken müssen, um die Akkorde zu spielen, die Sie nicht kennen.
E- La función Dictionary te indica las teclas que deben pulsarse para tocar los acordes que no conoces.
I- La funzione Dictionary ti indica i tasti da premere per suonare gli accordi che non conosci.
Istr2
TK628
pag
72 79
24 10 2007
10:56
Pagina
75
Table of contents
Other Farfisa Synthesizer manuals
