FARRIER MARINE F-22 User manual

FARRIER MARINE Page 1 Copyright © 2012 By Farrier Marine
Revised August 15, 2012
Includes F-22, F-82, F-85SR, F-32, F-32SR, F-36, F-39,
F-41, F-44SC, and all variations
Sailing Manual For All
Farrier Designs
This manual has been compiled to help you to operate your Farrier
design with safety and enjoyment. It contains details of the craft, and
information on its operation and maintenance. Please read it care-
fully and familiarize yourself with your trimaran before using it.
If this is your first sailboat or multihull, for your own comfort or
safety, please ensure that you obtain handling and operating expe-
rience before assuming command of the craft. Your national sailing
federation or yacht club will be pleased to advise you of local sailing
schools or competent instructors.
PLEASE KEEP THIS MANUAL IN A SECURE
PLACE, AND PASS ON TO THE NEW
OWNER WHEN YOU SELL YOUR BOAT
If required, a replacement copy of this Manual can be
purchased from Farrier Marine, current contact details
being available from www.f-boat.com
Design_____________________
Sail Number___________
Owner 1. __________________________ Owner 2. _________________________ Owner 3. ________________________
________________________________ ________________________________ _______________________________
________________________________ ________________________________ _______________________________
_______________________________ ________________________________ _______________________________
This Sailing Manual is the copyrighted property of Farrier Marine,
and is not to be used for any unauthorized purpose.

Copyright © 2012 By Farrier Marine Page 2 FARRIER MARINE
Contents
General............................................... 3
Preparation.......................................... 3
Loading .............................................. 3
Safety Compartment........................... 4
Outboard Motor.................................. 4
Trailering ............................................5
Rigging................................................6
Launching........................................... 9
Mast Raising On The Water................ 11
Daggerboard & Centerboard ..............11
Rudder........................................................... 12
Mast Setup..................................................12
Sailing..........................................................13
The Basics......................................... 13
Reefing.............................................. 14
Rotating Mast Control.......................15
Windward Performance.....................16
Reaching............................................17
Screacher........................................... 17
Spinnaker...........................................17
Spinnaker Jibing................................18
Spinnaker Sailing Downwind............18
Safe Sailing Recommendations.........19
Sailing Hints......................................20
Anchoring............................................23
Beaching..............................................23
Retrieving To Trailer ..........................23
De-rigging .......................................... 24
Lifting Out.......................................... 25
Marina Docking.................................. 25
Safety...................................................26
Unsinkability..................................... 27
Offshore Sailing ............................... 27
Capsize.............................................. 28
Righting.............................................29
Personal Responsibility ....................30
Safety In General ..............................30
Technical Notes...................................31
Winch line......................................... 31
Spring Retaining Clips...................... 31
Launching......................................... 31
Hoisting Mainsail.............................. 31
Bearing Away.................................... 31
Heavy Helm...................................... 31
Rudder/Daggerboard hum.................31
Rudder Ventilation............................ 31
Stay/Shroud Tensioners.................... 32
Compression Pads............................. 32
Beam Bolts........................................ 32
Wingnets............................................32
Bimini Top Storage............................33
Float/Beam Vents.............................. 33
Rust....................................................33
Cleaning Floats..................................33
Clean Boat Hint.................................33
Collision............................................ 33
Hurricane Survival............................ 34
Folding Assistance.............................35
SPECIFICATIONS ..........................36
Typical Trailer Setup ..........................39
Typical Deck Layout...........................40
F-32 Raising Mast.............................. 41
F-22 Sail Plan..................................... 42
F-82 Sail Plan..................................... 43
F-32 Sail Plan..................................... 44
F-33 Sail Plan......................................45
F-36 Sail Plan......................................46
F-39 Sail Plan......................................47
F-41 Sail Plan......................................48
Maintenance & Safety Checklist ........49
Maintenance & Safety Checklist ........50
Fire Precautions.................................. 51
Safe Sailing Recommendations...........52
FARRIER MARINE,
www.f-boat.com

FARRIER MARINE Page 3 Copyright © 2012 By Farrier Marine
and batteries, life buoy, flares, a chart of the area to be
sailed, food, water, and adequate fuel.
LOADING
Multihulls should be treated like aircraft when it comes
to loading. Farrier designs are light, responsive craft, and
due to their narrow waterline do not have an unlimited
load carrying ability. Overloading can affect performance
and handling, while excessive overloading can also
affect safety margins, the ratio of float buoyancy relative
to the total weight becoming lower. A higher ratio is faster
and safer. Always be conscious of weight and avoid
carrying unnecessary items.
The load-carrying capacity of the different Farrier
designs is listed under Specifications towards the back of
this manual. Some overloading is acceptable for general
sailing in sheltered waters, the only adverse effect being
a loss in performance. However, an overloaded boat
offshore in large waves can become dangerous due to
greater loads generated in the structure, and the slug-
gishness which can prevent the boat from rising to go
over or with the waves, as it should.
When storing supplies, try to keep all heavy items
located as low down as possible and in the forward end
of the cabin. Avoid storing any heavy items aft of the
main entry hatch inside, as too much weight aft can cause
transom drag, affecting performance. Farrier designs
have a very buoyant bow, which actually lifts at speed,
and additional weight should always be kept forward
rather than aft.
GENERAL
This manual contains important information about the safe
operation and maintenance of your Farrier designed trima-
ran. Read it carefully, become familiar with the procedures
described, and follow the recommendations to help make your
sailing enjoyable and trouble-free.
Your Farrier trimaran is designed and built as a high
performance family cruising yacht, which when used as
intended, with its enormous stability and unsinkability, is
one of the safest, most comfortable, and fastest sailboats
afloat. However, while speed is an important advantage,
it should be remembered that it is not necessarily the
most important multihull feature. Slow gentle sailing can
be even more enjoyable when combined with the
multihull's spacious and level decks to lounge on.
As you become familiar with your boat, you may
discover alternative methods of operation that have
advantages. We would appreciate if you would share
these with us so that we can share them with other
owners and this can be done on the F-boat forum, of
which there are several, as listed at.
http://www.f-boat.com/pages/forum.html
PREPARATION
Before going sailing, you will need to provide the
proper safety equipment as required by local regulations.
This should include life jackets for all crew members,
safety harnesses for children, anchor, compass, bilge
pump, fog horn, First Aid kit, fire extinguishers, flashlight
The first 5 Trailertris of different types on the beach in Moreton Bay (Brisbane), Queensland. Farrier designs have now been
sailing world wide for over 35 years, and the experience from all these years is the basis for this manual.

Copyright © 2012 By Farrier Marine Page 4 FARRIER MARINE
Should your model have float storage, avoid heavy
loads in the floats. These should only be used for light
bulky items such as sails, fenders etc. Heavy weight in
the ends of any boat, be it the bow, stern, or floats, can
adversely affect the general motion.
To maintain a light boat, and that sparkling edge of
performance, it is highly recommended that you go
through everything on board several times a year, and
take off any items that do not get used. This prevents the
gradual buildup of unnecessary weight.
SAFETY COMPARTMENT
Before sailing, it is important that the Safety Compart-
ment be loaded with the appropriate safety gear. This
compartment is accessible from top or bottom and should
have been built in as per the plans.
Its purpose is to keep important safety equipment that
should be available to the crew in any emergency situa-
tion, especially a capsize. The equipment stored here
should include flares, a handheld VHF radio, EPIRB
(offshore), extra line, spare tools, cutting implements etc.
in watertight bags (this is not a watertight compart-
ment).
WARNING: No multihull should venture offshore
without safety gear in such a compartment that
must be accessible from under the craft
OUTBOARD MOTOR
The recommended motor size is given in the specifi-
cations in your original literature and later in this Manual.
This is more than adequate for most circumstances.
A long shaft motor is the minimum required, and the
extra long 25" shaft motors are the best. A remote
control can also help make operation very easy with aft
cabin models. With weight being important, try to choose
the lightest possible outboard.
There are a number of specialist ‘Sail Boat’ motors
now available and some of these are designed for heavy,
hard to push, displacement boats, and their propellers
are effectively ’geared down’ to give high thrust at low
speeds. However, Farrier trimarans have a very easily
driven hull and may not need such a propeller. The result
can be the same as always driving your car in low gear.
You will have plenty of thrust, but speed is low, and
economy can be poor. These motors do have advan-
tages, and if used, you may need to experiment with
different propellers to get the best and most efficient
performance.
Refer to the engine manual for details of operation,
maintenance and winter storage. Always be sure you
have enough fuel for your planned trip.
The motor can be used while the floats are extended
or folded and should always be tilted up when sailing.
An F-22 on the trailer, with outboard and daggerboard rudder. This type of rudder can be lifted fully up for local
trailering or removed altogether for long distance trips. Note separate light bar high up and well clear of water

FARRIER MARINE Page 5 Copyright © 2012 By Farrier Marine
nected to the towing vehicle. Independent wiring avoids
the frequent breakdowns that occur with wiring through
the trailer being attacked by saltwater. When the trailer is
being towed on its own, the lights can be mounted directly
to the trailer.
Before trailering, check that tires are inflated correctly,
the beam locking pins are in place, the rudder is fully up
and secure, the pop-top or hatch is secured, and the boat
is tied down to the trailer. There should always be one tie-
down per side, these being looped around the winches or
brackets on the cockpit coamings, and tied to the tie-
down loops on the trailer. The bow eye should also be tied
down to the winch post, in addition to the winch line.
Check that all the trailer supports always bear equally
against the hulls. Use extra ties for long distances.
When trailering, BE SURE to pivot up or remove the
trailer jockey wheel, and check that the hitch is locked on
to the ball.
Should the mast extend aft past the trailer lights by
more than the legal amount, the appropriate warning flag
should be tied on the back. If mast extends too far aft it
can be positioned further forward which will eliminate any
excessive overhang. However, this may not be possible
if the towing vehicle is a tall van.
When trailering, always allow extra distance for stop-
ping. Particularly watch for low bridges, overhanging
trees or awnings etc. If necessary, the boat can be
partially unfolded on the trailer in order to pass under a
low bridge.
CAUTION
Measure and KNOW overall height on the trailer.
Care should then be taken to avoid all low
overhead bridges, awnings or roofs.
Daggerboard or
centerboard SHOULD
ALWAYS BE DOWN
when motoring, which
will prevent sideways
movement. If not, the
boat will tend to have a
hovercraft like motion
with wide skidding
turns. Having the board
fully down means that
handling will always be
excellent.
TRAILERING
The total towing
weight can vary con-
siderably, depending
on the design and op-
tions fitted. The actual
weight can be deter-
mined exactly by using
a weighbridge.
Check also that the
vehicle is approved and equipped as recommended by
its manufacturer for towing this weight, and the capacity
of the towing hitch is suitable.
While towing, watch for strong crosswinds. A Farrier
design is a relatively light boat for towing, but it still has
considerable windage. For easy, stable towing, the trailer
should be balanced to have 8 to 10% of the total weight
on the coupling ball. This can be measured by a bath-
room scale. If you find ‘fish tailing’ occurs, increase this
tongue weight. If necessary, a simple change like shifting
the gas tank or outboard forward can make a consider-
able difference to trailer behavior.
Trailer lights can be fitted either on special brackets or
as a separate light bar on the boat’s transom. They are
best independent from the trailer, as the wiring then never
gets near the water, considerably improving reliability. If
separate, be sure to fit the correct lights on the appropri-
ate sides. The wire should be run along the top of the
boat, looped around the foredeck cleat and then con-
An F-33 on trailer, separate light bar in place on aft mast support, and daggerboard
rudder blade removed for trailering . Lights can also be separately mounted each side
(see below left), and this makes it much easier to store in vehicle.
Trailer lights are mounted separately each side on this F-27

Copyright © 2012 By Farrier Marine Page 6 FARRIER MARINE
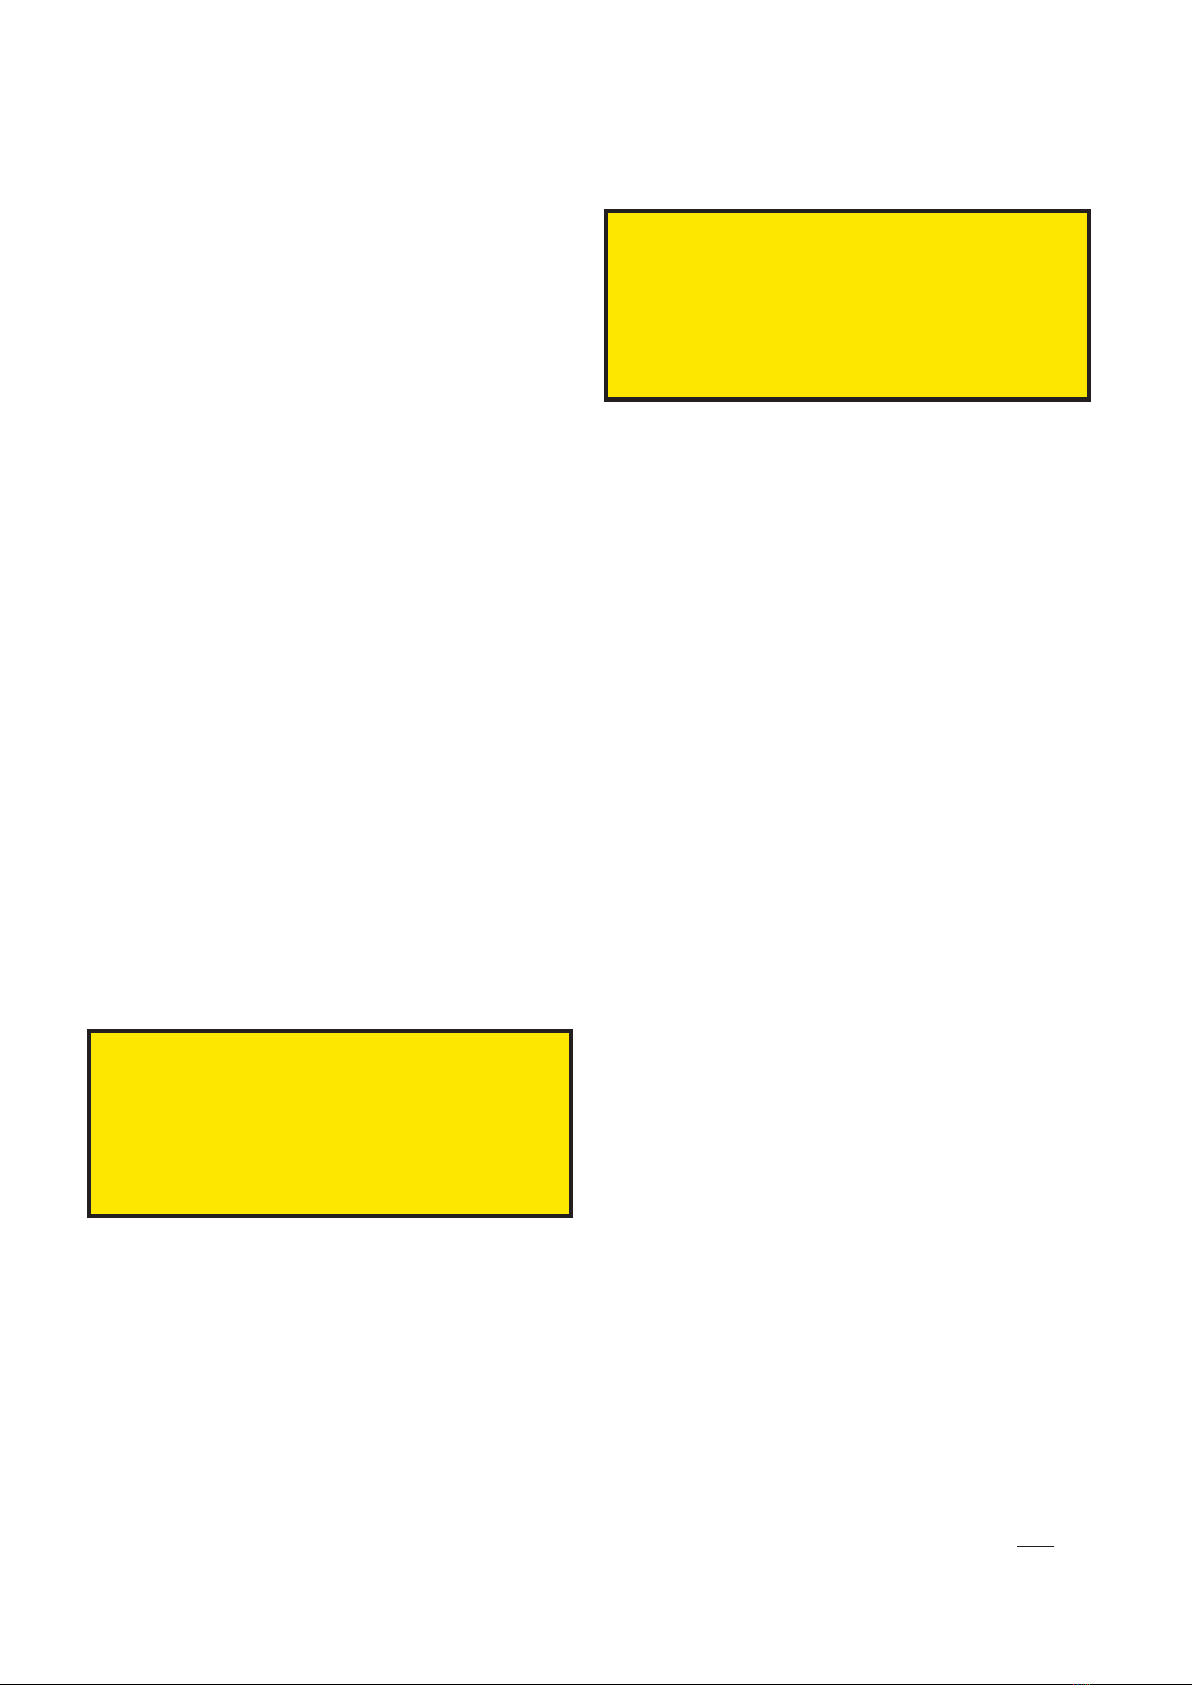
Mast raising pole in position on an F-28 with winch line
connected to jib halyard, ready to raise mast. Depending on
design, take care that rotating mast is restrained once up so
that it cannot topple forwards. This can be done by using the
Corsair type Highfield Lever to connect shrouds to float
chainplates, on older designs like F-28 and F-31. Modern
designs like the F-22 or F-32 do not require these.
RIGGING
The following is a general rigging procedure and
applies to all designs. For ease of rigging, it is highly
recommended that you follow this general procedure, as
it has been developed from hundreds of launchings and
proven to be fast, easy and efficient.
CAUTION
Always park into the wind, or uphill, to help the
mast stay in line while being raised. Trailer should
remain hooked to towing vehicle
Two should be able to completely rig an F-22 or F-32
ready to launch within 15 - 25 minutes of arriving at the
ramp by using the correct procedure. It is possible in fact,
for F-22 to be launched, unfolded, and sailing within 12
minutes. One person should be able to have the F-32
rigged and launched in around 30 - 35 minutes. However,
note that loading any extra gear or supplies onto the boat
is not counted in these times.
DANGER
Before starting to rig, check that there are no
powerlines that the mast could touch, either while
being raised or moved to launch ramp
Don’t be dismayed if it takes you considerably longer the
first few times out. It will take a little practice to become
familiar with the procedures, and the more you rig the
boat, the easier and quicker it will become. However, it is
very important to follow a set procedure each time.
Recommended Set-Up Procedure Is As Follows:
1. Remove the trailer tie-downs, and the trailer lights.
The tie-downs can be tied together and used as the bow
line for launching. Saves stowing them, and then finding
a bow line.
2. Undo the trailer winch hook, and pull some slack so
that the hook will pass over the bow or mast raising roller.
Place on the foredeck.
3. Place the mast raising pole on the foredeck ready
for use. Climb onto the bow using nonskid areas on the
float bows as stepping points.
CAUTION
The float bows can be slippery. Particularly warn
children to take care when climbing up or down
4. Move aft alongside the mast undoing the mast ties
(at each end) and the rigging ties as you go.
5. Lift the forward end of the mast and walk aft, rolling
the mast on the aft mast roller while checking that the
rigging lines or wires do not catch. Stop once the mast
foot is over the pivot brackets. Now’s the time to fit any
masthead indicator to the top of the mast. Lift the mast
up until the indicator can be fitted to the masthead from
the ground behind the boat. If rigging single-handed, the
mast can usually be balanced in this position to do this.
With rotating masts, the mast yoke will now need to be
fitted to the mast foot using the through pin (yoke can also
be fitted prior to rolling mast back, or be left on the foot at
prior de-rigging). This can vary with different models so
check specific drawings for your particular step (can be
downloaded from F-boat forum files)
6. The mast foot is now connected to the mast step as
follows:
F-22: Slots onto pin in step.
F-82: Pinned to brackets on cabin roof.
F-9A: Plugged onto pin in deck step.
F-9R: Attach yoke to deck brackets with fast pins
F-32: Slots onto pin in step.
In some cases, it may be necessary to push the mast
firmly aft to fit to step. If difficult, check that all stays are
clear, the terminals into the mast have not snagged
sideways, and the mast is centered on the aft roller.
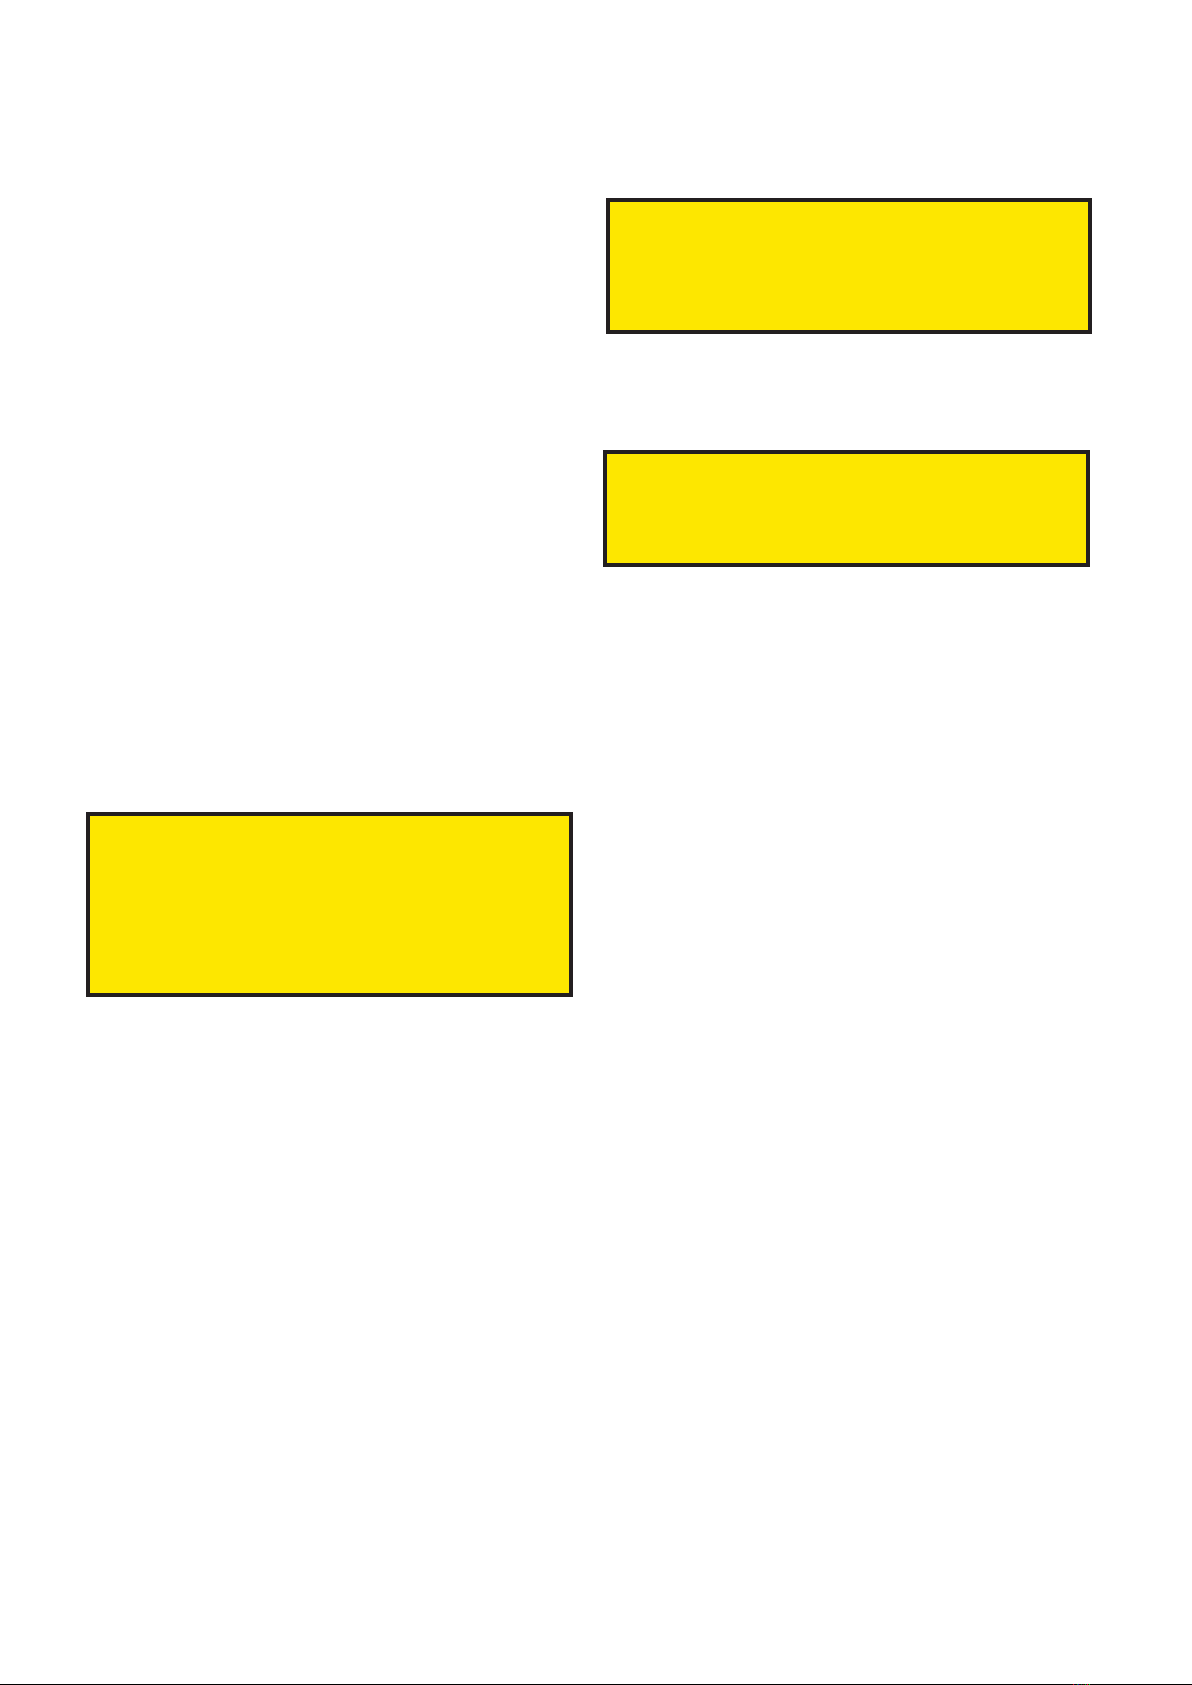
F-22 mast rolled back and attached to the deck pivot
brackets, with mast raising pole in place.

FARRIER MARINE Page 7 Copyright © 2012 By Farrier Marine
7. If required, fit the mast raising
wires, running from an eye on the mast
to the side anchors on the cabin roof
(aligned with the mast pivot point). These
raising wire anchors can be chainplates,
or 'lift up loops' depending on design.
Some designs such as the F-27 and F-
25A use the lower shrouds to stabilize
mast.
Note that the length of these raising
wires should be adjustable and they
should be slightly loose and monitored
on the first mast raising. This is to ensure
they cannot become overtight during the
initial raising procedure. They should
never be more than moderately tight,
and, once adjusted and set, need no
further monitoring or adjustment. Avoid
any line here as it stretches too much.
An alternative to raising wires is to
use spinnaker or screacher halyards. These can also
provide an extra backup in difficult conditions, but they
take longer to setup. If used, they must be cleated to
bottom of mast.
8. Position the mast raising pole on the mast or in the
yoke socket. Attach the wire from the top of the pole to
the eye on the front of the mast, with the pole being
approximately perpendicular to the mast.
If considered necessary, (strong cross winds or single-
handed) additional light side lines can be fitted from the
pole end to the raising wire anchors (as shown above) to
stabilize pole better sideways.
Where a yoke is used (rotating masts) the length of
the wire from the pole to the mast can also be adjusted,
and a little experimenting will give an almost perfect
moderate tension on the raising wires throughout the
complete raising procedure.
9. Take the trailer winch line hook, pull it back over
the pole and then connect it to the jib halyard (after it
has been unhooked from the mast). Winch
line should extend at least two feet (60cm)
aft of the mast pole fork.
10. Now check the following:
a. All halyards are positioned or led
correctly from the base of the mast, and
that jib halyard is SECURELY TIED OFF to
the cleat on side of mast.
b. Rotating mast shrouds to floats
should be positioned so as to avoid catch-
ing on anything which can cause damage
during raising procedure.
Later models (F-22 & F-32) always
leave the stays attached to floats, but on
many earlier models stays have to be
released to fold. In this case a solution is to
use a Highfield lever to attach shroud to float chain-
plate (photo on Page 23). Otherwise a block and
tackle can be used to attach shroud to aft beam area
on float, but be careful that mast is always supported
when up and raising wires have been removed.
CAUTION
With rotating masts, the side stays must always
be connected to the floats, otherwise there is a
danger of mast toppling forward if over winched.
11. The mast is now winched up, CHECKING AGAIN
FOR POWERLINES.
Check to see that all rigging wires are clear and have
not snagged anywhere, particularly aft chainplates on F-
9As. Raising wires should initially be slightly loose, and
Raising wire Deck Loops - these work well to anchor raising
wires as they can fold down to be flush on deck when not in
use. F-33 mast step with raising pole yoke shown above and
below left. The same basic mast raising setup applies for
both on trailer or on water mast raising.

Copyright © 2012 By Farrier Marine Page 8 FARRIER MARINE
tighten slightly on the way up.
If the mast raising pole tends to twist sideways then
this can be controlled by light lines to the raising wire
anchors as mentioned earlier.
CAUTION
During mast raising, it is very important to be alert
to all items of rigging lifting or supporting the mast.
If any resistance to raising is felt at any point,
STOP, and check nothing has fouled. Do not
proceed until any obstruction is clear
Check that the socket in the rotating mast foot aligns
correctly with the pivot ball on the deck with earlier
rotating masts, as the mast nears the fully up position.
Monitor the float stays with rotating masts on initial
rigging to ensure they do not become too tight or catch on
anything during raising.
Corsair models with rotating masts use custom High-
field levers to connect side stays to the float chainplates
and these give the stays just enough slack for the mast
to be fully raised when the float is folded, while preventing
any danger of the mast toppling forward.
These Highfield levers can be purchased from Corsair
and are an important safeguard against accidently
dropping the mast while folding or unfolding, provided
they are not disconnected from chainplate. The more
modern Farrier designs (F-22, F-32, and F-32SR) do not
need these levers, as their latest folding geometry allows
boat to be folded without detaching the side stays.
CAUTION
Winch operator should be careful to ensure trailer
winch line lays evenly across the drum while mast
is being raised. With an offset bow roller there can
be a tendency for incoming line to pile up on one
side of the drum to where it can suddenly slip off.
Larger masts can be heavy, with high loads, and extra
care should be taken to ensure they do not swing too far
sideways. Never park in a cross wind or sideways on a
slope, unless extra help is available to steady mast.
12. Connect forestay once the mast is fully up. At initial
rigging, mast rake should be set to around 3 to 4, which
is slightly more than the rake of the aft edge of the forward
beams when viewed from the side. Once initial adjust-
ment has been done, the forestay turnbuckle does not
need to be undone during normal rigging or de-
rigging, only the clevis pin is removed or inserted.
Lower and intermediate shrouds on the fixed F-27, F-
9A/F-31 mast remain connected during all rigging
and de-rigging procedures. After the initial adjustment,
there is also no need to undo these or disconnect them
from the shroud chainplates.
13. Once forestay is connected, slacken off the trailer
winch, disconnect jib halyard, and return it to the mast.
Mast raising wires may need to stay attached until after the
boat is unfolded, depending on model. F-28 shown.
F-31R/F-9R mast half way up, winch line just about to
leave 'cradle' on raising pole. Watch float shroud
turnbuckles if fitted, as they are easily snagged and bent.
If one has to park on a side slope or be in a cross wind,
then it is also a good idea to have someone on deck to
stabilize mast or raising pole, or use extra side lines to
stabilize pole, particularly on larger models.

FARRIER MARINE Page 9 Copyright © 2012 By Farrier Marine
Remove raising pole etc., rewind the
winch and reconnect hook to the bow
eye.
Leave rotating mast raising wires
attached to the mast, as these may still
be required for support until after the
floats are unfolded and stays are prop-
erly connected to floats.
14. The topping lift is now discon-
nected from the mast lower end and
connected to the end of the boom to help
take the weight. Remove the sail bag
from the mainsail/boom and connect the
boom to the mast.
15. Tighten all the battens in the
mainsail, if required. Connect the main-
sheet to the boom. Feed the mainsail
head into the track on the mast and connect the main
halyard
16. If required, run all the halyard lines from the mast
through the turning blocks back to the correct rope
clutches on the aft end of the cabin roof.
17. Connect the mast electric plug if required.
18. The headsail can be fitted now if wished, or after
launching. The sheets are laid out and connected to the
clew (sheets can be kept in the anchor well for quick
access). The headsail can be kept under control by a
shockcord which can be left on the foredeck for this
purpose. Just keep it hooked to the toerail or pulpit.
19. Fit or untie rudder so it is ready for use (still
retracted), and check that daggerboard up-line is cleated.
Outboard motor should also be in the up position.
20. The aft mast support is now removed and stored.
WARNING
Before taking boat to the water check there are no
powerlines that the mast could touch
LAUNCHING
Back the trailer down the ramp until the trailer is
submerged up until just past the inward bend of the side
frame members (about 6 to 8' back from the winch post).
Disconnect winch hook and push the boat off while
holding on to the bow line, or you can get on board
(having started the motor first). Be careful of crosswinds
or wind from the stern. The boat, with its shallow draft, will
move quickly sideways in such conditions, and you
should not launch until there is sufficient maneuvering
room alongside.
This ability to go sideways is one drawback of shallow
draft, and you should always make allowances when
launching/retrieving or under power. First priority at
every launch should be to LOWER DAGGERBOARD!
This helps to prevent any sideways movement, and gives
excellent maneuverability under power.
Some models are large boats to handle at ramps, but
because of their lightness, are easy to move around. The
trick is not to fight it, but to plan ahead what you are going
to do, and gently guide it in the correct direction.
An offshore wind at the ramp is ideal, as the boat will
lie quietly downwind at the end of the bow line. It 's then
just a simple matter of boarding over the float bows, and
backing off or just walking her over to a boarding dock, if
available.
An onshore wind is the most difficult, as the boat will
swing sideways once launched, and come towards the
ramp. In this situation the boat should be held off the ramp
from a central position on the side. You will find a balance
point where it will lie evenly until you are ready to board.
If a dock is alongside it is a good idea to run a stern line
to the dock, so that the stern can be pulled to the dock
after launching, thus preventing it from swinging around.
A good way of launching in all conditions, if extra help
is available, is for someone on board to start the motor
before launching, and simply back the boat away from the
ramp, remembering to immediately drop the dagger-
board once clear of trailer.
Launching an F-33

Copyright © 2012 By Farrier Marine Page 10 FARRIER MARINE
Folding stability is good, but it is limited, so don't push your
luck. A few owners have managed to roll their folded boats
over. Take particular care with tall rigged Rversions, and
avoid tight fast turns in strong cross winds.
beam locking pins, place your foot on the top of the
upper folding strut, grasp the top of the beam and pull
downwards, while pushing with your foot.
WARNING
Always check that no one has their foot or hand in
or near beam recess when folding as the beams
can come down quickly!
The float will unfold, but be careful it doesn’t pick up
too much speed towards the end. Hold the beam down
and tighten the bolts using a speed wrench. These bolts
should be tightened firmly, but NOT OVERTIGHTENED.
WARNING
The beam bolts must always be in place and
tightened before sailing
If anything seems hard or difficult when folding, STOP
and see if anything is misaligned, or snagged. It is usually
a wingnet catching. Should it be difficult to hold beams
down to tighten the bolts, then usual cause is wingnets
that have been lashed too tightly.
It is not necessary to hold both forward and aft beams
when folding, one person operating either beam is all that
is required, except for larger designs. The wingnets will
extend and tighten themselves. There is a knack in
unfolding of using both your foot to push on the upper
folding strut and your hands to pull the top of the beam in
and down. After a few tries you will find it easy to do.
The side stays are now secured correctly to the float
chainplates, where required. They may already be at-
tached with rotating masts, or where the stays have
Highfield levers fitted. Just close the levers to tension.
With the F-27 & F-9/F-31 fixed mast, the turnbuckle
must be directly connected to chainplate, and there
should be just enough slack in the wire (but not too
much - which can overload tensioners) to insert the
clevis pins. The stays are then tensioned by the block and
All designs are always launched folded, and unfolding
can be done either at the dock, or while motoring away,
even in choppy conditions. Folded stability is good, but
it is limited, particularly on bigger boats like the F-9
& F-32, and even LESS so with 'R' masts.
Take care in strong winds, as it is possible to roll boat
over! If necessary, immediately unfold at least one side
to avoid any risk. The F-32 has a secondary wider folded
beam of 9' 6" which improves folded stability, and if an F-
32R, or motoring very far while folded, use this position.
WARNING
Always take care in strong winds while fully folded
and with mast up. A combination of a fast tight turn
and mast windage and weight could cause a roll
over in such conditions. If in doubt, unfold one or
both sides to eliminate this danger.
See also http://www.f-boat.com/foldedstability/
To unfold, first check that there are no ropes across
the beam recesses, and the tiller is clear. Remove the
Turnbuckles have now been replaced by deadeyes and
lashing on later models - much lighter and easier on boat
F-33 being unfolded at dock. Folding is harder on larger
designs with low profile beams and foot should be placed on
Upper Folding Strut for leverage. May take two, or block
and tackle assistance can be used if necessary - see later.

FARRIER MARINE Page 11 Copyright © 2012 By Farrier Marine
tackle tensioners anchored at the aft beams and at-
tached to the shackle located about 4' up the top stays.
Pull these on firmly, checking that the mast is straight.
The first time out, both tensioner lines should be marked
when the mast is straight, as a reference for future use
and adjustment.
These tensioners on fixed masts need considerable
tightening when going to windward in high winds, as they
keep the mast straight and forestay tight for good point-
ing. Avoid letting the leeward shroud become too loose.
Once adjusted at initial launching, turnbuckles should
not require to be adjusted during subsequent launchings.
Just release the Highfield levers with rotating masts or
turnbuckles from the chainplate with fixed masts.
Rotating mast side stays only need to be moderately
tight, even slightly loose, as a tight rig can restrict rotation.
Thus synthetic stays and the latest deadeye tensioners
can be used with rotating masts, and these save consid-
erable weight aloft, and are much easier to handle.
Once the mast is properly supported by the stays, the
mast raising wires (where needed) can be removed.
The spinnaker pole bowsprit can now be fitted or
extended depending on model.
MAST RAISING ON THE WATER
It may be necessary to sometimes launch with mast
down and raise it later. To do this you will need an
additional strong block to attach to the bow roller/stem
fitting. A spinnaker sheet block is ideal and can be lashed
around bow if no suitable fitting is present. The mast
raising pole/yoke must also be carried on board.
Once in clear water, follow the same mast setup and
raising procedures listed under RIGGING, but instead of
the trailer winch line, a line from a sheet winch to the bow
block, and then back to the jib halyard is used to winch up.
The procedure is reversed for lowering.
BOARDS
The daggerboard or centerboard have two control
lines, one to pull up (red) and one to pull down (blue). The
daggerboard will not kick back, and should break off if it
ever hits bottom hard enough. This protects the dagger-
board case from damage in most cases - a much more
expensive repair.
CAUTION
Even at low speeds, a grounding can cause the
crew to be thrown forward, and care should be
taken to avoid this. Slow down in shallow water.
Obviously, one should always be careful around shal-
low waters, keeping alert, and the boat speed
down. The daggerboard is very strong and will
only break off with an exceptionally hard
grounding. Normally you can expect the boat
to come to a shuddering stop, with no dam-
age, should you hit bottom at speeds less than
5 knots or so. It’s then just a matter of retract-
ing the daggerboard and continuing on your
way.
The daggerboard case itself is exception-
ally strong, and is not likely to be damaged in
a grounding, though this cannot be guaran-
teed. But even with a lost daggerboard, your
Farrier trimaran will still be sailable, and will
still go to windward. In this case you should
allow her to heel as far as possible, submerg-
ing the lee float to pick up lateral area.
The centerboard, as is optional for the F-
F-27 shroud tensioner - these are used to take up the slack
necessary to allow easy connection of the stay to float
chainplate after unfolding.

Copyright © 2012 By Farrier Marine Page 12 FARRIER MARINE
22, F-82, F-32, and F-36, can kick
back and is thus less likely to be
damaged in a grounding. However, it
should only be cleated in a cleat that
will let go at a certain load to avoid any
damage. A clam cleat with the teeth
filed slightly to reduce holding power
can be used for this. Never use a horn
cleat to hold the centerboard down.
When maneuvering in confined
waters always have the board down.
This promotes quick turns, prevent-
ing any sideways motion. In general,
the board should always be down,
except perhaps when running down-
wind in light conditions. However, no
speed advantage has ever been found
for this, so probably easier to just
leave it down.
The board should always be half to fully down when
running or reaching in heavy winds or seas. It greatly
enhances directional control, keeping the tiller very light.
Should you at any time find the helm heavy, then
the causes could be the daggerboard being up, the
rudder has kicked back slightly (always watch for this),
or is not raked forward enough. Another possible
cause can be the mainsail sheeted in too tight (a
common fault). Even in the strongest winds, or the
fastest 20 knot spinnaker run, the helm should always
be light enough for easy one-handed control. If not,
you should check for reasons why.
RUDDER
Kick back rudders were used on all earlier designs, but
these do not work well in shallow water. Later designs
now have lift up daggerboard rudders, which are much
more effective. It is just a simple pull up or push down, and
depth/wetted area can be varied to suit the situation.
The daggerboard blade can also kick back in some
models, or is designed so that case aft end strip will shear
out in any grounding, so boat escapes any damage.
The earlier kick back rudders still work well and have
two control lines, one to pull up and one to pull down.
These should be color coded, with red (for danger) to pull
up, blue, for deep water, to pull down. The rudder will kick
back, should it hit bottom hard enough, the pull down line
pulling through the cleat.
At high speeds, the cleat alone may not be enough to
hold rudder down. In this case, a lock/shear pin can be
fitted through the case and blade as a positive lock down.
It is also a good idea to fit a horn cleat on the tiller as
a backup, but this should only be used if the hold down
cleat is worn, and the lock/shear pin is not available.
Never use the horn cleat where there is a danger of
grounding.
The rudder is held in the up position by the pull up line,
except with transom hung rudders, where the pull down
line can actually work better once the rudder is lifted
vertically.
MAST SETUP
Rig tension and mast setup are very important for
good sailing performance and while rotating masts do not
require much rig tension (to allow full mast rotation), most
owners do not tension the fixed mast rigs enough. To
avoid this, a simple rig tension gauge (Loos Type recom-
mended) available at Marine stores can be purchased,
and this includes hints on tensioning your rig. Rigging
wire will stretch a little initially and all settings should be
checked after a few sails.
Rotating masts can use synthetic rigging, which will
stretch a little more, but this does not matter on a rotating
mast. Synthetic rigging is much lighter, easier on the
boat, easier to handle, and is now the recommended
choice.
Depending on type, synthetic rigging will stretch more
the first time out, sometimes considerably, so it needs to
be tightened up as you go. But once the initial stretching
phase is over it becomes very stable and only needs the
occasional check.
All masts should be set up with some prebend (center
of mast pushed forward). This will range from as little as
F-33 daggerboard rudder, with blade fully down
F-22 daggerboard rudder lifted partially up. The best solution for shallow water

FARRIER MARINE Page 13 Copyright © 2012 By Farrier Marine
SAILING
This manual is not intended to be a Sailing
Instruction Manual, and it is presumed that all owners
will have a basic sailing knowledge and skill. There are
however, many aspects of sailing a Farrier trimaran
efficiently, and the following covers some of these:
THE BASICS
The mainsail is usually hoisted first. Turn directly into
the wind and commence pulling on the halyard. You may
find winching necessary to get the main fully up, and if
fitted, use the jib halyard winch. If the boom roller furling
system is fitted, the main will automatically unroll from the
boom. Winch the halyard tight until all the wrinkles just
disappear from the mainsail luff, no tighter, and lock the
halyard with the rope clutch. The topping lift can now be
eased.
All models sail and tack easily under mainsail alone,
unless a non-standard mainsail with an oversize square-
top/roach has been fitted. These can be impossible to
tack main only, plus be dangerous downwind.
If you have a lot of tacking to clear a channel then it
may be much easier with just the main. You don’t have to
worry about tacking the jib, you won’t be going too fast,
particularly in crowded waters, and visibility is excellent.
The correct technique for sailing mainsail only is to
sheet it free to avoid choking the boat. The traveller can
be locked on the centerline, and the mainsheet slack-
ened off so the boom is about 12" out from center. Your
boat speed should be 5 - 6 knots in 10 to 15 knots of wind,
even better with a rotating mast. If less, then the problem
is an oversheeted main or trying to point too high.
There is a technique involved in sailing main only, and
3/4" with Rotating masts (even less with wing masts), to
3 to 5" with fixed masts. Mainsail should then be cut to
suit this.
There is no correct amount of prebend as such, other
than each mast should have some, as it will help stabilize
the mast, and it can also be used to control the mainsail
shape to some degree. This means that if the mainsail is
cut for say 3" prebend, less will make the main fuller for
light airs. More will tend to flatten the main for windy
conditions.
Prebend in Rotating masts is harder to adjust in this
regard, but the ability to rotate the mast can give an even
greater control over mainsail fullness.
For good windward performance the forestay MUST
BE TIGHT and this is essential. Fixed masts can increase
forestay tension by pulling on the shroud tensioners,
along with more mainsheet tension. Rotating masts can
only use mainsheet tension, but the superior mainsail
shape due to the rotating mast, more than makes up for
any jib luff sag
An important rule, vital to the well being of all masts,
particularly fixed masts, is to be sure that your leeward
cap shroud never becomes TOO LOOSE. Some loose-
ness is not unusual, but if it is very loose and visibly
flopping around, you could risk losing your mast.
To tighten the shrouds on a fixed mast while under-
way, you can use the spinnaker winches on the tensioners,
or else snug up the leeward tensioner a set amount to just
remove any slack. Now tack and pull on the other side an
equal amount. It is easier to tension the leeward shroud
rather than the windward one.
On the F-9/F-31 fixed mast the top shroud's tension in
heavy weather should always be 2500lbs or more..........
Don’t forget to relieve this when not sailing.
Even an extreme racer like the F-32SR can sail well main
only, provided mainsail roach is not oversize

Copyright © 2012 By Farrier Marine Page 14 FARRIER MARINE
once learned how, it is a very relaxed
form of sailing. The secret is to keep
the main eased out more, particularly
after a tack. Don’t try to point high until
boat speed has built up.
Jib halyard can now be connected
and the jib hoisted. Tighten until the
wrinkles just disappear from the jib luff,
using the halyard winch if needed.
There's no need to go any tighter. As
the wind increases you will find the
halyard will need tightening, again, just
enough to just get the wrinkles out.
Sheet the jib and you are sailing!
If available, two additional controls
may be added to the mainsail at this
stage, these being the boom vang (fixed
masts only) which just snaps on, and
the Cunningham eye tackle. A min. 4:1
fiddle block with cleat is snap shackled
to the mast step, and the line from the top fiddle block is
passed through the Cunningham eye on the sail and
connected to the horn cleat on the other side of the mast.
This will give an 8 : 1 purchase, and should be adjusted
to just remove the wrinkles from the mainsail luff. Neither
of these controls are essential for everyday sailing, their
main purpose being to give more efficient control over the
mainsail. Both must be removed when roller furling.
Farrier trimarans are sailed like any other yacht, the
most notable differences being the response, lightness of
helm, and low angle of heel. This ranges from an average
of 5 to 10 degrees to a maximum of about 15 degrees.
Pointing ability is excellent, but care must be taken not
to oversheet or try to point too high. Just a few degrees
less pointing, with sheets slackened slightly, can see
boat speed jump from 6 or 7 knots to 9 or 10 knots.
When reaching, the headsail shape can be improved
by using a barber hauler. This is a line hooked to the
headsail clew, or a small block on the jib sheet (allows
easier tacking), then led to a block attached to an eye on
the float deck and then back to a camcleat on the cockpit
coaming. Two barber haulers give a wide range of sheet
adjustment. One can also be used on the boom to hold it
down while running or reaching. This is more effective
than a traditional boom vang and a good safety feature to
prevent an unexpected jibe.
For the best performance while running, weight should
be kept forward. At least one crew member should sit on
the main hull bow when racing downwind. This reduces
wetted area and can make a significant difference.
REEFING
Several different reefing systems can be fitted, and all
the various operation procedures are well documented.
With jiffy reefing, the reefing lines are led inside the boom
to cleats at the forward end, and if necessary down to the
mast base and then back to a winch.
A roller reefing boom is also optional and this is a very
effective reefing system, being fast, easy to operate, and
infinitely adjustable. The other main advantage is the
ability to easily roll up the mainsail for storage.
Rolled Main
Cunningham Eye line
Eye should also be
lashed around mast
Mast
Roller Furling Boom
Furled mainsail
Boom vang and Cunningham eye controls on an F-27 -
Boom vangs are not used with rotating masts as they will
restrict rotation
Jib barber hauler in use on an F-27 - will considerably boost performance

FARRIER MARINE Page 15 Copyright © 2012 By Farrier Marine
To reef, first disconnect the boom vang (if fitted) and
Cunningham eye tackle. The topping lift should also now
be used to lift the back of the boom a couple of inches
above horizontal. This stops the main from creeping
forward to bind against the mast when furling. This may
not be required, depending on the cut of the mainsail.
Now take the main halyard around the winch and
release the rope clutch. Go forward with the halyard held
in hand, unlock the furling handle and begin turning. As
the main is rolled down, let the halyard slowly run out to
suit. When the main is rolled up sufficiently, lock the
furling handle, let off the topping lift, return to the cockpit
and retension the halyard. Reefing is complete.
You should always try to locate the head of the reefed
mainsail close to or just above a staying point, rather than
in the middle of a mast panel. This avoids unwanted
bending loads on any unsupported mast section.
As mentioned previously, if you find a problem with the
F-28 Mainsail being roller furled. Note foot being used to
control halyard.
Main neatly roller reefed on an F-27
mainsail rolling up close to and jamming against the
mast, this is usually caused by not lifting the end of the
boom sufficiently with the topping lift.
You may also find it easier to regulate the speed at
which the halyard runs out, as you wind the boom, by
using the ball of your foot on the line just before it enters
the mast.
The boom vang cannot be reconnected, but with the
barber hauler system available, if needed, from the
floats, this is not of any importance.
The Cunningham eye tackle can be connected to the
reefing tack eye if wished, as shown, and again used to
tension the luff as required.
It is also advisable to take a line from the Cunningham
eye forward and around the mast. This avoids the possi-
bility of the bolt rope pulling out of the mast groove.
Boomless Mains: These are reefed differently and
can in fact be easier to reef. Luff is reefed the same as jiffy
reefing, using basically an extra long Cunningham Eye
tackle, with a single line threaded through the first reefing
eye. One pull and luff is reefed. It is also a good idea to
take a line around front of mast if reef is likely to last a
while, to ensure main luff cannot pull away from mast.
Leach end uses a rope clutch on side of clew board,
with a line running from opposite side of clewboard, up
through reefing eye, and back down to rope clutch. One
pull and leach is reefed. No need to disconnect main
sheet which just stays attached to clew eye.
ROTATING MAST CONTROL
The correct rotation of a rotating mast will give a much
more efficient and powerful mainsail. It is thus important
that the rig not be set up too tight as this can prevent full
rotation.
There are many opinions on what the correct amount
of rotation should be, but a general guideline is to keep
the mast rotated enough to give a smooth, even transition
from the mast to the mainsail on the leeward side.
An F-25C with boomless main and reefed

Copyright © 2012 By Farrier Marine Page 16 FARRIER MARINE
than an equivalent monohull, but this may not be the
fastest way to windward. A good multihull is capable of
much higher speeds to windward than a mono, which
also brings the apparent wind forward, to where pointing
will be lower, but the speed to windward is much greater.
One thing to avoid is oversheeting the headsail, as
while pulling this on very tight will guarantee a good
pointing angle, the boat speed may be slow. The correct
way is to let the sheet out 1 - 2 “ from being tight on, so
that curve of the headsail leach matches the curve of the
mainsail. It should then not backwind the main, and your
pointing angle and boat speed should both be excellent.
Once you have achieved good boat speed, then
experiment by tightening sheets a little, pointing slightly
higher, while trying to maintain the same boat speed.
The mainsail traveller should be around 6" to wind-
ward in lighter conditions, then around the centerline in
moderate winds, and, as the wind increases, moved to
leeward slightly with more mainsheet tension being ap-
plied. In very strong winds the mainsheet should be
pulled on as tight as possible. Stand above it and pull it
on as hard as you can - most sailors don't have this tight
enough in strong winds. A tight mainsheet helps keep
forestay straight for good pointing ability.
If the jib is backwinding the main,
open the slot, by moving the traveller a
little more to center. Keeping an open
slot between jib and main is crucial to
good windward performance, as any back
winding of the main will choke the boat.
Equally as important, the jib must be
relatively flat with NO HOOK in the leach,
and not oversheeted. Leach battens are
highly recommended to keep the leach
flat.
If set up and sailed correctly, a Farrier
trimaran will match the windward ability
of the best monohull racers, 20 to 30%
larger. Pointing high and going fast is
one of the hardest things to achieve in
any boat, but with a little care and tuning
a Farrier design is one of the best.
The amount of rotation will depend on the type and
shape of mast, and can range from 35 to 90 degrees from
the boat centerline. A good rule of thumb is for the mast
to be rotated around 40 to 50 degrees more than the
boom.
40°
CLOSE HAULED WITH MAST AT 40°
RELA TI V E TO BOOM
Avoid allowing the mast to rotate or swing back and
forth, which can happen in light winds combined with
waves, or when sailing off the wind with less sail pres-
sure. This is usually prevented by having the mainsheet
angled forward from the boom, which forces the boom
forward to keep the mast rotated when pulled tight.
The amount of mast rotation is controlled by a line to
the rotation arm on the mast from either the boom or the
deck. A line from the boom has the advantage of being
self-tacking, by maintaining the mast at a constant rota-
tion angle relative to the boom on all points of sail.
However, the control line will have to be detached from a
roller furling boom and transferred to an eye on the deck
when furling the main.
A control line from the deck is also self-tacking, but it
does not automatically adjust for different angles of sail.
It will thus need to be let out when bearing off. Some
racers like to fit two lines to the deck, one from each side
for absolute control, but this can also be just another
complication and is not necessary for general sailing. A
2 or 4 : 1 tackle is now recommended for the control line,
as the loads here can be high.
WINDWARD PERFORMANCE
All Farrier designs will point very high if set up and
sailed correctly, but this can also be very dependent on
the crew’s skill. It is possible to point just as high or higher
F-33 Mast Rotator Arm & attached to boom for self tacking
F-27 hard on the wind off San Francisco

FARRIER MARINE Page 17 Copyright © 2012 By Farrier Marine
REACHING
When reaching, it is vital that the mainsail be let out far
enough. A common mistake is to sheet it in too tight, with
loss of boat speed, a heavy helm and an excessive heel
angle.
ALWAYS REMEMBER YOU WILL GENERALLY
GO FASTER BY EASING THE SHEETS OUT. PULL-
ING THEM ON TIGHTER IS MORE LIKELY TO SLOW
YOU DOWN
Your mainsail should have leach tell tails fitted as
standard. Watch these, and should they disappear be-
hind the mainsail to leeward, then you are sheeted in too
tight. They should always be flowing aft.
In light winds the mainsheet system can tend to bind
and be hard to let out. To overcome this there is some-
times a lever on the side of the camcleat block that
disconnects the ratchet. The mainsheet system will then
run out easily.
The headsail should also be barber hauled out to the
floats when reaching. This is used to get the perfect
shape in the headsail (so that it doesn’t backwind the
main), and will boost reaching performance significantly.
SCREACHER
This is an optional roller furling wire or synthetic luff
combination genoa/reacher, flown from the spinnaker
bow pole. A separate dedicated halyard just below the
spinnaker halyard is best used for the screacher, as this
allows it to be left up while furled, ready for use.
This multipurpose sail can be a perfect all-around, first
choice, additional sail for cruisers, or an essential power-
house for racers. It is still a developing sail in many
respects, and offers some significant and worthwhile
Screacher being used to windward on F-32SR, while doing
16 knots in 8 knots of wind. Luff could be a little tighter, but
very hard to do with that level of performance. A screacher
is also be a great allround easy to use sail for cruisers.
An F-33 with spinnaker, while screacher can be seen up and furled, ready for use
advantages.
It can be used very effectively to windward in light airs,
if cut for this, and for reaching in moderate airs. It thus
eliminates the regular hank on genoa,
while providing more sail area, and it is
easier to change headsails. The jib is
just dropped and the screacher un-
furled when required. Sheeting can be
a simple strap around the aft beam,
which can be moved in and out for the
correct sheeting angle.
For the best windward performance,
it is very important to keep the luff tight,
and many racing owners have fitted 2
to 1 halyards to keep the clutch loads
lower. However, the risk of twist when
hoisting can then be higher, and cruis-
ers will usually not experience the sort
of high loads that some hard racers
can induce, in the search for the ulti-
mate performance.
The screacher can be tacked easily
when needed by rolling up and then
unrolling on the new side.
SPINNAKER
The spinnaker is an easy sail to use
on a trimaran, due to the wide beam
and level sailing. It is thus a practical
and safe sail for family sailing, with very

Copyright © 2012 By Farrier Marine Page 18 FARRIER MARINE
few control problems. All Farrier designs now only use
asymmetric spinnakers, which are the easiest to use, and
the fastest if used correctly.
The asymmetric spinnaker can be launched from the
leeward wingnet, or main hull bow, and the sheets led
back to blocks on the floats near the aft beams for general
all round performance, though pointing ability is limited.
CAUTION: Avoid using continuous spinnaker
sheets, which can prevent the spinnaker from
being released easily.
For better pointing ability, a closer sheeting angle
is better, and a block on a movable strap around aft beam
works best. The spinnaker can then be set near perfectly,
without a tight foot or a loose and flapping leach.
The tack line is led from a block at end of the pole back
along main deck to a cleat on the aft end of cabin roof. To
set, connect tack line, sheet, and halyard. Pull on tack line
until tack is at the end of pole, hoist and then sheet in.
SPINNAKER JIBING
The asymmetric spinnaker can be jibed either through
inside in front of the screacher or forestay, or around the
outside. With 'inside' jibing the sheets are run between
the spinnaker tack and the screacher if fitted, forestay if
not. Outside jibing requires the sheets to be run outside
the spinnaker tack.
Inside jibing is probably the most common, as
outside jibing does have the risk of a sheet going
under the boat, though this is lessened by using a
continuous one piece sheet, but these have safety
concerns. The advantage is that the sail does not
have to fit through the narrow slot between spinnaker
and screacher.
With inside jibing, the skipper should start turning
slowly while the crew eases the sheet to keep the sail
full. As the clew nears the slot, or the spinnaker starts
to collapse, the new sheet should be quickly hauled in
to pull the spinnaker through the slot and around,
while also releasing the old sheet.
Outside jibing procedure is similar, with the crew
waiting until the clew reaches just in front of the
headstay, and then pulling in the new sheet, with the
sail going around the outside.
In all cases it is very important that the skipper turns
slowly, and then heads up to fill the sail before coming
to the right course.
SPINNAKER SAILING DOWNWIND
On first using an asymmetric spinnaker you may find
downwind performance disappointing with a fixed mast -
unless you note what is said here. The asymmetric
cannot match a symmetric spinnaker straight downwind
because of the smaller, flatter area, and the less projec-
tion to windward. The advantage is considerably easier
handling, and a superior reaching performance.
Tacking downwind does not work well with fixed masts,
as mast interferes with mainsail flow, and the main is not
as effective. A rotating mast is much more efficient and
such boats can achieve a very large performance in-
crease, making downwind tacking the fastest way to go.
However, the same effect can be achieved with a fixed
mast by using the jib inside the spinnaker which, besides
increasing area, helps smooth the flow over the mast and
main with spectacular results.
Asymmetric spinnaker on an F-33R. Jib can also be flown
inside by racers as shown for better performance
Asymmetric spinnaker being used on an F-27 while winning
Australian Nationals

FARRIER MARINE Page 19 Copyright © 2012 By Farrier Marine
need to tack the jib, and the fully battened main remains
docile and easy to handle.
When running downwind in strong winds , it is safer to
run with a headsail only. It is also still possible to go to
windward and tack while sailing under either jib or main-
sail alone.
Strong and gusty Winds:additional caution should
be exercised in gusty winds. Always have the sheet of
the largest sail up, be it the mainsail, genoa, or spinnaker,
in hand, ready for quick release. Use only the cam-
cleats provided and never use self-tailers as cleats in
high winds - they are too difficult to release fast.
Always be ready to release the sheets if you feel the
boat is being pressed too hard. Instruct your crew to do
likewise. If concerned, reef until you are comfortable.
DANGER
Never leave the sheets unattended if unreefed
and the wind is exceeding 20 knots
If being pressed while reaching then it is better to bear
away downwind than round up. The boat will slow down,
and the mast momentum from the turn is to windward,
reducing heel. Round up and speed may increase sur-
prisingly, while mast is thrown to leeward, heeling the
boat more.
The only time to round up is while hard on the wind or
close reaching (do not bear away in either case). Round-
ing up or luffing will feather sails until any gust passes by.
In general, your visual indication of being overpow-
ered is when the leeward float is pressed far enough
down to have waves regularly wash over it. If cruising with
your family, then you should reef before this for the best
comfort. If sailing for speed, this is not of great concern,
providing the crew is vigilant, and this sort of sailing has
been done for hours at very high speeds.
It is not unusual to drive the low resistance float bows
The basic technique is to sail downwind while keeping
the apparent wind at about 90, trimming the sails so they
are not stalling or luffing. The jib, for instance, should be
sheeted to the float just aft of the forward beam. The extra
speed generated will pull the apparent wind further
forward, allowing you to go deeper and deeper while
maintaining a very high speed. Just keep the apparent
wind at around 90. It can be tricky to get the right angles,
but if done correctly, the results can be devastating.
Flying jib inside the spinnaker may also help improve
performance with a rotating mast in light winds, by
smoothing and speeding up the wind flow over the mast.
SAFE SAILING RECOMMENDATIONS
DANGER
Be fully aware that it is possible to capsize any
multihull and the following rules should always
be observed for safe sailing
1. Always reduce sail when required as follows:
Wind Range Maximum Sail Configuration
to 12 knots Genoa or screacher & mainsail
12 -20 knots Jib and mainsail
20 - 25 knots Jib and mainsail with 1st reef
25 - 35 knots Jib and mainsail with 2nd reef
35 - 45 knots Jib only, or Storm jib & main 2nd reef
45 knots + Storm jib or main only with 3rd reef
A more detailed chart for each model is on last page
The sail configurations recommended above are for
standard cruising designs and have been arrived at from
practical experience over many years of sailing Farrier
trimarans in many differing conditions.
If necessary, all sail can be taken
down and a properly set up Storm
Parachute Anchor put out. This is
now a well proven method for a mul-
tihull to survive even the worst off-
shore storm. It appears to virtually
eliminate the danger of capsize from
both extreme wave action and hurri-
cane force winds.
Other variations of the above are
possible depending on the circum-
stances, and racing versions will need
to reef earlier. Experienced and alert
racing crews can also delay reefing
to beyond the above limits.
A quick way to reduce sail, and
achieve a very comfortable and safe
motion is to simply drop the jib and
sail under main only, reefed if con-
sidered necessary. This avoids the
This is definitely not safe sailing with a novice crew aboard! DO NOT do this sort
of thing with family or inexperienced crew on board. To be safe, always reef early.

Copyright © 2012 By Farrier Marine Page 20 FARRIER MARINE
through waves, or even submerge the float in some
circumstances. This has been found to have no adverse
effect on the boat, and in fact the boat will tend to round
up slightly, not slew to leeward as commonly and mistak-
enly believed.
Early Farrier designs used low buoyancy floats, and
frequently completely submerged the leeward float, with
speeds in excess of 15 knots, for quite some time, with no
ill effect on the boat. However, this is sailing on the limit,
and don't push your luck unless prepared for a ducking.
Beware of being caught side on, with little speed
and with all sails sheeted in tight. This can happen after
a tack if concentration is lost. Any strong gust in this
situation can be turned into a 100% heel/capsize force,
whereas if boat is moving it will
tend to accelerate to absorb the
gust rather than heel over and
get bogged down
Thunderstorms: If caught in
a severe thunderstorm, a simple
safety procedure is to drop all
sail and simply let the boat drift.
You will lie side on to the wind
which is quite safe, unless the
waves are very large, in which
case you should steer off down-
wind. Farrier designs will steer
quite well from a reach to a run
with no sails up in any winds over
5 knots - try it sometime. It is
even possible to round up into
the wind.
Anchoring in Storms:
Another safety procedure in a
severe storm is to simply drop all
sails and anchor, and this is a
frequently overlooked safety proce-
dure. It is very effective. At sea a Storm
Parachute anchor has the same effect.
Always carry full safety gear,
including life jackets, as required by
U.S. Coast Guard and local regula-
tions.
Check Weather Forecast: Al-
ways listen to the latest weather fore-
cast before you set out on any sailing
trip.
Use Large Safety Margins: Al-
ways leave a large safety margin, be it
while sailing, or just motoring around.
The above procedures will give a high
margin of safety and should always be observed when-
ever safety is paramount. If absolute performance is
required, and an experienced crew is aboard, the above
limits can be exceeded. In some earlier sea trials full sail
has been carried in over 40 knots of wind, including the
spinnaker. This is not for the inexperienced however, and
any skipper doing such sailing must be prepared for and
accept the responsibility for the extra risks involved. It
should not be done offshore.
SAILING HINTS
Farrier trimarans have several unique sailing features,
one of these being the ability to make continuous 360
degree turns in the one spot. To do this, while going to
windward for instance, just tack, but don’t touch any of the
sheets. You will continue to turn, jibe, and tack again
All Farrier designs are well tested, and very seaworthy, but don't push your luck
For safety, when sailing hard, ALWAYS keep sheet in hand ready for quick release
This manual suits for next models
8
Table of contents
Popular Boat manuals by other brands

Classic Accessories
Classic Accessories Roanoke owner's manual

Beavertail
Beavertail STEALTH 2000 owner's manual

Ranger boats
Ranger boats RT Series Owner's/operator's manual

Volvo Penta
Volvo Penta D6 Operator's manual

Bayliner
Bayliner Classic Runabouts owner's manual

Pro-Line Boats
Pro-Line Boats 26 Super Sport owner's manual

Regal
Regal 38GC owner's manual

Malibu Boats
Malibu Boats Response owner's manual

Sea Eagle Boats
Sea Eagle Boats 285 FPB Instructions and owner's manual

Hobie
Hobie Getaway Illustrated Part Guide

Cruisers Yachts
Cruisers Yachts 3075 Express Series owner's manual

Yamaha
Yamaha VX WaveRunner 2007 Owner's/operator's manual