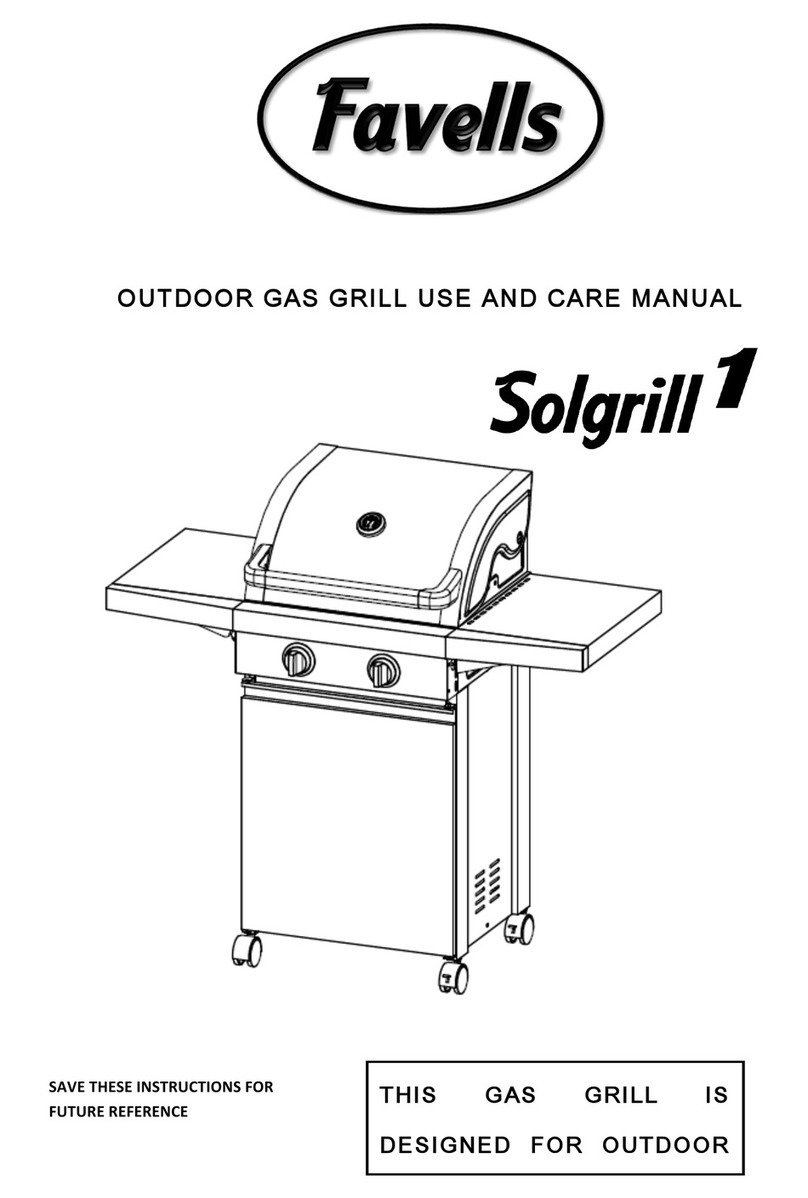
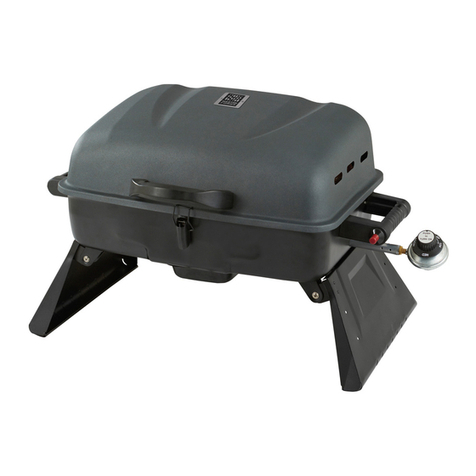
Favells Bronzgrill 1 User manual

OUTDOOR GAS GRILL USE AND CARE MANUAL
!
!
"#$%!&'%"%!()"&*+,&(-)"!.-*!
.+&+*%!*%.%*%),%!
!
!
!
THIS GAS GRILL IS
DESIGNED FOR OUTDOOR
USE ONLY

1
!
(/0-*&#)&1!*%#2!#33!()"&*+,&(-)"!#)2!-0%*#&(-)"!4%.-*%!-0%*#&()5!&'("!+)(&6!
.-33-7!#33!"&%0"!()!-*2%*6!)%$%*!#33-7!,'(32*%)!&-!-0%*#&%!&'("!+)(&6!
789:;:<=1!
Only%to%be%used%outdoors.%
Read%the%instructions%before%using%the%appliance.%
Accessible%parts%maybe%very%hot,%keep%young%children%away.%
Do%not%move%the%appliance%during%use.% %
Turn%off%the%gas%supply%at%the%gas%container%after%use.%
Any%modification%of%the%appliance%may%be%dangerous.%
Parts%sealed%by%the%manufacturer%or%his%agent%must%not%be%altered%by%the%user.%
If%the%ground%temperature%is%above%50k,%the%surface%needs%protection.%
#>>?:>;@:1!
Some%parts%of%this%appliance%become%very%hot,%take%special%care%when%children%or%elderly%are%
present.%
.@9!A@B9!=8C?>A1!
Do%not%store%or%use%gasoline%or%mentholated%fuels%or%any%other%flammable%vapors%and%liquids%
in%the%vicinity%of%this%or%any%other%appliance.%
Never%light%a%gas%grill%with%gasoline%or%comparable%fluids!%
Suggestion:%user%should%not%change%the%assembly%that%the%manufacturer%packaged.%
!
The%gas%cylinder%is%recommend%to%13kg%LPG%gas%bottle,%it%is%sufficient%for%a%heating%period%of%
approx.9.5%hours%with%full%power.%
D6!&?EF:;E8G!H8>8!
%
!
!
!
!
!
!
!
!
!
!
!
!
!
!
!
!
!
!
!
!
!

2
!
I6!%JKG@H?H!$;?L!
!
M6!";:<G?!K89>!G;=>!
=?N6!)-6!
8KK?GG8>;@:!
O>A!
=?N6!
)-6!
8KK?GG8>;@:!
O>A!
1%
lid%
1%
2%
lid%handle%
1%
3%
thermometer%
1%
4%
firebox%right%panel%
1%
5%
shutter%right%panel%
1%
6%
warming%rack%bracket%
2%
7%
shutter%left%panel%
1%
8%
shutter%cover%board%
1%
9%
Crossover%bracket%assembly%
4%
10%
main%burner%tube%assembly%
5%
11%
firebox%left%panel%
1%
12%
inner%control%panel%
1%
%
%
%
14%
grease%tray%
1%
15%
control%panel%assembly%
1%
16%
control%knob%
3%
17%
cart%left%panel%assembly%
1%
18%
cart%right%panel%assembly%
1%
19%
cart%bottom%panel%
1%
20%
cart%back%panel%
1%
21%
wheel%
4%
22%
cart%beam%
1%
23%
door%bottom%gemel%
2%
24%
door%assembly%
2%
25%
door%magnet%
1%
26%
heat%distribution%panel%
3%
27%
warming%rack%
1%
28%
cooking%grids%
2%
29%
right%side%table%
1%
30%
side%table%bracket%1%
2%

3
31%
side%table%bracket%2%
2%
32%
Side%burner%layer%
1%
!
P6!.;J;:<!?G?Q?:>=!
!
4!
,!
%
!
M6X12%hexage%screw%
Plastic%washer%
M6X12%screw%
%aluminum%washer%
10%set%
4%set%
%
%
R6!/@B:>;:<!=>?K=!
Make%sure%your%grill%is%assembled%properly.%Detailed%assembly%instructions%are%packed%with%
each% grill% giving% specific% assembly% procedures% for% each% model.%Follow% these% instructions%
carefully%to%ensure%the%correct%and%safe%assembly%of%the%grill.%
!
,8B>;@:1!Although% we% take% every% effort% to% ensure% that% the% assembly% process% is% as% easy% as%
possible,%it%is% inherent%with%fabricated%steel%parts%that%corners%and%edged%can%cause%cuts%if%
improperly%handled%during%assembly%procedures.%Be%careful%while%handling%any%parts%during%
assembly.%It%is%strongly%recommended%that%you%protect%hands%with%a%pair%of%work%gloves.%
%
%
!
%
Use%two%B%screws%to%connect%the%cart%left%side%panel%and%cart%bottom%panel.%(See%figure%1%for%
reference)%
%
%
!
!
!
!
!
!
!
!
!
.;<B9?!D!
%
%
%
%
.;<B9?!D!

4
Use%two%B%screws%to%connect%the%cart%right%side%panel%and%cart%bottom%panel.%(See%figure%2%
for%reference)%
!
%
%
%
%
%
%
%
%
%
%
%
%
%
%
%
%
.;<B9?!I!
!
Use% four% B% screws% to% connect% the% cart% back% panel% and% cart% assy.% % %(See% figure%3%for%
reference)%
!
!
!
!
!
!
!
!
!
.;<B9?!M%
!
!
!
!
!
!
!
!
.;<B9?!M!
!
!
!

5
!
!
Fix%four%wheels%on%the%pipes%of%the%cart%assy.%(See%figure%4%for%reference)%
%
%
%
%
%
%
%
%
%
%
%
%
%
%
%
%
%
%
%
!
.;<B9?!P!
!
Use%two%B%screws%to%fix%the%door%beam%on%the%cart%assy.%(See%figure%5%for%reference)%
!
!
!
!
!
!
!
!
!
!
!
!
!
!
!
!
!
!
!
.;<B9?!R%

6
%
Utilize%the%wedges%to%put%the%front%hood%assy%on%the%cart%assy.% % (See%figure%6%for%reference)%
!
!
!
!
!
!
!
!
!
.;<B9?!S!
!
!
!
!
!
!
!
!
.;<B9?!S!
!
!
!
%
Put%the%grease%tray%into%the%brace.%(See%figure%7%for%reference)%
%
%
%
%
%
%
%
%
%
%
%
%
%
%
%
%
%
%
%
.;<B9?!T!

7
!
Assemble%two%doors%on% the%cart%assy.%Pls%note%the%spring%hinges%under%the%control%panel%,%
first% hold% down% the% spring% hinge,% then% push% it% into% the% hole% of% door.%(See%figure%8%for%
reference)%
%
%
%
%
%
%
%
%
%
%
%
%
%
%
%
%
.;<B9?!U%
!
!
.;<B9?!U!
!
!
%Put%two%pipes%into%the%right%side%table%.%(See%figure%9%for%reference)%
!
!
!
!
!
!
!
!
!
!
!
!
!
!
!
.;<B9?!V%
!
!
.;<B9?!V!

8
!
%
Utilize%the%wedges%to%assemble%the%right%side%table%assy%on%the%firebox%assy.%(See%figure%10%
for%reference)%
!
!
!
!
!
!
!
!
!
!
!
!
!
!
!
!
!
!
!
!
!
.;<B9?!DW%
!
Use%two%C%screws%to%fix%the%side%table%with%the%firebox%firmly.%(See%figure%11%for%reference)%
%
%
%
%
%
%
%
%
%
%
%
%
%
%
%
%
%
%

9
.;<B9?!DD%
%
Put%two%pipes%into%the%left%side%burner.%(See%figure%12%for%reference)%
%
%
%
%
%
%
%
%
%
%
%
%
%
%
.;<B9?!DI!
!
!
%Utilize%the%wedges%to%assemble%the%left%side%burner%assy%on%the%firebox%assy.%(See%figure%13%
for%reference)%%%%%%%%%%%%%%%%%%%%%%%%%%%%%%%%%%%%%%%%%%%%%%%%%%%%%%%%%%%%%%%%%%%%%%%%%%%%%%%%%%
%
%
%
%
%
%
%
%
%
%
%
%
%
%
%
%
%
%
%
%
.;<B9?!DM%
!
!
!

10
!
%Use%two%C%screws%to%fix%the%side%burner%with%the%firebox%firmly.%(See%figure%14%for%reference)%
%
%
%
%
%
%
%
%
%
%
%
%
%
%
.;<B9?!DP!
!
!
Use% two% A% screws% to% fix% the% nozzle% of% side% burner% on% the% side% burner% insert% tray% bracket.%
Remember%the%nozzle%should%aim%at%the%gas%inner%hole.%(See%figure%15%for%reference)%
!
!
!
!
!
!
!
!
!
%
%
%
%
%
%
%
%
!
!
!
!
!
!
!
.;<B9?!DS!

11
S6!09?K898>;@:!
You% will% need% to% purchase% a13kg% LPG% gas% bottle% and% the% pressure% regulator% should%
correspond%to%the%pressure%and%gas%category%of%the%appliance%which%can%be%obtained%from%
your% nearest% Gas% Retailer.% The% regulator% should% be% comply% with% EN12864% with% current%
version%and%national%regulation.%
You%will%need%to%purchase%a%gas%bottle%and%a%28^30%mbar%regulator%to%operate%this%gas%grill%
which%can%be%obtained%from%your%nearest%Gas%Retailer.%
See%point%9%for%farther%instructions.%
%:?9<A!=8X;:<!>;K=1!
a) Reduce%the%opening%time%of%the%lid.%
b) Turn%the%grill%off%as%soon%as%cooking%is%completed.%
c) Preheat%the%gas%grill%for%10%to%15%minutes%only.%
(Except%for%the%first%use)%
d) Do%not%preheat%longer%then%recommended.%
e) Do%not%use%a%higher%setting%than%required.%
Connect%the%hose%and%regulator%to%the%gas%container%at%the%right%side%of%the%gas%grill%.Keeping%
in%mind%that%the%gas%container%must%be%kept%away%from%heat%and%in%a%safe%position%.The%hose%
dimension%is%8mm%diameter.%
%
T6!(:=>8GG8>;@:%
After%purchasing%your%gas%bottle%you%will%then%be%ready%to%set%it%up%with%your%gas%grill.%
a) 7F?:! EF8:<;:<! >F?! <8=! Y@>>G?! LF;EF! =F8GG! Y?! E899;?H! @B>! 8L8A! C9@Q! 8:A! =@B9E?! @C!
;<:;>;@:6%Position%the%gas%bottle%at%the%side%of%your%gas%grill,%not%underneath,%keeping%in%
mind%that%the%bottle%must%be%kept%away%from%heat%and%in%a%safe%position.%
b) When%ready%to%use%your%gas%grill%insert%the%regulator%into%the%gas%bottle%valve%and%tighten%
firmly.!&F?!Q8J;QBQ!G?:<>F!@C!F@=?!=F8GG!:@>!?JE??H!D6RQ6%
%
%
%
789:;:<1%Before%attempting%to%light%your%gas%grill%you%must%refer%to%your%lighting%
instructions%and%warning%/%safety%points.%
Check%the%hose%before%each%use,%searching%for%cracking,%cuts%or%any%abrasions.%If%the%hose%is%
found%to%be%faulty%in%any%way%do%not%attempt%to%use%your%gas%grill.%
When% changing% your% gas% bottle% ensures%that%there%are%no%sources%of%ignition%close%by%i.e.%
fires,%cigarettes,%naked%flames%etc.%Make%sure%that%the%appliance%is%switched%off.%
%:=B9?!>F8>!>F?!F@=?!;=!:@>!=BYZ?E>?H!>@!>L;=>;:<%which%will%affect%the%gas%flow%when%using%
your%gas%grill.%Also%the%hose%must%not%have%undue%tension%and%must%not%touch%any%part%of%the%
gas%grill%which%may%be%hot.%
0G?8=?!EF@@=?!CG?J;YG?!F@=?!LF@=?!F?8>K9@@C!F;<F?9!>F8:!UW!
%X?9A!I!A?89=!EF8:<;:<!>F?!CG?J;YG?!F@=?!LF?:!>F?!:8>;@:8G!E@:H;>;@:=!9?NB;9?!;>6!
!
!
!
!
!
!

12
'@L!>@!E@::?E>!8!<8=!Y@>>G?!
a) Turn%the%orange%cap%so%that%the%arrow%is%pointing%to%the%gap%in%the%shroud.%
b) Remove% the% orange% safety% cap% by% pulling% the% lanyard% out,% then% out.% Do% not% use% tools.%
Leave%the%cap%hanging.%
c) Check%that%the%black%sealing%washer%is%fitted%inside%the%cylinder%valve.%Place%the%regulator%
down%over%the%valve%with%switch.%
d) Turn%the%switch%clockwise%on%gas%bottle^then%turn%on%the%gas%grill%as%instructed.%
!
!
!
!
!
!
!
!
!
!
!
!
!
!
.;<B9?!DT!%
!
789:;:<1! Always% test% gas% line% for% leaks% at% connector% with% soap% water% finishing% all%
connections.%
%
%
'@L!>@!H;=E@::?E>!8!<8=!Y@>>G?!
a) Except% for% twin^cylinder% installations% with% a% changeover% valve,% turn% off% the% gas% tap% if%
fitted% to% the%appliance.%Wait%until% the% burner% and% pilot% light% have% gone% out.% For%
installations% with% a% changeover% valve,% it% is% only% necessary% to% switch% off% the% empty%
cylinder.%
b) Replace%the%orange%safety%cap%onto%the%empty%cylinder.%
%
U6!789:;:<!8:H!=8C?>A!K@;:>=!
Please%read%the%following%points%before%using%your%gas%grill:%
a) *?8H!>F?!;:=>9BE>;@:=!Y?C@9?!B=;:<!>F?!8KKG;8:E?.%Please%follow%all%assembly%instructions%
in%this%manual;%if%instructions%are%not%followed%it%may%cause%problems%in%use.%
b) This%gas%grill%accessible!K89>=!Q8AY?! X?9A! F@>! LF?:! Y?;:<! B=?H6! [??K!A@B:<!EF;GH9?:!
8L8A6%Use%protective%when%handling%particularly%hot%components.%
c) In%the%event%of%a%gas%leak%shut%off%gas%to%the%gas%grill,%extinguish%any%open%flames,%open%
lid%and%if%leak%continues%check%for%damages,%poor%connections%etc.%Contact%your%local%gas%
dealer%immediately%if%the%problem%can’t%be%solved.%
d) 2@!:@>!Q@X?!58=!<9;GG!HB9;:<!B=?.%
e) Do%not%use%or%store%any%flammable%liquids%or%vapors%in%the%vicinity%when%operating%the%
gas%grill.%
f) This%gas%grill%only!>@!Y?!B=?H!@B>H@@9=6%
g) Do%not%use%a%naked%flame%to%check%for%gas%leaks.%

13
h) Do%not%operate%gas%grill%if%there%is%a%gas%leak.%Turn%off%the%gas%supply.%
i) Do%not%attempt%to%disconnect%any%gas%fitting%part%if%your%gas%grill%is%being%used,%on%the%
gas%grill%or%the%gas%regulator%/%bottle.%
j) Care%is%advised%when%operating%your%gas%grill,%you%should%never%leave%unattended%when%
in%use.%Turn%off%the%gas%supply%at%the%gas%container%after%use.%
k) The%gas%grill%should%be%cleaned%on%a%regular%basis.%
Take% care% not% to% enlarge% burner% ports% or% orifice/nozzle%openings%when%cleaning%the%
burner%or%valves.%
l) Do% not% attempt% to% use% this% appliance% in% a% garage% or% any% enclosed% area.% Also% >F;=!
8KKG;8:E?!QB=>!Y?!\??K!8L8A!C9@Q!CG8QQ8YG?!Q8>?9;8G=,%etc.%We%recommend%keeping%
a%distance%of%at%least%0.5%to%1.0%meter%clear%of%any%flammable%materials.%
m) We% would% recommend% that% this% gas% grill% be%serviced%by%your%local%gas%retail%outlet%at%
least% once% a% year% by% a% competent% engineer.% Do% not% attempt% to% service% this% appliance%
yourself.%
n) #:A!Q@H;C;E8>;@:!@C!>F?!8KKG;8:E?!Q8A!Y?!H8:<?9@B=.%Do%not%attempt%any%unauthorized%
interference%of%the%main%controls%on%this%gas%grill,%i.e.%gas%taps,%injectors,%valves%etc.%
%
%
.;<B9?!DU!
%
7#*)()51! &F?! '8:HG?! 4G8E\! #9?8! ]"??! #Y@X?! 0;E>B9?! C@9!*?C?9?:E?^!7;GG!
4?E@Q?! '@>! 7F?:! >F?!58=! <9;GG! (:!+=?_! 4%!,#*%.+3`!2@!)@>!&@BEF!&F?!4G8E\!
#9?86!
!
%
V6!"8C?>A!K9?E8B>;@:=!
a)%Always%test%gas%line%for%leaks%at%connector%with%soapy%water%after%making%connections.%
b)%The%top%lid%must%always%be%open%when%lighting%the%burner.%
c)%Use%oven%gloves%and%sturdy,%long%handled%gas%grill%tools%when%cooking%on%the%grill.%
d)% Be%prepared%if%an%accident%or%fire%should%occur.%Know%where%the%first%aid%kit%and%fire%
extinguishers%are%and%know%how%to%use%them.%
e)%Keep%any%electrical%supply%cord%and%the%fuel%supply%hose%away%from%any%heated%surfaces.%
f)%Always%cook%with%great%care.%
%
DW6!3;<F>;:<!;:=>9BE>;@:=!
,8B>;@::%The%lid%must%be%open%when%lighting%the%burner!%
Do%not%stand%with%your%face%directly%over%the%gas%grill%when%lighting%it.%
Your%gas%grill%will%have%following%method%of%ignition:%
%
0;G@>!58=!,@:>9@G!(<:;>;@:1!
With%all%gas%controls%on%the%Gas%grill%in%the%“OFF”%position,%turn%the%gas%cylinder%valve%to%the%
on%position%at% the%regulator.% To%create%a% spark%you%must%push% the%control%knob% in% (A)%and%
hold%in%this%position%for%3^5%seconds%to%allow%gas%flow%and%then%turn%anticlockwise%to”%HIGH”%

14
(B).%It%can%spark%to%the%burner%lighting%tube%(C).%You%will%hear%a%“snap”%from%the%igniter%and%
you%will%also%see%a%3”^5”%orange%flame%coming%from%the%burner%lighting%tube%at%the%left%side%
of%the%burner%(D).%
Continue%to%hold%the%burner%control%knob%in%for%two%seconds%after%the%“snap”,%this%will%allow%
gas%to%flow%completely%down%the%burner%tube%(E)%and%insure%ignition.% %
When%the%burner%is%alight,%adjacent%burners%will%cross%light%when%their%controls%are%turned%to%
“HIGH”%
At%“High”%setting%the%burner%flame%should%be%approximately%12^20mm%long%with%a%minimum%
of%orange%flame.%Turn%the%gas%control%fully%anticlockwise%for%minimum%setting.%
Should%you%have%any%difficulty%lighting%your%gas%grill%following%the%above%steps,%contact%your%
dealer%for%advice.%
%
%
%
%
%
!
!
!
!
!
!
!
!
!
!
.;<B9?!DV%
%
DD6!">@98<?!
Your%Gas%Bottle%must%be%stored%outdoors%in%a%well%ventilated%area%and%must%be%disconnected%
from%your%gas%grill%when%not%being%used.%Ensure%that%you%are%outdoors%and%away%from%any%
sources%of%ignition%before%attempting%to%disconnect%your%gas%bottle%from%your%gas%grill.%
When%you%are%using%your%gas%grill%after%a%period%of%storage,%please%ensure%to%check%for%gas%
leaks%and%check%for%any%obstructions%in%the%burner%etc.%before%using.%Also%follow%the%cleaning%
instructions%to%ensure%gas%grill%is%safe.%
If%gas% grill%is%stored%outdoors%ensure%to%check%that%all%areas%under%the%front%panel%are%free%
from%any%obstructions%(insects%etc.)%This%area%must%be%kept%free%as%this%may%affect%the%flow%of%
Warning : If the burner still does not light ,turn the burner control knob
to” OFF” and wait 5 minutes to let the gas clear before lighting again.

15
combustion%or%ventilation%air.%
%
DI6!,G?8:;:<!;:=>9BE>;@:=!
Maintenance% is% recommended% that% every% 90% days% for% your% gas% grill,%but% it% is% absolutely%
necessary%to%perform%maintenance%at%least%once%a%year.%By%doing%so%you%will%extend%the%life%
of%your%gas%grill.%
!
Your% gas% grill% is%easy%to%clean%with%minimum%effort,%just%follow%these%helpful%hints%for%
cleaning%convenience.%
&9@BYG?!"F@@>;:<! !
09@YG?Q! ! ! %%%%%%%%%%%%%%%%%%%%%! !
0@==;YG?!,8B=?%%%%%%%%%%%%%%%%%%!
"@GB>;@:%
!
Burners%will%not%light%using% %
the%ignition%system% % % % % % % % % % % % %
LP% gas% cylinder% empty% % % % % % % % % % % %
Faulty%regulator% % % % % % % % % % % % % % % % % !
Replace%with%full%cylinder% %
Have% regulator% checked% or%
replaced%
Low% flame% or% flashback% (fire%
in% burner% tube^a% hissing% or%
roaring%noise%may%be%heard)
!
Windy%conditions.% % % % % % %%%%%%%%%
Obstructions% in% gas% jets% or%
hose.% % % %
Obstructions%in%burners% % % % % % % % % % %
Obstructions% in% gas% jets% or%
hose.% % % %
Obstructions%in%burners% % % % % % % % % % %
Clean%burners%
Clean%jets%and%hose
Clean%burners%
Clean%jets%and%hose
Use%BBQ%in%a%more%
sheltered%spot!
Gas% valve% knob% difficult% to%
turn.% % % %
Gas%valve%jammed% % % % % % % % % % % % % % % !
Replace%gas%valve!
%
If%your%problem%is%not%resolved%from%the%information%above,%please%call%the%Gas%grill%helpline.%
a) Turn%the%burner%on%for%15%to%20%minutes.%Grease%drippings%will%be%burned%off%from%your%
grill%as%well%as%your%lava%rock.%Ensure%appliance%is%cold%before%continuing.%
b) Grids%should%be%cleaned%periodically%by%soaking%and%washing%in%soapy%water.%
c) The%interior% surfaces%of% the%grill%housing% cover%should% also%be% washed%with%hot,%soapy%
water.%Use%a%wire%brush,%steel%wool%or%a%scouring%pad%to%remove%stubborn%spots.%
d) Periodically%check%the% burner%to%see%that%it%is%free%from% insects%and%spiders%which%may%
clog% the% gas% system,% deflecting%gas%flow.% Ensure%to%clean%venturi%pipes%on%burner%very%
carefully,%make%sure%that%there%are%no%obstructions.%We%recommend%that%you%use%a%pipe%
cleaner%to%clean%the%venturi%pipe%area.%
e) Any%modifications%of%this%appliance%may%be%dangerous%and%are%not%permitted.%
%
DM6!58=!<9;GG!"8C?>A!';:>=!
Stand%your%gas% grill%on%a%safe%level%surface,%away%from%inflammable%items%such%as%wooden%
fences%or%overhanging%tree%branches.%
Never%use%your%gas%grill%indoors!%
Once%lit%do%not%move%your%gas%grill%or%leave%it%unattended.%
Keep%children%and%pets%at%a%safe%distance%from%the%gas%grill.%
Keep%a%fire%extinguisher%handy.%
The%gas%grill%will%become%hot%when%in%use,%so%handle%lids%etc.%with%the%help%of%gloves.%
Ensure%that%the%appliance%has%completely%cooled%down%before%storing.%
%
%
%

16
%
Use%outdoors%only!%
Read%the%instructions%before%using%the%gas%grill.%
Assessable%parts%may%be%very%hot,%Keep%young%children%away!%
Do%not%move%the%gas%grill%during%using.%
Turn%off%the%gas%supply%at%the%gas%container%after%use.%
Any%modification%of%the%appliance%may%be%dangerous%and%be%not%permitted.%

17
Table of contents
Other Favells Grill manuals
Popular Grill manuals by other brands
Barazza
Barazza B Free Series Installation and use manual

Ninja
Ninja Foodi LG450CCO owner's guide

Z GRILLS
Z GRILLS ZPG-450A owner's manual
Megamaster
Megamaster 570 Elite Assembly & operating instructions
SEVERIN
SEVERIN PARTYGRILL MIT NATURGRILLSTEIN RG 2619 Dimensions
Gasmate
Gasmate AVENIR GM172-146 manual
Char-Broil
Char-Broil 415.16120801 Product guide

Louisiana Grills
Louisiana Grills LGK13 Assembly and operation

Lotus cooker
Lotus cooker CW-74ET Instructions for installation and use
Megamaster
Megamaster Blaze 500 Maxim Assembly & operating instructions

EXPERT GRILL
EXPERT GRILL XG18-102-001-19 owner's manual

PARRY
PARRY 7073 Product instructions
