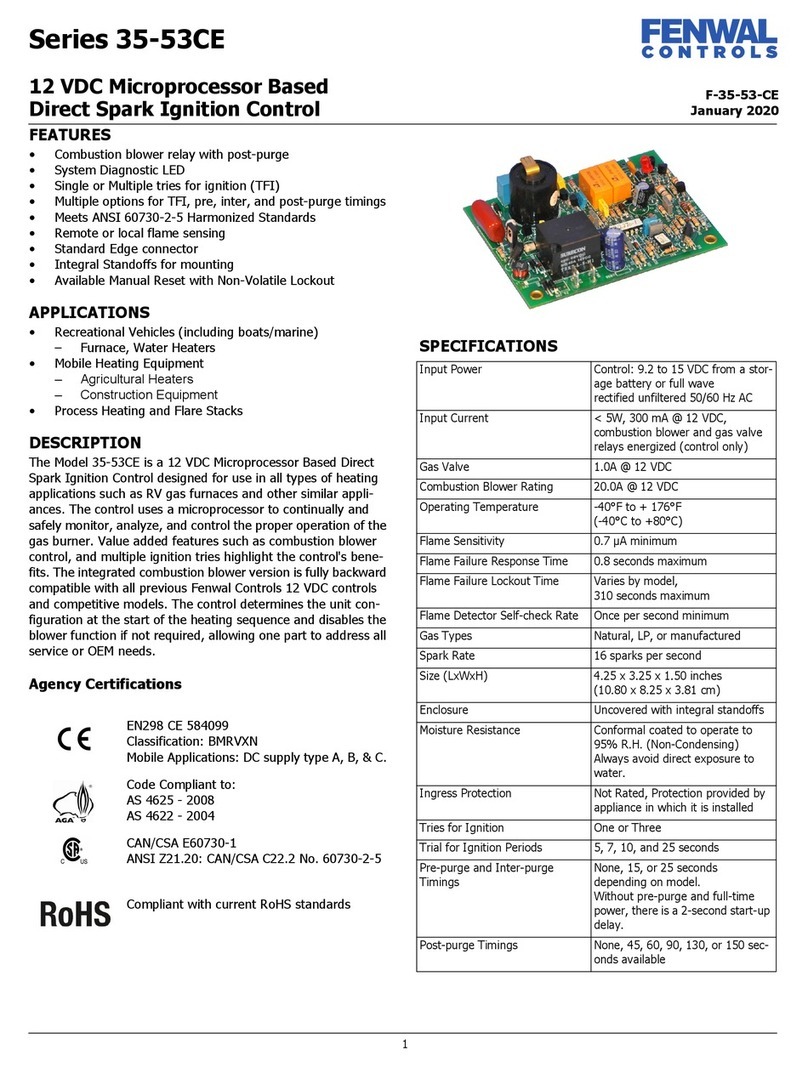
Fenwal Controls 35-608 Series User manual

06-237172-002
October 2018
1
APPLICATIONS
The Fenwal 35-608 series Direct Spark Control (35-608) is a
microprocessor based control suitable for many types of heat-
ing applications including HVAC, commercial cooking, furnaces,
boilers, and water heaters that require direct spark ignition,
burner supervision through flame rectification, and safety shut-
off. It is designed for use with Natural, LP, and mixed gases
used in gas-fired appliances.
The microprocessor circuit design of the 35-608 provides pre-
cise, repeatable timing and operating sequences. High energy
spark output and excellent flame sense characteristics provide
reliable burner operation. The on-board diagnostics with LED
output make troubleshooting easy and ensure safe and efficient
operation.
FEATURES
• Safe start and full-time flame sensing
• Automatic 1 hour reset after lockout option*
• Wide variety of prepurge and interpurge timings**
• Single or three trials for ignition
• Diagnostic LED with Fenwal error codes
• Green power LED
• Remote or local flame sense options
• RoHS compliant
AGENCY CERTIFICATIONS***
EN298 Classification AMC/RLXK
* Automatic reset after 1 hour is not allowed for CE
approved models.
** Prepurge time cannot exceed interpurge time on CE
approved models.
*** Certification varies by model.
**** EMC emission requirements shall be verified after
incorporation of the burner control system into the end
use appliance.
CSA Design certified to ANSI Z21.20,
CAN/CSA C22.2 No. 199-M99
SPECIFICATIONS
Input Power Control: 18-30 VAC 50/60 Hz, 8W
(Class 2 Transformer)
Input Current Drain 300 mA @ 24 VAC with gas valve
relay energized (Control only)
Main Gas Valve 5.0A max (continuous)
Operating Ambient Temperature -40°F to + 176°F
(-40°C to +80°C)
Storage Temperature -40°F to + 185°F
(-40°C to +85°C)
Flame Sensitivity 0.7 μA minimum
Flame Failure Response or
Reignition Time
0.8 seconds minimum
Flame Detector Self-check Rate Once per second minimum
Flame Failure Lockout Time Varies by model, 300 seconds
maximum
Types of Gas Natural, LP, or manufactured
Spark Rate Remote sense (50/60 Hz)
Local sense (25/30 Hz)
Size (LxWxH) 5.20 x 3.95 x 2.50 inches
(13.21 x 10.03 x 6.35 cm)
Moisture Resistance Conformal coated to operate non-
condensing to 95% R.H.
Ingress Protection Not Rated, Protection provided by
appliance in which it is installed
Tries for Ignition One or three try versions available
Trial for Ignition Periods 4, 7, 10, and 15 seconds available
Pre-purge Timings None, 15, or 30 seconds available
Inter-purge Timings None, 15, or 30 seconds available
SERIES 35-608
INSTALLATION INSTRUCTIONS FOR FENWAL SERIES 35-608
DIRECT SPARK IGNITION CONTROLS

Effective: October 2018
2 06-237172-002
INSTALLATION GUIDELINES
MOUNTING AND WIRING
The 35-608 is not position sensitive and can be mounted verti-
cally or horizontally. The case may be mounted on any surface
with #6 sheet metal screws.
WIRING DIAGRAMS
Figure 1. 35-6086 5/6 Pin
CAUTION
Label all wires prior to disconnection when ser-
vicing or replacing controls. Wiring errors can
cause improper and dangerous
operation. A functional checkout of a replace-
ment control should always be performed.
WARNING
The control must be mounted and located in a
manner which protects components from expo-
sure to water (dripping, condensate, spraying,
rain). Any control that has been exposed to
water must be replaced.
WARNING
All wiring must be done in accordance with
both local and national electrical code. Wiring
must be at least #18 AWG rated for 105°C or
higher.
WARNING
The 35-608 uses voltages of shock hazard
potential. Wiring and initial operation must be
done by qualified service technician.
WARNING
Operation outside specifications could result in
failure of the Fenwal product and other equip-
ment with injury to people and property.
6-Pin Standard 35-608 Model (.156” Header)
Name Description Connection
MV Main Gas Valve Pin 1
TH Thermostat Pin 2
GND Ground Pin 3
GND Ground Pin 4
LAMP (NC) Normally Closed Pin 5
S1 Flame Sense Pin 6
6-Pin 35-6084 Model (.156” Header)
Name Description Connection
NC Alarm Lamp 24 Vac Pin 1
Reset Input (Special Order) Pin 2
TH Thermostat Pin 3
Valve GND Ground for Valve Pin 4
Valve Valve 24 Vac Pin 5
GND Control Ground Pin 6
S1 Remote Flame Sense Q.C. Terminal
.250” Wide
8-Pin CE (EN298) Special Model (35-608300-015)
(.156” Header)
Name Description Connection
ALARM Lockout Pin 1
24V 24 VAC Power Pin 2
RESET Manual Reset Pin 3
TH Thermostat Pin 4
GND Valve Return Pin 5
MV Main Gas Valve Pin 6
GND Ground Pin 7
GND Ground Pin 8
S1 Flame Sense Q.C. Terminal
.250” Wide
Remote Sense
BURNER
1
2
5
6
3
4
FL AM E
SENSOR
FC +
(2 CONTACTS)
FC -
H.V.
LAMP (NC)
GND
GND
GAS
VALVE
TH
MV
24 VAC
S1
Local Sense
BURNER
1
2
5
3
4
FC +
(2 CONTACTS)
FC -
H.V.
LAMP (NC)
GND
GND
GAS
VALVE
TH
MV
24 VAC

Effective: October 2018
06-237172-002 3
Figure 2. 35-6084 6 Pin Local Sense Figure 3. 8 Pin Local Sense Wiring
HIGH VOLTAGE AND REMOTE SENSE
CABLE REQUIREMENTS
The HV Ignition Cable must meet a voltage rating of 25 KV and
an insulation rating of 200 °C. Recommend length of 3ft (.9m)
or less. Consult factory for longer lengths.
Remote flame sense cable must meet a voltage rating of 250V
and an insulation rating of 200 °C. Recommended length of 10ft
(3m) or less. Consult Factory for longer lengths.
Remote Sense
BURNER
1
4
5
2
3
(2 CONTACTS)
H.V.
GND
GAS
VALVE
TH
VALVE
24 VAC
6
VALVE
GND
RESET
NC
S1
Local Sense
BURNER
1
4
5
2
3
(2 CONTACTS)
H.V.
GND
GAS
VALVE
TH
VALVE
24 VAC
6
VALVE
GND
RESET
NC
S1
FL AM E
SENSOR
Local Sense
BURNER
1
2
5
6
3
4
FC +
(2 CONTACTS)
FC -
H.V.
GND
GND GAS
VALVE
TH
MV
24 VAC
7
8
GND
RESET
24V
ALARM
Remote Sense
BURNER
1
2
5
6
3
4
FC +
(2 CONTACTS)
FC -
H.V.
GND
GND GAS
VALVE
TH
MV
24 VAC
7
8
GND
RESET
24V
ALARM
FL AM E
SENSOR
S1

Effective: October 2018
4 06-237172-002
SEQUENCE OF OPERATION / FLAME
RECOVERY / SAFETY LOCKOUT
START UP - HEAT MODE
When a call for heat is received from the thermostat supplying
24 volts to TH the following sequence occurs in the order listed:
1. The green power LED is illuminated.
2. The control resets and then performs a self check routine,
flashing the red diagnostic LED once in the first two sec-
onds.
3. The control begins a pre-purge delay.
4. Following the pre-purge period, the control energizes the
gas valve.
5. The control enables the high voltage spark output for the
trial for ignition period.
6. When the control detects the presence of flame during the
trial for ignition, the control terminates the sparking pro-
cess.
7. The thermostat and burner flame are constantly monitored
to assure the system continues to operate properly.
8. When the thermostat is satisfied and the demand for heat
ends, the main gas valve is de-energized immediately and
the green LED turns off.
FAILURE TO LIGHT - LOCKOUT
SINGLE TRIAL MODEL
Should the burner fail to light, or if the flame is not detected
during the trial for ignition period, the control performs the fol-
lowing actions:
1. The control enters ignition lockout.
2. The main gas valve is de-energized immediately.
3. The diagnostic LED indicates the fault code for lockout.
MULTI TRIAL MODEL
Should the burner fail to light, or if the flame is not detected
during the first trial for ignition period, the control performs the
following actions:
1. The main gas valve is de-energized.
2. The control then goes through an interpurge delay before
another ignition attempt.
3. The control attempts two additional ignition trials before
going into lockout and the main gas valve relay is de-ener-
gized immediately.
4. The diagnostic LED indicates the fault code for lockout.
LOCKOUT RESET
Recovery from lockout requires a manual reset by either recy-
cling the thermostat or removing 24 volts for a period of 5 sec-
onds. On models with automatic reset, if the thermostat is still
calling for heat after one hour the control will automatically reset
and attempt to ignite the burner.
CE versions have an option for non-volatile lockout. In this
case, only the external RESET input must be used to recover
from an ignition lockout.
FLAME FAILURE RESPONSE
RE-IGNITION MODE (STANDARD)
If the established flame signal is lost while the burner is operat-
ing, the control will respond within 0.8 seconds (max) by ener-
gizing the HV spark for the programmed TFI period in an
attempt to relight the burner. If the burner does not light within
the TFI, the gas valve is de-energized immediately and on
multi-try models a new TFI sequence begins.
If the burner does not relight, the control will lockout as previ-
ously described in “Failure to Light - Lockout”. Multi-try models
will make 2 more attempts to light the burner. If the flame is re-
established, normal operation resumes.
RECYCLE MODE (OPTIONAL)
With "recycle after loss of flame", upon loss of flame, the main
gas valve is de-energized within 0.8 seconds (max). After the
flame recycle delay, the control attempts to relight the burner.
Multi-try models allow three tries for ignition including inter-
purges. If the burner relights, normal operation resumes. If the
burner does not relight, the control will go into lockout as
described in “Failure to Light - Lockout”.
CHECKOUT
Test the gas control system after any service or component
changes to the appliance using the following method:
1. Perform a visual check of all piping, burners, and venting.
Check all wiring for integrity and proper electrical and
ground connections. Verify the burner is properly
grounded.
2. With the gas supply and thermostat off, turn on power to
the appliance.
3. Turn the thermostat to a setting high enough to initiate a
call for heat. Verify the ignition control proceeds through
the operating sequence to a safety shutoff (lockout) condi-
tion. (The burner will not light because the gas is shut off)
4. Turn off the thermostat.
5. Turn on the gas supply, and purge the gas lines of air.
Check for gas leaks on all joints upstream of the gas valve
with a soap solution.
6. Turn the thermostat to a setting high enough to initiate a
call for heat. Verify the ignition control proceeds through
the operating sequence to a normal run (burner lit) condi-
tion. Confirm there are no gas leaks downstream of the
gas valve using a soap solution.
7. Turn the thermostat setting down below the room tem-
perature. Verify the burner flame goes out.
WARNING
Risk of Explosion or Fire
Verify there are no gas leaks by using a rich
soap and water solution on all joints and
pipe connections. Never use a match or
lighter to test for the presence of gas. Fail-
ure to test properly before operation can
lead to explosion or fire and may result in
severe injury or death.

Effective: October 2018
06-237172-002 5
TROUBLESHOOTING
Before troubleshooting the system, check the following items:
• Verify all mechanical and electrical connections are secure
and tight.
• Verify all system wiring is correct.
• Verify there is a proper system ground. The igniter, flame
sensor, and ignition module must share a common ground
with the burner. Nuisance shutdowns are often caused by a
poor or erratic ground.
• Perform the instructions in “Checkout” on page 4, as the
first step in any troubleshooting.
• Verify that the system is powered and that the thermostat is
calling for heat.
• Verify the green power LED is lit, indicating 24 VAC power
to the control.
• If the control proceeds to an error code on the red
diagnostic LED, troubleshoot per the Fault Conditions table
below:
The LED will flash on for 1/4 second, then off for 1/4 second
during a fault condition. The pause between fault codes is 3
seconds.
FLAME CURRENT MEASUREMENT
Flame current is the current that passes through the flame from
sensor to ground. To measure flame current, connect a True
RMS or analog DC micro-ammeter to the FC+ and the FC-
terminals. The reading should be 1.0 micro-amps DC or higher.
If the meter reads negative or below “0” on the scale, the meter
leads are reversed. Re-connect leads with proper polarity.
Alternately, a Digital Voltmeter may be used to measure the DC
voltage between the FC+ and FC- terminals. Each micro-amp
of flame current produces 1.0 VDC, so a reading of 2.6 VDC
would equate to 2.6 micro-amps.
A good burner ground that matches the control ground is critical
for reliable flame sensing.
INTERNAL CONTROL FAILURE
If the control detects an error in its software or hardware, all out-
puts are turned off and the red LED displays a steady ON condi-
tion. If this condition persists after an attempt to restart then the
control must be replaced.
PROPER ELECTRODE LOCATION
Proper location of the electrode assembly is important for
optimal system performance. The electrode assembly should
be located so that the tips are inside the flame envelope and
about 1/2 inch (1.2 cm) above the base of the flame.
• Ceramic insulators should not be in or close to the flame.
• Electrode assemblies should not be adjusted or disassem-
bled. Electrodes should have a gap spacing of 0.125±
0.031 inch (3.12± 0.81 mm), unless otherwise specified by
the appliance manufacturer. If this spacing is not correct,
the assembly must be replaced. Electrodes are NOT field-
adjustable.
• Exceeding the temperature limits can cause nuisance lock-
outs and premature electrode failure.
• Electrodes must be placed where they are not exposed to
the appliance user in normal operation.
WARNING
Risk of Explosion or Fire
The 35-608 control cannot be serviced by the user.
If any control faults are detected, the 35-608 con-
trol must be replaced by qualified service person-
nel. Risk of explosion or fire can result if the control
module has been opened or with any attempts to
repair it, and the warranty is void.
Fault Conditions
LED Indication Fault Mode
Off Normal Operation
2 Flashes Flame without call for heat
3 Flashes Ignition Lockout
4 Flashes Manual Reset Error
Steady On Internal Control Failure
Troubleshooting Guide
Symptom Probable Cause
1. Control does
not start, green
LED is off.
A. Mis-wired
B. 24 VAC Transformer bad
C. Fuse/Circuit breaker bad (no power)
2. Thermostat
on - no spark or
valve
A. Mis-wired
B. Bad thermostat, no voltage at thermostat
terminal TH
C. Bad control, check red LED for steady
on or flashing codes.
3. Valve on - no
spark during
TFI
A. Shorted electrode
B. Spark gap not correct. Set to .094-.156
inch.
C. High voltage cable is faulty or has a poor
connection.
4. Spark on -
valve off
A. Gas Valve coil open
B. Valve wire disconnected
C. Bad control, check voltage between gas
valve terminal MV and GND.
5. Flame okay
during TFI - no
flame sense
after TFI
A. Check electrode position and cleanliness
B. Check high voltage wire
C. Poor ground at burner
D. Poor flame, check flame current

Effective: October 2018
6 06-237172-002
DIMENSIONS
Figure 4. 6-Pin 35-6086 and 35-6084 Model Dimensions
Figure 5. 8-Pin 35-608 Model Dimensions
TH
VALVE (GND)
GND
VALVE
NC
1.750 MAX.
2.50 MAX.
3.940
.910
5.200
3.380
.283
3.375
RED LED
.187 ± .010 DIA.
(4 MOUNTING HOLES)
GREEN LED
REMOTE FLAME SENSE TERMINAL
FC+FC-
5 or 6 PIN HEADER
1.750 MAX.
2.15 MAX.
3.940
.910
5.200
3.380
.283
3.375
PIN 1
RED LED
8 PIN HEADER
.187 ± .010 DIA.
(4 MOUNTING HOLES)
GREEN LED
.250" Q.C. MALE
XX SEC
1.56” SPACING

Fenwal Controls, Kidde-Fenwal Inc.
400 Main Street
Ashland, MA 01721
Tel: 800-FENWAL-1
Fax: 508-881-7619
www.fenwalcontrols.com
This literature is provided for informational purposes only. KIDDE-FENWAL, INC. assumes no responsibility for the product’s suitability for a particular application. The
product must be properly applied to work correctly. If you need more information on this product, or have a particular problem or question, contact KIDDE-FENWAL, INC.
06-237172-002 Rev BD ©2018 Kidde-Fenwal, Inc.
STANDARD PART NUMBER CONFIGURATION
35 – 6 0 8 X X X X X X–
TRIES FOR IGNITION & METHOD OF FLAME SENSE
0 = Single Try - Local Sense
1 = Single Try - Remote Sense
2 = Single Try - Local Sense with 1 Hour Automatic Reset
3 = Single Try - Remote Sense with 1 Hour Automatic Reset
5 = Three Tries - Local Sense
6 = Three Tries - Remote Sense
7 = Three Tries - Local Sense with 1 Hour Automatic Reset
8 = Three Tries - Remote Sense with 1 Hour Automatic Reset
PRE-PURGE
0 = None
1 = 15 Seconds
2 = 30 Seconds
INTER-PURGE
0 = None
1 = 15 Seconds
2 = 30 Seconds
TRIAL FOR IGNITION
1 = 4 Seconds
3 = 7 Seconds
5 = 10 Seconds
7 = 15 Seconds
ENCLOSURE
0 = Noryl Gray Enclosure
1 = Integral Stand-Offs
PRODUCT DESIGNATION
2 = CE (EN298) Standard Model
3 = CE (EN298) Special OEM Configuration
4= CE & CSA Hi Reliability
5 = Standard QC Terminal
6 = Multi-Pin Standard
9 = Special OEM Configuration
Description
EXPORT INFORMATION (USA)
Jurisdiction: EAR
Classification: EAR99
This document contains technical data subject to the EAR.

Fenwal Controls
400 Main Street
Ashland, MA 01721
Tel. (508) 881-2000
© Kidde-Fenwal Inc. 06-237657-001 Rev AC
EU DECLARATION OF CONFORMITY
We
Company Name: Kidde-Fenwal Inc.
Postal Address: 400 Main Street
City and Post Code: Ashland, MA 01721
Tel: 508-881-2000
Declare that the DoC is issued under sole responsibility and belongs to the following product:
Apparatus Model(s) Series 35-40, 35-53, 35-60, 35-61, 35-63, 35-608, 35-65, 35-66, 35-9X
Type: Fitting
Batch Number Date code and Revision Level Assigned per production lot, (YYWW RR)
Object of the Declaration:
Series 35-40, 12/24Vdc Direct Spark Automatic Gas Ignition Controllers
Series 35-53, 12Vdc Direct Spark Automatic Gas Ignition Controllers
Series 35-60, 35-61, 35-63, 35-608 24Vac Direct Spark Automatic Gas Ignition
Series 35-65 & 35-66 24Vac Hot Surface Automatic Gas Ignition Controllers
Series 35-9X Platform Ignition Module
SERIES 35-40 SERIES 35-53 SERIES 35-60/61/63/608 SERIES 35-65/66
SERIES 35-9X
The object of the declaration described above is in conformity within the relevant union
harmonization legislation:
Gas Appliance Regulation: (EU) 2016/426 Low Voltage Directive: 2014/35/EC
EMC Directive: 2014/30/EC Rohs 2011/65/EU
The following harmonized standards and technical specifications have been applied:
EN298:2012: Automatic Burner Control systems for Burners and appliances burning gaseous or liquid fuels.
EN13611:2007_A2:2011: Safety and control devices for Gas Burners and Gas burning appliances – General Requirements.
Name of Notified Body & Number: BSI Group, 0086, EU Type Examination Certification
Notified Body Certificate No.: Series 35-40: CE682407
Series 35-53 CE682404
Series 35-60/61/63/608 CE682405
Series 35-65/66 CE682406
Series 35-9x CE690652
Surveillance Audit Notified Body: BSI Group
For copies of the Installation Instructions and the EU DoC, got to www.fenwalcontrols.com, - Document Library - Data sheets.
Paul Finn
Kidde-Fenwal, Inc. Ashland, MA USA 01 Oct 2018 Paul Finn, Certification Engineer
Place of Issue: Date of Issue Name
Table of contents
Other Fenwal Controls Computer Hardware manuals
