ACHTUNG! WARNING! ATTENTION! ADVERTENCIA! ATTENZIONE!
DE
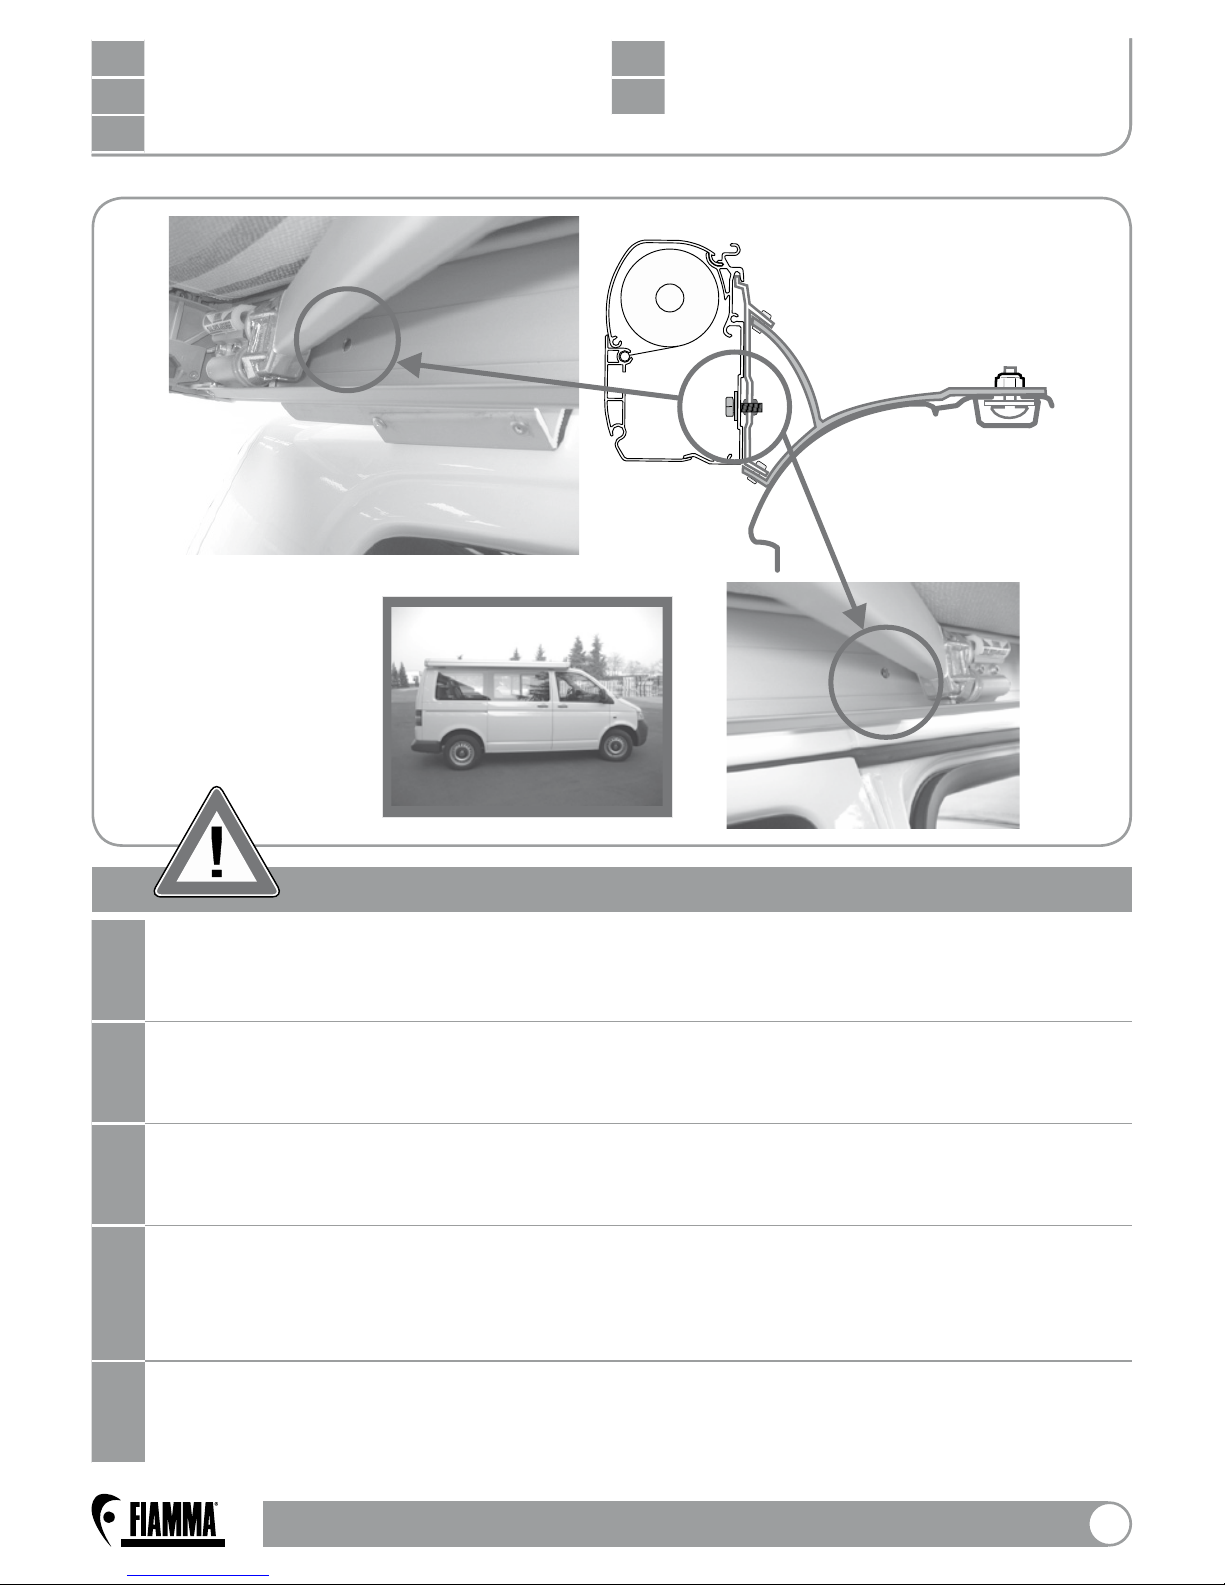
Hinweis zur Befestiung der Halterungen.
Bei diesem Markisenmodell ist der Gehäusekasten bereits vorgebohrt, um die
Montage der Halterungen zu vereinfachen. Vor der Befestigung der Halterungen
mit dem Kleber bitte grundsätzlich eine Probe durchführen, um sicher zu sein,
dass die Bohrungen der Halterungen mit denen des Gehäusekastens aufgrund der
Toleranzen (auch am Fahrzeug) übereinstimmen.
EN
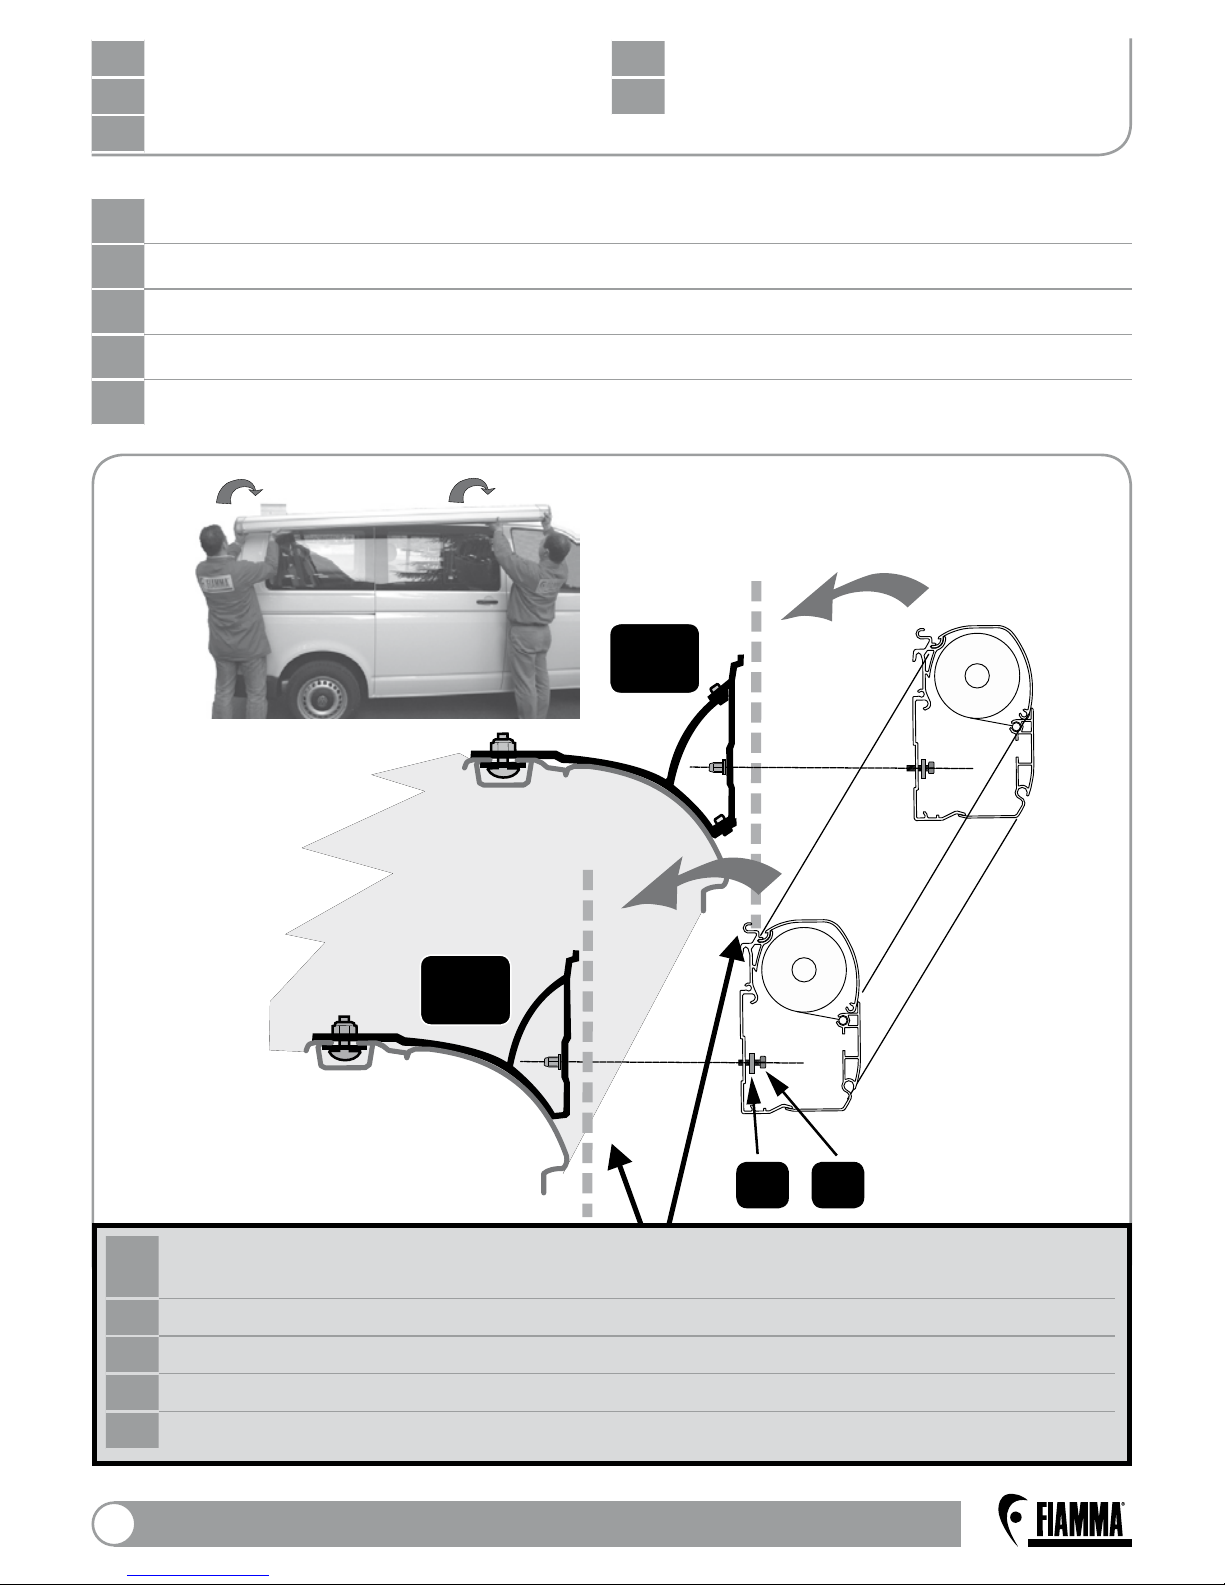
Cautions for brackets installation.
In this version of the awning, the case box is pre-drilled for an easy mounting of
the brackets. Before installing the brackets with the glue, a preliminary test of
installation is always recommended so as to be sure that the holes in the brackets
coincide with the ones of the case box.
FR
Précautions de montage des étriers.
Sur cette version de store, le boîtier a été perforé préalablement pour faciliter le
montage des étriers.
Avant de les fixer définitivement avec de l’adhésif, faire une simulation d’installation
pour vérifier que les orifices de fixation des étriers sont bien en correspondance
avec ceux du boîtier.
ES
Precauciones para el montaje de los soportes.
En este modelo de toldo, el armazón está pre-perforado para facilitar el montaje de
los soportes.
Antes de fijar los soportes con el pegamento, hacer una prueba preliminar de la
instalación para asegurarse de que los agujeros de los soportes coincidan con los
del armazón.
IT
Avvertenze nel montaggio delle staffe.
Su questa versione di tendalino, il cassonetto è pre-forato per agevolare il
montaggio delle staffe.
Prima di fissare le staffe con il collante, fare una prova generale di installazione così
da assicurarsi che i fori delle staffe coincidano con quelli del cassonetto.