Fieldbook F1 Parts list manual

Getting Started Manual Page 1 of 16
Fieldbook F1
Getting Started Manual

Getting Started Manual Page 2 of 16
Security and performance
1、It is strictly prohibited to use sharp objects to touch, and blow mobile phone screen, do not use cell phones to
immerse in deep water, so as not to damage the mobile phone waterproof function.
2、Please don't put mobile phones in high temperature environment (high temperature will cause the battery heat),
otherwise it may cause fire or explosion.
3、Please charge the mobile phone, charger from personal or other inflammable and explosive articles, lest produce
fire, explosion or other hazards.
4、In banning the use of mobile phones, please strictly abide by, be sure to turn off your phone.
5、Do not use mobile phone, charger is placed in a strong electromagnetic field instruments, such as induction cooker
and microwave oven, otherwise it may cause electrical failure, fire or explosion.
6、Please do not arbitrarily adapted mobile phones or unauthorized repair and accessories, improper modification or
remove easily trigger a mobile fire, explosion, only authorized institutions to repair this mobile phone.
7、Do not use the original factory standard models of battery, charger or accessories.
8、If the power cord is damaged, such as lead appears, fault, or connect the plug is loose, please do not continue to
use, so as to avoid electric shock, charger short circuit or fire.
9、Mobile phones will affect the normal work of the electronic equipment and medical instruments, such as cardiac
pacemaker, hearing AIDS, and other medical electronic equipment, etc. Suggested that the mobile phone and the
distance of the heart pacemakers keep at least 15 cm, to avoid potential interference of mobile phone of pacemaker.
10、Please do not use of cell phones when driving a car. In case of an emergency, please use the hands-free calling
device (may need another purchase), otherwise please stop first and then to talk.
11、Do not use mobile phones from the top of the car insurance balloon or balloons unfolds can hit area, otherwise the
gasbag swell or burst, may cause serious damage to the occupants.
12、Please send mobile phones, and the charger where children can't touch, please do not in the case of no regulation
for children to use mobile phones and chargers.
13、To comply with the regulations of RF leakage. When you wear mobile phones or using data function, please keep
a distance of antenna and the body for at least 1 inch (2.5 cm).
14、Prior to cleaning and maintenance, please power off, disconnect the charger with mobile phone connection at the
same time, in order to avoid electric shock or charger short circuit.
15、Please do not use chemical detergent, grind erinaceous cleaner wipe the phone or charger, otherwise it may
damage the parts or fire, can be used with a slightly damp soft cloth to wipe, anti-static.
16、Please deal with waste battery, don't throw it into the trash can.
17、Please do not in grey, damp environment, recharged, too high or too low temperature (allow charging temperature
range of 0 ℃ to 40 ℃), and the power cord can't close to the heating vessel.
18、Please do not take pictures, cameras and recording, so as not to violate the law, regulations or infringe on the
rights of the copyright owner.
19、The company to use photographs, video and audio recording, due to its accessories or software photo, video,
audio has not been recorded, removed, destroyed or damaged are not responsible for any loss caused.
20、Due to the user download file with virus cell phone can't normal use, or load data has been destroyed pictures,
ringtones, such as files, leading to cell phone use is not normal, the company does not undertake any responsibility
caused by.
Warning: thanks for not complying with the above Suggestions or improper use of mobile phones, will not take any
responsibility.
Note: the value-added service applications provided by the corresponding service, details please refer to the relevant

Getting Started Manual Page 3 of 16
help or service provider.
Statement:
1、The company reserves do not make advance notice of the right products to improve the performance of the
company's products reserves the final interpretation. The company is committed to improve the quality of the
products, and constantly introduce updated version, so the instruction and the function of the products contained or a
slightly different design, specification, please refer to your mobile phone, such changes will fail to notice additionally,
please forgive me.
2、This phone is dustproof, waterproof design, namely close all ports, airtight skin plug headphones and charging
interface, installed SIM card back cover and screw down the screws, mobile phone is available in the international
organization for standardization SGS IP68 dust waterproof level testing standard scope.
3、The standard definition of operating equipment damage other than caused by the user's own responsibility.
Getting Started Manual Page 4 of 16
Started to use your phone:
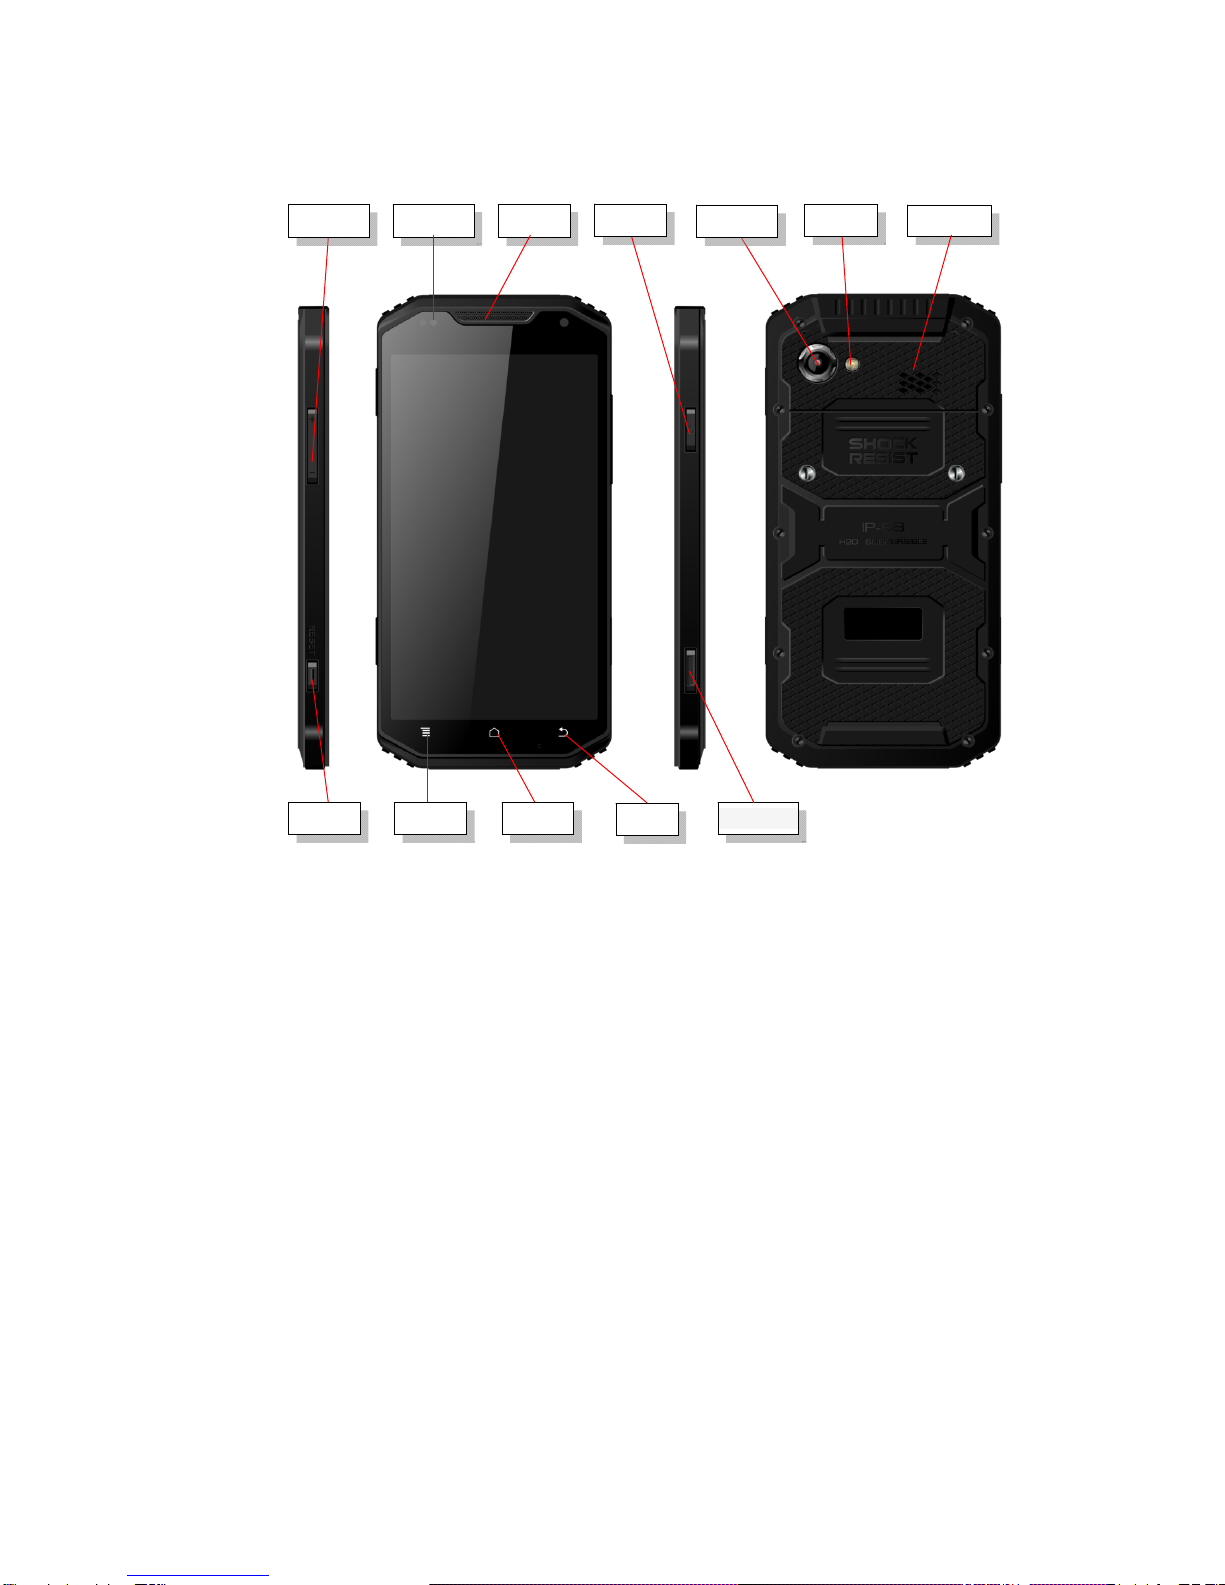
Power on: Press and hold the power key button for 3 seconds
Power off: Press and hold the power key button for 3 seconds, select ‘power off’ in the menu option.
Menu Key: Select to show the available menu in current screen.
Home Key: Return to home screen. To view recent application, press and hold the home key.
Back Key: Return to previous screen.
Volume Key: Adjust the volume of the ringtone.
Reset Key: Shut down the phone when phone abnormal.
Camera key: Short press to enter camera in home screen. Long press the key to open torch
Receiver Power Key
Menu Key Home Key Back Key
Front camera Rear camera Speaker
FlashVo l u m e K e y
Reset Key Camera key

Getting Started Manual Page 5 of 16
Insert the SIM Cardand T-Flash card :
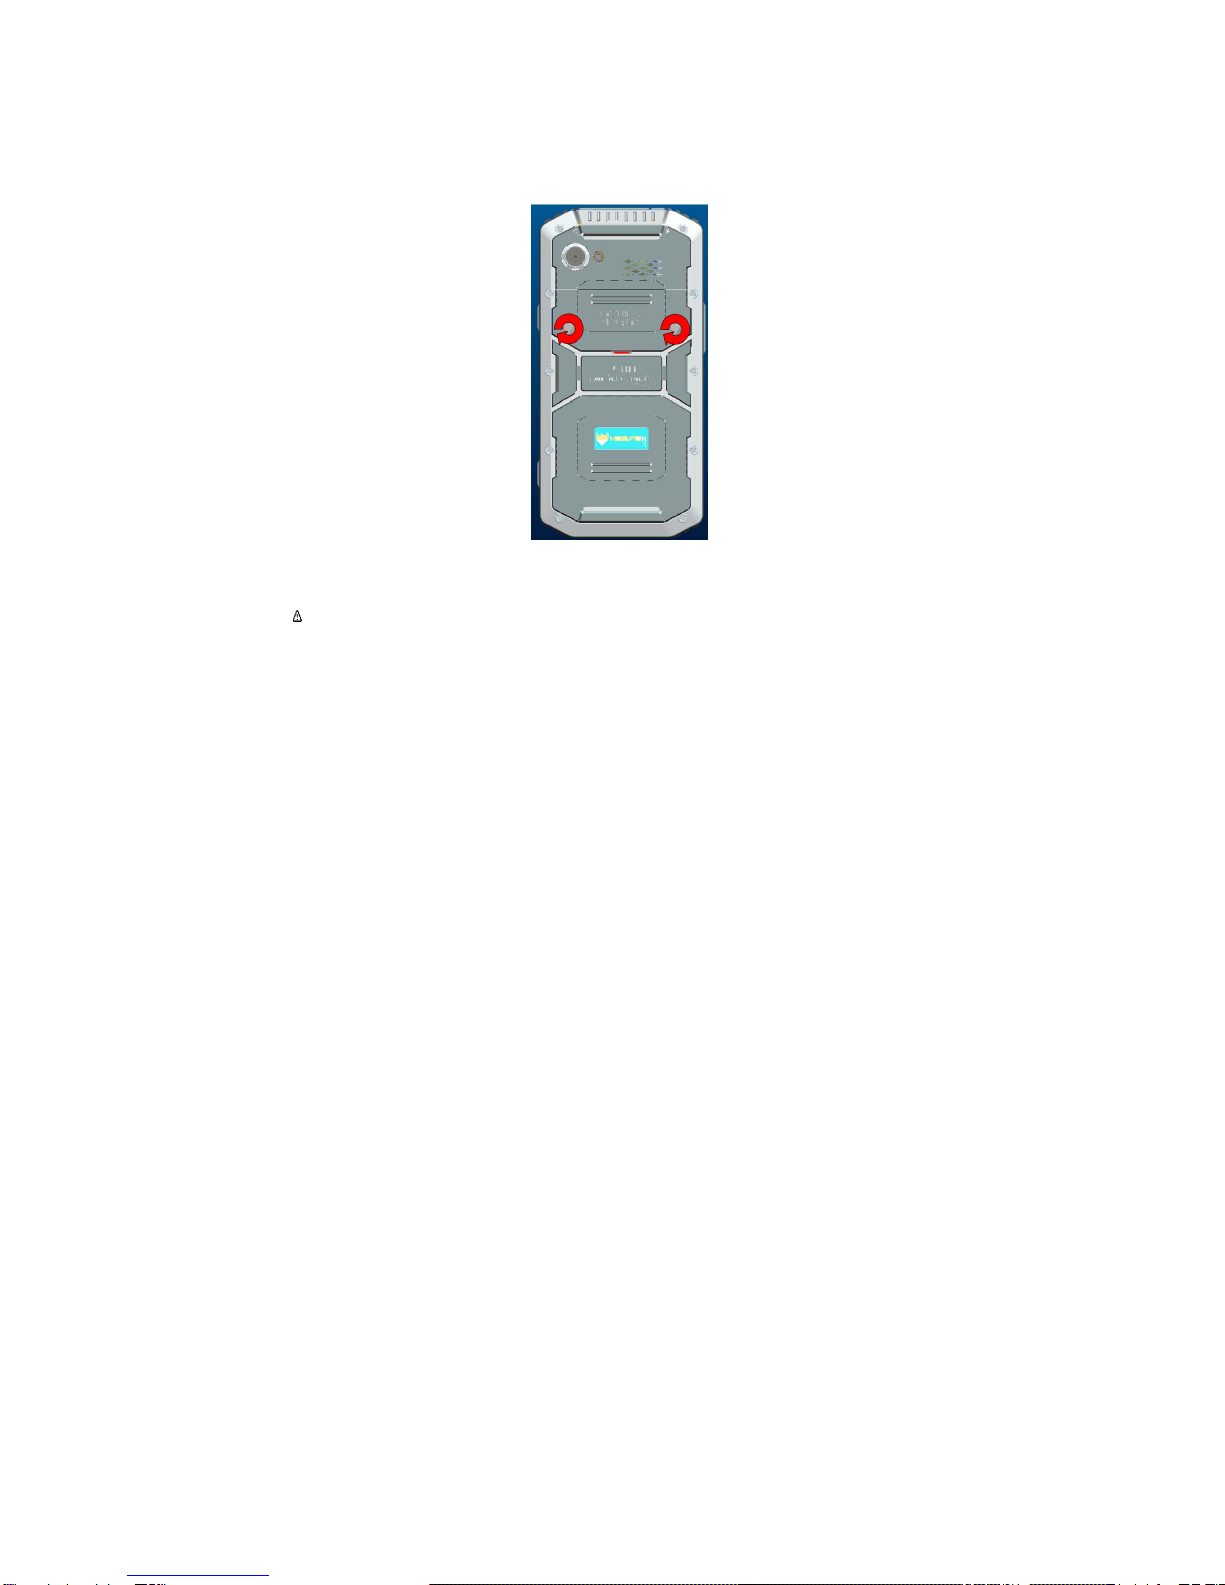
1. Remove the back cover: Loosen the screws on the back side – to rotate both the screws anti-clockwise until
open the bake cover as shown in Jig-1
Jig-1
2. Take off the back cover: Remove the back cover by lifting it up from the bottom part as shown in Jig-2
Jig-2
3. Put the Sim Card in the holder: Put the SIM card into the slot touching the SIM contacts of the phone as

Getting Started Manual Page 6 of 16
shown in Jig-3
Jig-3
4. Insert T-Flash card: Open T-Flash card holder and insert T-Flash card into the slot, then close T-Flash card
holder as shown in Jig-4
Getting Started Manual Page 7 of 16
Jig-4
5. Insert the back cover: Insert the back cover and rotate four screws clockwise to lock the back cover as shown in
jip-5
Jig-5
Attention: Please power off the phone before plug in or pull out the SIM card.
T-Flash card:
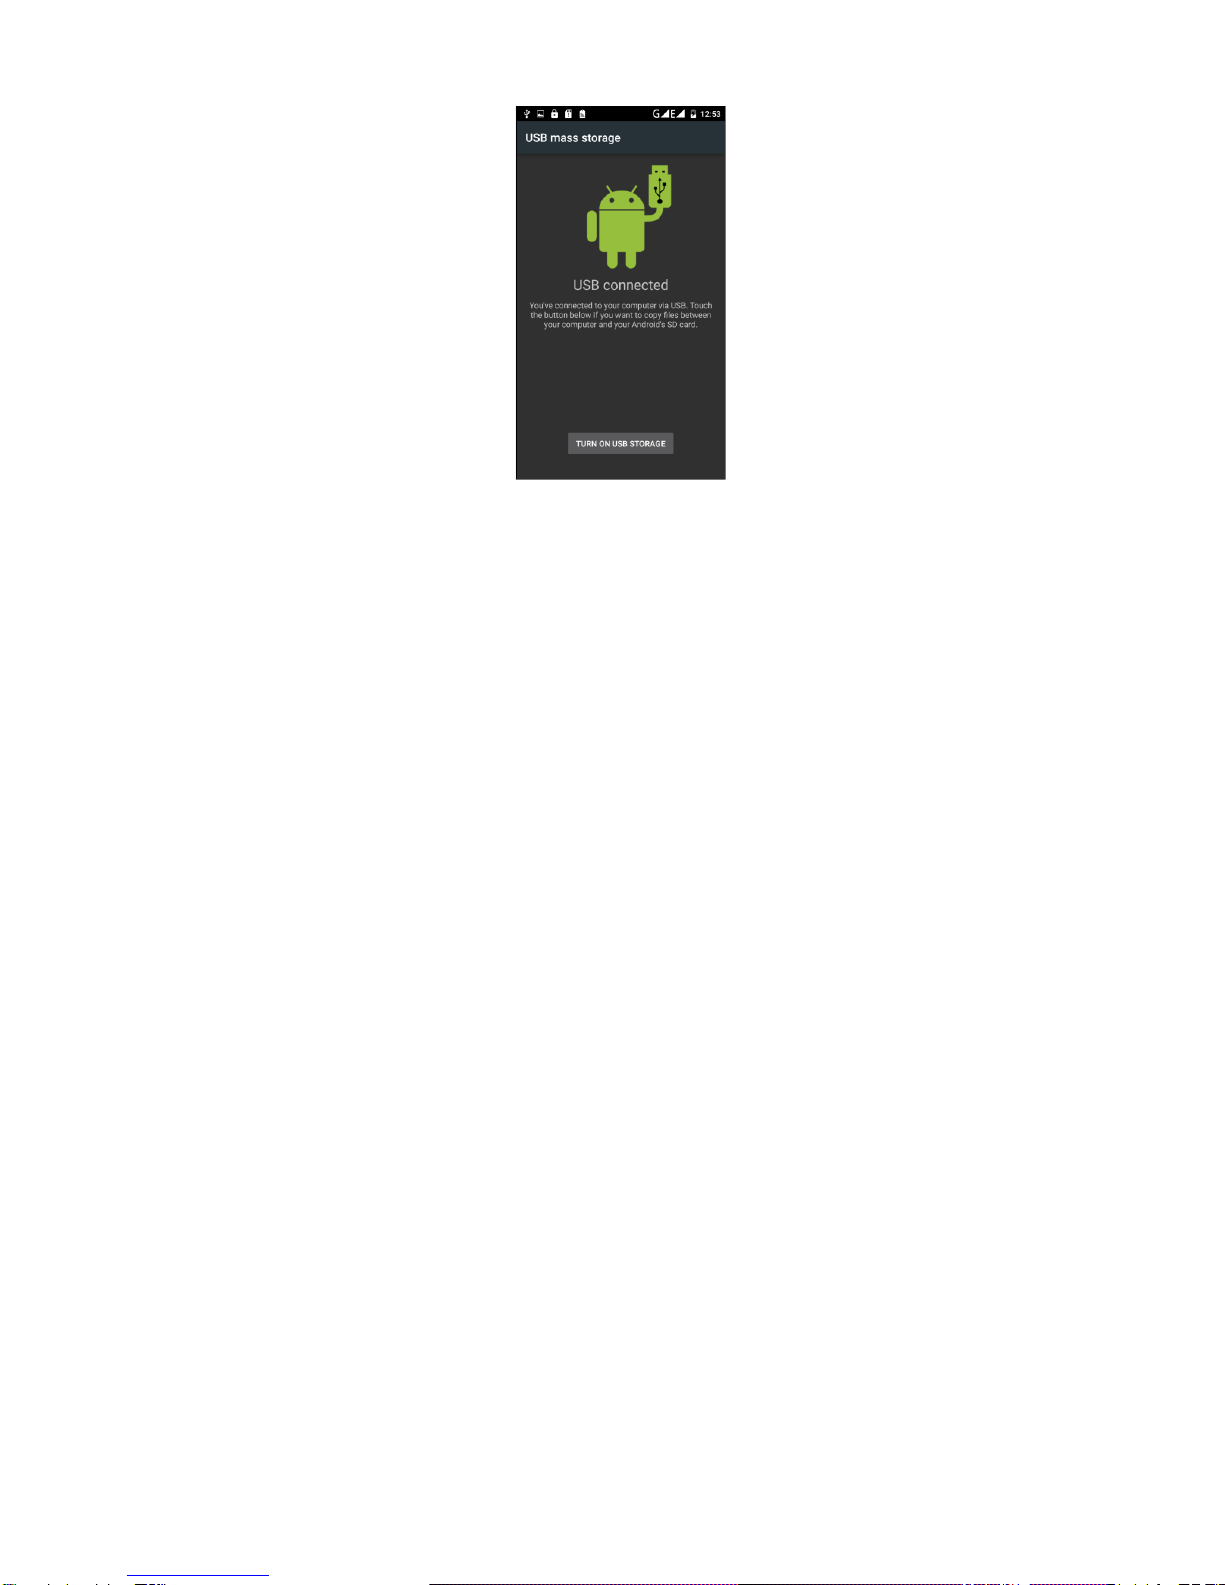
1. Connect USB, turn on USB storage.
Automatically pop up USB connected interface after connecting USB, and then click Turn on USB storage to
use the T-Flash as USB storage.
Getting Started Manual Page 8 of 16
Using of touch screen:
Single Click: To select an icon. For example, click dial to open the keypad which will be displayed on the
screen.
Double Click: To zoom-in or zoom-out. For example, to zoom-in or out of a photo, click twice when viewing a
photo or browsing on the internet.
Hold: Click and hold the screen, icon or input box to get more operation options.
1)Long-Time Click a picture in the gallery list interface, the status bar prompts to select a picture, you
select to share or delete.
2)Long-Time Click the blanks of home screen to add home screen shortcut.
3)Long-Time Click the blanks of home screen wallpaper sources can be selected.
Drag the screen: You can drag the screen to view more applications which are not displayed in one screen.
Scratch the screen: A screen of information can not be displayed scratch scrolling display hidden information.
Home screen:
You can use various functions of the phone screen through the touch screen. Click the icons to open the
applications. View all applications by clicking an application tab.
The phone has a default screen. You can add multiple screens. After adding multiple screens, about scratching
the screen to switch the screen between each other, and at any point of a long blank screen to add widgets, wallpaper
settings, enter the settings.

Getting Started Manual Page 9 of 16
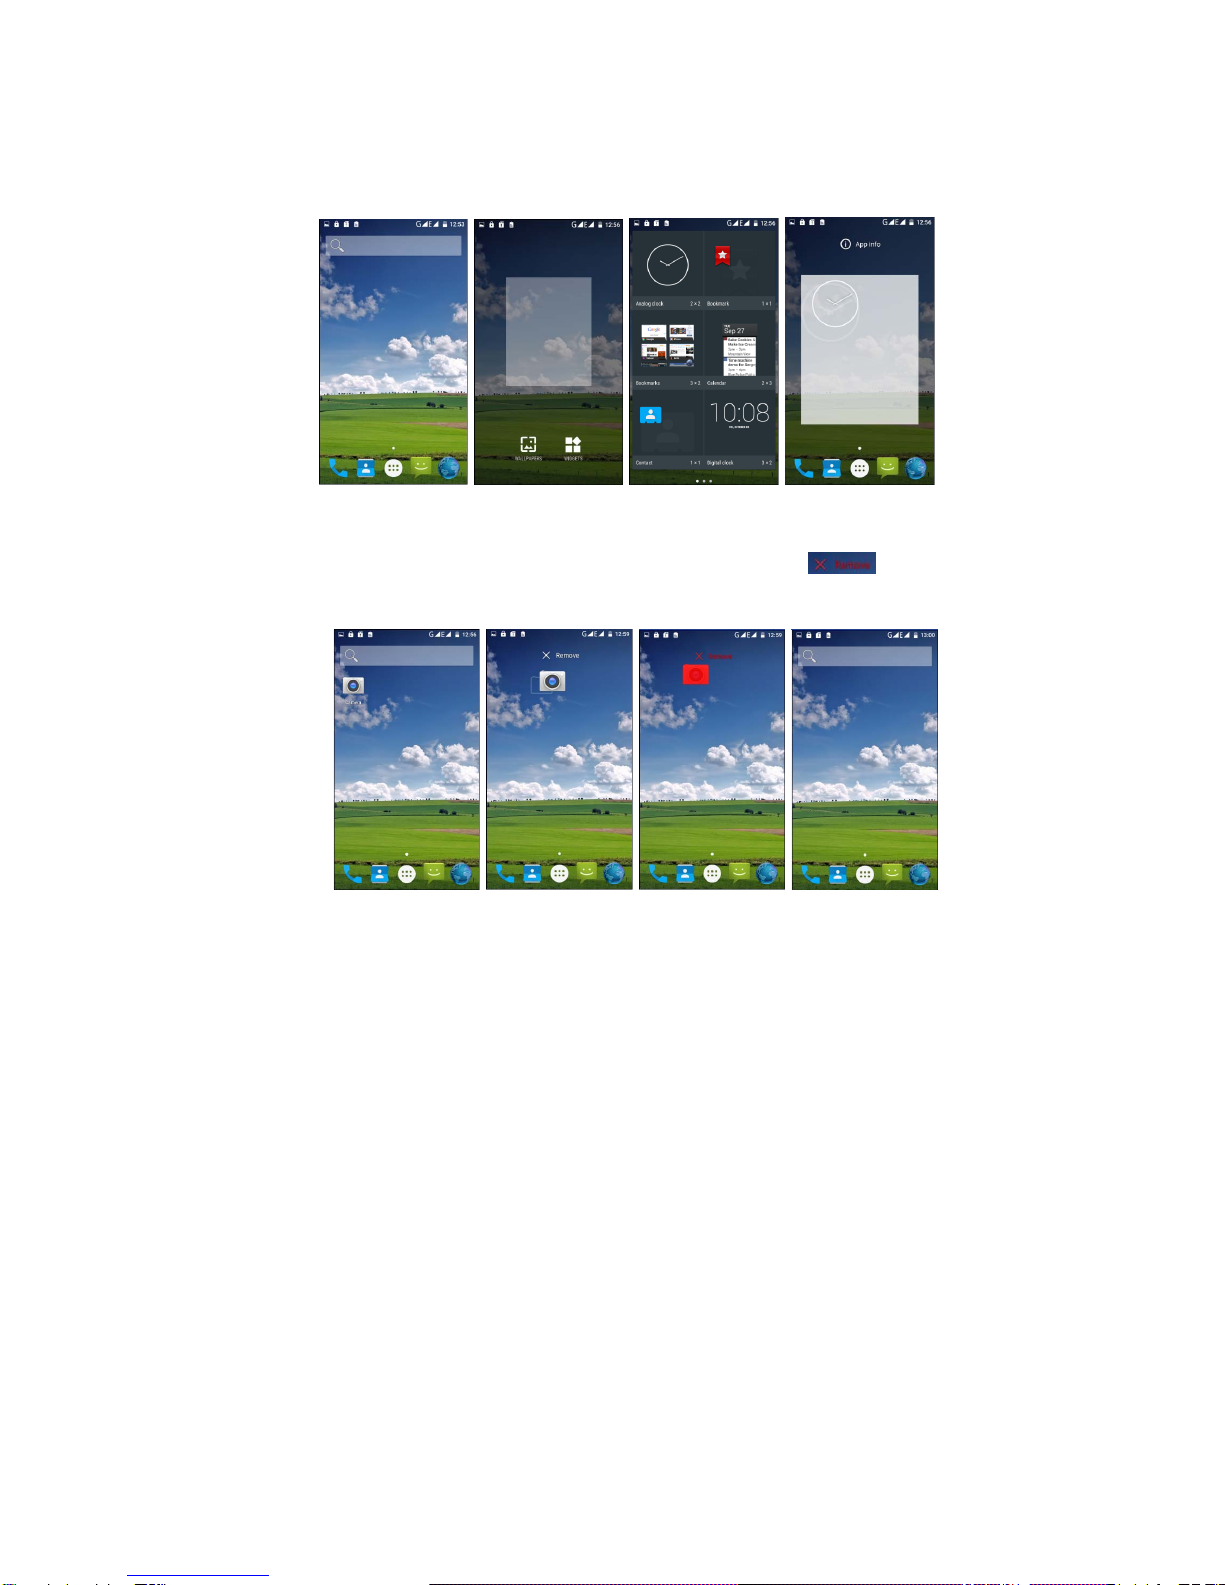
◆ Create shortcuts and screen
Click the main screen and then Pop-up list of application. Hold and click the application icon which you want to
add a shortcut. Interface white transparent box will pop up analog screen area. Drag the application icon to the area
you want to place, release the hand that add.
Create a new screen: When you add a shortcut if you choose to add a new screen, which added a new screen.
If you want to delete screen, need to delete all the shortcuts in this screen. The following figure:
Status Bar
Message Board
Getting Started Manual Page 10 of 16
◆ Add widgets
Long press the blank screen, pop-up screen Tap the widget button to jump to the widget interface, long press to add
widgets, the interface will pop up white transparent box simulation screen area, drag the application icon to be placed
area, release the hand that the addition is complete. As shown the following figure:
◆ Delete the shortcuts and widgets
To delete an object, tap and hold the object, then drag it towards the bottom of the screen . When the
object turns red let go of it and the selected object will be deleted.
◆ Lock the screen
Lock the phone in order to avoid useless operation and to save the battery by press the power key.
The phone will automatically lock when it is not being used for some time.
Getting Started Manual Page 11 of 16
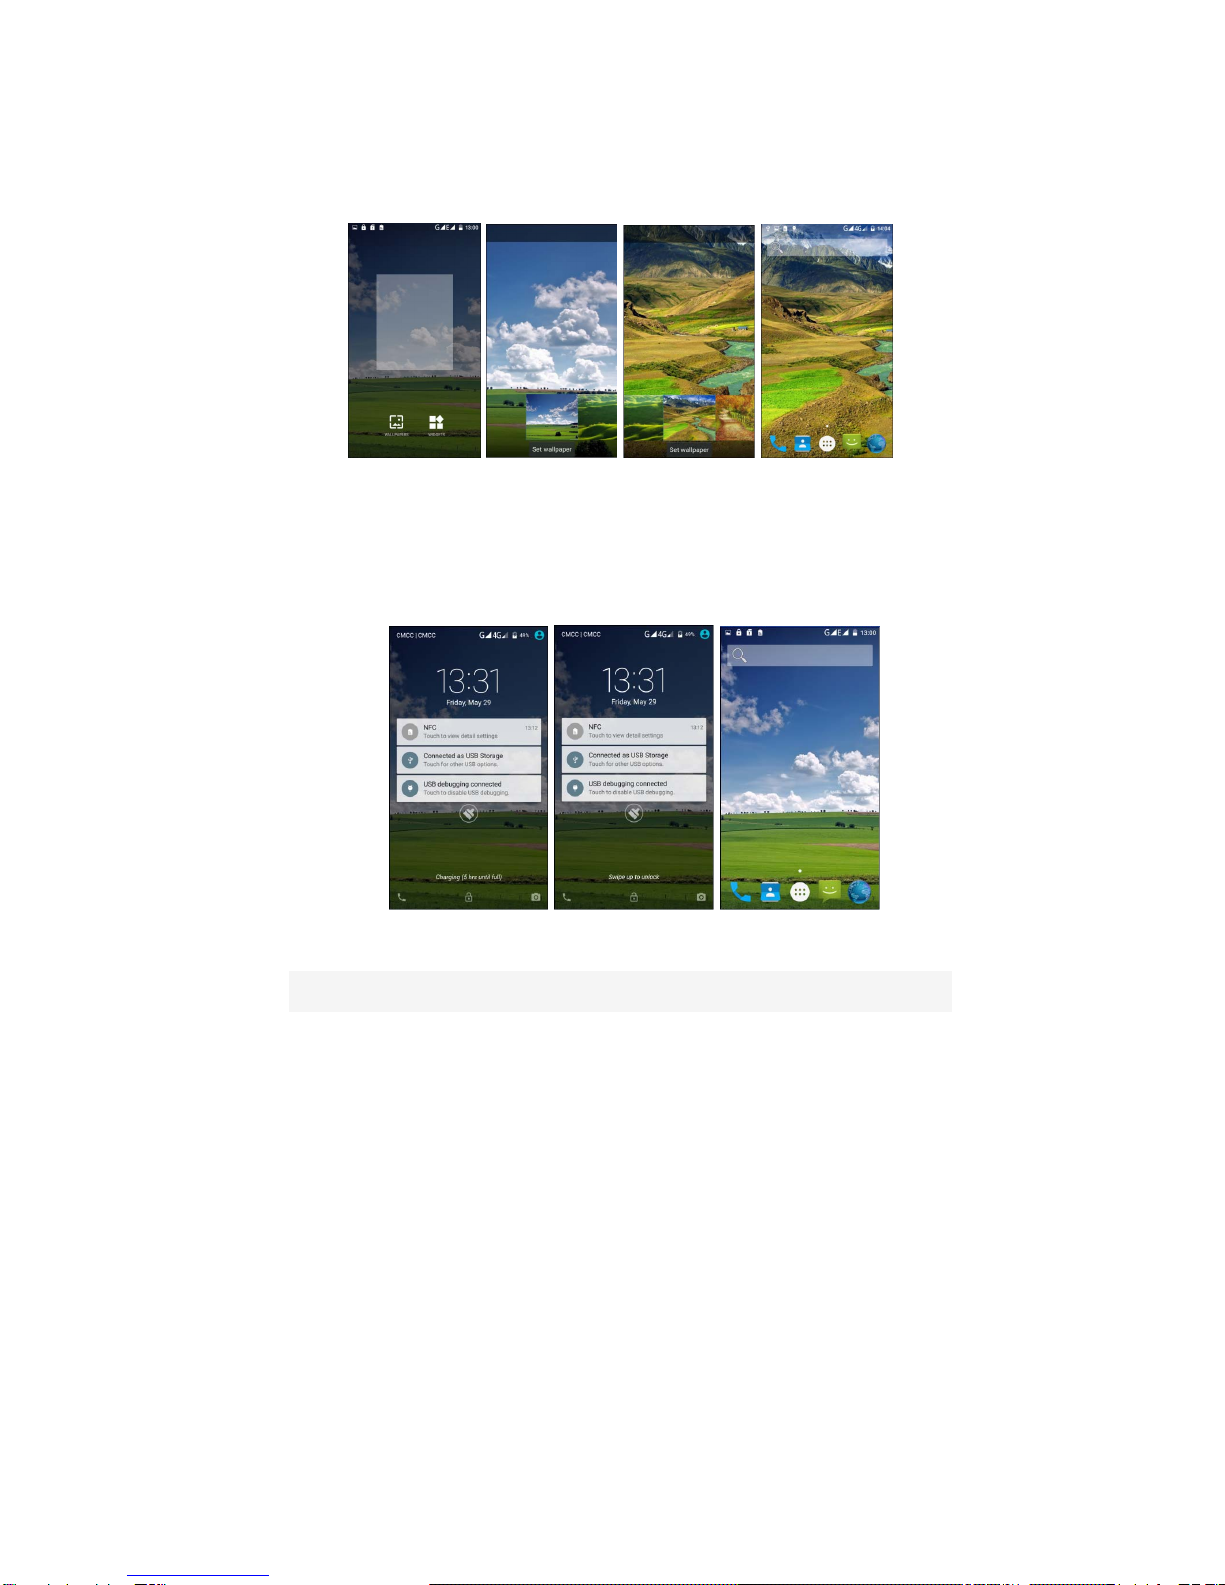
◆ Set wallpaper
Long Point Home screen pop-up "wallpaper" and "widgets" button. Click the "wallpaper" button to enter the setup
screen wallpaper. Slide the bottom of the screen wallpaper zoom view can be switched wallpaper. After Select to set
wallpaper, Click "Set wallpaper" that wallpaper setting is completed. As shown the following figure:
◆ Unlock the phone
Press the power button to enter the unlock screen. Touch the screen blank, Bottom of the screen will pop up
"swipe up to unlock". As shown the following figure:
◆ Message board
Drag the status bar of any screen can open the message board. Here you can view the phone unread notifications.
Continuous downward slide screen, You can adjust the screen brightness, Data usage, Auto-rotate, WLAN, Bluetooth,
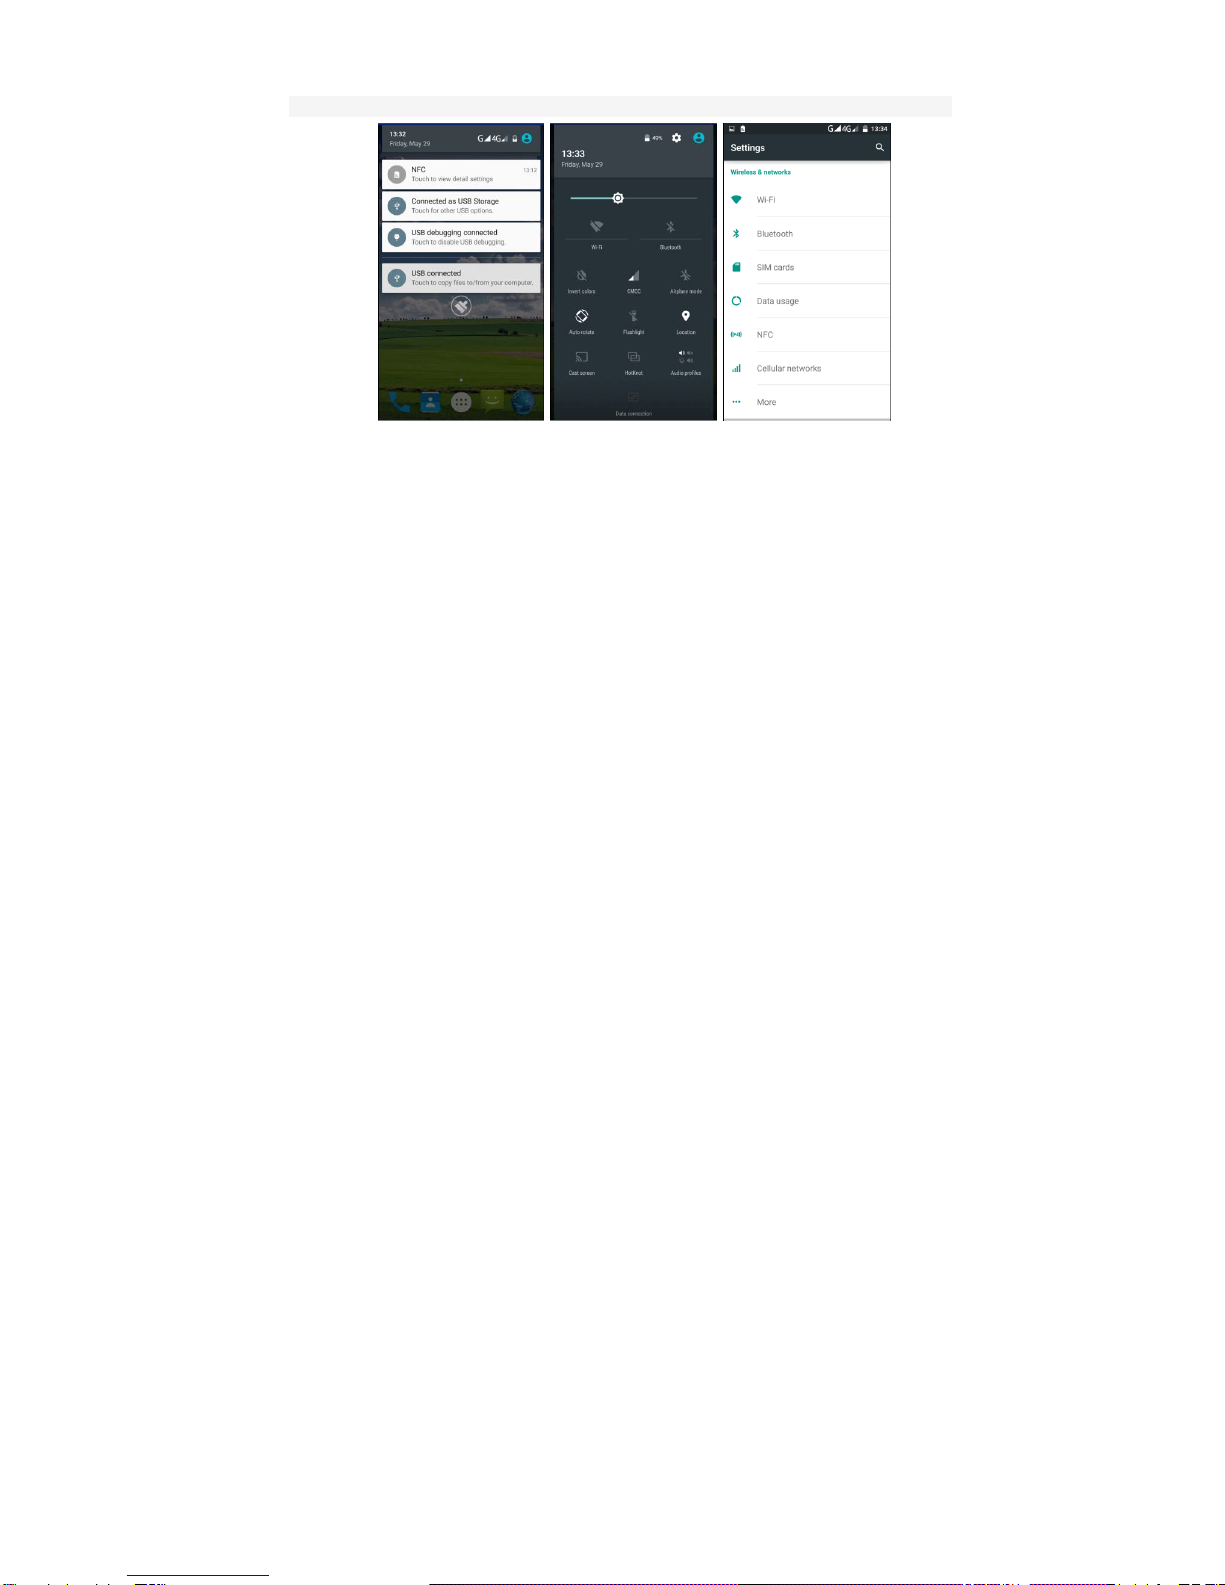
Getting Started Manual Page 12 of 16
Location, Data connection, Flashlight, HotKnot , Audio profiles . As shown the following figure:
◆ Manage applications
Install applications: Enter Settings -> Storage -> Default write disk (You can select "Phone storage" and "SD
card") -> Slide down the screen to find the "Downloads" button-> Click to go to (Locate the installation software
(.APK), then follow the instructions step by step installation)
Uninstall application: Enter Settings->Apps->Downloaded, then will be able manage and remove installed
applications.
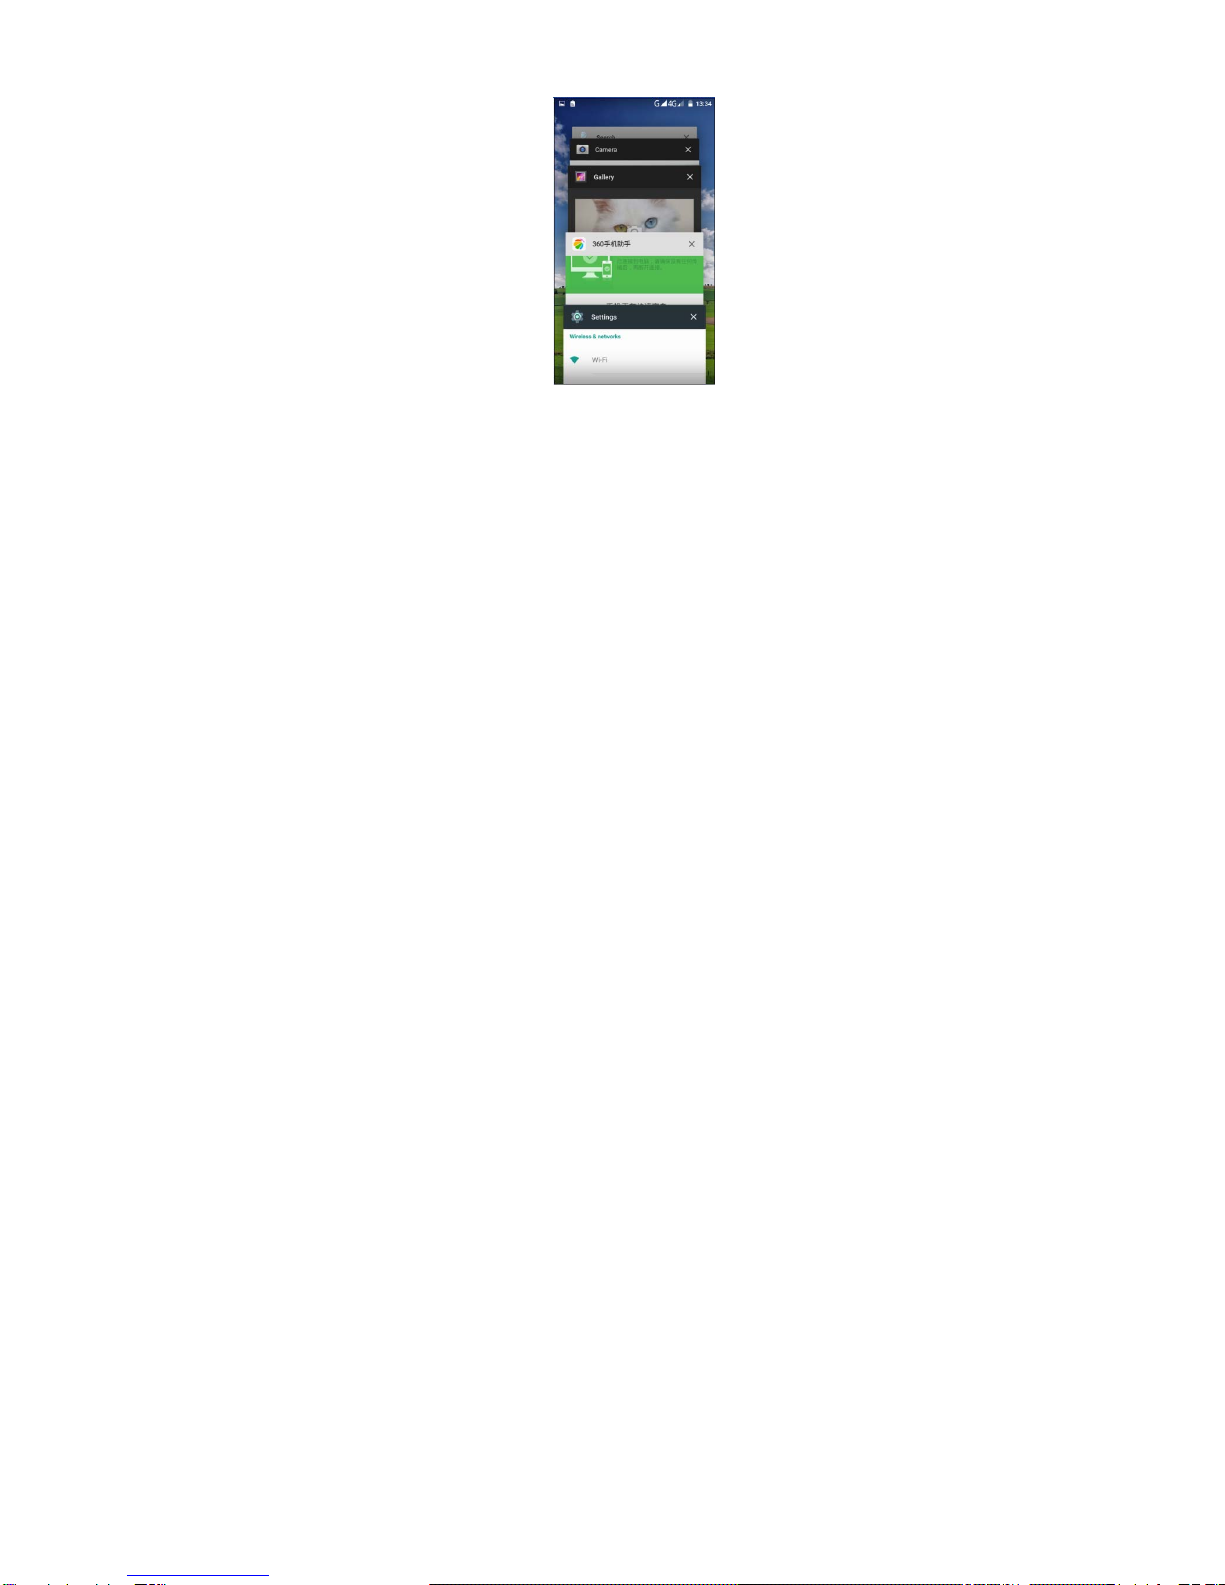
◆ Recently used applications
Press and hold the home key, the screen will display a window which shows your recently used applications. Click
the icon to open the application.
To delete the most recently used application record in the list:
1) Sliding around an application.
2) Click the delete icon the upper right corner of the application. As shown the following figure:
Getting Started Manual Page 13 of 16
Extend the battery life:
Some functions may use up more power, which eventually shorten the battery life. You could:
Close all the wireless connection when not in use Bluetooth, WLAN or GPS.
Reduce the brightness and shorten the screen timeout to save battery, or press power key to shut down the screen
when the phone is not in use.
Close any automatically synchronized applications such as Email, calendar, contacts and other.
Some applications which are downloaded could also shorten the battery life.

Getting Started Manual Page 14 of 16
Troubleshooting
1、My phone is frozen or cannot switch on
Try pressing the reset button on the left side of the phone.
2、My phone cannot connect to a network or “No service” is displayed
Try connecting in another location. Verify the network coverage with your operator.
3、Unable to make outgoing calls
Make sure your phone is connected to a network, and the network is not overloaded or unavailable.
4、Unable to receive incoming calls
Make sure your phone is switched on and connected to a network (check for overloaded or unavailable network).
5、SIM card PIN locked
Contact your network operator to obtain the PUK code (Personal Unblocking Key).
6、To configure a new 4G network:
On your device, tap Settings.
Select Wireless & networks > Cellular networks.
Select Network settings. In Network operators, select your operator. In Access Point Names, select the correct access
point name and enter the exact connection parameters provided by your 4G provider.
Getting Started Manual Page 15 of 16
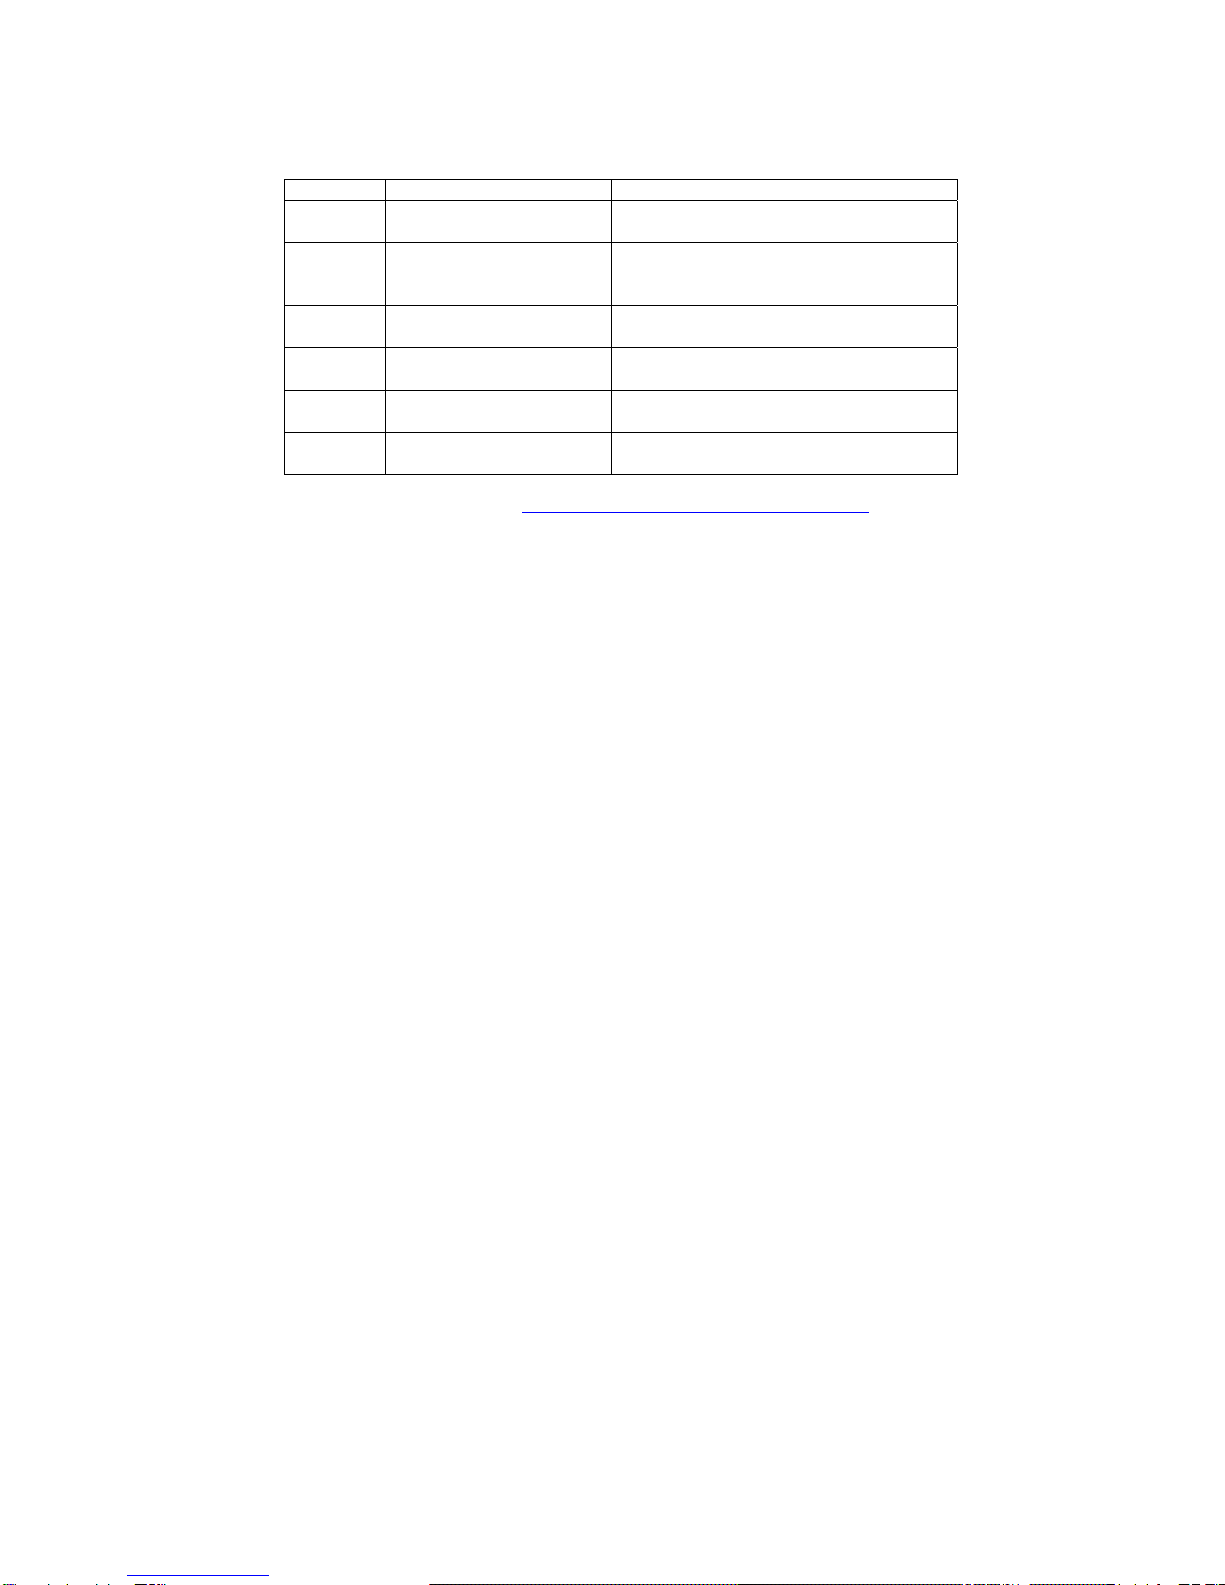
National restrictions
This device is intended for home and office use in all EU countries (and other countries following the EU directive
1999/5/EC) without any limitation except for the countries mentioned below:
Country restrictions Reason/remark
Bulgaria None General authorization required for outdoor use and
public service
France Outdoor use limited to 10 MW
E.I.R.P. within the band
2454-2483.5 MHz
Military Radiolocation use. Reframing of the 2.4 GHz
band has been ongoing in recent years to allow current
relaxed regulation. Full implementation planned 2012
Italy
None If used outside of own premises, general authorization is
required.
Luxembourg
None General authorization required for network and service
supply (not for spectrum)
Norway
Implemented
This subsection does not apply for the geographical area
within a radius of 20 km from the centre of Ny-Alesund
Russian
Federation
None
Only for indoor applications
Note: Frequency 2454-2483.5MHZ are restricted to indoor in France.
Consult the declaration of conformity on http://www.archos.com/products/declaration_conformity.html
Warning:
Any Changes or modifications not expressly approved by the party responsible for compliance could void the user's
authority to operate the equipment.
This device complies with part 15 of the FCC Rules. Operation is subject to the following two conditions:
(1) This device may not cause harmful interference, and (2) this device must accept any interference received,
including interference that may cause undesired operation. Note: This equipment has been tested and found to
comply with the limits for a Class B digital device, pursuant to part 15 of the FCC Rules. These limits are designed to
provide reasonable protection against harmful interference in a residential installation. This equipment generates uses
and can radiate radio frequency energy and, if not installed and used in accordance with the instructions, may cause
harmful interference to radio communications. However, there is no guarantee that interference will not occur in a
particular installation. If this equipment does cause harmful interference to radio or television reception, which can be
determined by turning the equipment off and on, the user is encouraged to try to correct the interference by one or
more of the following measures:
—Reorient or relocate the receiving antenna.
—Increase the separation between the equipment and receiver.
—Connect the equipment into an outlet on a circuit different from that to which the receiver is connected.
—Consult the dealer or an experienced radio/TV technician for help.

Getting Started Manual Page 16 of 16
SAR tests are conducted using standard operating positions accepted by the FCC with the phone transmitting at its
highest certified power level in all tested frequency bands, although the SAR is determined at the highest certified
power level, the actual SAR level of the phone while operating can be well below the maximum value.
Before a new mobile phone is a available for sale to the public, it must be tested and certified to the FCC that it does
not exceed the exposure limit established by the FCC, Tests for each phone are performed in positions and locations
(e.g. at the ear and worn on the body)as required by the FCC. For body worn operation, this mobile phone has been
tested and meets the FCC RF exposure guidelines when used with an accessory designated for this product or when
used with an accessory that contains no metal and that positions the handset a minimum of 10 mm from the body.
Non-compliance with the above restrictions may result in violation of RF exposure guidelines.
Table of contents


