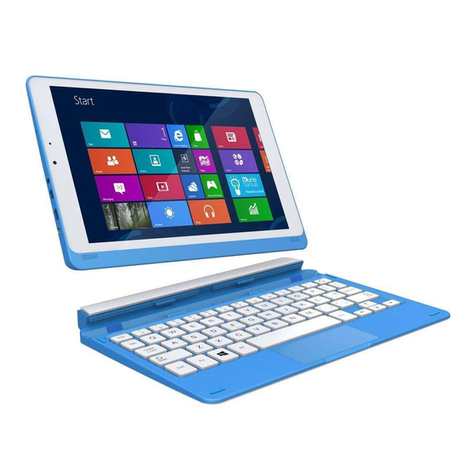
Filemate Clear X2 User manual

FileMate Clear X2/X4
User Manual

2
Table of contents
1 Getting started
Ch arging the b attery 4
Set up your Clear 5
Favorites Tray 6
Browse & organize your Home screens 8
Touch & type 10
Type text by speaking 11
What’s New in Android 11
2 Exploring your Clear
Swipe up for Google Now 14
Swipe down for notifications & settings 15
Relax with Google Play 18
Use & customize the lock screen 20
Try Face Unlock 21
Share content with Android Beam 21
Change the wallpaper 22
Take a screenshot 23
Connect to keyboards, mice, & other devices 23
3 Use the keyboard
Enter & edit text 25
Try Gesture Typing 27
Use keyboard dictionaries 28
4 Try some apps
Use All Apps 29
St a rt Gmail 3 0
Fi nd Pe o ple 31
Manage your Calendar 32
Open & use Clock 33
Manage dow nloads 34

3
5 Google Now & Search
Abo ut Goo gle Now 35
Use Google Now 38
Turn Google Now on or off 40
Co ntro l lo cati on acce ss, re port ing, & history 40
Use your voice on Android 42
Voice Actions commands 44
Google Now Card list 44
Abo ut Gmail Cards 47
About the Activi ty summary ca rd 47
6 Settings
Se ttings 48
7 Accessibility
Ac cessibi lity 51
8 Warranty
Wa rranty 52
9 Troubleshooting
Troubleshoot i ng 55

4
1
Getting started
Charging the battery
The battery may not be fully charged at first. It’s a good idea to fully charge it as soon as you get a
chance, and for at least 6 to 8 hours prior to use. The best way to charge your Clear tablet is by
connecting it to its wall charger ensuring that the charging pin of the wall charger is carefully
inserted it into the charging port. Do not force the charging tip into the power port or wiggle it
around. Failure to follow these guidelines will result in damaging your power port and may be
considered incidental, accidental, or physical damage to your tablet which would not be covered
under Wintec Industries’ limited 1 year warranty. Here are some basic guidelines:
Use only the charging unit and micro USB cable that come s with your FileMate Clear.
Using a different charging unit or cable may damage your tablet. If you need a replacement
wall charger, please contact Wintec Industries’ customer support team at 1 -866-989-4683.
The best power source is the charging unit that comes with your tablet. Other sources, such
as a laptop, may not work as well or may damage your Clear. Using non-approved or generic
chargers may damage the power port which is not covered under the 1 year limited warranty
with Wintec Industries.
The tablet charges faster when you’re not using it. So, please power your Clear off and let it
charge.
Have a charging routine is best. Decide where and when you plan to charge your Clear.
It is not recommended to use and charge your Clear at the same time. There is a possibility
of bending or flexing the charging port causing physical distress or damage.

5
It is not recommended to charge or use your FileMate Clear while driving. The voltage output
from your vehicle is different and may damage your FileMate Clear.
The input voltage range between the wall outlet and this charging unit is AC 100V–240V, and
the charging unit’s output volt-age is DC 5V, 2A.
The Clear’s battery can’t be removed. Don’t attempt to open t he Clear .
Op e ni ng yo ur C le ar will vio l ate your l imited 1 ye ar war ran ty wi t h Wi ntec Indust r ie s .
Set up your Clear
To turn on your Clear, press the Power button on the top right hand side for a few seconds, and
then release it.
The first time you turn on the tablet, you’ll see a Welcome screen.
• To choose a different language, touch the menu
• To continue, touch S t a r t and follow the instructions. If you do not completely finish the setup
information per screen, the Clear will not allow you to adv ance.
IMPORTANT: You must have a Wi-Fi connection to complete the setup process.
When prompted, you can sign in with your Google Account or create one at that time. You can also
choose to skip this step and create one later. An email address that you use for any of the following
is acceptable as a Goo gl e Acc ount:
• Gmail
• Google Apps
• YouTube
• Any other Google product
When you sign in with a Google Account, all the email, contacts, calendar events, and other data
associated with that account are automatically synced with your tablet. If you have multiple Google
Accounts, you can add the others later.

6
Favorites Tray
Every Home screen shows the Favorites tray: another quick way to get to your books, magazines,
apps, movies, and music:
At the bottom of the Clear’s screen, no matter what you’re doing, you’ll always find these three
navigation buttons:
Back
Opens the previous screen you were working in, even if it was in a different app. Once you back up
to the Home screen, you can’t go back any further in your history.
Home
By tapping on the Home icon, it opens the Home screen. If you’re viewing a left or right Home
screen, it opens the central Home screen. To open Google Now, swipe up. Google Now gives just
what you need to know, right when you need it.
Recent apps
Opens a list of thumbnail images of apps you’ve worked with recently. To open an app, touch it. To
re-move a thumbnail from the list, swipe it left or right
Open folder for
popular apps
View all
your apps
Shop on
Google Play

7
If you don’t use these buttons often, they may shrink to dots or fade away, depending on the
current app. To bring them back, touch their location.
On the All Apps screen available from the Favorites tray, notice the Settings icon. The
Settings icon provides you with brings you all the different settings options for your Clear. This
is where you can turn on the Wi -Fi, adjust the brightness of the screen, turn off screen lock,
view your downloaded app information, view your battery’s charging information, and perform a
backup and reset if necessary. Take your time to be familiar with all the different options in the
Settings screen.
T I P :
You can use Quick Settings to access Wi-Fi settings, change display brightness, and
more. To open Quick Set-tings, swipe down from the top right corner of any screen. At
the top of the screen you’ll find Google Search, which lets you search your tablet or the
Internet.
Touch G o o g l e to type your search terms, or the Microphone icon to speak them.
Many screens in apps and Settings include a Menu icon. Touch it to explore additional
options, often including a Help item that provides more information about that screen.

8
Browse & organize your Home screens
Browse Home screens
To move between Home screens, swipe left or right. There may not be anything there now, but
you can customize your home screens to have what you want ranging from any of the widgets
that can be found in the widget section in the Apps folder. Keep in mind that widgets are
shortcuts to applications. Here is an example of the My Library widget displays music, movies,
magazines, and books.
When you’re ready to shop for more, try th e suggestions in one of the Play Recommendations
widgets:
Touch any title to
open it.
Touch to
avoid future
suggestions
like this
Touch to see a
different suggestion
Touch to
learn more

9
To resize a widget, touch & hold, then let go and drag the blue dots. To remove it, touch & hold,
then drag it to the Remove icon at the top of the screen.
O r g a n i z e Ho m e s c r e e n s
To add an app or widget to a Home screen:
1. Go to the Home screen where you want to place the app or w i d g e t .
2. Touch the All Apps icon.
3. Swipe right, if necessary, to find the app or widget you want.
4. Touch & hold the app or widget until the Home screen appears, slide it into place, and lift
your finger.
To move an app or widget icon to a different location on a Home screen:
1. Touch & hold the icon.
2. Slide your finger to the new position.
To move between Home screens, slide toward the edge of the s c r e e n . To bump another icon
out of the way, slide slowly into it.
3. Lift your finger. The icon drops into its new position.
To create a folder, slide one icon quickly over another.
To rename a folder, touch its name.

10
Touch & type
To select or activate something, touch it. To type something, such as a name, password, or
search terms, just touch where you want to type. A keyboard pops up that lets y o u t y p e i n t o t h e f i e l d .
O t h e r c o m m o n g e s t u r e s i n c l u d e :
•Touch & hold. Touch & hold an item on the screen by touching it and not lifting your finger
until it responds.
•D r a g . Touch & hold an item for a moment and then, without lift ing your finger, move your
finger on the screen until you reach the target position. For example, you can move apps around
on the Home screen.
•S w i p e o r s l i d e . Quickly move your finger across the surface of the screen, without pausing
when you first touch (so you don’t drag something instead). For example, you can slide a Home
screen left or right to view the other Home screens.
•D o u b l e - t a p . Tap quickly twice on a webpage, map, or other screen to zoom. For example,
double-tap a picture in Chrome to zoom in, and double-tap again to zoom out.
•P i n c h . In some apps (such as Maps, Chrome, and Gallery), you can zoom in and out by placing
two fingers on the screen at once and pinching them together (to zoom out) or spreading them
apart (to zoom in).
•Rotate the screen. The orientation of most screens rotates with your device as you turn it. To
lock or unlock the screen’s vertical orientation, swipe down from the top right of any screen and
touch the Rotation icon in Quick Settings
To change your tablet’s notifi cation sounds, volumes, and more, go to
S e t t i n g s > D e v i c e > S o u n d.
To change your tablet’s brightness, font sizes, and more, go to
Settings > Device > Display .

11
Type text by speaking
You can speak to enter text in most places that you can enter text with the onscreen keyboard.
1. Touch a text field, or a location in text you’ve already ent ered in a text field.
2. Touch the Microphone key on the onscreen keyboard.
3. When you see the microphone image, speak what you want to t y p e .
Say “comma,” “period,” “question mark,” “exclamation mark,” or “exclamation point” to enter
punctuation.
When you pause, what you spoke is transcribed by the speech -reco g n i t i o n s e r v i c e a n d
ent e r e d i n t h e t e x t f i e l d , u n d e r l i n e d . Y o u c a n touch the Delete key to erase the
underlined text. If you start typ ing or enter more text by speaking, the underline disappear s. To
improve processing of your voice input, Google may record a f e w s e c o n d s o f a m b i e n t
b a c k g r o u n d n o i s e i n t e m p o r a r y m e m o r y at any time. This recording remains on the device
only fleetingly and is not sent to Google.
To change your tablet’s speech set tings, go to Settings > Personal > Language &
input
What’s New in Android
If you are new to Android, or perhaps new to the version that is on your Clear, you may want to
check out some of the new features in Android 4.2 (Jelly Bean). For a list of all changes since
Android 4.0, please click below:
http://www.android.com/about/jelly-bean/
•Gesture Typing (Android 4.2)
Instead of typing each letter, use Gesture Typing to input a word without lifting your finger. You
don’t need to worry about spaces because they’re added automatically for you.
TIP: Glide your finger over the letters you want to type, and lift it after each word.
•PhotoSphere mode (Android 4.2)
Use Photo Sphere mode in the Camera app to capture 360 de gree photos.
TIP: Touch the Camera icon to open the app, then touch the mode options to select
Photo Sphere mode.

12
•G o o g l e P l a y w i d g e t s
New widgets on your Home screens display recently used apps, music, movies, books, or games
you already have including preloaded content that comes with your device. Other widgets offer
suggestions for browsing Google Play.
TIP: Touch a widget to access its content on Google Play. Touch &hold a widget to
resize it or remove it.
•Q u i c k S e t t i n g s (Android 4.2)
Use Quick Settings to easily ac cess Wi-Fi settings, manage display brightness, open the main
Settings menu, and more.
TIP: Swipe down from the top right corner of any screen to open Quick Settings, and
then touch one of the boxes to op en a specific s e t t i n g .
•E x p a n d a b l e n o t i f i c a t i o n s
Expandable notifications were introduced in Android 4.1, including the option t o perform
actions from the notification itself. In Android 4.2, you can expand notifications more easily
with a swipe of your finger.
TIP: Swipe down the notification shade from the top of the screen, then glide your
finger down the notifications to expand them. Touch an icon inside a notification to
handle a task directly.
•R e a r r a n g e H o m e s c r e e n s
Slide an icon slowly to move other icons or widgets gently aside.
Touch & hold an icon and slide slowly to the location of your choice and then s lide an icon
quickly over another to create a folder.
•S c r e e n m a g n i f i c a t i o n
U s e r s w i t h v i s u a l i m p a i r m e n t s c a n e n t e r f u l l - s c r e e n m a g n i f i c a t i o n b y t r i p l e - t a p p i n g
t h e s c r e e n .
Go to S e t t i n g s > S y s t e m > A c c e s s i b i l i t y > M a g n i f i c a t i o n g e s tures to turn on
screen magnification.

13
•Google Now
Google Now shows you information at just the right time, such as today’s weather before you
start your day, how much traffic to expect before you leave for work, and even your favorite
team’s score while they’re playing.
Swipe up from the bottom center of any screen, or touch the Google Search bar on any Home
screen.
•Say “Google” to search
When the Google Now screen is open, you can say “Google” to activate a voice search.
Open Google Now, and then say “ Google” and what it is you want to search.

14
2
Exploring your Clear
Swipe up for Google Now
Google Now is about getting you just the right information, at just the right time. It tells you
today’s weather before you start your day, how much traffic to expect before you leave for
work, and even your favorite team’s score while they’re playing. All of this happens
automatically. Google Now brings you the information you want to see, when you want to see it.
No s e a r c h i n g r e q u i r e d .
Swipe your finger up from the bottom of any screen , or touch the Google Search bar at the top
of the Home screen. When you want to see more cards, touch
Show more cards at the bottom of the screen. When you don’t need them anymore, swipe them
out of the way.
You’re in control
When you decide to use Google Now, you’re turning on location reporting and location history.
Google Now also uses location information provided by Google’s location service.
If location services are turned on, Google Now uses data that you may have stored in other
Google products. For example, if you have searches stored in your Web History, Google Now can
show cards based on sports scores, f l i g h t s t a t u s , a n d s o o n .

15
Similarly, Google Now can use data that you may have stored in t h i r d - p a r t y p r o d u c t s t h a t
y o u a l l o w G o o g l e t o a c c e s s . F o r e x a m p l e , your tablet’s synced calendar may include
entries from non-Google calendar products. If you have a synced calendar entry for a dentist
appointment that includes the dentist’s address, Google Now can check traffic and suggest when
to leave.
You’re in control. You can choose exactly which cards you’d like to see, adjust the details of
what they display, and adjust your p r i v a c y s e t t i n g s . For more information about Google Now
and your location i n f o r m a t i o n , c o n t a ct G o o g l e S u p p o r t . w w w . g o o g l e . c o m / s u p p o r t
Swipe down for notifications & settings
Notifications alert you to the arrival of new messages, calendar events, and alarms, as well as
ongoing events, such as video downloads.
When a notification arrives, its icon appears at the top of the s c r e e n . I c o n s f o r p e n d i n g
n o t i fi c a t i o n s a p p ea r o n t h e l e f t a n d system icons showing things like Wi Fi signal or battery
strength on the right:
To open the notification shade, swipe down from the top left corner of any screen.
Certain notifications can be expanded to show more information, such as email previews or
calendar events. The one at the top is always expanded when possible.
To open the related app, touch the notification icon on the left. Some notifications also allow
you to take specific actions by t o u c h i n g i c o n s w i t h i n t h e n o t i f i c a t i o n . F o r e x a m p l e ,
C a l e n d a r n o tifications allow you to Snooze (remind you later) or send email to other guests.
When you’re finished with a notifi cation, just swipe it away. To dis miss all notifications, touch
the dismiss icon at the top right of the notification shade. You can perform these actions from
the notification shade
Pending
notifications
Bluetooth, WiFi & Battery and Status

16
Dismiss All
Touch to
respond to
other guests
Swipe down
using one
finger to
expand
certain
notifications

17
Q u i c k S e t t i n g s
Use Quick Settings to easily ac cess Wi-Fi settings, manage display brightness, open the main
Settings menu, and more. To open Quick Settings, swipe down from the top right corner of any
screen:
Touch to
open all
settings
Touch a
square to
open a
specific
setting

18
Relax with Google Play
Google Play brings together all your favorite content in one place –movies, TV shows, books,
music, magazines, apps, and more –so you can reach it from any of your devices.
Use Google Play widgets
These widgets are available on your Home screens:
•M y L i b r a r y . Displays your most recently used music, books, and so on. Touch any of the
images to see your content.
•Recommended on Play. S u g g e s t s m u s i c , m o v i e s , a n d o t h e r content that may interest you.
Touch the suggestion to learn more about it.
•R e c o m m e n d e d a p p s . Recommends apps that you can add to your Home screen. Touch the
recommendation to learn more a b o u t i t
To resize a widget, touch & hold, then let go and drag the blue dots. To remove it, touch & hold,
then drag it to the Remove icon at the top of the screen. To add another Google Play widget,
touch the All Apps icon, t h e n W i d g e t s , and swipe from right to left until you see the one you
want. Then touch & hold, and let go in the Home screen location you want.
Touch to
avoid future
suggestions
like this
Touch to
see a
different
suggestion
Touch to
learn more

19
Shop on Google Play
To open the Google Play Store app, touch the Play Store icon in your Favorites tray on every
Home s c r e e n . Most things you purchase on Google Play are available from your computer as
well as from any of your A n d r o i d m o b i l e d e v i c e s . ( A n d r o i d a p p s a r e o n e e x c e p tion –they
run only on Android devices.)
Sign in to play.google.com to get access to all of your entertainment. The Google Play Store has
millions of applications, music and movies choices available.
Find your content
If you purchased on Google Play in the past, you’ll automatically have access to those previous
applications and content.
TIP: Ensure that you’re signed in using the same account that you used to purchase it.
You can get to your content using any of the Google Play icons in your Favorites tray, including
Books, Magazines, Movies, and M u s i c . Or, touch the Play Store icon to open Google Play. In the
top right corner, to the left of the Menu and Search icons, you’ll fi nd the My Library icon
corresponding to the section of Google Play you’re currently viewing. For example, while
browsing the Movies& TV section, you’ll see the Google Play Movies app icon, which will take
you to My Movies & TV:
You can quickly access your content this way, from the Google Play Store app, even if you
originally purchased it on Google Play using a different phone or tablet. If you get a new device,
all your media will automatically be waiting for you here when you turn on and sign in.
G o o g l e P l a y s e t t i n g s
To adjust your Google Play settings, switch accounts, or get help, choose the option you want
from the M e n u in the top right corner. The Google Play Settings screen lets you control when
Touch icon in this location to see your
content of that type

20
you’re notified about updates to apps and games, clear your search history, and enable user
controls.
TIP: To filter Android apps based on maturity level or require a PIN before completing
any purchase, touch C o n t e n t f i l t e r i n g or Set or change PIN.
G o o g l e P l a y s u p p o r t
For more detailed information about Google Play, including phone a n d e m a i l s u p p o r t
o p t i o n s , v i s i t
www.google.com/support
Use & customize the lock screen
You can add widgets to the top of the lock screen and swipe between them. Lock screen widgets
let you scan recent Gmail mess a g e s , C a l e n d a r e n t r i e s , a n d o t h e r a p p c o n t e n t w i t h o u t
u n l o c k i n g your screen.
If your tablet is set up for more than one user, you may need to touch your image at the bottom
of the screen to see your own l o c k s c r e e n . To open Google Now from the loc k screen, swipe up
from the bottom of the lock screen. Enter your PIN, pattern, or password if p r o m p t e d . To set
or change the type of lock, go to S e t t i n g s > P e r s o n a l > S e c u r i t y > S c r e e n l o c k .
Add a widget to the lock screen
1. If the lock screen has no widgets yet, you’ll see a large Plus icon. If you don’t see it, swipe any
existing widgets from left to r i g h t u n t i l i t a p p e a r s .
2. Touch the Plus icon. If prompted, enter your PIN, pattern, or password. A list of the available
widgets appears. Apps that support lock screen widgets can add their own widgets to this list.
3. Touch the widget you want to add. You can add up to five widgets to your lock screen. To
move between them, swipe across the top of the screen in portrait mode, or across the left side
of the screen in landscape mode.
R e o r d e r l o c k s c r e e n w i d g e ts
1. Touch & hold a widget.
2. Drag the widget and release it in the location of your choice.
Remove a lock screen widget
Touch & hold the widget, then drag it onto the Remove icon.
This manual suits for next models
1
Table of contents
Other Filemate Tablet manuals

