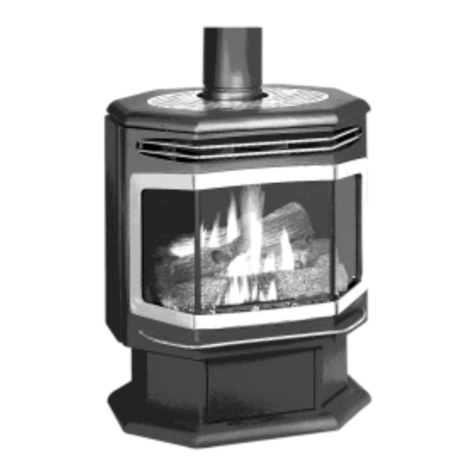
Firebelly Razen CS1 User manual

Operating Instructions
Razen CS1 Cookstove

General notes
• All local regulations, including those referring to national and European standards need to be complied with when installing
this cookstove.
• Check all parts are tted correctly including rebricks and hotplate before lighting the cookstove.
• On rst lighting the stove may produce some fumes as the stove paint cures. Open windows as necessary to allow the fumes
to clear.
• The door handles and controls will become hot during operation of the stove. Use the glove provided.
• The chimney should not be shared with any other appliances.
• Keep the rebox door closed except when access is required for lighting, refuelling and de-ashing.
• The cookstove is not suitable for slow combustion or continuous burning.
• Do not modify the cookstove
• Use only replacement parts authorised by Razen Cookstoves.
Ventilation
• Take care not to obstruct any air inlet grilles supplying combustion air for the stove.
• An air extraction device shall not be used in the same room as the cookstove unless adequate additional ventilation is provided.
• Other heating appliances requiring air for combustion shall not be used in the same room as the cookstove unless adequate
additional ventilation is provided.
Fuel
• The stove is woodburning only. The maximum log length is 500mm. Ensure the wood is well seasoned. To season wood store it in
dry and well ventilated conditions for at least 12 months. Radial cracks in the ends of the timber indicate that the timber may
be ready to burn.
• The stove is not an incinerator and should not be used to burn anything other than wood.

Controls
Clearances from combustible materials
Any adjacent combustible material should be far enough away from the cooking stove so as not to rise 60°C above the room
temperature when the cooking stove is in operation. The minimum required clearance to combustible material is:
at the sides 5mm
at the back 500mm
Note: The space beneath the appliance is not a fuel storage area.

Lighting and operation
Open the air inlet control fully and move the selector switch to point to the hotspot.
Open the re door and light a small re at the back of the rebox using paper and kindling and close the door. As the re takes hold
add more wood gradually. Once the re is hot the air inlet control can be reduced so that the re burns at a steady rate. When
refuelling it is best to add small amounts of fuel at regular intervals rather than large amounts in one go. Do not refuel above the level
of the top of the right side rebrick.
To increase heat to the oven move the selector switch to point to the oven. With the selector switch pointed at the hotspot the hot
ue gases will bypass the oven. The hotspot will always be hot provided the re is lit and it’s temperature is directly linked to the heat
of the re. The controls may become hot, use the tool provided.
Ash
Wood burns effeciently on a layer of ash and so complete removal is not necessary. Only remove ash when thecookstove is cold. Lift
out the fuel retainer to improve acces to the rebox. Remove the ash into a heat proof receptacle. Take care when disposing of the
ash as it may remain hot even after the re has gone out.
Oven and Hotplate
The gure shows the heat gradient accross the hotplate. The hotspot is used for
fast boiling and frying and the other areas for simmering and warming. Solid at
bottom pans work best on the hotplate.
The oven also has a temperature gradient, the top of the oven being warmer
than the bottom. Use an oven shelf thermometer when cooking to determin the
temperature at a particular point inside the oven. The temperature of the oven
can be controlled by regulating the amount of fuel added and by adjusting
the oven/hob selector switch and air inlet control. Each installation will be a
little different and variables such as the wood fuel used and the draught of the
chimney will effect how the cookstove functions. The best settings and the control
of the cookstove will be learnt with practice.
Note: Take care when the cookstove is lit as the external surfaces will become hot

Cleaning
The hotplate should be wiped down with cooking oil beofre each time it is used for the rst few times. This will help to season the
hotplate and prevent any food spillages sticking. Cooking oil will also prevent rust forming on the hotplate if it is to be unused for a
long period. The hotplate will darken as it is used with the effects of heat and the metal seasoning. This is normal and it should not be
cleaned with oven cleaners.
The stainless steel parts of the cookstove can be wiped down with proprietary stainless steel cleaner. When clean, the stainless steel
parts can be oiled (baby oil works well) to help prevent marks. Always wipe stainless steel parts in the direction of the grain.
The oven shelves and shelf supports can be removed for easy cleaning.
The glass in both doors can be cleaned with a proprietary glass cleaner. Gentle use of nylon scourers (Scotchbrite) will work on tough
marks. Light scratches in the stainless steel can also be removed using a Scotchbrite pad - be sure to rub in the direction of the grain.
Flue ways
Maintenance
It is advised that a competent engineer inspect the chimney and ue ways
annually. The chimney and ue ways should be cleaned when necessary to
prevent any build up of soot. Remove the hotplate to check the ue ways
around the oven. To do this, remove the left side oven shelf support to give
access to the hotplate retaining bolts. Remove the nuts and the hotplate will
lift off. When replacing the hotplate tighten the nuts just enough to level the
hotplate. To access the ueway underneath the oven rst remove the fuel
retainer and grate and then right hand side rebrick.
Always do a thorough check of the cookstove and chimney prior to lighting
after a long period of shut down to check for blockages and to make sure all
components are in the correct place.

Faultnding
Symptom: Low ue draught. The cookstove is difcult to light and smoke comes into the room.
Possible cause Solution
Obstruction in the stove or chimney Clear the chimney and ue ways, check position of rebricks
Cold chimney Insulate or line the chimney
Chimney too short Extend the chimney
Down Draught Relocate the chimney terminal or t an anti down draught cowl
Shortage of supply air for combustion Check air vents are clear and for competing draughts
Symptom: High ue draught. The cookstove is difcult to control and is too hot, wood burns too fast.
Possible cause Solution
Chimney and terminal too effective Change the terminal or t a ue draught stabiliser
Fire door not sealing Check door catch and door rope seal
Air inlet control not closing Check air control is tted correctly and moves freely
Symptom: Poor combustion, dirty re and little heat.
Possible cause Solution
Low Flue draught See above for low ue draught solutions
Wet fuel Check wood is thoroughly seasoned
Air inlet control not open Check air control moves freely and opens fully
Adverse conditions
High winds may cause excessive draughts in some chimneys causing increased combustion and a hotter re. To prevent over heating
close the air inlet control and point the selector switch to the oven. Do not add further fuel until conditions improve.
Chimneyre
In the event of a chimney re call the re brigade - 999. Close the air inlet control and point the selector switch to the oven. Move
any combustible materials such as furniture away from the stove and chimney breast. Do not open the rebox door. Do not throw
water on the stove.

Technical Data
Model CS1
Nominal heat output kW 10.6
Air vent size cm² 30
Weight kg 200
Mean ue gas temperature ºC 302
Flue gas mass ow g/s 9.4
Total effeciency % 75.2
Side clearance to combustibles mm 5
Rear clearance to combustibles mm 500
Test Standard BS EN 12815:2001
Maximum log length mm 500
Requirements to maintain nominal heat output of 10.6kW:
Refuelling period hrs 1
Mass of wood per refuel (test fuel beech) kg 3.4
Flue draught Pascals 12
Firebelly Stoves Ltd Unit 16, Slaithwaite, Hudderseld, West Yorkshire, HD7 5HA, UK
Table of contents
Other Firebelly Stove manuals
Popular Stove manuals by other brands

EdilKamin
EdilKamin LILIA Installation, use and maintenance

Hunter Stoves
Hunter Stoves AVALON 4 Instructions for Installation/Operating/Maintenance/Servicing

Defy
Defy DGS170 user manual

Lopi
Lopi heritage bay owner's manual

Cadel
Cadel AMARANTO 9 Installer manual

MCZ
MCZ SUITE-CLUB-MUSA Hydromatic 24 M2 TRANSLATION OF ORIGINAL INSTRUCTIONS

Dimplex
Dimplex LEE instruction manual

Esse
Esse 500 Series Installation & user's instructions

Breckwell
Breckwell SP6000 owner's manual

Jetmaster
Jetmaster MK6 Installation and operating instructions

Ekofires
Ekofires 6010 Install and user manual

Desa
Desa 107434-01C.pdf OWNER'S OPERATION AND INSTALLATION MANUAL