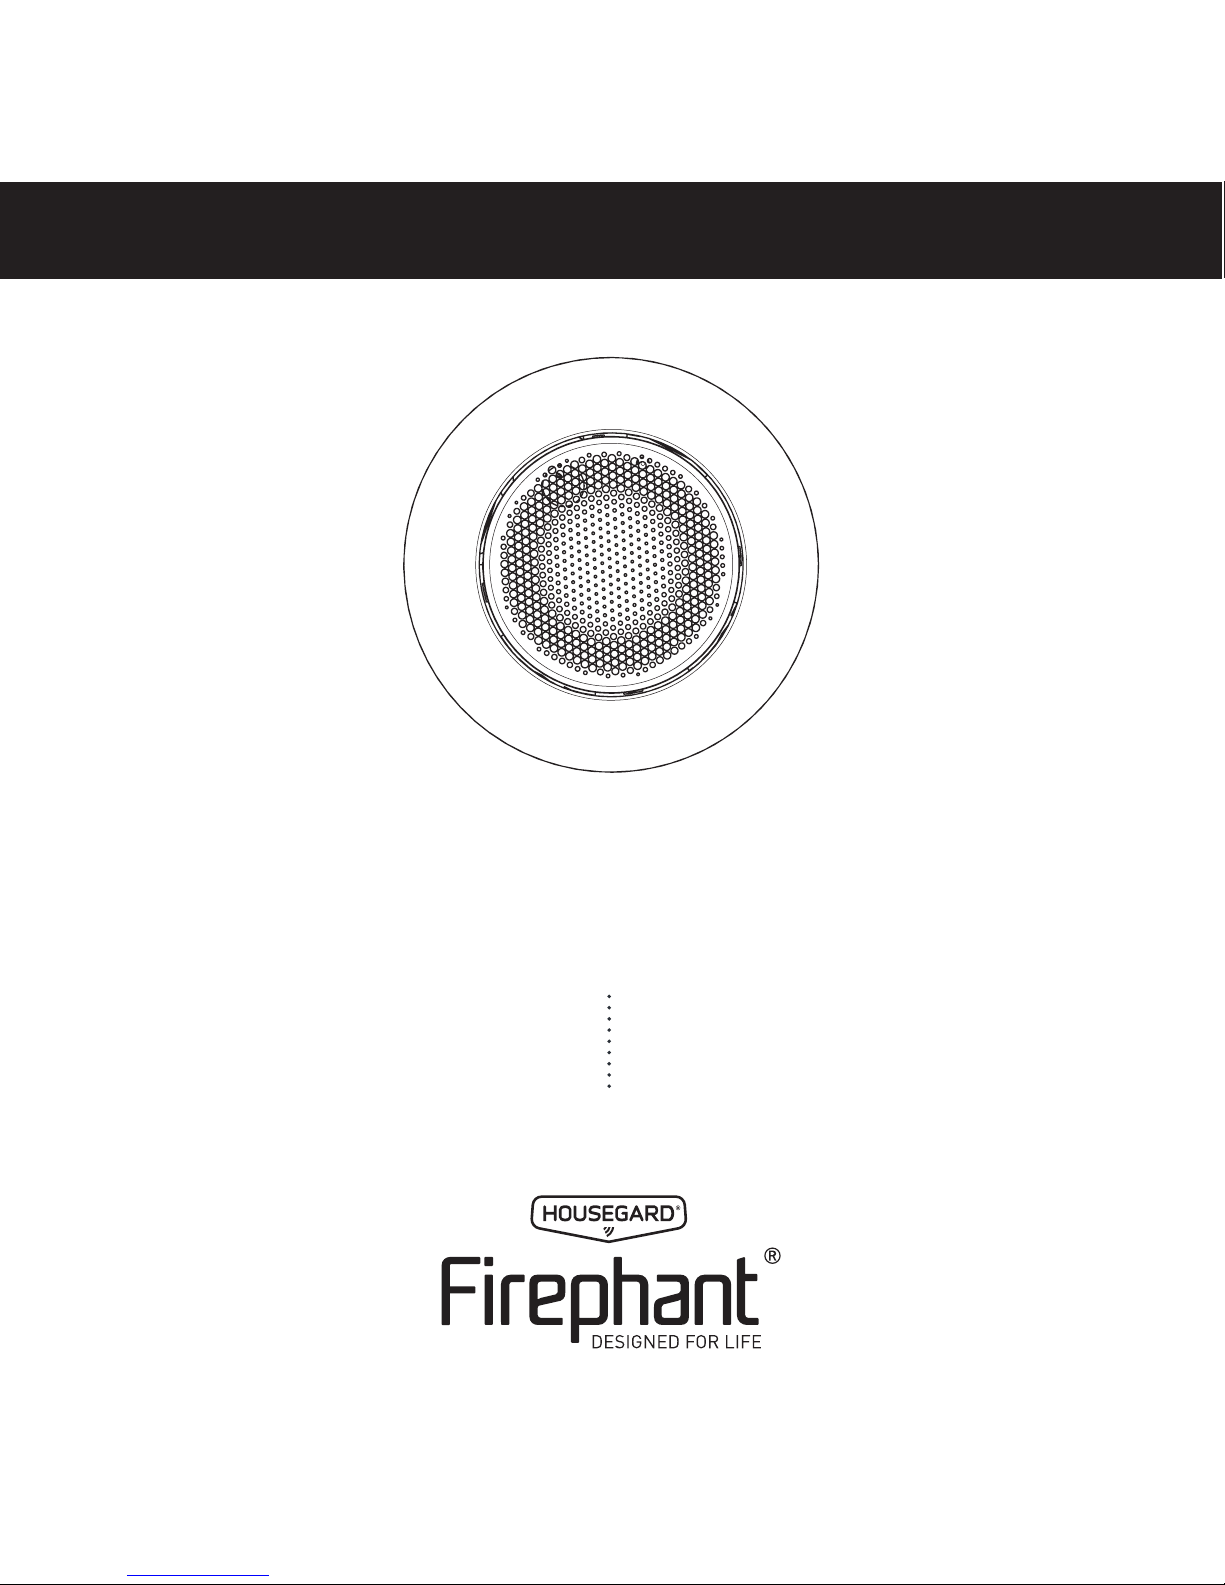
Firephant SA800 User manual
1
SMOKE ALARM
BRANDVARNARE
PALOVAROITIN RØYKVARSLER
RØGALARM
USER MANUAL
Manual: SA800 5 Y - Ver. 170426

3
SMOKE ALARM
MODEL: SA800
Congratulations on the purchase of your
new smoke alarms. We recommend
that you spend some time reading this
instruction manual in order that you fully
understand all the operational features. You
will also find some hints and tips to help
you resolve any issues. Read all the safety
instructions carefully before use and keep
for future reference.
The smoke alarm is designed to detect
smoke particles. The Housegard smoke
alarm is designed to give an early warning
if a fire occurs, but its operation depends on
correct positioning and maintenance.
ENGLISH
FEATURES
»Optical smoke alarm
»High sensitivity and stability
»Test and pause function
»LED diode indicates normal operation
»Low battery warning
TECHNICAL SPECIFICATIONS
Model No: SA800
Detection type: Photoelectric chamber
Power source: DC 3V lithium
(Supplied with battery)
Standby current: ≤ 8.7µA
Alarm sound level: 85 dB /3 m
Operating temperature: 0 °C to 45 °C
Ambient humidity: 10 % - 90 %
Sensitivity: 0,1 ~ 0,16 dB/m
Dimension: Ø110 x 36 mm

4
1. The smoke alarm is battery-powered.
The smoke alarm will not work without bat-
teries, or if the batteries are dead, removed
or not correctly connected. Only use the
specified type of battery. DO NOT connect
the smoke alarm to any type of detector or
equipment other than what is stated in this
manual.
2. The test button provides a full test of all
the smoke alarm’s functions. No other test
methods are required. Test smoke alarms
every week to check that they are working
properly.
3. Do not remove or disconnect the batte-
ries to stop false alarms, as this will cause
the smoke alarm to lose important func-
tionality. Open a window or ventilate the air
around the smoke alarm to stop the alarm
and/or press the pause button.
4. The smoke alarm must be installed in
line with all local and national rules and
regulations on installation.
5. The smoke alarm is intended for use in
houses. Can also be used in camping-cars.
In apartment blocks, each apartment
should be fitted with its own smoke alarm.
This smoke alarm is not suitable for use in
non-residential buildings. The smoke alarm
is not a replacement for a complete alarm
system as required under law or by the fire
safety authorities.
6. There may be reasons why a person in a
household might not hear the alarm (e.g.
noise, deep sleep, impaired hearing). If you
suspect that a person in the household
will not hear the smoke alarm, specialist
alarms should be installed. If a person
in the household has impaired hearing, spe-
cial alarms should be installed to alert the
person via sound, light and vibrations.
7. The smoke alarm detects combustion
particles in the air (smoke). It does not
react to flames or gas. The smoke alarm
is designed to give off an audible alarm if a
fire is developing.
8. No smoke alarms are entirely reliable
and they cannot give a 100% guarantee
to protect life and property against fire.
The smoke alarm is no replacement for
insurance. Homeowners and tenants should
take out life and home insurance.
IMPORTANT SAFETY INFORMATION
The smoke alarm should be tested every
week and replaced every 10 years.
5
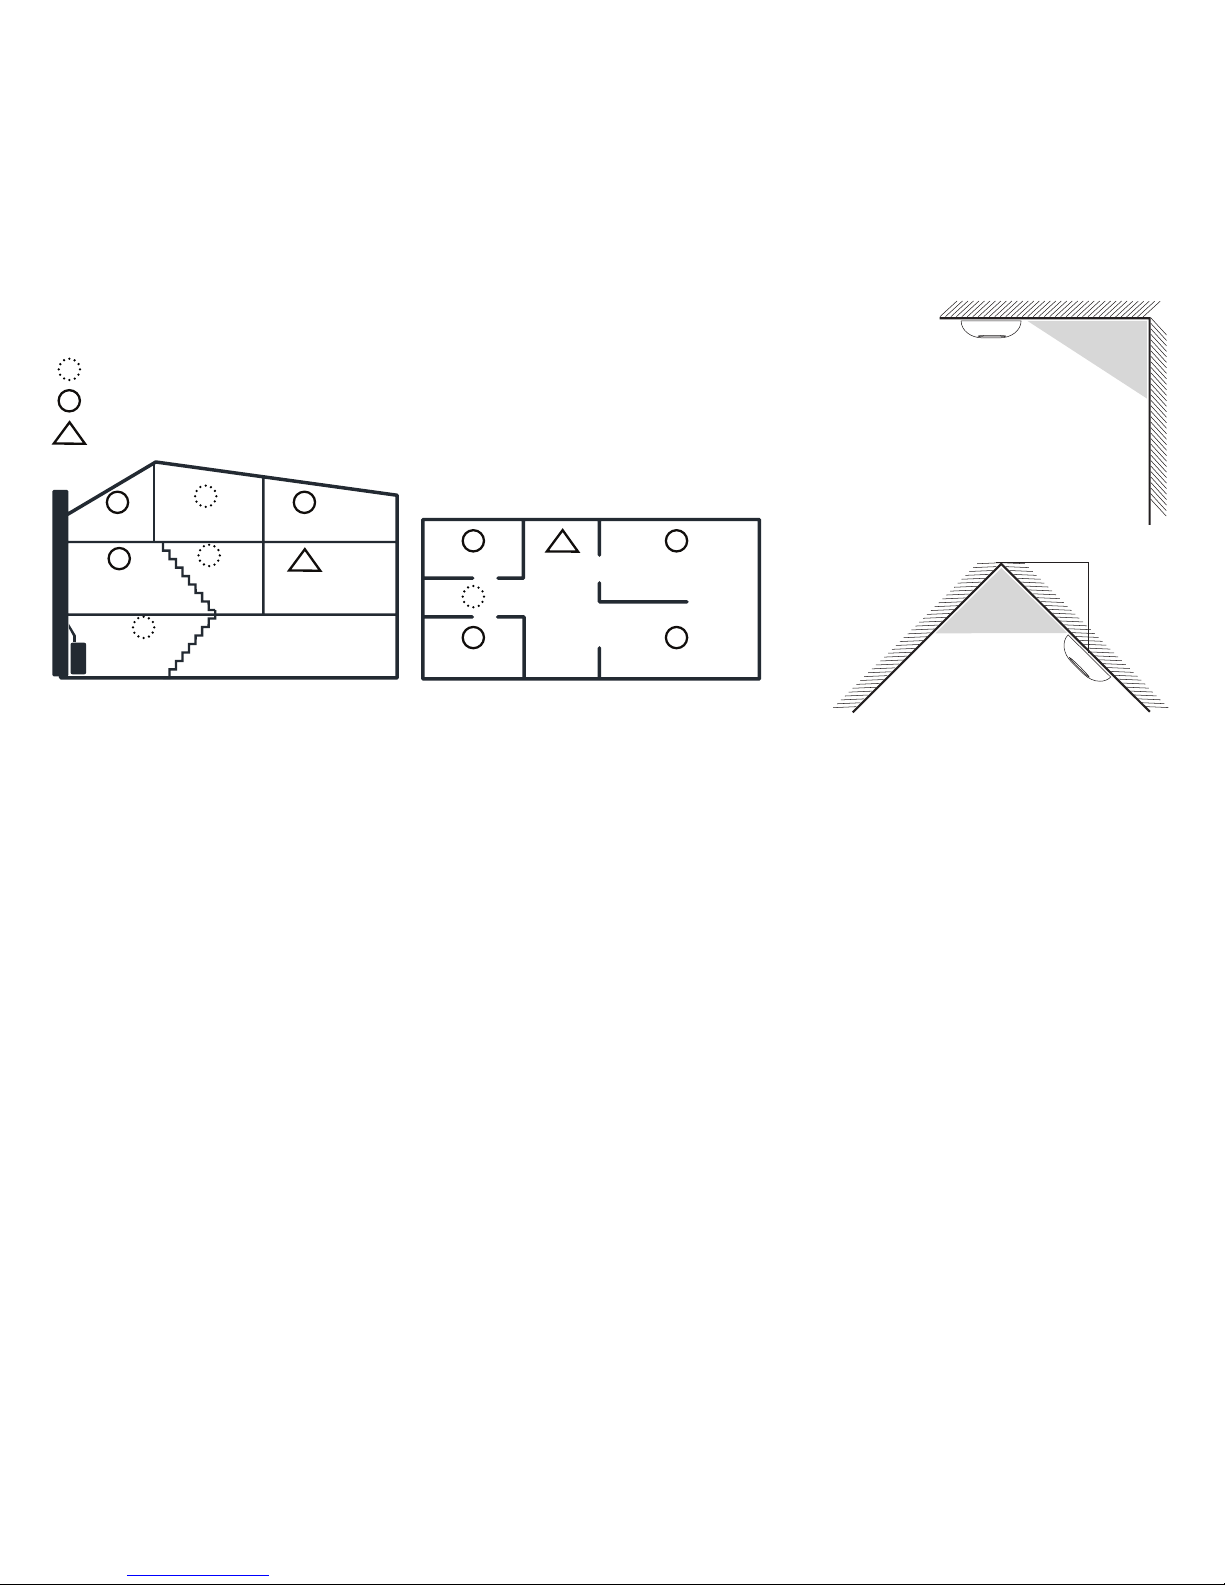
POSITIONING THE SMOKE ALARM
For the smoke alarm to give an early warning, it needs to be installed where the fire
occurs. Housegard therefore recommends that you install a smoke alarm in every room
and on all floors.
»Install a smoke alarm in all separate bedrooms and in rooms commonly occupied.
»In homes with several storeys, a smoke alarm should be installed at the top of every
staircase between each storey.
»In the basement, a smoke alarm should be installed on the ceiling at the foot of the stairs.
»In bedrooms where people sleep with closed doors, there should always be a smoke
alarm fitted in the bedroom.
»Install a smoke alarm in every room where there is a potential risk of fire.
»Install a smoke alarm at each end of corridors, if they are longer than 9 metres.
»Install the smoke alarm in the middle of the ceiling. If this is not possible, install the
smoke alarm on the wall at least 0.5 m from any corner and at least 10–15 cm from the
ceiling. (Wall-mounting is not recommended).
Multi-story residence Single-story residence, apartment
Minimal protection
Recommended/more substantial protection
Smoke alarms with a pause function are recommended
50 cm
100 cm

6
SMOKE ALARMS SHOULD NOT BE PLACED IN THE FOLLOWING
LOCATIONS
»In the kitchen, near the cooker, where smoke from cooking could cause false alarms.
»In areas of high air humidity, such as bathrooms or near dishwashers or washing machi-
nes, where steam and moisture could cause false alarms.
»Near fans and ventilation ducts, where air flows may prevent smoke from reaching the
smoke alarm.
»Near light sources and electrical equipment that emit an electromagnetic field.
»Near a fireplace or stove with an open fire.
»At the top of a V-shaped ceiling, where air pockets could stop the smoke from reaching
the smoke alarm.
»In a garage, where exhaust fumes could cause false alarms.
»In dusty and dirty areas, where the dust and dirt could damage the smoke alarm.
»In rooms where the temperature may fall below 0 °C or rise above 45 °C, or in rooms with
large temperature variations.
WARNING: Incorrect positioning may lead to reduced reliability and false alarms.
PROTECT YOUR HEARING
Smoke alarms emit a loud audible signal. We recommend that you
always use earplugs or other hearing protection when program-
ming and testing your smoke alarms.
7
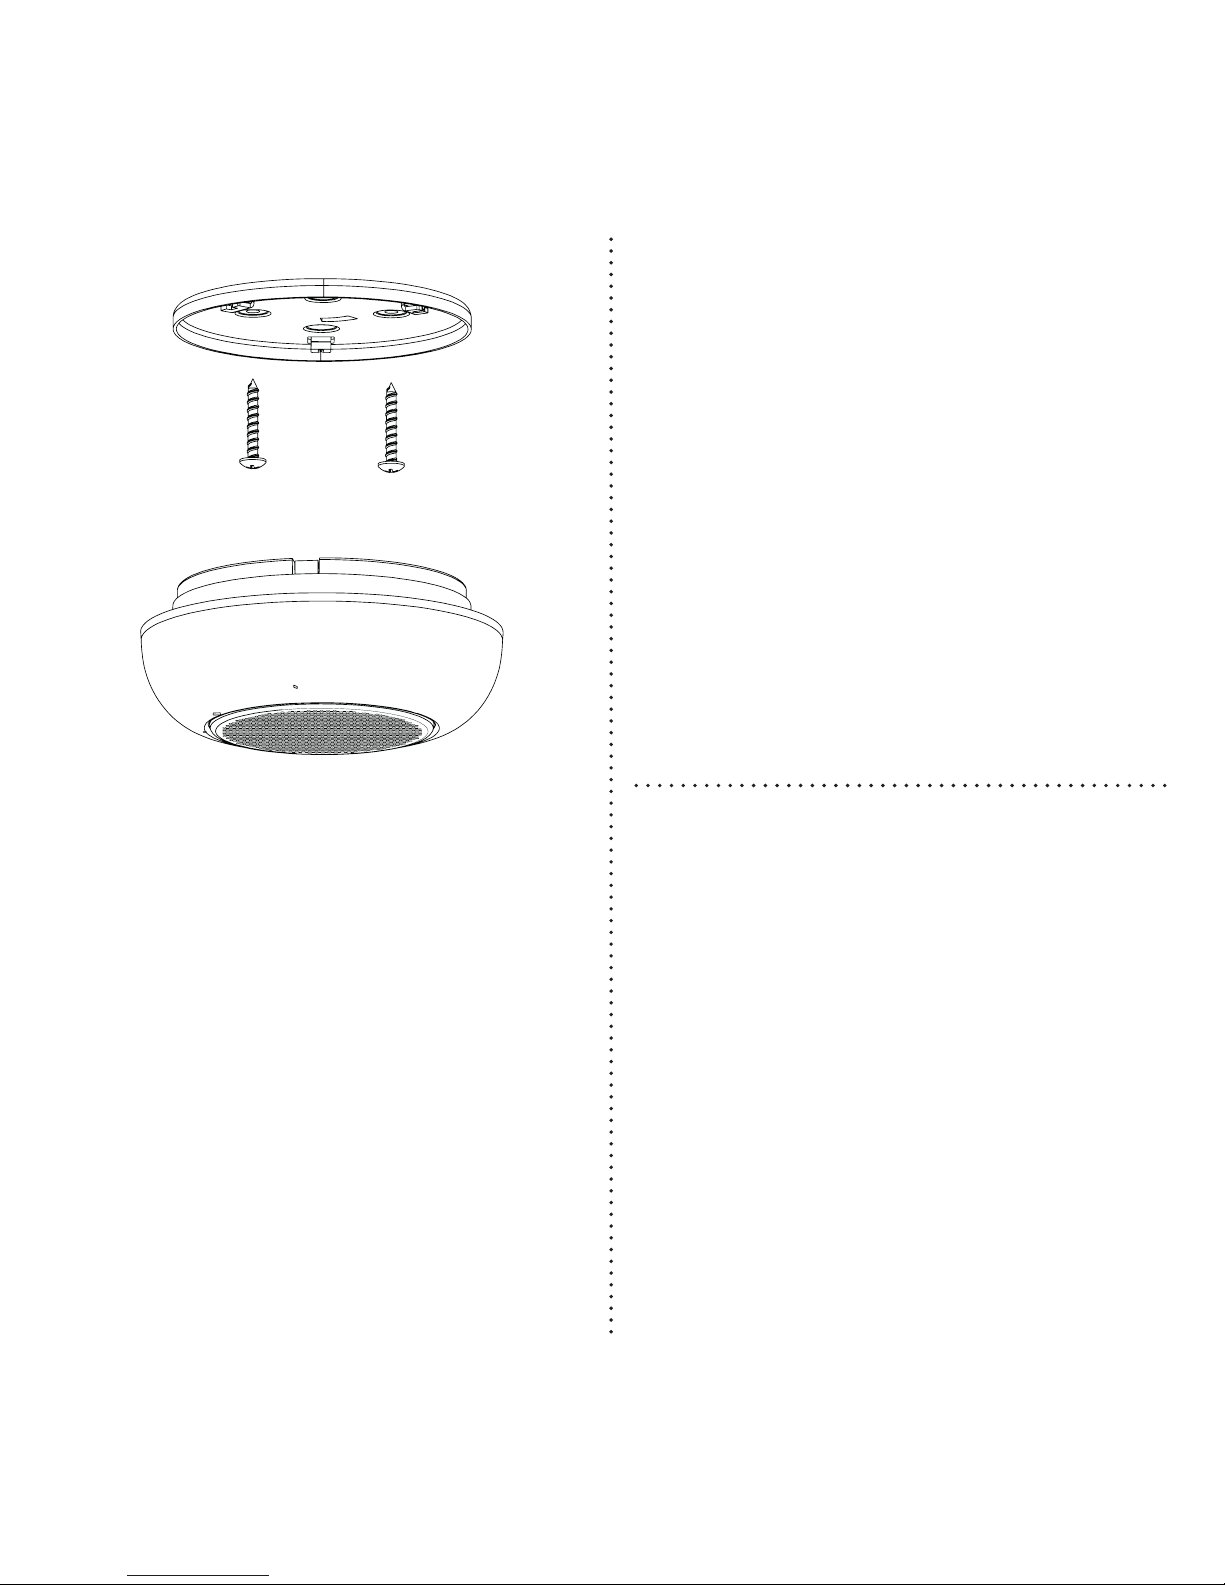
FITTING THE BATTERIES AND
TESTING EACH SMOKE ALARM
Twist off the smoke alarm’s mounting plate
and install 1 DC 3V lithium battery. Make
sure you have the right polarity +/- . Test
each smoke alarm by firmly pressing down
the test button for 5 seconds and release.
HOW TO INSTALL YOUR SMOKE
ALARM
1.Remove the mounting plate on the back
of the smoke alarm by twisting it counter
clockwise.
2.Install the mounting plate in the chosen
position on the ceiling. Take care to posi-
tion your smoke alarm properly.
3.Place the smoke alarm against the moun-
ting plate and twist the smoke alarm
clockwise to lock it into place.
4.Press the test button and hold it for 5
seconds to test the smoke alarm.
OPERATION
During normal operations, the smoke
alarm’s LED flashes every 344 seconds.
This means that the battery and the unit are
working correctly. When smoke is detected,
an internal sounder will activate to alert
occupants, and the LED will flash rapidly.
The sounder is a loud, pulsating alarm.

8
MODE SOUNDER LED
Normal - 1 flash every 344 second
Test beep 0.5 sec, av 0.5 sec,
beep 0.5 sec, av 0.5 sec and
so on
Flashes rapidly
Alarm beep 0.5 sec, av 0.5 sec,
beep 0.5 sec, av 0.5 sec and
so on
Flashes rapidly
Pause(Hush) - 1 flash every 10 second
Chamber fault 3 beeps every 43 seconds -
Low battery alarm 1 beep every 43 second 1 flash every 43 second
MEANING OF THE DIFFERENT LED AND ALARM SIGNALS
CAUSES AND REMEDIES FOR FALSE ALARMS
A smoke alarm detects and reacts to smoke particles in the air. The smoke particles set off
the smoke alarm. This function means that the smoke alarm will also react to dust partic-
les, moisture or other particles in the form of pollen, insects and so on. These factors are
usually the cause of a false alarm.

9
Cause of error Action
Steam and moisture. A false alarm may
occur if the smoke alarm is placed too close to a
bathroom, laundry room, or other location with
high air humidity.
Place the smoke alarm at least 2 metres from any
bathroom, laundry room, or other location where
high air humidity may occur.
Dust and dirt. Since air passes freely through
the detection chamber, the smoke alarm will
always attract some dust and pollen particles.
This can lead to a false alarm. The smoke alarm
may also become more sensitive for this reason,
which could cause false alarms. In addition, dirt
will collect over time, as the smoke alarm ages,
which may result in false alarms.
Regularly vacuum the smoke alarm, using a
plastic nozzle to avoid damaging the electronics.
Avoid fitting smoke alarms in places with a lot of
dust and dirt. You can put a ‘hat’ over the smoke
alarm or remove it entirely while you are carrying
out renovation work at home that involves sawing,
sanding, etc.
Draughts, dust and air flows. False alarms
may be caused by the smoke alarm being placed
too close to doors, windows, ventilation systems,
fans, air ducts, heat pumps or suchlike. This can
lead to dust particles being carried up into the
detection chamber.
Do not install smoke alarms in a draughty loca-
tion, close to windows or doors, ventilation, fans,
air ducts, heat pumps or suchlike. Find a better
location for the smoke alarm, further away from
draughts and air flows.
Temperature variations. Temperature vari-
ations may lead to condensation in the detection
chamber. This may happen, for example, if the
smoke alarm is placed in a room where windows
are opened for ventilation in the winter, or close
to exits, balcony doors or other places that switch
between hot and cold.
Avoid fitting smoke alarms in rooms with rapid
temperature changes or close to windows and
doors that are frequently opened and closed. Move
the smoke alarm to a place with a more even and
stable temperature.
Generally unfavourable positions. Incorrect
positioning in an unstable indoor environment, a
draughty area, close to electronic apparatus (EMC)
and lighting may cause a false alarm.
Place smoke alarms at least 5 metres from open
fires, stoves or other heating devices. 2 metres
from rooms with high humidity. 2 metres from
ventilation ducts, heat pumps and air conditioning.
1 metre from light bulbs and fluorescent tubes.

10
TESTING THE SMOKE ALARM
Test your smoke alarm by pressing down the test button and hold it for 5 seconds, then
release.
»Always test all alarms after installation to ensure that they are functioning properly.
»The test button performs a full test of all functions. Never use a naked flame to test the
smoke alarm, since this can destroy the alarm.
»Test your smoke alarm routinely once a week.
»Always test your smoke alarms after a long period of absence from the home and always
when you return from a holiday.
»Always stand an arm’s length away when testing your smoke alarm to avoid damage to
your hearing.
FOR YOUR SAFETY! NEVER IGNORE A SMOKE ALARM THAT HAS GONE OFF. WHEN YOU
HEAR THE ALARM SIGNAL, YOU MUST GIVE IT YOUR FULL ATTENTION AND ACT ACCOR-
DINGLY.
PAUSE FUNCTION
When in alarm mode, pressing the Test/Pause button reduces the sensitivity of the smoke
alarm for about 9 minutes. The pause feature should only be used after the cause of the
alarm is known (such as normal cooking fumes). During the pause time, the red LED will
flash every 10 seconds. After the pause time has expired, the smoke alarm will automatical-
ly return to normal sensitivity. If smoke is still present in the unit, the alarm will re-activate.
The pause feature can be used repeatedly.

11
CLEANING AND MAINTENANCE
The smoke alarm should be cleaned regularly, and at least twice a year. Clean your
smoke alarm by vacuuming externally along the opening to the detection chamber to
remove dust and dirt.
IMPORTANT: Do not try to open the cover to clean inside the smoke alarm. This will
negate the warranty.
REPLACING THE BATTERY
How often the battery needs replacing depends on the type of
battery. It is recommended that you replace batteries routinely
once a year, preferably on a particular date. Alternatively, re-
place the battery when the smoke alarm emits the low battery
signal (short audible signal and flash LED every 43 seconds).
1.Twist the smoke alarm counterclockwise to remove it from
the mounting plate.
2.Take out the old batteries.
3.Insert new batteries. Check the correct polarity +/-.
4.Place the smoke alarm against the mounting plate and twist the smoke alarm clockwise
until it clicks into place.
5.Press the test button to test the smoke alarm.
TYPE OF BATTERY
Attention: The correct functioning of the smoke alarm is ensured by the use of one of
the following batteries
Voltage: DC 3V
Type: Lithium
Battery life: Approx. 5 years
Rec. batteries: EVE-/PAIRDEER CR123A
CAUTION: When using lithium battery, it will cause danger of explosion if the battery is
incorrectly replaced. Replace only with the same or equivalent type.
12
Problem Action
The smoke alarm gives off no signal when tested. 1. Take the smoke detector down and check
that the batteries are fitted correctly.
2. Check that the batteries still have some charge.
The smoke alarm flashes and emits a short
audible signal every 43 seconds. 1. This indicates low battery charge.
2. Replace the batteries.
The smoke alarm goes off when there is no smo-
ke, or when cooking, etc. 1. Clean the smoke alarm. See also section on
false alarms.
2. Change the location of the smoke alarm.
See section on false alarms.
TROUBLESHOOTING
WARRANTY
This smoke alarm comes with a 5-year
limited warranty against manufacturing
defects. (Valid from date of purchase.) The
batteries are not covered by the warranty.
Liability under the warranty is limited to
the value of an equivalent smoke alarm.
Defective smoke alarms should be returned
to the retailer, along with a description of
the problem. If the claim is approved, the
faulty goods will be replaced with a new
smoke alarm of the same or an equivalent
type. Any claim must be accompanied by a
receipt confirming the date of purchase.
GPBM Nordic AB hereby declares that
Housegard model SA800 complies with the
essential requirements and other relevant
provisions of Directive 89/106/CEE. The
Declaration of Conformity is available upon
Frank Willy Ottesen
Technical Manager
17
0333
DOP: SA800-1216
EN 14604:2005+AC:2008
Cert: 0333-CPR-292145-1
Other manuals for SA800
1
Table of contents
Other Firephant Smoke Alarm manuals

Popular Smoke Alarm manuals by other brands

Smartek
Smartek NUBI 4.0 NB40LP1 quick start guide

jablotron
jablotron SD-728 manual

BASETech
BASETech KD-133A operating instructions

DMP Electronics
DMP Electronics 521LX Installation sheet

VESDA
VESDA VESDA-E VEP-A00-1P installation instructions

System Sensor
System Sensor i3 Series Frequently asked questions and answers


