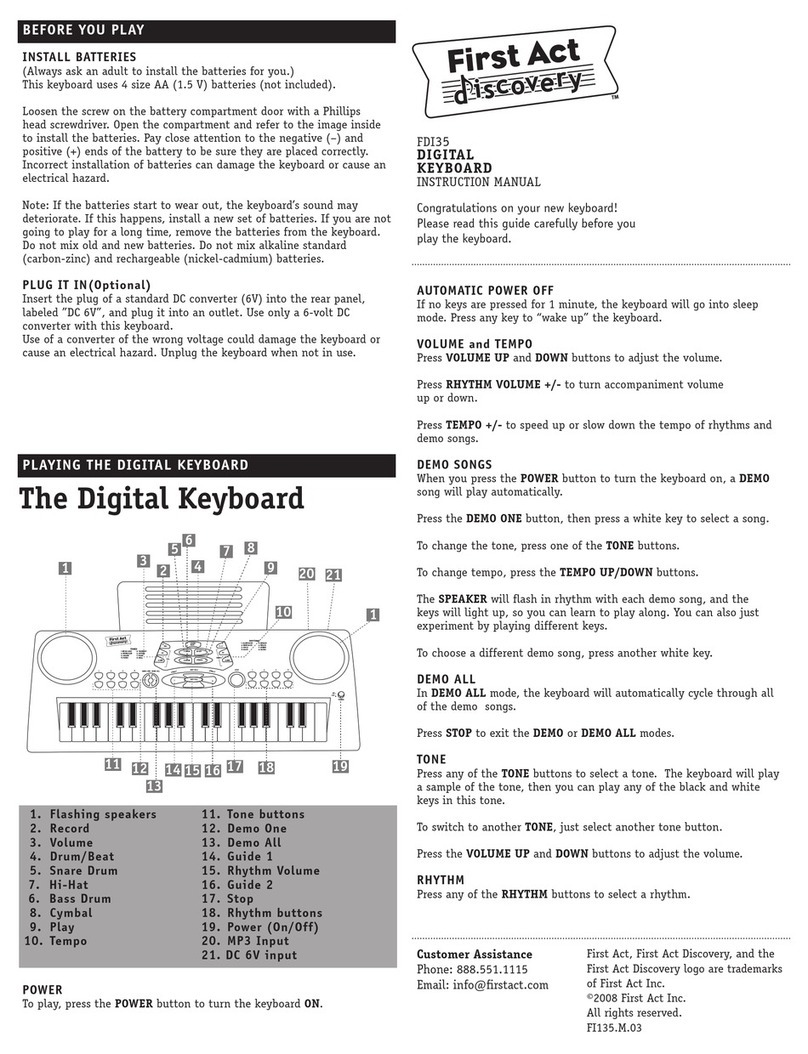
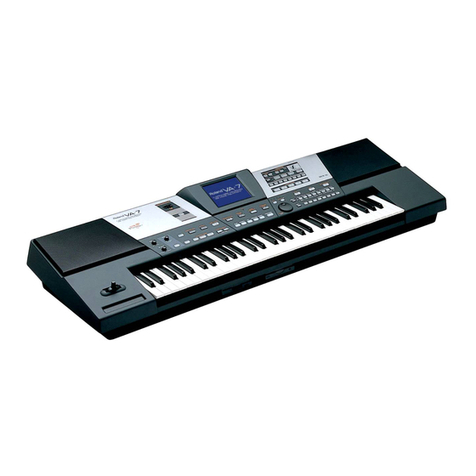
First Act MI071 User manual

NOTICES IMPORTANTES
LISEZ CETTE SECTION AVEC SOIN.
•Lisezetrespectezcesdirectives.
•N’utilisezpascetappareilprèsdel’eau.
•Nelenettoyezqu’avecunchiffonsec.
•Nel’utilisezpasprèsd’unesourcedechaleurcommeunradiateur,unechauffer-
etteouunecuisinière.
•Faitesfairetoutentretienparunepersonnequaliée.Unentretienestrequis
silepianoaétéendommagéd’unefaçonquelconquecommeparexemple:un
liquideaétérenversésurlepiano,lepianoaétéexposéàlapluieouàl’humidité,
lepianonefonctionnepasnormalementouaétééchappé.
•Anderéduirelerisqued'incendieetdechocélectrique,n'exposezpaslepiano
àlapluieouàl'humidité.
AVERTISSEMENTS
Ne changez pas les pièces sans conseil professionnel. Tout changement peut
entraînerunmauvaisfonctionnement.
Gardezlessacsd'emballagehorsdelaportéedesenfantsand'évitertoutrisque
desuffocation.
Déplaceztoujourslepianoavecsoinandenepasendommagersoncoffretou
sespiècesinternes.
Évitezlecontactaveclesacidesetlesalcalis.N'utilisezpaslepianodansunmilieu
corrosifouextrêmementhumideand'éviterlacorrosiondescontactsélectriques.
REMARQUE:Cetappareilaététestéettrouvéconformeauxlimitespourun
appareilnumériquedeclasseBfaisantl’objetdelapartie15desrèglementsdela
FCC.Ceslimitesseveulentd’offriruneprotectionraisonnablecontrel’interférence
nociveeninstallationrésidentielle.Cetappareilgénère,utiliseetpeutirradier
uneénergiedefréquenceradioet,s’iln’estpasinstalléetutiliséconformément
àcesdirectives,peutcauseruneinterférencenociveauxcommunicationsradio.
Toutefois,onnegarantitaucunementqu’iln’yaurapasinterférencedansune
installationparticulière.Sicetappareilcauseuneinterférencenociveàlarécep-
tionradiooutélé,cequipeutêtreétablienéteignantetrallumantl’appareil,on
encouragel’utilisateurdetenterderemédieràlasituationenprenantuneou
plusieursdesmesuressuivantes:
•Réorientezoudéplacezl’antenneréceptrice;
•Augmentezladistanceentrel’appareiletleposterécepteur;
•Connectezl’appareildansuneprisedecourantouuncircuitdifférentdecelui
oùleposterécepteurestconnecté.
•Recherchezl’aide ouleconseil durevendeur oud’un réparateur d’appareils
radiooudetélévision.
Attention:Changeroumodiercetappareilsanslapermissionexpressedela
partieresponsabledelaconformitépeutannulervotreautorisationd’utilisercet
appareil.
IMPORTANT SAFETY INSTRUCTIONS
PLEASE READ THIS SECTION CAREFULLY.
•Readandfollowtheseinstructions.
•Donotusethisdevicenearwater.
•Cleanonlywithadrycloth.
•Donotusenearanyheatsourcessuchasradiators,heaters,stoves,orotherheat
producingmachinery.
•Referallservicingtoqualiedservicepersonnel.Servicingisrequiredwhenthe
keyboardhasbeendamagedinanyway,suchaswhenliquidhasbeenspilled
onthekeyboard,thekeyboardhasbeenexposedtorainormoisture,doesnot
operatenormally,orhasbeendropped.
•Toreducetheriskofreandelectricshock,donotexposethiskeyboardtorain
ormoisture.
WARNINGS
Donotchangethepartswithoutprofessionalinstructions.Anychangemaycause
malfunctions.
Keepthewrappingbagoutofthereachofchildrentoavoidachokinghazard.
Alwaysmovethekeyboardcarefullytoavoiddamagetooutercoveringandinner
components.
Thekeyboardshouldnotcomeintocontactwithacidoralkali.Itshouldnotbe
operatedwherethereiscorrosiveorexcessivelymoistairtoavoidcorrosionofthe
electricalcontacts.
NOTE:Thisequipmenthasbeentestedandfoundtocomplywiththelimits
foraClassBdigitaldevice,pursuanttoPart15oftheFCCRules.Theselimits
aredesigned toprovidereasonableprotectionagainst harmfulinterference
inaresidentialinstallation.Thisequipmentgenerates,uses,andcanradiate
radio frequency energy and, if not installed and used in accordance with
the instructions, may cause harmful interference to radio communications.
However,thereisnoguaranteethatinterferencewillnotoccurinaparticular
installation. If this equipment does cause harmful interference to radio or
televisionreception,whichcanbedeterminedbyturningtheequipmentoff
andon,theuserisencouragedtotrytocorrecttheinterferencebyoneormore
ofthefollowingmeasures:
•Reorientorrelocatethereceivingantenna.
•Increasetheseparationbetweentheequipmentandreceiver.
•Connecttheequipmentintoanoutletonacircuitdifferentfromthattowhich
thereceiverisconnected.
•Consultthedealeroranexperiencedradio/TVtechnicianforhelp.
Warning:Changesor modicationstothis unitnotexpresslyapprovedby the
partyresponsibleforcompliancecouldvoidtheuser’sauthoritytooperatethe
equipment.
CUSTOMER ASSISTANCE/SERVICE APRÈS-VENTE
PHONE/TÉLÉPHONE:888.551.1115
EMAIL/COURRIEL:info@rstact.com
FirstActInc.
745BoylstonStreet
Boston,MA02116USA
rstact.com
FirstActandtheFirstActlogoaretrademarksofFirstActInc.
©2010FirstActInc.Allrightsreserved.
FirstActetlelogoFirstActsontdesmarquescommercialesdeFirstActInc.
©2010FirstActInc.Tousdroitsréservés.
MI071.M.EF.01
DIGITAL KEYBOARD
INSTRUCTION MANUAL
SPECIFICATIONS:
Output Power:≥3W×2
Frequency Range:C7-G2
Power Supply:6VDC
Dimensions:(LxWxH)28.5”×10.5”x3.125”
Weight:5lbs
Keys:54
PIANO ÉLECTRONIQUE
MODE D’EMPLOI
SPÉCIFICATIONS :
Puissance à la sortie :≥3W×2
Plage de fréquence :C7-G2
Alimentation : 6VCC
Dimensions : (LxPxH)72,39×26,67x7,94cm
Poids :5lb
Notes : 54
KEYBOARD FEATURES
INSTALL BATTERIES
Thiskeyboardalsouses4AA(1.5V)batteries(notincluded).Thebatterycompartmentis
locatedonthebottompanelofthekeyboard.
LoosenthescrewsonthebatterycompartmentdoorwithaPhillipsheadscrewdriver.Open
thedoorandrefertotheimageinsidetoinstallthebatteries.Besuretoinstallthenegative(–)
andpositive(+)endsofeachbatterycorrectly.Incorrectinstallationcandamagethekeyboard
orcauseanelectricalhazard.Closethecompartmentdoorandtightenthescrew.
Note:Ifthebatteriesstarttowearout,thekeyboard’ssoundmaydeteriorate.Ifthishappens,
installanewsetofbatteries.Ifyouarenotgoingtoplayforalongtime,removethebatteries
fromthekeyboard.Donotmixoldandnewbatteries.Donotmixalkalinestandard(carbon-
zinc)andrechargeable(nickel-cadmium)batteries.
MIC JACK
TheMICinputjackletsyoupluginamicrophone(notincluded)andsingalongwhileyouplay.
ADAPTOR JACK
Useonlya6V/200MAVoltDCconverter(notincluded)withthiskeyboard.Useofaconverter
ofthewrongvoltagecouldresultinarehazardordamagetothekeyboard.Unplugthe
keyboardwhennotinuse.
IMPORTANT
Turnoffthekeyboardwhennotinuse.
CARACTÉRISTIQUES DU PIANO
54notes
10rythmes
10tonalités
8chansonsdedémo
6sonsdetambours
Commandedevolume(16niveaux)
Commandedetempo(32niveaux)
Fonctionsd’enregistrementetd’écoute
Accompagnementintégréavecaccord
àunouplusieursdoigts
Fonctiondesynchrodesrythmes/accords
Vibrato
POSE DES PILES
Lepianopeuts’alimenterde4piles4AA(nonfournies).Lelogementdespilessetrouvesur
lefonddupianoélectronique.
Desserrezlavisduvoletdulogementdespilesavecuntournevisàpointecruciforme.Ouvrez
levoletetposezlespilestelqu’indiquédanslelogement.Assurez-vousderespecterlapolarité
indiquée(+et -).Mal poserlespilespeut endommagerlepianoou causerdesproblèmes
électriques.Refermezlevoletdulogementetremettezlavis.
Note:Lesondupianopourradevenirdistordusilespiless’épuisent.Danscecas,posezunjeu
depilesneuves.Sivousprévoyeznepasutiliserlepianopendantunelonguepériode,enlevez
lespiles.Nemélangezpasdevieillespilesavecdesneuves.Nemélangezpasdespilesalcalines
ordinaires(carbone-zinc)avecdespilesrechargeables(nickel-cadmium).
PRISE MIC
LapriseMICpermetdebrancherunmicrophone(noninclus)etdechantertoutenjouant
dupiano.
PRISE TRANSFORMATEUR
N’utilisezqu’untransformateur6VCC/200mAaveccepiano(noninclus).Untransforma-
teurdemauvaisetensionpourraitprésenterunrisqued’incendieoudedommageaupiano.
Débranchezlepianoquandvousnel’utilisezpas.
IMPORTANT
54Keys
10Rhythms
10Tones
8DemoSongs
6DrumSounds
VolumeControl(16Levels)
TempoControl(32Levels)
RecordandPlaybackFunctions
Built-InSingleFingerandFingered
ChordAccompaniment
Rhythm/ChordAccompanimentSyncFunction
Vibrato

POWER
PressthePOWERbuttontoturnkeyboardon.
VOLUME
PresstheVOLUMEbuttonstoadjustthevolume.
TEMPO
Press the TEMPO buttons to adjust tempo on rhythms, programmed
rhythms,anddemosongs.
RHYTHM SELECTION
PressoneoftheRHYTHMbuttons(01-10)toselectaplay-alongrhythm.
TONE SELECTION
Press one of theTONE buttons (01-10) to select a sound for the keys,
rhythms,ordemosongs.
VIBRATO
PresstheVIBRATObuttontogivethenotesapulsedsound.Pressthis
buttonagaintoswitchofftheVIBRATOfunction.
SUSTAIN
PresstheSUSTAINbuttontomakethekeysholdtheirsoundlonger.Press
thisbuttonagaintoswitchofftheSUSTAINfunction.
DRUM SOUNDS
PressanyoftheDRUMSOUNDSbuttonstoaddpercussiontoyourplaying.
DEMO SONGS
DEMO ONE
Press the DEMO ONE button to play the rst demo song. Press the
buttonagaintostopthedemosong.Pressthebuttonagaintoplaythe
nextdemosong.
STOP
PresstheSTOPbuttontostopademosongorrhythm.
DEMO ALL
PresstheDEMOALLbuttontoplayallofthedemosongsinorder.
NOTE ACCOMPANIMENT
Press a RHYTHM button. Press the NOTE button to enter accomp-
animentmode.Triggeraccompanimentbyplayinganotewithyourleft
handonthekeyboard(keys1-11).Theaccompanimentwillmatchthe
notesplayedwithyourlefthandandwillchangeaccordingly.Yourright
handisfreetoplaymelodies.
SYNC
The NOTE function can be used with SYNC to start the chord and
rhythm simultaneously. Press SYNC, then NOTE. When you press a
keyintheaccompanimentarea(keys1-11),thesynchedupchordand
rhythmwillbegin.
CHORD ACCOMPANIMENT
Pressa RHYTHMbutton.Press theCHORD buttonto enterchord
accompanimentmode.Theaccompanimentwillmatchthetypeofchords
thatyouplaywithyourlefthand(Major,Minor,7th)andwillchange
accordingly.Yourrighthandisfreetoplaymelodies.
DRUM FILL
Toaddadrumlltoarhythm,presstheFILLbutton.Ashortdrumll
willbeinsertedintothepatternthatisplaying.
RECORD AND PLAYBACK
RECORD
To recordyourown melody, presstheRECORD button.Recordup to
54notes.
REPLAY
Toplaybackthemelody,presstheREPLAYbutton.
RHYTHM PROGRAM
DRUM PROGRAM
PresstheDRUM PROGRAMbutton toenterrhythm programmode.
Pressanyofthe6DRUMSOUNDSbuttons.Programupto16notes.
DRUM PLAY
PresstheDRUMPLAYbuttontoplaybacktheprogrammedrhythm.
Éteignezlepianoquandvousnel’utilisezpas.
MISE EN CIRCUIT
AppuyezsurPOWERpourmettrelepianoencircuit.
VOLUME
AppuyezsurlesboutonsVOLUMEpourréglezleniveausonore.
TEMPO
Appuyez sur les boutons TEMPO pour régler le tempo des rythmes,
rythmesprogrammésetchansonsdedémo.
SÉLECTION DU RYTHME
AppuyezsurunboutonRHYTHM(01à10)pourchoisirunrythme.
SÉLECTION DE LA TONALITÉ
AppuyezsurunboutonTONE(01à10)pourchoisirlesondesnotes,des
rythmesoudeschansonsdedémo.
VIBRATO
AppuyezsurVIBRATOpourdonnerunsonpulséauxnotes.Appuyezde
nouveausurleboutonpourcouperl’effet.
SOUTIEN
AppuyezsurSUSTAINpourprolongerladuréedusondelanote.Appuyez
denouveausurleboutonpourcouperl’effet.
SONS DE TAMBOUR
AppuyezsurundesboutonsDRUMSOUNDSpourajouterdespercus-
sionsàvotremusique.
CHANSONS DE DÉMO
DÉMO UN
Appuyez sur DEMO ONE pour faire jouer la première pièce de dé-
monstration.Appuyezdenouveausurlatouchepourarrêterladémo.
Appuyezencoresurlatouchepourentendreladémosuivante.
ARRÊT
AppuyezsurSTOPpourcouperlachansondedémoourythme.
DÉMO TOUS
AppuyezsurDEMOALLpourentendretoutesleschansonsdedémo
dansl’ordre.
ACCOMPAGNEMENT DES NOTES
AppuyezsurunboutonderythmesuividuboutonNOTEpourpasser
aumoded’accompagnement.Lancezl’accompagnementenjouantune
notedelamaingauchesurlepiano(notes1à11).L’accompagnement
concorderaauxnotesjouéesdelamaingaucheetchangementencon-
séquence.Vouspouvezjouerdesmélodiesdelamaindroite.
SYNCHRO
La fonction NOTE peut être utilisée avec SYNC pour engager un
accordetunrythmeenmêmetemps.AppuyezsurSYNCpuissurNOTE.
Quandvousjouezunenoted’accompagnement(notes1à11),l’accordet
lerythmeserontsynchronisés.
ACCOMPAGNEMENT D’ACCORD
AppuyezsurRHYTHMsuivideCHORDpourpasseraumoded’accom-
pagnementd’accord.L’accompagnementconcorderaautyped’accords
quevousjouezdelamaingauche(majeur,mineur,7e)etchangeraen
conséquence.Vouspouvezjouerdesmélodiesdelamaindroite.
COMBLAGE DE TAMBOURS
Pourajouteruntambouràunrythme,appuyezsurFILL.Unebrève
séquencedetambourseraajoutéeàlaséquencequevousjouez.
ENREGISTREMENT ET ÉCOUTE
ENREGISTRER
Pourenregistrervotrepropremélodie,appuyezsurRECORD.Jusqu’à
54notespeuventêtreenregistrées.
REJOUER
Pourentendrevotremélodie,appuyezsurREPLAY.
PROGRAMMATION DE RYTHMES
PROGRAMME DE TAMBOURS
Appuyez sur DRUM PROGRAM pour passer au mode de program-
mationdesrythmes.Appuyezsurl’undes6boutonsDRUMSOUNDS.
Vouspouvezprogrammerautantque16notes.
ÉCOUTE DES TAMBOURS
AppuyezsurDRUMPLAYpourfairejouerlerythmeprogrammé.
1. POWER
2. POWER INDICATOR LIGHT
3. RHYTHMS
4. NOTE
5. CHORD
6. SYNC
7. FILL
8. DEMO ONE
9. STOP
10. DEMO ALL
11. VOLUME
12. TEMPO
13. RECORD
14. REPLAY
15. DRUM PROGRAM
16. DRUM PLAY
17. DRUM SOUNDS
18. TONES
19. VIBRATO
20. SUSTAIN
21. KEYS
22. MIC INPUT JACK
23. BATTERY COMPARTMENT
24. ADAPTOR JACK
1. BOUTON DE MISE EN CIRCUIT
2. TÉMOIN DE MARCHE
3. RYTHMES
4. NOTES
5. ACCORDS
6. SYNCHRO
7. COMBLAGE
8. DÉMO UN
9. ARRÊT
10. DÉMO TOUS
11. VOLUME
12. TEMPO
13. ENREGISTRER
14. REJOUER
15. PROGRAMME DE TAMBOURS
16. ÉCOUTE DU PROGRAMME
17. SONS DE TAMBOUR
18. TONALITÉS
19. VIBRATO
20. SOUTIEN
21. NOTES
22. PRISE DE MICRO
23. LOGEMENT DES PILES
24. PRISE TRANSFORMATEUR
CONTROL PANEL
13
1615
14
1 8 9 10
2
5 6 74 11 12 18
17
3
19 20
21
2224 23

poWer
PressthePOWERbuttontoturnkeyboardon.
VoLume
PresstheVOLUMEbuttonstoadjustthevolume.
tempo
Press the TEMPO buttons to adjust tempo on rhythms, programmed
rhythms,anddemosongs.
rHytHm seLectioN
PressoneoftheRHYTHMbuttons(01-10)toselectaplay-alongrhythm.
toNe seLectioN
Press one of theTONE buttons (01-10) to select a sound for the keys,
rhythms,ordemosongs.
ViBrato
PresstheVIBRATObuttontogivethenotesapulsedsound.Pressthis
buttonagaintoswitchofftheVIBRATOfunction.
sustaiN
PresstheSUSTAINbuttontomakethekeysholdtheirsoundlonger.Press
thisbuttonagaintoswitchofftheSUSTAINfunction.
Drum souNDs
PressanyoftheDRUMSOUNDSbuttonstoaddpercussiontoyourplaying.
Demo soNGs
demo one
Press the DEMO ONE button to play the rst demo song. Press the
buttonagaintostopthedemosong.Pressthebuttonagaintoplaythe
nextdemosong.
stoP
PresstheSTOPbuttontostopademosongorrhythm.
demo aLL
PresstheDEMOALLbuttontoplayallofthedemosongsinorder.
note accomPaniment
Press a RHYTHM button. Press the NOTE button to enter accomp-
animentmode.Triggeraccompanimentbyplayinganotewithyourleft
handonthekeyboard(keys1-11).Theaccompanimentwillmatchthe
notesplayedwithyourlefthandandwillchangeaccordingly.Yourright
handisfreetoplaymelodies.
sync
The NOTE function can be used with SYNC to start the chord and
rhythm simultaneously. Press SYNC, then NOTE. When you press a
keyintheaccompanimentarea(keys1-11),thesynchedupchordand
rhythmwillbegin.
chord accomPaniment
Pressa RHYTHMbutton.Press theCHORD buttonto enterchord
accompanimentmode.Theaccompanimentwillmatchthetypeofchords
thatyouplaywithyourlefthand(Major,Minor,7th)andwillchange
accordingly.Yourrighthandisfreetoplaymelodies.
drum fiLL
Toaddadrumlltoarhythm,presstheFILLbutton.Ashortdrumll
willbeinsertedintothepatternthatisplaying.
recorD aND pLayBacK
record
To recordyourown melody, presstheRECORD button.Recordup to
54notes.
rePLay
Toplaybackthemelody,presstheREPLAYbutton.
rHytHm proGram
drum Program
PresstheDRUM PROGRAMbutton toenterrhythm programmode.
Pressanyofthe6DRUMSOUNDSbuttons.Programupto16notes.
drum PLay
PresstheDRUMPLAYbuttontoplaybacktheprogrammedrhythm.
Éteignezlepianoquandvousnel’utilisezpas.
mise eN circuit
AppuyezsurPOWERpourmettrelepianoencircuit.
VoLume
AppuyezsurlesboutonsVOLUMEpourréglezleniveausonore.
tempo
Appuyez sur les boutons TEMPO pour régler le tempo des rythmes,
rythmesprogrammésetchansonsdedémo.
séLectioN Du rytHme
AppuyezsurunboutonRHYTHM(01à10)pourchoisirunrythme.
séLectioN De La toNaLité
AppuyezsurunboutonTONE(01à10)pourchoisirlesondesnotes,des
rythmesoudeschansonsdedémo.
ViBrato
AppuyezsurVIBRATOpourdonnerunsonpulséauxnotes.Appuyezde
nouveausurleboutonpourcouperl’effet.
soutieN
AppuyezsurSUSTAINpourprolongerladuréedusondelanote.Appuyez
denouveausurleboutonpourcouperl’effet.
soNs De tamBour
AppuyezsurundesboutonsDRUMSOUNDSpourajouterdespercus-
sionsàvotremusique.
cHaNsoNs De Démo
dÉmo un
Appuyez sur DEMO ONE pour faire jouer la première pièce de dé-
monstration.Appuyezdenouveausurlatouchepourarrêterladémo.
Appuyezencoresurlatouchepourentendreladémosuivante.
arrÊt
AppuyezsurSTOPpourcouperlachansondedémoourythme.
dÉmo tous
AppuyezsurDEMOALLpourentendretoutesleschansonsdedémo
dansl’ordre.
accomPagnement des notes
AppuyezsurunboutonderythmesuividuboutonNOTEpourpasser
aumoded’accompagnement.Lancezl’accompagnementenjouantune
notedelamaingauchesurlepiano(notes1à11).L’accompagnement
concorderaauxnotesjouéesdelamaingaucheetchangementencon-
séquence.Vouspouvezjouerdesmélodiesdelamaindroite.
synchro
La fonction NOTE peut être utilisée avec SYNC pour engager un
accordetunrythmeenmêmetemps.AppuyezsurSYNCpuissurNOTE.
Quandvousjouezunenoted’accompagnement(notes1à11),l’accordet
lerythmeserontsynchronisés.
accomPagnement d’accord
AppuyezsurRHYTHMsuivideCHORDpourpasseraumoded’accom-
pagnementd’accord.L’accompagnementconcorderaautyped’accords
quevousjouezdelamaingauche(majeur,mineur,7e)etchangeraen
conséquence.Vouspouvezjouerdesmélodiesdelamaindroite.
comBLage de tamBours
Pourajouteruntambouràunrythme,appuyezsurFILL.Unebrève
séquencedetambourseraajoutéeàlaséquencequevousjouez.
eNreGistremeNt et écoute
enregistrer
Pourenregistrervotrepropremélodie,appuyezsurRECORD.Jusqu’à
54notespeuventêtreenregistrées.
reJouer
Pourentendrevotremélodie,appuyezsurREPLAY.
proGrammatioN De rytHmes
Programme de tamBours
Appuyez sur DRUM PROGRAM pour passer au mode de program-
mationdesrythmes.Appuyezsurl’undes6boutonsDRUMSOUNDS.
Vouspouvezprogrammerautantque16notes.
Écoute des tamBours
AppuyezsurDRUMPLAYpourfairejouerlerythmeprogrammé.
1. POWER
2. POWER INDICATOR LIGHT
3. RHYTHMS
4. NOTE
5. CHORD
6. SYNC
7. FILL
8. DEMO ONE
9. STOP
10. DEMO ALL
11. VOLUME
12. TEMPO
13. RECORD
14. REPLAY
15. DRUM PROGRAM
16. DRUM PLAY
17. DRUM SOUNDS
18. TONES
19. VIBRATO
20. SUSTAIN
21. KEYS
22. MIC INPUT JACK
23. BATTERY COMPARTMENT
24. ADAPTOR JACK
1. BOUTON DE MISE EN CIRCUIT
2. TÉMOIN DE MARCHE
3. RYTHMES
4. NOTES
5. ACCORDS
6. SYNCHRO
7. COMBLAGE
8. DÉMO UN
9. ARRÊT
10. DÉMO TOUS
11. VOLUME
12. TEMPO
13. ENREGISTRER
14. REJOUER
15. PROGRAMME DE TAMBOURS
16. ÉCOUTE DU PROGRAMME
17. SONS DE TAMBOUR
18. TONALITÉS
19. VIBRATO
20. SOUTIEN
21. NOTES
22. PRISE DE MICRO
23. LOGEMENT DES PILES
24. PRISE TRANSFORMATEUR
coNtroL paNeL
13
1615
14
1 8 9 10
2
5 6 74 11 12 18
17
3
19 20
21
2224 23

Notices importaNtes
Lisez cette section avec soin.
•Lisezetrespectezcesdirectives.
•N’utilisezpascetappareilprèsdel’eau.
•Nelenettoyezqu’avecunchiffonsec.
•Nel’utilisezpasprèsd’unesourcedechaleurcommeunradiateur,unechauffer-
etteouunecuisinière.
•Faitesfairetoutentretienparunepersonnequaliée.Unentretienestrequis
silepianoaétéendommagéd’unefaçonquelconquecommeparexemple:un
liquideaétérenversésurlepiano,lepianoaétéexposéàlapluieouàl’humidité,
lepianonefonctionnepasnormalementouaétééchappé.
•Anderéduirelerisqued'incendieetdechocélectrique,n'exposezpaslepiano
àlapluieouàl'humidité.
avertissements
Ne changez pas les pièces sans conseil professionnel. Tout changement peut
entraînerunmauvaisfonctionnement.
Gardezlessacsd'emballagehorsdelaportéedesenfantsand'évitertoutrisque
desuffocation.
Déplaceztoujourslepianoavecsoinandenepasendommagersoncoffretou
sespiècesinternes.
Évitezlecontactaveclesacidesetlesalcalis.N'utilisezpaslepianodansunmilieu
corrosifouextrêmementhumideand'éviterlacorrosiondescontactsélectriques.
REMARQUE:Cetappareilaététestéettrouvéconformeauxlimitespourun
appareilnumériquedeclasseBfaisantl’objetdelapartie15desrèglementsdela
FCC.Ceslimitesseveulentd’offriruneprotectionraisonnablecontrel’interférence
nociveeninstallationrésidentielle.Cetappareilgénère,utiliseetpeutirradier
uneénergiedefréquenceradioet,s’iln’estpasinstalléetutiliséconformément
àcesdirectives,peutcauseruneinterférencenociveauxcommunicationsradio.
Toutefois,onnegarantitaucunementqu’iln’yaurapasinterférencedansune
installationparticulière.Sicetappareilcauseuneinterférencenociveàlarécep-
tionradiooutélé,cequipeutêtreétablienéteignantetrallumantl’appareil,on
encouragel’utilisateurdetenterderemédieràlasituationenprenantuneou
plusieursdesmesuressuivantes:
•Réorientezoudéplacezl’antenneréceptrice;
•Augmentezladistanceentrel’appareiletleposterécepteur;
•Connectezl’appareildansuneprisedecourantouuncircuitdifférentdecelui
oùleposterécepteurestconnecté.
•Recherchezl’aide ouleconseil durevendeur oud’un réparateur d’appareils
radiooudetélévision.
Attention:Changeroumodiercetappareilsanslapermissionexpressedela
partieresponsabledelaconformitépeutannulervotreautorisationd’utilisercet
appareil.
importaNt safety iNstructioNs
PLease read this section carefuLLy.
•Readandfollowtheseinstructions.
•Donotusethisdevicenearwater.
•Cleanonlywithadrycloth.
•Donotusenearanyheatsourcessuchasradiators,heaters,stoves,orotherheat
producingmachinery.
•Referallservicingtoqualiedservicepersonnel.Servicingisrequiredwhenthe
keyboardhasbeendamagedinanyway,suchaswhenliquidhasbeenspilled
onthekeyboard,thekeyboardhasbeenexposedtorainormoisture,doesnot
operatenormally,orhasbeendropped.
•Toreducetheriskofreandelectricshock,donotexposethiskeyboardtorain
ormoisture.
Warnings
Donotchangethepartswithoutprofessionalinstructions.Anychangemaycause
malfunctions.
Keepthewrappingbagoutofthereachofchildrentoavoidachokinghazard.
Alwaysmovethekeyboardcarefullytoavoiddamagetooutercoveringandinner
components.
Thekeyboardshouldnotcomeintocontactwithacidoralkali.Itshouldnotbe
operatedwherethereiscorrosiveorexcessivelymoistairtoavoidcorrosionofthe
electricalcontacts.
NOTE:Thisequipmenthasbeentestedandfoundtocomplywiththelimits
foraClassBdigitaldevice,pursuanttoPart15oftheFCCRules.Theselimits
aredesigned toprovidereasonableprotectionagainst harmfulinterference
inaresidentialinstallation.Thisequipmentgenerates,uses,andcanradiate
radio frequency energy and, if not installed and used in accordance with
the instructions, may cause harmful interference to radio communications.
However,thereisnoguaranteethatinterferencewillnotoccurinaparticular
installation. If this equipment does cause harmful interference to radio or
televisionreception,whichcanbedeterminedbyturningtheequipmentoff
andon,theuserisencouragedtotrytocorrecttheinterferencebyoneormore
ofthefollowingmeasures:
•Reorientorrelocatethereceivingantenna.
•Increasetheseparationbetweentheequipmentandreceiver.
•Connecttheequipmentintoanoutletonacircuitdifferentfromthattowhich
thereceiverisconnected.
•Consultthedealeroranexperiencedradio/TVtechnicianforhelp.
Warning:Changesor modicationstothis unitnotexpresslyapprovedby the
partyresponsibleforcompliancecouldvoidtheuser’sauthoritytooperatethe
equipment.
customer assistaNce/serVice aprÈs-VeNte
PHONE/TÉLÉPHONE:888.551.1115
EMAIL/COURRIEL:info@rstact.com
FirstActInc.
745BoylstonStreet
Boston,MA02116USA
rstact.com
FirstActandtheFirstActlogoaretrademarksofFirstActInc.
©2010FirstActInc.Allrightsreserved.
FirstActetlelogoFirstActsontdesmarquescommercialesdeFirstActInc.
©2010FirstActInc.Tousdroitsréservés.
MI071.M.EF.01
DIGITAL KEYBOARD
instruction manuaL
specificatioNs:
Output Power:≥3W×2
Frequency Range:C7-G2
Power Supply:6VDC
Dimensions:(LxWxH)28.5”×10.5”x3.125”
Weight:5lbs
Keys:54
PIANO ÉLECTRONIQUE
mode d’emPLoi
spécificatioNs :
Puissance à la sortie :≥3W×2
Plage de fréquence :C7-G2
Alimentation : 6VCC
Dimensions : (LxPxH)72,39×26,67x7,94cm
Poids :5lb
Notes : 54
KeyBoarD features
instaLL Batteries
Thiskeyboardalsouses4AA(1.5V)batteries(notincluded).Thebatterycompartmentis
locatedonthebottompanelofthekeyboard.
LoosenthescrewsonthebatterycompartmentdoorwithaPhillipsheadscrewdriver.Open
thedoorandrefertotheimageinsidetoinstallthebatteries.Besuretoinstallthenegative(–)
andpositive(+)endsofeachbatterycorrectly.Incorrectinstallationcandamagethekeyboard
orcauseanelectricalhazard.Closethecompartmentdoorandtightenthescrew.
Note:Ifthebatteriesstarttowearout,thekeyboard’ssoundmaydeteriorate.Ifthishappens,
installanewsetofbatteries.Ifyouarenotgoingtoplayforalongtime,removethebatteries
fromthekeyboard.Donotmixoldandnewbatteries.Donotmixalkalinestandard(carbon-
zinc)andrechargeable(nickel-cadmium)batteries.
mic Jack
TheMICinputjackletsyoupluginamicrophone(notincluded)andsingalongwhileyouplay.
adaPtor Jack
Useonlya6V/200MAVoltDCconverter(notincluded)withthiskeyboard.Useofaconverter
ofthewrongvoltagecouldresultinarehazardordamagetothekeyboard.Unplugthe
keyboardwhennotinuse.
imPortant
Turnoffthekeyboardwhennotinuse.
caractéristiQues Du piaNo
54notes
10rythmes
10tonalités
8chansonsdedémo
6sonsdetambours
Commandedevolume(16niveaux)
Commandedetempo(32niveaux)
Fonctionsd’enregistrementetd’écoute
Accompagnementintégréavecaccord
àunouplusieursdoigts
Fonctiondesynchrodesrythmes/accords
Vibrato
Pose des PiLes
Lepianopeuts’alimenterde4piles4AA(nonfournies).Lelogementdespilessetrouvesur
lefonddupianoélectronique.
Desserrezlavisduvoletdulogementdespilesavecuntournevisàpointecruciforme.Ouvrez
levoletetposezlespilestelqu’indiquédanslelogement.Assurez-vousderespecterlapolarité
indiquée(+et -).Mal poserlespilespeut endommagerlepianoou causerdesproblèmes
électriques.Refermezlevoletdulogementetremettezlavis.
Note:Lesondupianopourradevenirdistordusilespiless’épuisent.Danscecas,posezunjeu
depilesneuves.Sivousprévoyeznepasutiliserlepianopendantunelonguepériode,enlevez
lespiles.Nemélangezpasdevieillespilesavecdesneuves.Nemélangezpasdespilesalcalines
ordinaires(carbone-zinc)avecdespilesrechargeables(nickel-cadmium).
Prise mic
LapriseMICpermetdebrancherunmicrophone(noninclus)etdechantertoutenjouant
dupiano.
Prise transformateur
N’utilisezqu’untransformateur6VCC/200mAaveccepiano(noninclus).Untransforma-
teurdemauvaisetensionpourraitprésenterunrisqued’incendieoudedommageaupiano.
Débranchezlepianoquandvousnel’utilisezpas.
imPortant
54Keys
10Rhythms
10Tones
8DemoSongs
6DrumSounds
VolumeControl(16Levels)
TempoControl(32Levels)
RecordandPlaybackFunctions
Built-InSingleFingerandFingered
ChordAccompaniment
Rhythm/ChordAccompanimentSyncFunction
Vibrato
Other First Act Electronic Keyboard manuals


