Assembly
Assembly
9
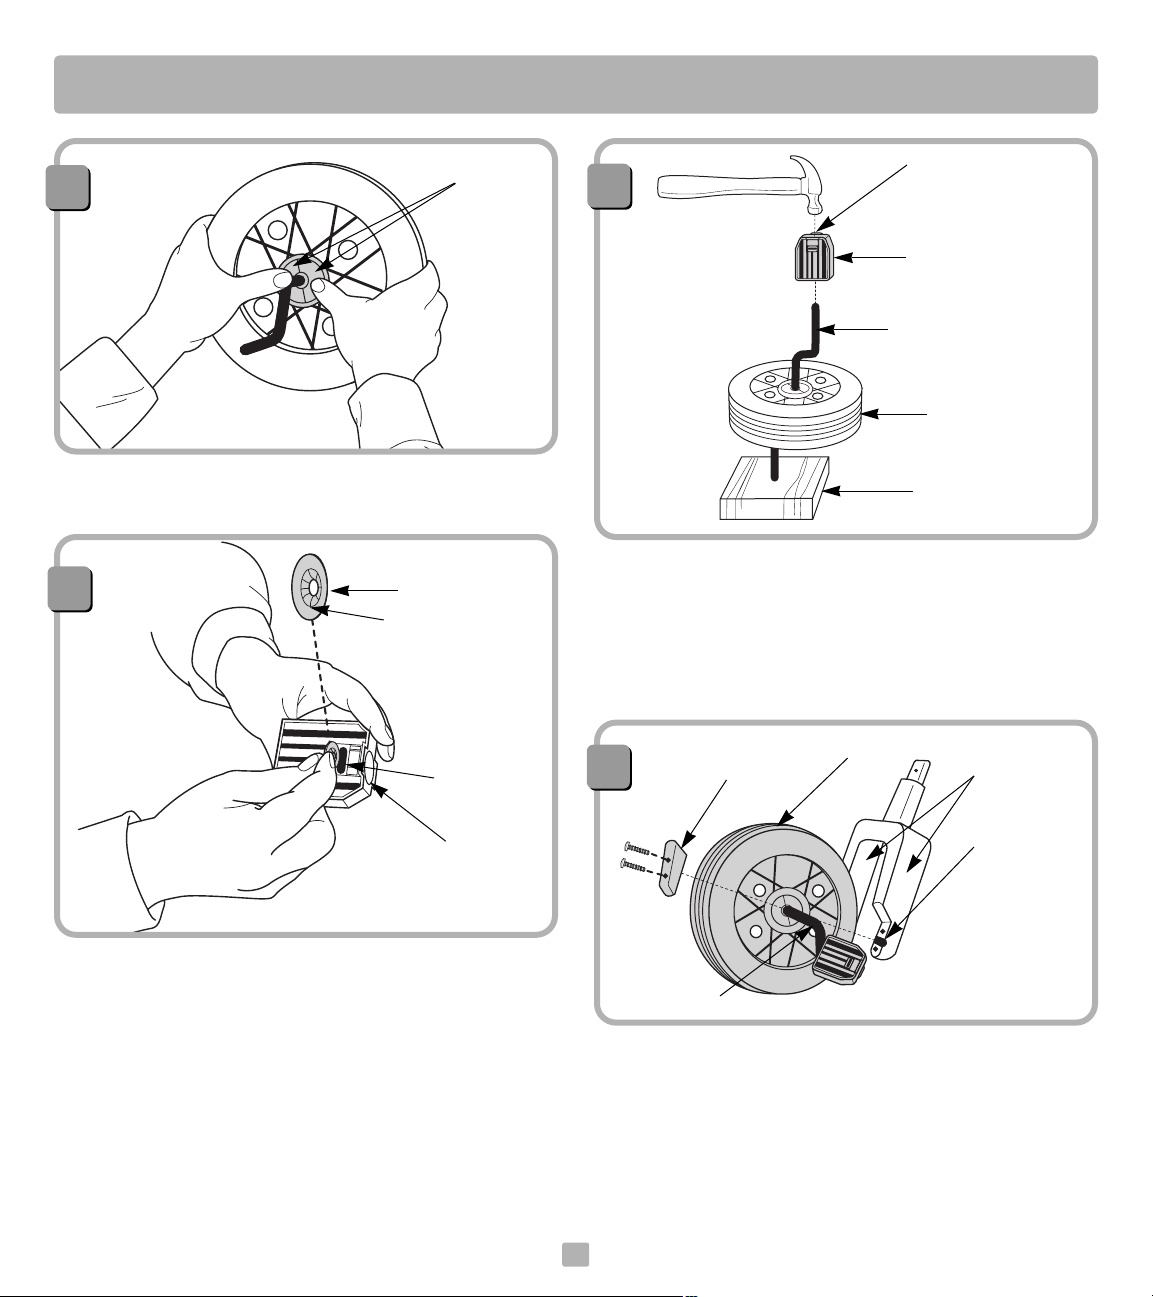
•
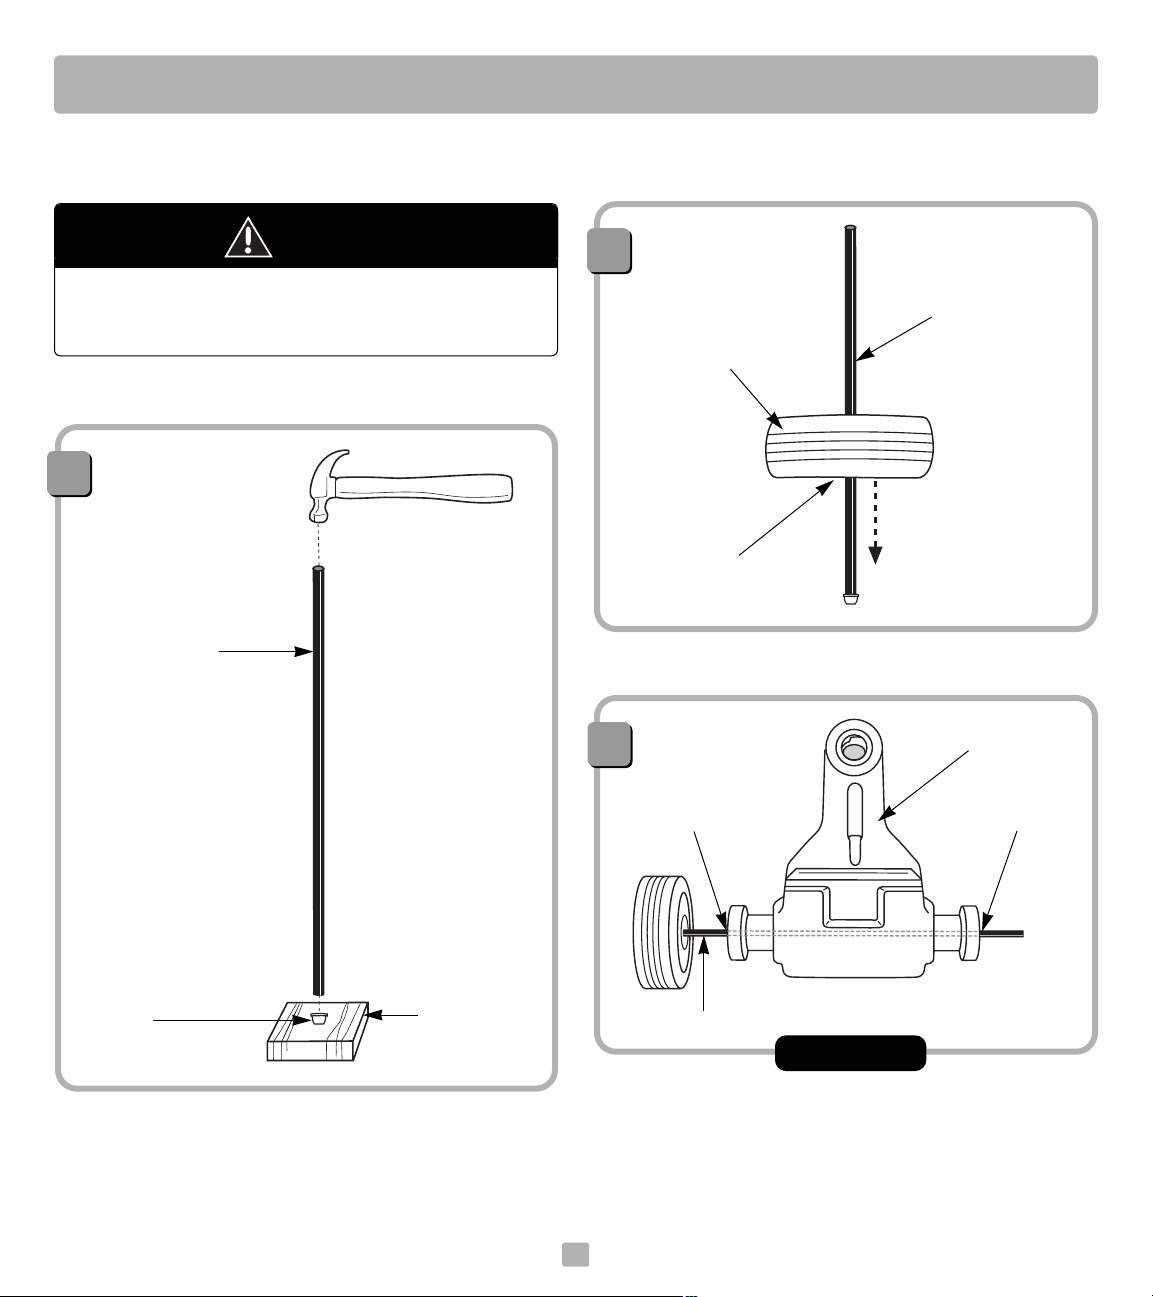
Push the pedal axle covers into the center of the front wheel
until they are flush with the surface of the front wheel.
• Insert a lock washer into the slot in a pedal. Make sure the
raised tabs on the lock washer are facing the “closed”, or
outside end of the pedal.
• Insert the other lock washer into the other pedal.
10
Pedal Axle Covers
Lock Washer
Raised Tabs
Slot
Closed
(Outside) End
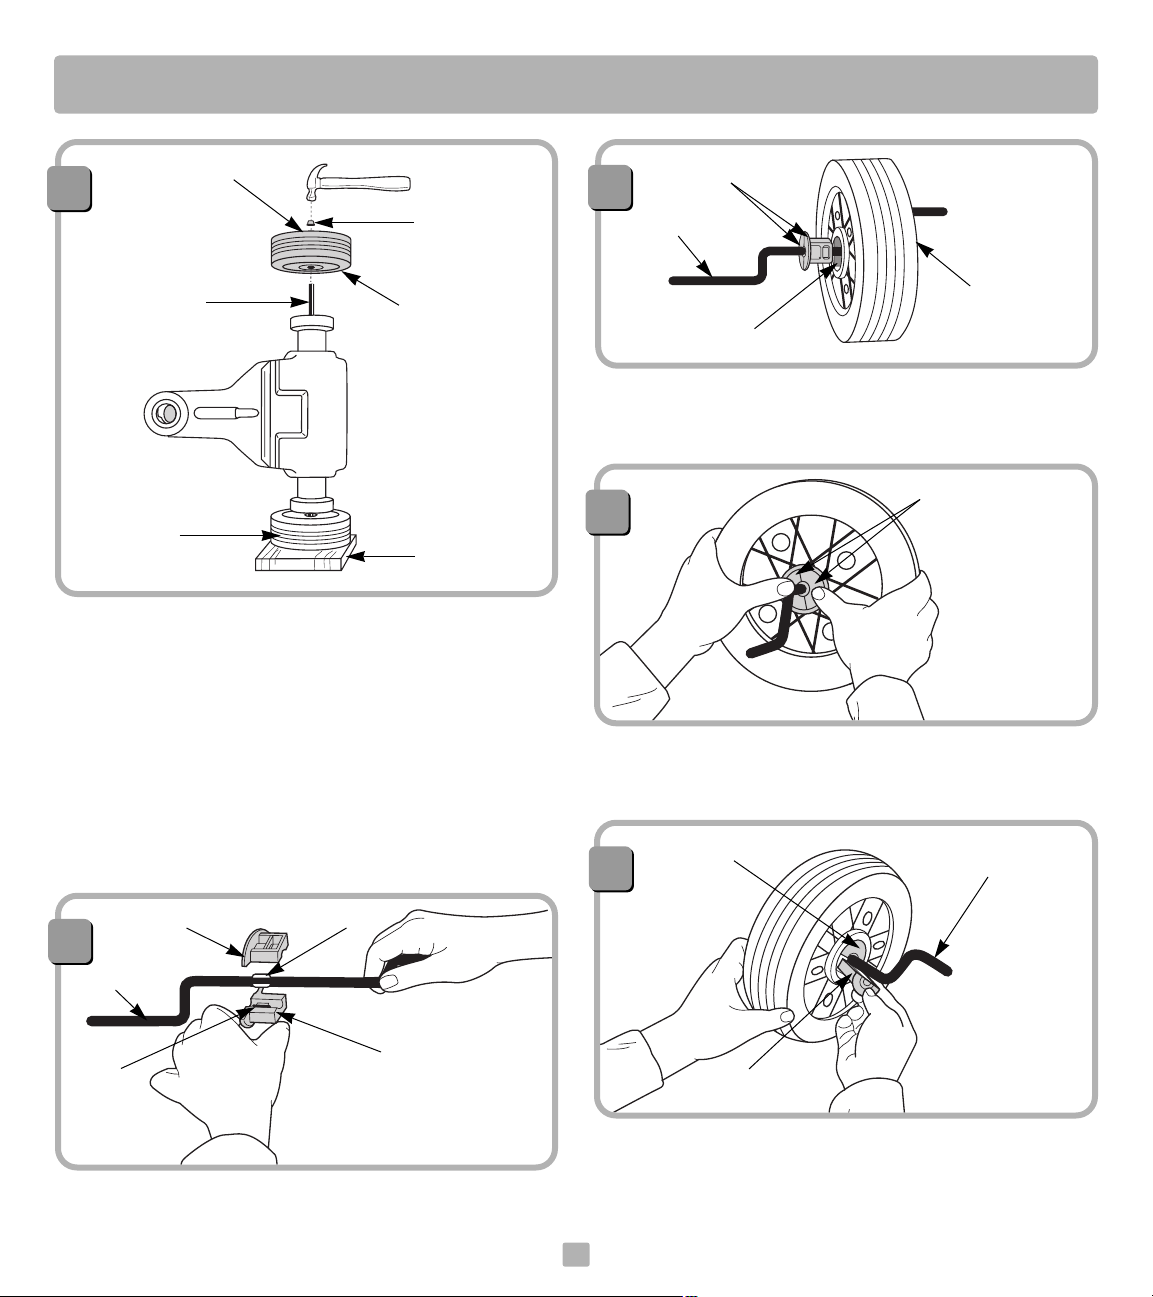
6
6
•
Place a scrap block of wood under the front wheel assembly.
• Place a pedal on the pedal axle.
• With the pedal lock washer centered over the pedal axle
end, tap the pedal with a hammer until it is secure.
• Repeat this procedure to attach the other pedal to the
other end of the pedal axle.
11
Lock Washer
(inside)
Pedal
Pedal Axle
Front Wheel
Assembly
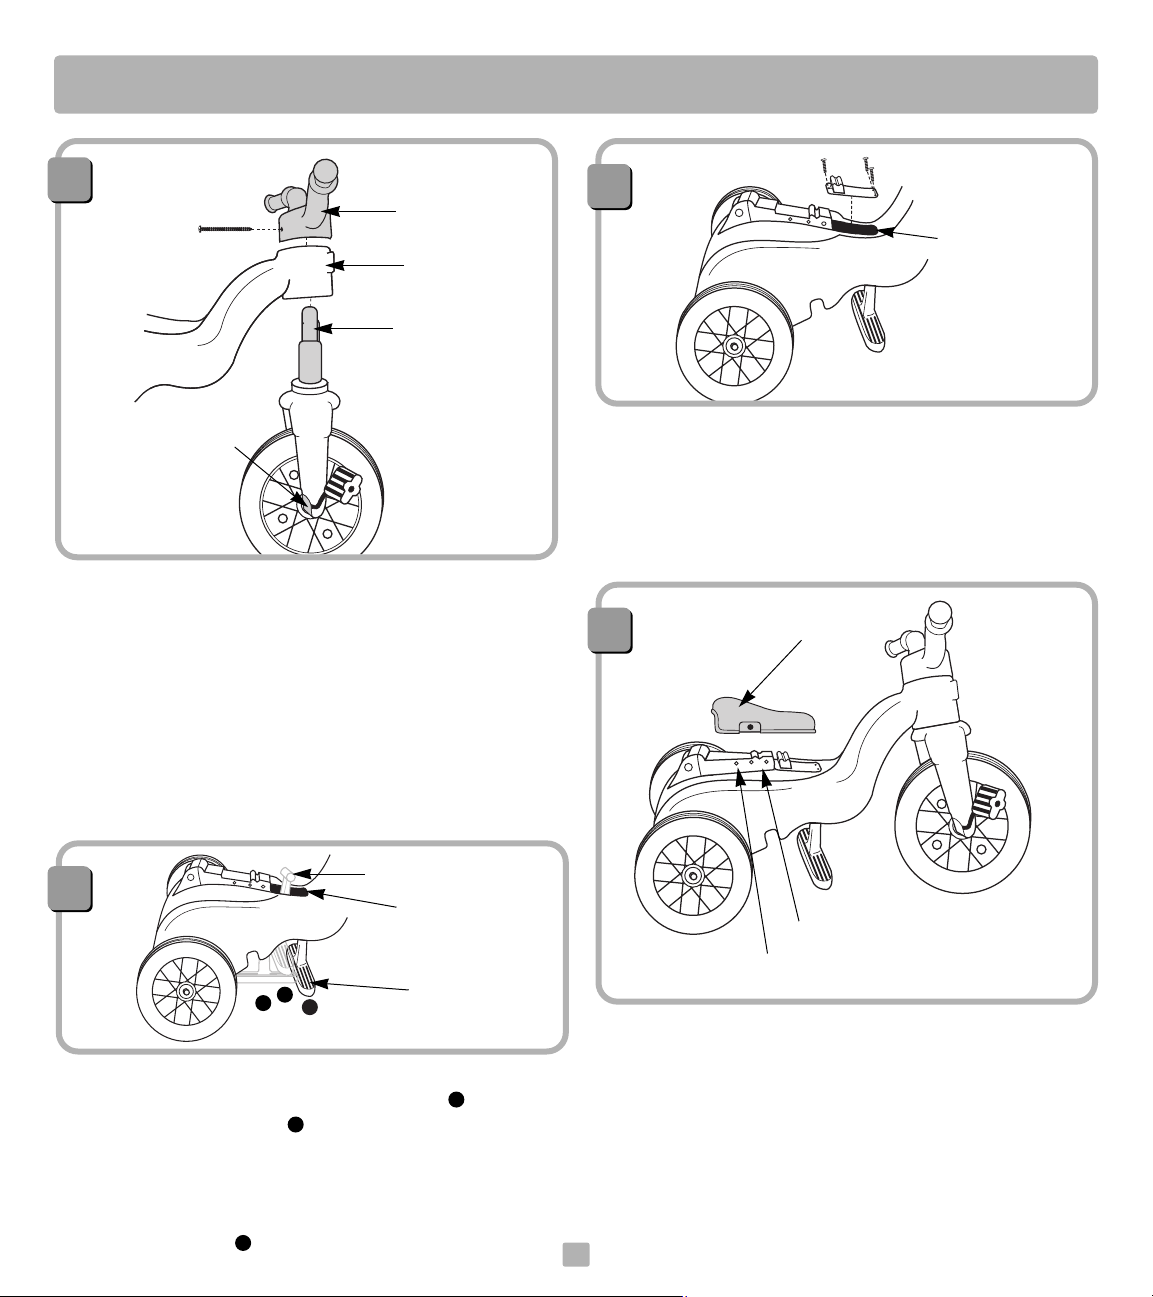
• Place the front wheel assembly between the fork arms so
that the pedal axle fits into the groove at the bottom of
each fork arm.
• Place a fork cover over the pedal axle on one fork arm.
• Insert two #10 x 3/4" screws into the fork cover and tighten
with a Phillips screwdriver. Do not over-tighten.
• Repeat this procedure to attach the other fork cover to the
other fork arm.
12
Fork Cover Fork Arms
Groove
Pedal Axle
Scrap Block
of Wood
Front Wheel Assembly
Fisher-Price, Inc., a subsidiary of Mattel, Inc., East Aurora, NY 14052 U.S.A.
©2001 Mattel, Inc. All Rights Reserved.
® and TM designate U.S. trademarks of Mattel, Inc.
Printed in Mexico 72669b-0920