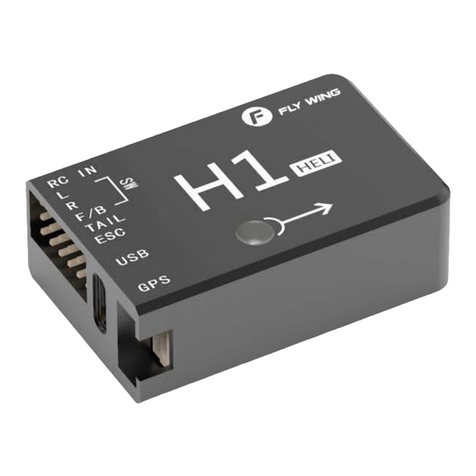
Fly Wing H1-Heli User manual

Heli
User Manual
Manual
V2.6
2021.03

H1 user manual
Flight safety notice
Flywing suggests that users enjoy flying in a reasonable safe environment. The knowledge of flight safety is very
important for the safety of yourself, the surrounding people and the environment.
1. Fly in open areas away from buildings, trees,high voltage power cable lines,crowd,water surface,and any near
by obstacle.
2. Please keep the transmitter in hand, even when using the auto flight /auto landing and auto home function,to
control the helicopter any time.
3. Please operate the helicopter within your sight range at all the times.
4. To ensure flight safety,please do not fly the helicopter beyond 120 meters above the ground. If there are no
flying height restriction or if the restriction is lower than 120 meters in your area, please follow the regulations.
Please visit http://www.flywingrc.com Watch flight safety teaching videos and acquire more comprehensive
safety knowledge such as flight restrictions
Pre-flight safety inspection
Please check the helicopter carefully before taking off. Precautions are as follows:
1. Check whether the main blades ,tail blades, helicopter body and landing skids are damaged or distorted, please
replace them with the genuine Fly Wing RC parts.
2. Check whether the flight control linkages and fuselage are fixed firmly, and whether the GPS unit is correctly fixed on
the helicopter tail boom (horizontally placed, straight line behind the main mast ) H1 Unit is fixed firmly on the double
sided foam pad either at the front or at the back of the main mast. Pay attention to the direction of the arrow which has
to be pointed towards the direction of travel
3. Check whether the power of the helicopter and the transmitter are sufficient. After the transmitter is powered on, turn
on the power supply of the helicopter, and check whether the helicopter passes the self inspection test (the rotor head
and swash plate move regularly for several seconds)
Flight operation requirements
1.Do not fly in bad weather, such as strong wind (10m / s), rain, snow and foggy weather, etc.
2.Choose an open place with no tall buildings around the flight pathway. Any large number of buildings using
steel bars will affect the effectiveness of compass function , and they will block GPS signal, resulting in poor
positioning of helicopter and even unable to receive the signals.
3.Please do not fly in any area with high voltage cable line, radio tele-communication station, mobile phone
transmission tower or Wi-Fi, to avoid signal interference of your transmitter and receiver.
4.Please take extra caution when flying above 6000 meters as performance of the battery and the motor power
system of the helicopter will be reduced to cold temperature and thinner air density.
Flight operation requirements
1.Fly within your sight of range(VLOS)
2.Keep away from rotating blades and motor.
3.Activating the stop switch during flight will cause the helicopter to fall. Please use this function only in case of
emergency.
4.During the flight, please do not answer or make phone calls, send short messages or use other mobile devices
that may interfere with your helicopter operation.
5.Do not operate the helicopter under the influence of alcohol or drugs.
6.Please return home as soon as possible when low power warning appears from the transmitter.
7.In the process of runaway return, when the radio signal becomes normal again, the helicopter landing
position can be controlled by the transmitter.
8.After landing, the helicopter electronic power should be stopped first and then the transmitter should be
turned off to avoid any loss of transmitter signal.
9.When using the GPS Autopilot flight mode and Return Home functions, you should always be prepared

H1 user manual
10.to control the helicopter manually by turning the transmitter 3D mode switch in case of Emergency .
11.Please note that the helicopter is still in the Auto GPS flight mode state at this time. If you need to completely
exit the flight mode, please turn the flight stop button on the transmitter.
12.Please keep control of the helicopter all the way. Do not rely on GPS to provide information. In specific flight
mode or flight environment, GPS system can not work normally, such as precise landing or active braking and
other functions will not be available. Please make a reasonable judgment on the flight condition by naked eye
observation, and set the corresponding flight and return altitude according to the flight environment.
Disclaimer:
The remote control model is not a toy. This product is only suitable to adults who have experience in correct model
helicopter assembly, setting, commissioning and operation. The helicopter should only be flown in legal remote
control flying field. This product is not suitable for children or those who do not have experience in remote control
model helicopters. For inexperience or a new beginner, the helicopter must be operated under the direct
supervision of someone with considerable skills or expertise. The remote control model product of this
specification belongs to the operator who has high operational skills. Improper or unfamiliar use of this product
may cause serious harm to yourself and others, or even death. If the product is disassembled , it can cause loss of
parts in various situations. If the product is defective due to improper use, it will not be possible for us to replace
with the new product or to accept return of the item ,under the warranty conditions. The dealer is unable to
correct the abnormal loss of parts and components, because of the end user improper installation and setting
methods, modification of the goods (including use of the non-original parts), other equipment that does not meet
the specifications, and poor operation. For any damage, accident or injury caused,. Buyers and Operators assume
full responsibility at the time of purchase. Those who can not operate any professional remote-controlled model
helicopters, they shall not operate this product. At the same time, the operator must operate in the legal remote
control model flying site, pay attention to the personal safety of himself and others and strictly abide by and
comply with national and local laws and regulations. The whole machine hood is a fragile product. Many glass
fiber parts are surface painting products. Due to shrinkage, temperature and transportation process, there may be
problem of blasting and cracking on these items. This is the nature of the product itself. We can not be responsible
for any serious problem after face-to-face courier signed direct delivery of the product to you, Please be aware of
terms and conditions before you buy this sophisticated high tech radio control helicopter!
Through reading of the entire user manual to familiarize with the product
functions before operation
If the product is not operated correctly, it may cause serious injury to yourself or others, or cause product
damage and property loss. This product is complex, it needs to be familiar with it for a period of time
before safe usage, and you need to have some basic knowledge before operation. If there is no strong
safety awareness, improper operation may lead to product damage and property loss, and even cause
serious injury to oneself or others. This product is not suitable for children. Do not use parts not provided
or recommended by our company. You must strictly follow the company's guidelines to install and use
thees products. This guidance document contains safety, operation and maintenance instructions. Be
sure to read all instructions and warnings in the user's manual carefully before assembling, setting up
and using. You have read and understood all the contents of this document before using it.
To avoid possible injury and loss, it is important to observe the following items:
1. Users are not allowed to operate this product in any condition of poor physical or mental state such as drinking,
drug taking, drug anesthesia, dizziness and fatigue, nausea, etc.
2. Except in special circumstances (such as the helicopter may hit a crowd), it is forbidden to turn off the engine
during the flight
3. After landing, be sure to turn off the helicopter before turning off the remote control transmitter.
4. It is forbidden to use this product to throw or launch any dangerous object to buildings, people or animals.
5.The user shall immediately stop using the helicopter with abnormal flight status in case of accident (such as collision
or overturning). The user shall not continue to use the helicopter until it is repaired by the company or its recommended
maintenance center.
Warning

H1 user manual
The documentation of this product is subject to update without prior notice. Please visit the official website
http://www.flywingrc.com , go to the product page for the latest information.
About H1
Overview
The H1 helicopter flight control system, with its built-in floating IMU and double-layer damping sponge,
combined with a new generation of control and IMU algorithms, makes it easy to experience helicopters.
The H1 flight control system consists of a main controller
(built-in floating IMU, compass and barometer) and a dual-mode GPS module.
System composition
●w
Working principle:
The main controller is the core module of the flight control system. The IMU, barometer, GPS and compass
modules are used to realize the precise attitude control and high-precision positioning of the aircraft. The H1
parameter adjustment assistant is used to configure parameters to the main controller, including the parameters
of installation, flight control and other external equipment. The LED light shows the current system status in real
time to help you better understand the current status of flight control.
●Components and ports:
Main controller:
1.The main controller has 5 PWM outputs and a receiver input port. The PWM output port is respectively
connected with three servo of the swash plate, the tail servo and the main ESC. The tail lock supports
the tail motor and the tail servo.
2. The built-in IMU and barometer are used to measure the flight attitude and altitude, and the horizontal
direction of the aircraft is fixed together with GPS, so as to realize the flight control.
3.Support a variety of receiver types, receiver input support ppm, s.bus and other mainstream single line mode,
automatic identification.
4.Type-C plug is adopted, which is convenient and easy to use.

H1 user manual
About main controller port:
1. Pin Port:
Receiver,servo,ESC
connection
2. USB Port:
TYPE-C port , connect to
computer to adjust
3. GPS Port : Interface
between GPS and
external compass
4. LED:
H1 status indicator
Support swash plate Type::
HR3 H3
●GPS Module:
GPS module contains GPS / GLONASS dual-mode receiver and compass. Compass is used to
measure geomagnetic field, and together with GPS, it can realize horizontal fixed point of
aircraft. The compass should be calibrated before use, and it should not be stored and used
in ferromagnetic environment.
Right servo
Left servo
Back servo
Forward servo
Left servo
Right servo
Nose direction

H1 user manual
Installation
Overview
Install procedure
Please read this section carefully, install and set up your flight control system according to the following process
to ensure the normal operation of the system.
1. Ensure that the modules required for installation are complete.
2. Watch the teaching video(www.flywingrc.com/video/):
• Watch the installation demonstration and module connection video, install the flight control system to the
helicopter and connect it correctly.
• Watch the transmitter setup tutorial, set the transmitter to airplane mode, and set the return / GPS / manual
mode switch (5 channels)
• Set the Stop/ Run (7 channels), the circle / 8 fly (8 channels) and the invert flight (9 channels).
• Watch the parameter adjustment software setting tutorial, run the parameter adjustment software, select the
corresponding COM port (not COM1), click the connection, and complete the parameter setting according to
the software guidelines and instructions.
3. Check whether the motor rotation direction, transmitter channel setting and transmitter out of control
protection (turn off the transmitter, and the software shows that the transmitter signal is lost) are set correctly.
4. Move the magnets and speakers out of the room to ensure that there is no magnetic material in the room (or
use a notebook computer to calibrate it in the open area without high-voltage wires or iron buildings outside),
and then calibrate the compass in the software.
5. Confirm that the connection of each module is reliable, and there is no error prompt on the left side of the
main interface of the software.
6. The first flight test was carried out in the open area without high-voltage lines and iron buildings. Keep away
from the crowd and do not test in the community.
7. When the helicopter is powered on and the transmitter is powered on, put the transmitter mode switch in the
GPS position, the route switch in the off position, the stop switch in the stop position, and the invert flight switch
in the normal position. At this time, the yellow light of the flight control flashes, and the blue light is always on.
In the 3D mode, move the transmitter rocker to check the movement of the servo. After completion, flip to GPS
mode to wait for satellite search. It takes 3-5 minutes for the first use to preheat the satellite search. It is
recommended to wait for a while after the green light is on to ensure good satellite signal. Finally, push both
sticks to the bottom outer corners to unlock. After the green light flashes, flip STOP switch to STAR. The
helicopter begins to accelerate and rotate. After the speed is stable, the push rocker rises.
8. Fw450l as an example, the following figure shows the installation effect:

H1 user manual
Ready to install
When using H1, you need to prepare helicopter, transmitter receiving system, ESC, servo, battery and other
equipment. Device support type:
1. Helicopter type:H3 or HR3 swash plate;The main power is electric;Helicopter with variable pitch or motor
driven tail.
2. Servo type: 1520us broadband servo is used as swash plate servo, 1520us broadband or 760us narrowband
servo is used as tail servo.
3.ESC type : Main motor and tail motor tail ESC support standard PWM speed control ESC, working range:
1000us-2000us.
4.Receiver type:Support s.bus/i.bus/w.bus protocol, PPM protocol, Grauper SUMD HD08 protocol.
5.Battery:Support 3-6s lipo battery, support voltage detection, with low voltage protection function.
Download software
Download software H1-Heli
https://www.flywingrc.com/software/
Win7 and above systems are required for parameter adjustment software, and Win10 is recommended
Install software
H1 Heli will guide you to complete the parameter setting of flight control system. Please follow the
steps below
Support Win7, Win8 , Win10(32 or 64 bit)
1. Use TYPE-C USB wire connect flight controller and your computer
2. Drive H1-Heli installation package and install it according to the prompts.
3. Double-click H1-Heli icon to run the parameter adjustment software.
For safety, when adjusting the parameters, please remove the blade or disconnect the motor
The original Win10 64 bit operating system is recommended to achieve the best experience.
If the software prompt does not find flight control, or the communication
interface initialization fails, please install the driver and restart the computer.
If you are still prompted, please replace the cable and try again

H1 user manual
Start Installation
It is necessary to install and set parameters properly according to the requirements, otherwise, it may not be
able to fly or even cause serious safety accidents.
Installation Steps :1、Install main controller and GPS;2、Connection;3、Set transmitter;4、Adjust software
Install flight controller system
Install main controller
The main controller is upwards and parallels the fuselage. The LED mounting mark is pointed to the nose
direction, and the centre position is close to the centre of gravity of the aircraft as far as possible, and then fixed
to the fuselage with a double-sided adhesive.
Install GPS Module
The GPS module is horizontally parallel to the fuselage, the GPS outlet direction points to the head direction, and
then it is fixed to the fixed seat with double-sided adhesive tape, and the fixed seat is fixed on the tailpipe with
double-sided adhesive tape and tie. After installation, make sure that the GPS module is level with the aircraft
fuselage, the GPS is fixed firmly, and the outgoing line is level with the aircraft nose. GPS should be installed at
least 15cm away from magnetic materials (including but not limited to the power cord, steering gear, motor,
magnet, horn, etc.), otherwise, it will interfere with GPS internal compass.
GPS application requirements:
1. Keep the side of the GPS mark upward and the arrow pointing to the nose of the aircraft, otherwise it will
not fly normally.
2. Please try to keep no tall buildings and trees around
3. 3. Compass is a magnetic sensitive equipment, which should be far away from strong magnetic field, strong
electric field and strong electromagnetic field (wire). If compass interference or abnormal course control
occurs near some objects, please stay away as soon as possible
4. In order to avoid the interference to the compass in the process of operation, it is necessary to select the
appropriate GPS installation position to ensure that the warning of compass interference will not appear
when any equipment on the aircraft is in the maxi load operation, and the phenomenon of circling will not
appear in the process of flight.

H1 user manual
Face up, never upside down
If you need to use in severe cold conditions,Please do a good job of heat preservation.
It is recommended to install it close to the place with small vibration
It is recommended to install it close to the position with small vibration and parallel to the fuselage.
The vibration near the center of gravity is small
The flight control system is not waterproof, oil proof and dust-proof.
Check regularly to ensure that the double-sided tape is firmly installed.
Flight control system connection
Follow the instructions below to complete the connection.If there is no BEC, please connect the external BEC and the
signal line in parallel (y line can be used) to the flight control electrical control port, and do not connect the BEC to
the receiver.If the low voltage return function is not required, the voltage return line on the side of the flight control
can be disconnected.If it is a 12s battery helicopter, the voltage detection function is not available.
The metal shell of H1 is designed for grounding. Please do not connect the power supply to H1 or
the carbon plate in contact with H1.

H1 user manual
Aircraft equipment connection:
When using H1, it is necessary to connect the receiver, ESC, battery and other related equipment, and set their
parameters in the software, otherwise it may not be able to fly or even lead to serious safety accidents.A
helicopter with a tail servo,don't connect the servo. Select broadband and narrowband in the software before
connecting the servo ( When selecting a standard model, please check whether the configuration table is
consistent with your own hardware, and then connect the tail servo after confirmation)
Receiver connection:
Different types of receivers have different connection interfaces, please connect accordingly.
After successful connection, the main controller will automatically recognize the signal and display the rocker
information on the software.The power supply of the receiver is directly used by the receiver after stabilized by
the flight control.Do not supply additional power to the receiver or connect any additional electrical equipment,
otherwise the internal voltage stabilizing system of flight control will be burned.
Common wrong connection:
1. The receiver shall not be connected with any other battery ESC or extra BEC module, capacitor and other
equipment
2.No load equipment can be connected to the receiver, including but not limited to: servo, graphic transmission,
flash LED light. If you need the transmitter to control the load equipment, please only connect the signal line to the
receiver and supply power to the equipment separately (it is not allowed to directly or indirectly connect the power
supply to the receiver, refer to error 1)

H1 user manual
Transmitter settings
Transmitter Requirement:
1. The transmitter must support SBUS mode.It has at least 9 channels and own Failed-Safe function.And you
can set the out of control protection output of all channels by yourself.Otherwise, the out of control protection
function cannot be realized.
2. The working mode of your transmitter should be Airplane.
3. All channels of the transmitter should work independently, and no need to set any mixed control, including
but not limited to "pitch curve related to helicopter, throttle curve, and linkage stop switch built in the
transmitter".
4. You need to use 5-channel three section switch as control mode switch, 7-channel two section switch to
control motor stop and start, and 8-channel three section switch as semi autonomous flight switch.If you
need to fly backward with one button, you need to set 9 channels as a 2-stage switch.
Take Futaba 14sg as an example:
1. Set 7008sb receiver to mode B (s.bus 1) and connect flight control with s.bus 1 interface of receiver.
2. Bind transmitter with receiver,build new model,select AIRPLANE,no mix
3. LINKAGE MENU---FUNCTION Set 5 channels of transmitter as 3-stage switch (SA),
Return of corresponding aircraft ---GPS mode---3Dmanual mode ; 7 channels are set as 2-stage switch
(SF),Corresponding motor disarm and arm;The 8-channel is set as a 3-stage switch (SB), corresponding to
the semi-automatic flight closing - one key to 0 figure fly - 8-figure fly;9 channels set to 2-stage switch (SC),
Corresponding to one key normal flight and invert flight.
4. Enter fail safe mode , Turn on the 5-channel f / s.Set the 5-channel mode switch (SA) to the return
gear,Press and hold the "RTN" key at POS for 1 second. Then return to the main interface , Observe on
software,turn off the transmitter in the GPS position. Will the software prompt you to lose the transmitter
signal, or will the transmitter automatically jump to the RETURN , Channel 7 stays on the start position (if
channel 7 is in the STOP position after the transmitter is turned off, please set channel 7 as out of control
and stay on the start position according to the setting of channel 5).

H1 user manual
Adjust software
Install new helicopter:
Please watch the “tutorial video”,run parameter adjustment assistant,Complete the parameter
setting according to the software guidelines.The specific process is as follows:
1.Ensure the power supply of flight control system is normal.
2.Connect H1 to the computer, set the transmitter correctly, bind and turn it on, and the
mode is in 3D.
3.Run the parameter adjustment software.Choose the right COM port(not COM1),click
connect computer,until the Interface become Light up.
4.Click "install new machine" in the main interface.
5. Select the corresponding model.
6. Confirm the model configuration.
7.click“yes,this is my helicopter”,the preset parameter information is written,the import is
successful.If the configuration is different, please click "configuration is different" and go to
step 11 to select general model installation.

H1 user manual
8.After importing parameters successfully,calibrate transmitter according to the prompts on the left ; If the
software display is inconsistent with the direction of the transmitter ( The transmitter is pushed forward ,
and the software progress bar is at the "back" end),The corresponding channel is reversed in the menu
of the transmitter(Refer to the remote control manual for details),until all channels are correct.
9.Enter the tail servo installation option and follow the instructions on the left to determine the neutral
position and stroke calibration of the tail servo.
10.Click “swash”, Adjust according to the prompts

H1 user manual
11.If it is not the helicopter with this configuration, please select the Universal model top for installation;
select the helicopter with the corresponding size (here, the length of a single rotor is used to distinguish the
helicopter type.)
12.Click”swash “ , first select the corresponding swash plate type according to the left prompt, then adjust
the forward and reverse direction of the servo to ensure the correct direction of the steering gear. Finally, fine-
tune the servo neutral point for swash plate leveling.
13.Click”Collective”Adjust the zero pitch according to the prompts,Then adjust the positive pitch 12 degrees
and the negative pitch 12 degrees.

H1 user manual
14.Click “Tail”,follow the prompt to select the servo type first, then click the slider to the left, if the slider
is to the right, click the tail servo output to reverse; then click the tail servo back, calibrate the neutral point,
The far left of the slider and the far right of the slider, drag the slider until the slider just touches the
maximum limit of the tail axis.
Adjustment
1.Main interface
Please notice the GPS star quantity,The minimum number of stars is 15.Is there a 3-channel low value?
If the star less 15, Please change the place. There are no obstacles or tall buildings.
If 3 channel minimum, Please reduce the 3 channel D / R value of the transmitter and recalibrate the
transmitter.

H1 user manual
The error message can be displayed below the main interface connection,When the aircraft is abnormal, it
can not be powered off,Connect the computer to view the error message and correct it(See the common
errors and solutions section for solutions). After installing the new helicopter, the tail gain and throttle value
can be set in the main interface
2.Main rotor adjustment
After installing the new helicopter,the transmitter mode is in 3D.
You can reset the swash plate and pitch on this page.Click the servo to return to the center,The current servo
angle can be adjusted by three progress bars,Until the swash plate is level(Vertical to the front and side of
the main shaft)Then click the adjustment to complete the adjustment of the positive and negative pitch in
pitch adjustment. The recommended setting is ±12 degrees.

H1 user manual
Parameters
Adjust the sensitivity according to the helicopter state.The default standard flight is recommended to meet the
needs of most helicopter.Clear the default value of aircraft parameters and click the button to clear all flight
control data and restore the default settings(you don't need to click on it except in special circumstances).
1.If the tail swings quickly from left to right, the tail gain can be reduced. If the tail swings slowly, the swash
gain can be increased or the tail gain can be increased.
2.If the helicopter shakes violently, and there is no mechanical problem,Please reduce the sensitivity of the
swash plate properly,If the helicopter shakes left and right, increase the speed or sensitivity of the swash
plate.
3.The curve of the swash plate, the rolling speed and the spin speed are all controlled by the handle ,
Everyone's situation is still adjusted , the default applies to most player feel , Novice recommended
default.
4.The tail lock compensation is in 3D mode, When the pitch is changed quickly, the advance compensation
of the lock tail is enhanced, which does not need to be changed for non special needs.
3.Compass calibrate
If the compass is used for the first time, it must be calibrated, otherwise the system may not work
normally, thus affecting flight safety.Compass is easy to be disturbed by strong electric field, strong
magnetic field and strong electromagnetic field, which will lead to compass abnormality and even flight
accidents. Frequent calibration can make the compass work in the best condition.
Calibration notes:
1. Do not calibrate in the area of strong magnetic field and electric field or near large metal, such as
magnetite, parking lot, building area with underground steel bar, or indoor place with sound, etc.
2. Do not carry ferromagnetic materials, such as keys, watches, etc. with you during calibration.
3. If the compass is calibrated indoors, remember to re-calibrate it when flying outdoors to prevent the
compass from abnormal during the flight due to the difference of magnetic field between the two areas.
4. If the compass may be affected by steel, please move the aircraft to another location.

H1 user manual
Calibration procedure:
Please select an open space and calibrate the compass according to the following steps. If you want to see more
about compass calibration, please watch the relevant teaching video.
Method:Calibration with parameter adjustment software:
1. Enter the sensor page of parameter adjustment software and click to start compass calibration.
2. The rotor rotates 360 ° horizontally in front of the helicopter, and the rotor rotates 360 ° horizontally upside
down.
3. The helicopter nose is rotated vertically 360 ° upward, and the helicopter nose is rotated vertically 360 °
downward.
4. Roll 360 ° clockwise and 360 ° counterclockwise.
5. If the progress bar does not end, repeat the above operation until the calibration progress bar ends,
indicating that the calibration is successful.
Situations requiring re-calibration:
1.
If the compass data is abnormal, the red light of aircraft status indicator will flash.
2.
The flight site is far away from the last compass calibration site.
3.
The mechanical structure of the helicopter has changed.
4.
The flight drift is serious, or it can't fly in a straight line
4.Low voltage setting
When the flight control detects the battery voltage and calculates the single chip voltage, it will trigger and
climb back.If it is used for the first time, it must be confirmed whether the voltage return line of flight control is
correctly connected ( Only 3-6s is supported ) , Check the sensor page to see if low voltage return is on ,
Whether the set low voltage return voltage meets its own requirements(It is recommended to determine the
return voltage value according to your own flight habits, which is about 3.70. If the setting is too low, it may
lead to the power failure of the low-voltage protection of the electric regulator first, or the battery power is not
enough to support the aircraft return after triggering the return, and the power failure of the electric regulator
protection during the return).

H1 user manual
Function
Flight Function
Flight Mode:
Flywing designs a variety of control modes for users, Using different control modes, the flight performance of
the aircraft will be different,You can set the transmitter 5-channel switch as the flight mode switch through the
parameter adjustment software.
GPS mode:The aircraft uses dual-mode GPS satellite signal
It can locate and return automatically at any flight altitude.
3D mode:Don't use GPS module and air pressure altimetry system
For positioning, it only provides attitude maintenance, no self stabilization,
and can be used in 3DIf you are flying, you can't return.
If you use this mode, the speed will automatically change
Increase to ensure flight requirements.
Home mode :Same as GPS mode, dual mode is used
GPS module and air pressure setting are used to realize the return
function.In this mode, the aircraft will rise appropriately, and then
spin to the right side to return.Over the return point, spin to tail,
slow and automatic landing, touchdown.After the automatic stop, turn off the motor.
Auto flight
Flywing has designed an auxiliary route training mode for users,Using this mode, the aircraft will automatically
fly the route. At this time, the transmitter can intervene to achieve the purpose of practice.This function needs to
set the 8-channel switch of transmitter as the automatic route switch.
About auto flight:
In this mode, the aircraft will not star auto return , pay attention to the battery voltage , The function can be
turned off midway, and the helicopter will automatically switch to GPS mode.The center radius of automatic
cruise is 4m, and it can't be adjusted. Pay attention to use it in open area.When you start the auto cruise, you can
control the flight altitude and the course freely.After you operate the stick of the transmitter, the flight control will
give the direction control right to the user, but the helicopter will keep moving horizontally. You can use the semi-
automatic auxiliary cruise function to do course control training.
Route closing mode:The helicopter does not carry out
automatic route. It needs to be in this position before taking off.
Circle route mode:Using dual-mode GPS and air pressure
altimetry, the helicopter can make the nose of the helicopter
move towards the center of the circle in horizontal space.
8-figure route mode:Use dual-mode GPS and air pressure
altimetry to make the aircraft conduct ∞ figure automatic route.

H1 user manual
Home Mode
The process that the helicopter automatically returns to the last recorded return point is
called return. There are three different ways to return:
Out of control return:
When the GPS signal is good, the Compass works normally, and the return point is successfully recorded (the
point of each helicopter unlocking),If the transmitter signal is interrupted for more than 3 seconds, the
flight control system will control the helicopter to fly back to the nearest recorded return point at an altitude
of 15 meters.If the radio signal returns to normal during the return flight, the return flight will continue, but
the user can control the flight through the transmitter and cancel the return flight. This function needs to set
5-channel out of control protection in the transmitter to jump to the HOME
When the LED light flashes slowly or the GPS doesn't work, it can't HOME.
In the process of returning, the helicopter can not avoid obstacles, so it is necessary to check the
surrounding environment before taking off to avoid more than 15 meters of objects.
In the process of returning, when the helicopter rises to 15m and returns to the landing point,
the user can fine tune the landing point of the helicopter through the transmitter.
One key to return:
The one button return mode can be started through the transmitter mode switch (5 channels), and the return
process is the same as the runaway return.
When using the transmitter receiving system, the user needs to assign a switch on the transmitter as the mode
switch key (5 channels), and set it in the parameter adjustment software.
Low voltage return:
Flight control realizes low voltage return by judging battery voltage.
When the voltage is too low, the motor may not be able to output enough power. At this time, the user should
land the helicopter as soon as possible, otherwise the helicopter will fall directly, causing damage to the
helicopter or other hazards. In order to prevent unnecessary danger caused by insufficient battery voltage,
the flight control system will judge whether the current voltage is sufficient. (currently supports 3S, 4S, 6S
intelligent judgment)
If the current voltage is insufficient, the helicopter will be forced to return. Please ensure that the current
distance of the aircraft is in line with the range of the remaining power set by the helicopter. When it touches
the low battery to return, the helicopter will actively rise to 15m above the ground and turn around to fly back
to the take-off point. At this time, the transmitter can not operate the aircraft. In the second half of the descent
process, the remote control (if the signal of the remote control is normal) can control the aircraft to fine tune to
the appropriate landing point.
If you need to stop the low-voltage return, please switch the mode HOME mode, and then switch to the GPS
mode. You can manually control the helicopter to manually turn off the motor after landing. During this period,
the aircraft will not return with low-power until the aircraft is powered off.
Table of contents
Other Fly Wing Controllers manuals
Popular Controllers manuals by other brands

DTronics
DTronics DT-01 Firmware update manual
White Rodgers
White Rodgers 50A55 troubleshooting guide
YASKAWA
YASKAWA YRC1000micro Collaborative Operation Instructions
ETC
ETC echoflex ELEDR-RH installation guide
Festo
Festo DFPI-ND2P Series Repair instructions
Danfoss
Danfoss VLT AutomationDrive FC 301 operating guide
