FocusShifter DSLR Follow Focus User manual
Limited Lifetime Warranty
Engineerable LLC warrants that if anything goes wrong with your
FocusShifter due to a manufacturing defect, we will repair or
replace it at no charge to you for parts and labor. You are
responsible for all return shipping costs. This warranty excludes
malfunctions caused by misuse, tampering, unauthorized repairs,
modifications, and accidents, normal wear and tear. It also does
not cover consequential or incidental damages. Engineerable LLC
reserves the right to change or modify the warranty without notice
and disclaims all other warranties, expressed or implied.
To obtain warranty service, you must contact:
Engineerable LLC
Attn: FocusShifter
PO Box 277
Scottdale GA 30079
Email: service@focusshifter.com
DSLR Follow Focus
Operating Instructions
Thank you for your purchase of the FocusShifter
Follow Focus for DSLR.
Please visit the website, www.FocusShifter.com,
for tips, instructions, the latest news, and a link
to our Facebook page where you can share
pictures of your FocusShifter setup and videos
of your work.
Liability Disclaimer:
FocusShifter is only for use on camera lenses. It is not intended for any other use. Do not
place over, or wrap around any body parts, including but not limited to arms, legs, fingers,
toes, ears, etc. It is not suitable for children 6 and under due to small parts, and must be used
under adult supervision at all times for children older than 6 years. Engineerable LLC, its
employees, owners or agents or its subsidiaries shall not be held responsible for any misuse
or consequence of misuse of the products supplied to its buyer or customer. Engineerable
LLC shall not be liable for special, indirect, or consequential damages, loss of profits or
production or commercial loss in any way connected with the product, whether such claim
is based in contract, warranty, negligence, or strict liability. Further, in no event shall
liability of Engineerable LLC exceed the individual price of the Product on which liability is
asserted. As Engineerable LLC has no control over use, setup, final assembly, modification
or misuse, no liability shall be assumed nor accepted for any resulting damage or injury. By
the act of use, setup or assembly, the user accepts all resulting liability. If you as the
Purchaser or user are not prepared to accept the liability associated with the use of this
Product, you are advised to return this Product immediately in a new and unused condition
to the place of purchase.
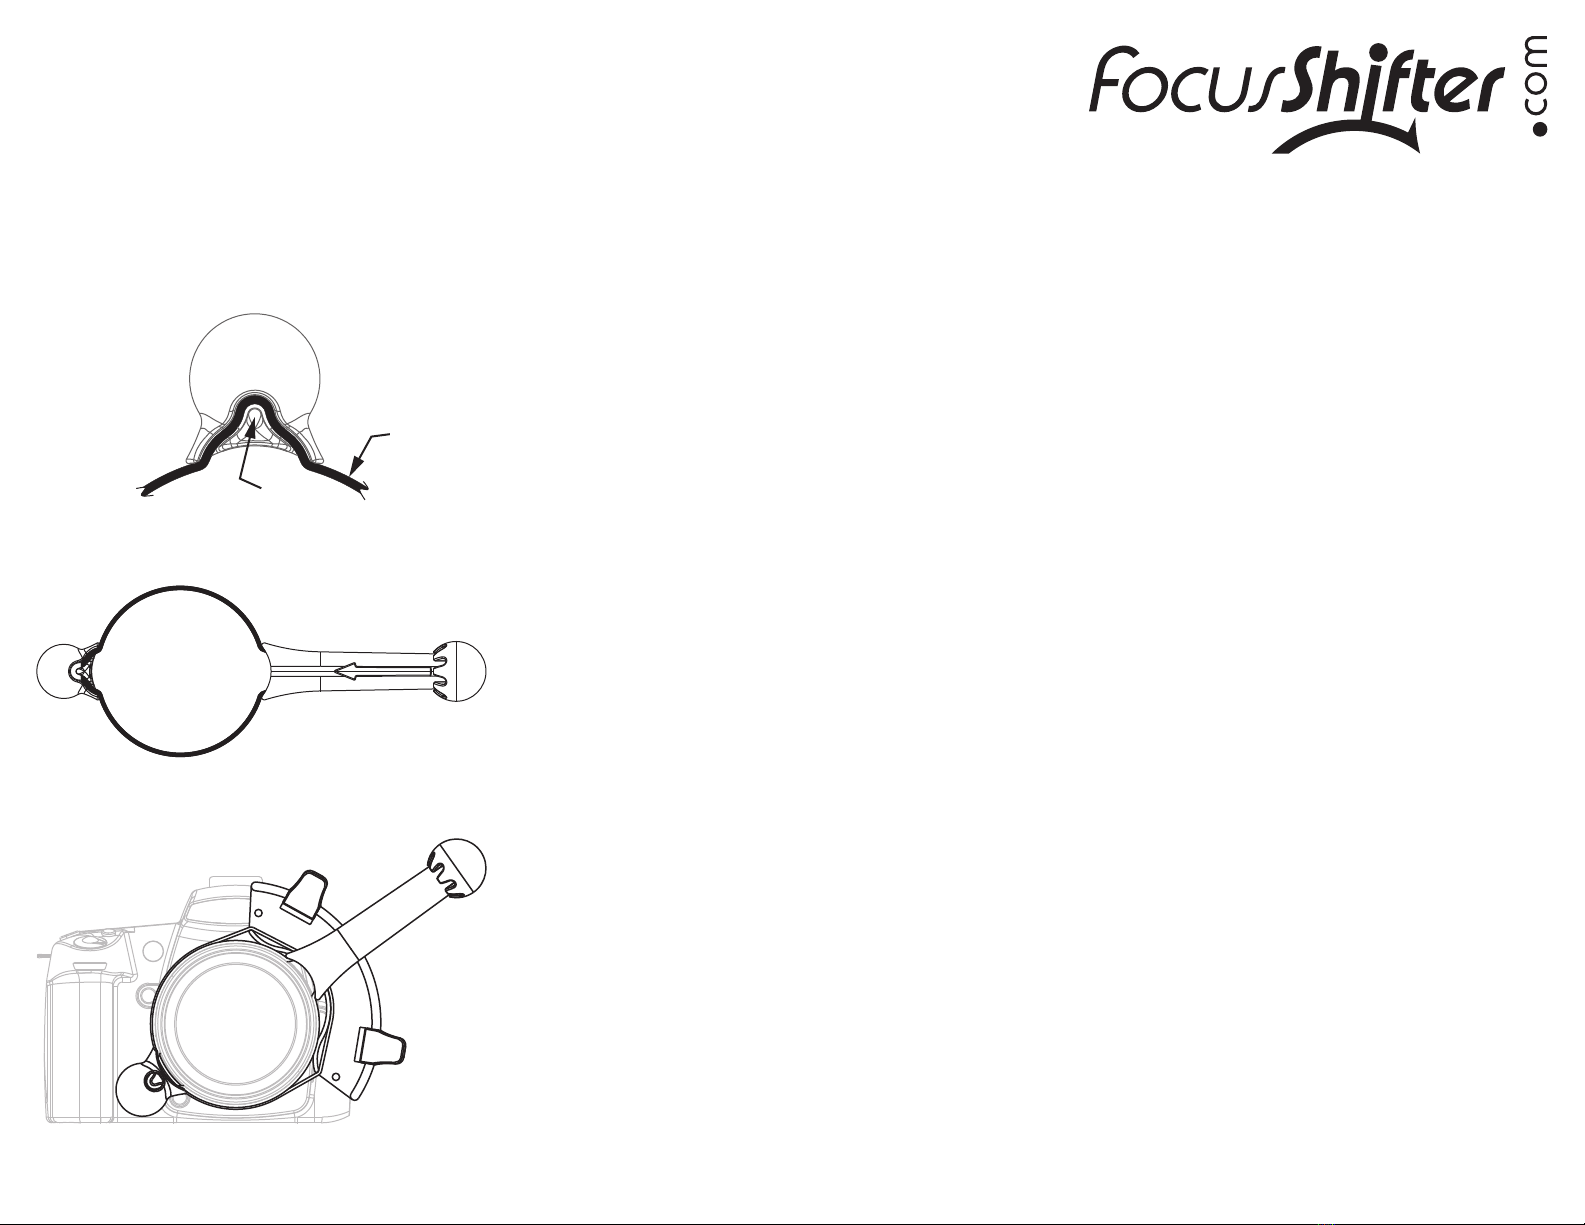
Installing the Balance
Counterweight
The Balance Counterweight is used to stabilize lenses that
have a loose focus ring. It balances the weight of the
FocusShifter handle, keeping your shots in perfect focus,
even if you are moving around.
1. The Balance attaches to the FocusShifter belt. Insert
the belt through the slot as shown.
2. The belt is fully inserted when it slides behind the tooth
and becomes captured in the slot.
3. Position the Balance at the opposite end of the belt
from the FocusShifter handle, and place the assembly on
the lens.
Balance
Tooth
Belt
4. To remove the Balance, pull the belt out of the slot by
wiggling it over the retaining tooth.
The FocusShifter Set includes
1. One FocusShifter with adjustable belt
2. One Marker Board
3. One fine tip dry erase marker
4. Two elastic bands for attaching the marker board
5. Two clips for setting hard focus stops
6. One Balance Counterweight
7. One custom carry pouch
Installing the Marker Board
1. Place the elastic band around the lens next to the focus
ring.
2. Pull the elastic band away from the lens, and place it
over the foot of the marker board.
Note: The holes at the ends of the marker board are for alignment during
manufacturing. They will not be used when setting up the marker board.
3. Position the marker board next to the focus ring. The
Marker Board should now be attached to the lens as shown
below. One elastic band is usually sufficient to hold it on
without slipping.
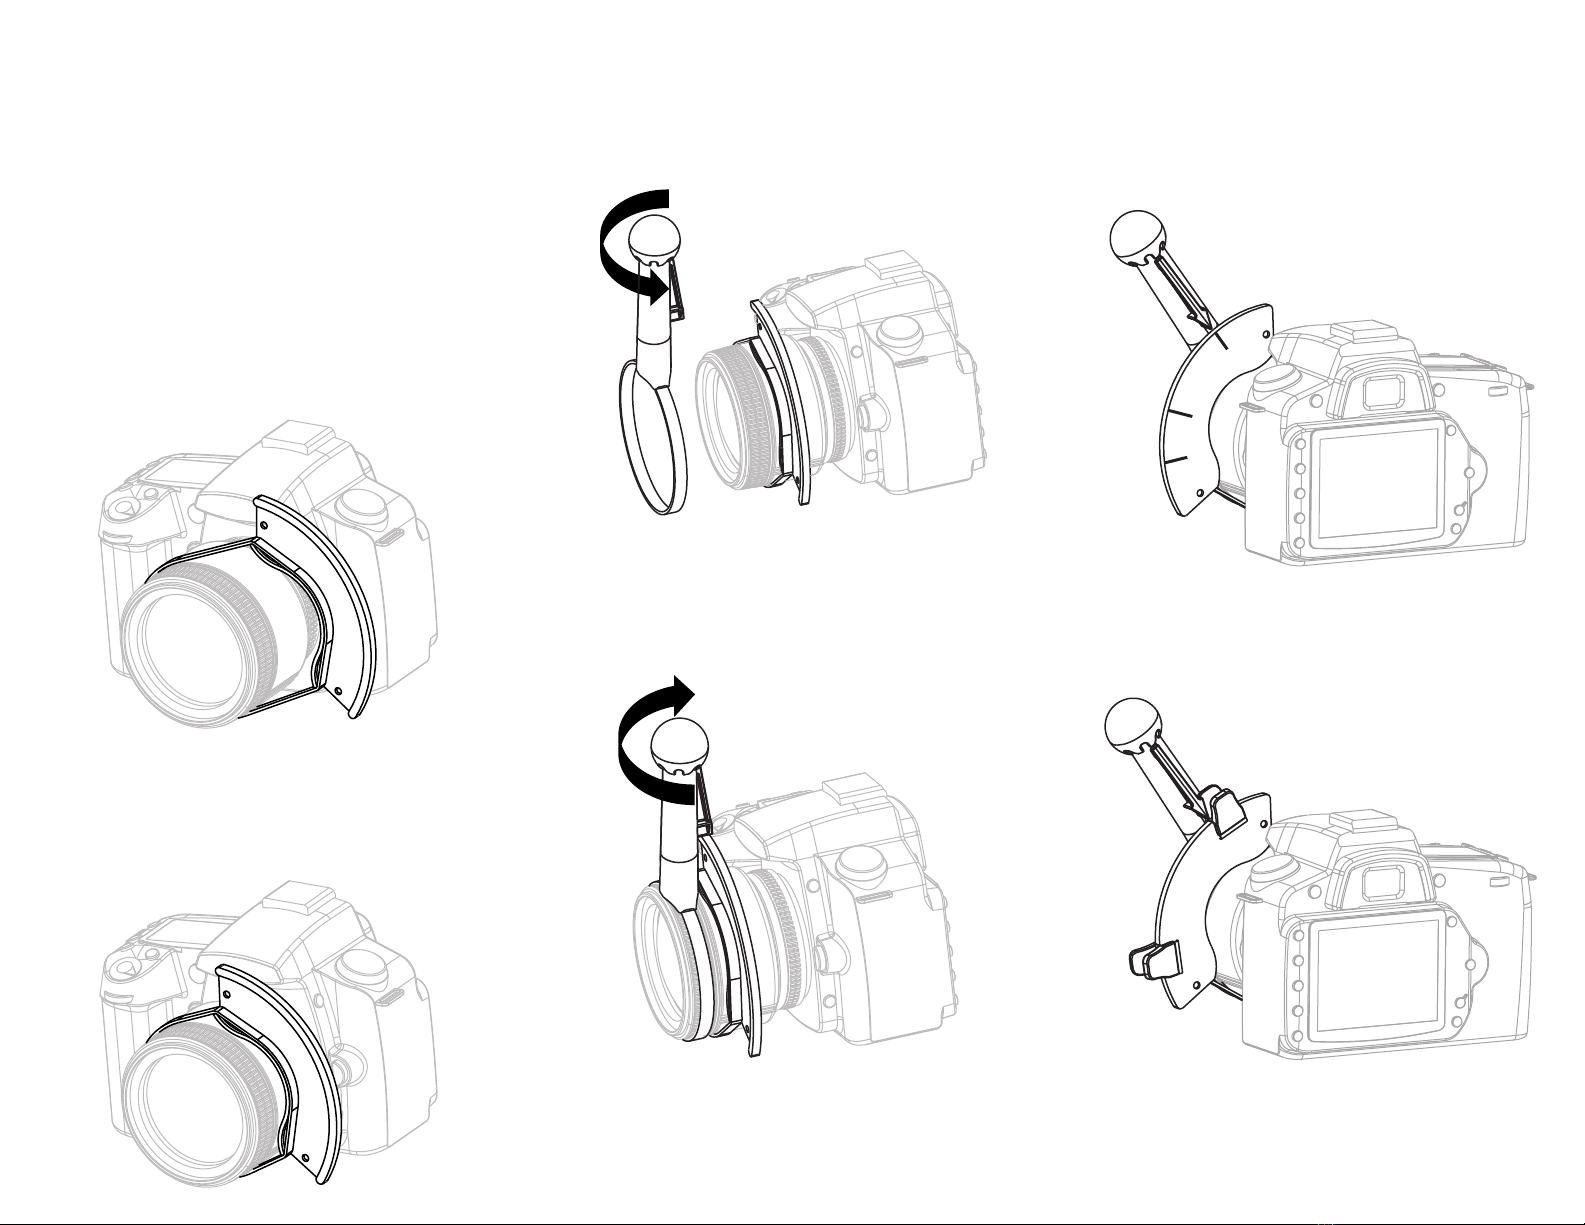
Installing the FocusShifter
1. Open the FocusShifter (turn the ball at the end counter
clockwise) so that the loop of belt is large enough to slip
over the end of the lens.
2. Slip it over and onto the focus ring.
3. Place it so that the arrow overhangs the Marker Board.
4. Tighten up the belt by turning the ball clockwise.
5. Adjust the belt tension to your preference.
Using the FocusShifter
You can set focus points using the dry erase marker, or
hard focus stops using the clips.
1. When using the Marker Board with a dry erase pen, the
FocusShifter can be placed closer to the Marker Board.
2. When using the hard stops, attach them onto the top
edge of the marker board, at the focus stop positions.
Position the marker board such that only the FocusShifter
arrow comes into contact with the hard stop.
Please see www.FocusShifter.com for more
instructions and examples, such as using it with the
Canon 50mm f/1.8 II.


