manuals.online logo
Brands
  1. Home
  2. •
  3. Brands
  4. •
  5. NOVOFLEX
  6. •
  7. Camera Accessories
  8. •
  9. NOVOFLEX MagicBall FREE User manual

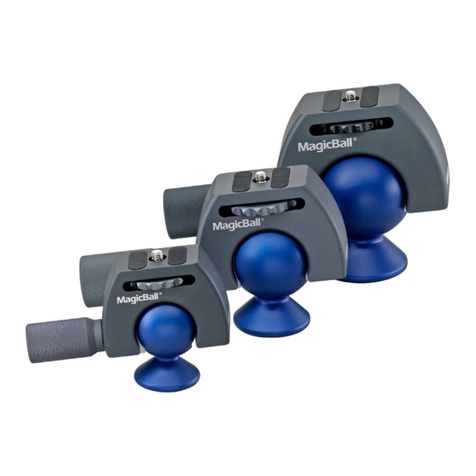
NOVOFLEX MagicBall FREE User manual

MagicBall®FREE
USER MANUAL
Congratulations on your acquisition of the MagicBall FREE – the revolutionary new ball and socket
head. Whilst you should have no difficulty in using the MagicBall FREE, you may find the following
explanations useful.
Features:
Thanks to the upside down installation of the housing and the free-running ball, the MagicBall FREE
allows for an enormous adjustment range of approximately 240 degrees. Even without a perfect
leveled tripod, a camera turn from landscape- to portrait mode is always possible.
In addition, the unleashed ball, released from the main housing, can be used as a quick release
system, which supports the photographer in all conceivable shooting situations, enables a quick
change from tripod- to freehand exposure.
Combined with the guide shell and the support leg, taking pictures while stabilization right next to
the photographers body or on a variety of conceivable surfaces is also highly convenient.
Scope of delivery:
The MagicBall FREE is available in different versions:
• MB FREE consisting of: ball (2) and housing (4)
• MB FREE SET: ball (2), housing (4), support leg (8) and guide shell (9)
• MB FREE H: housing (4) separate, without ball
• BF SET: ball (2), support leg (8) and guide shell (9), without housing
1 Threaded pin
2 Ball
3 Locking lever
4 Housing
5 Knurled ring
6 Thread hole
7 Locking mechanism
8 Support leg
9 Guide shell
Nomenclature
1
2
3
4
5
6
7
8
9
Specifications:
Load capacity:
5kg / 176oz
Dimensions:
8.4×4×7.8cm / 3.3”x1.6”x3.1”
Weight:
• Ball: 118g / 4.16oz
• Housing: 188g / 6.63oz
• Support leg: 46g / 1.62oz
• Guide shell: 39g / 1.38oz
© NOVOFLEX Präzisionstechnik GmbH
Brahmsstraße 7
D-87700 Memmingen / Germany
Phone +49 8331 88888, Fax +49 8331 47174
Email mail@novoflex.com, Internet www.novoflex.com
3
7
Handling:
Removing the ball:
In order to remove the ball from the housing, open the lock-
ing lever (3), bring the locking mechanism (7) in the “open“
position, hold this position and take the ball out from the
housing.
Inserting the ball:
Inserting the ball is only possible when the locking lever (3)
is opened (see fig. right). Bring the locking mechanism (7)
in the “open“ position, hold this position and insert the ball.
Alternatively press the ball with a little force from above into
the housing until it snaps in. To secure the connection bring
the locking mechanism (7) in the “lock“ position.
Fixing the balls position:
Having found the optimal angle when taking a picture, fix the
current position by turning the locking lever (3) clockwise
until it blocks. To open the current position turn the locking
lever counterclockwise.
Using the guide shell (9) and support leg (8)
(included in the scope of delivery of: MB FREE SET and BF
SET): In order to insert the ball (2) into the guide shell (9),
press the ball with a little force from above into the shell
until it snaps in with a silent click. For removing, pull it up
with a little force.
Important!
Don’t use this connection with a pendant camera, other-
wise your equipment could fall out. The ball (2) is not locked
after being catched by the guide shell (9).
The guide shell (9) is equipped with a 3/8“ hole incl. ¼“
adapter at the bottom for attaching the support leg (8), a mo-
nopod or a tripod.
The support leg (8) is used for stabilization right next to the
photographers body or in near-ground shooting situations.
For connection with the guide shell (9), the leg has a ¼“
thread at its top.
Camera mounting:
Use the threaded pin (1) in order to connect your cam-
era with the ball. For this purpose you can also remove
the ball from the housing, see chapter “Handling”.
Tripod mounting:
Mount your MagicBall FREE on your tripod using the
tripod screw and the thread hole (6) on the bottom of
the housing. Inside the thread hole there is an adapter,
which can be removed. This is necessary, when your
tripod is equipped with a 3/8“ screw. To tighten the
connection turn the knurled ring (5) clockwise.
Classical mounting as an alternative:
When using this kind of installation, remove the
threaded pin (1) by using a screw driver and place it
into the thread hole (6) of the housing. If necessary, re-
move the thread adapter before. Afterwards connect
the tripod with the ball (if necessary place the thread
adapter into the thread hole). Now mount the camera
on top of the housing. To tighten the camera turn the
knurled ring (5) counterclockwise.
1
Standard-
mounting
Classical
mounting
65
9
2
8
Fixed
ball
This manual suits for next models

2

Other NOVOFLEX Camera Accessories manuals

NOVOFLEX MagicBall MB MINI User manual

NOVOFLEX

NOVOFLEX MagicBall MB MINI User manual

NOVOFLEX MiniConnect MR User manual

NOVOFLEX

NOVOFLEX MiniConnect MR User manual

NOVOFLEX VR-System PRO II User manual

NOVOFLEX

NOVOFLEX VR-System PRO II User manual

NOVOFLEX CASTEL-XQ II User manual

NOVOFLEX

NOVOFLEX CASTEL-XQ II User manual

NOVOFLEX VR-System III User manual

NOVOFLEX

NOVOFLEX VR-System III User manual

NOVOFLEX Q-BASE II User manual

NOVOFLEX

NOVOFLEX Q-BASE II User manual

NOVOFLEX TrioPod-M User manual

NOVOFLEX

NOVOFLEX TrioPod-M User manual

NOVOFLEX Panorama VR-System Mini User manual

NOVOFLEX

NOVOFLEX Panorama VR-System Mini User manual

NOVOFLEX BAL-NIKZ User manual

NOVOFLEX

NOVOFLEX BAL-NIKZ User manual

NOVOFLEX VR-SYSTEM SLIM User manual

NOVOFLEX

NOVOFLEX VR-SYSTEM SLIM User manual

NOVOFLEX MagicBalance PRO75 User manual

NOVOFLEX

NOVOFLEX MagicBalance PRO75 User manual

NOVOFLEX CASTEL Mini II User manual

NOVOFLEX

NOVOFLEX CASTEL Mini II User manual

NOVOFLEX FALCON User manual

NOVOFLEX

NOVOFLEX FALCON User manual

NOVOFLEX MICROPOD User manual

NOVOFLEX

NOVOFLEX MICROPOD User manual

NOVOFLEX CASTEL-COP-DIGI User manual

NOVOFLEX

NOVOFLEX CASTEL-COP-DIGI User manual

NOVOFLEX TrioPod PRO 75 User manual

NOVOFLEX

NOVOFLEX TrioPod PRO 75 User manual

NOVOFLEX ClassicBall CB3-II User manual

NOVOFLEX

NOVOFLEX ClassicBall CB3-II User manual

NOVOFLEX MFT-RETRO User manual

NOVOFLEX

NOVOFLEX MFT-RETRO User manual

NOVOFLEX MiniConnect MC User manual

NOVOFLEX

NOVOFLEX MiniConnect MC User manual

Popular Camera Accessories manuals by other brands

Sunpak PRO 723B Specifications

Sunpak

Sunpak PRO 723B Specifications

dji Ronin-S user guide

dji

dji Ronin-S user guide

SLIK DST-3 operating instructions

SLIK

SLIK DST-3 operating instructions

Nikon DR-4 manual

Nikon

Nikon DR-4 manual

AERMEC MU quick start guide

AERMEC

AERMEC MU quick start guide

GreenWorks BAG707 Operator's manual

GreenWorks

GreenWorks BAG707 Operator's manual

OOZE VAULT Instruction guide

OOZE

OOZE VAULT Instruction guide

Ikan OFly quick start guide

Ikan

Ikan OFly quick start guide

Zhiyun WEEBILL 3 quick start guide

Zhiyun

Zhiyun WEEBILL 3 quick start guide

Axis 290A installation guide

Axis

Axis 290A installation guide

Promate Precise-160 user guide

Promate

Promate Precise-160 user guide

Feider FBA20U2 Original instructions

Feider

Feider FBA20U2 Original instructions

Moza iFocus M user manual

Moza

Moza iFocus M user manual

LSI MegaRAID Quick installation guide

LSI

LSI MegaRAID Quick installation guide

Sony SPK-HCA release note

Sony

Sony SPK-HCA release note

Kenko INNOVATIVE STRONG PAN-TILT HEAD MVH-2D instruction manual

Kenko

Kenko INNOVATIVE STRONG PAN-TILT HEAD MVH-2D instruction manual

Sea & Sea DX-D100 instruction manual

Sea & Sea

Sea & Sea DX-D100 instruction manual

Gradus Group VELLO PGS-P user manual

Gradus Group

Gradus Group VELLO PGS-P user manual

manuals.online logo
manuals.online logoBrands
  • About & Mission
  • Contact us
  • Privacy Policy
  • Terms and Conditions

Copyright 2025 Manuals.Online. All Rights Reserved.