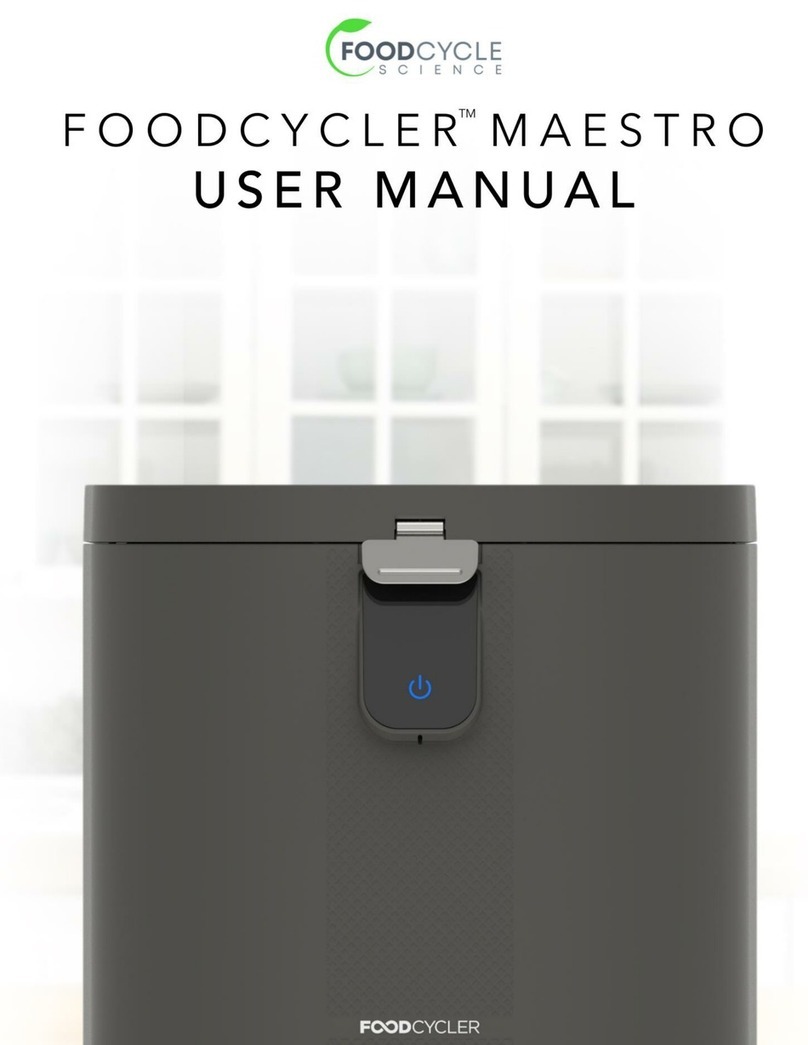
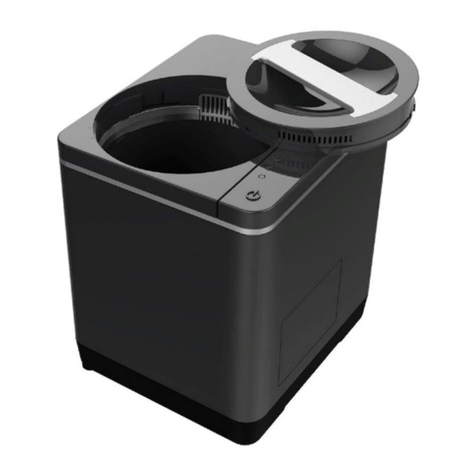
FoodCycler FC-30 User manual

F O O D C Y C L E RTM
USER MANUAL


The FoodCycler™ is an energy-efficient food recycler which transforms your leftovers and
food scraps into a nutrient-rich soil amendment. The aerobic process reduces food waste
by up to 90% of its original volume, leaving a garden-ready supplement that is
scientifically proven to nourish your garden.
This guide will familiarize you with your FoodCycler™, introduce you to its features and
functions, while also showing you how to use and care for your unit.
To ensure that you are using your unit safely and effectively, please read this guide
thoroughly prior to operating your new unit. Please be advised that this unit is designed
for home and office use only.
W E L C O M E
T O
Y O U R
C L E A N E R
,
G R E E N E R
H O M E


C O N T E N T S
1
2
3
4
5
7
8
9
1 1
1 4
1 7
S A F E T Y G U I D E L I N E S . . . . . . . . . . . . . . . . . . . . . . . . . . . . . . . . . . . . . . . . . . . . . . . . . . . . . . . . . . . . .
S P E C I F I C A T I O N S . . . . . . . . . . . . . . . . . . . . . . . . . . . . . . . . . . . . . . . . . . . . . . . . . . . . . . . . . . . . . . . . . .
P A R T S . . . . . . . . . . . . . . . . . . . . . . . . . . . . . . . . . . . . . . . . . . . . . . . . . . . . . . . . . . . . . . . . . . . . . . . . . . . . . . . . .
U N I T S E T U P . . . . . . . . . . . . . . . . . . . . . . . . . . . . . . . . . . . . . . . . . . . . . . . . . . . . . . . . . . . . . . . . . . . . . . . . .
R U N N I N G A C Y C L E . . . . . . . . . . . . . . . . . . . . . . . . . . . . . . . . . . . . . . . . . . . . . . . . . . . . . . . . . . . . . . .
R E P L A C I N G Y O U R C A R B O N F I L T E R S . . . . . . . . . . . . . . . . . . . . . . . . . . . . . . . . . . . . . . . . .
W H A T C A N B E C Y C L E D ? . . . . . . . . . . . . . . . . . . . . . . . . . . . . . . . . . . . . . . . . . . . . . . . . . . . . . . . .
U S I N G Y O U R B Y - P R O D U C T I N T H E G A R D E N . . . . . . . . . . . . . . . . . . . . . . . . . . . . . .
F A Q . . . . . . . . . . . . . . . . . . . . . . . . . . . . . . . . . . . . . . . . . . . . . . . . . . . . . . . . . . . . . . . . . . . . . . . . . . . . . . . . . .
I N D I C A T O R L I G H T S G U I D E . . . . . . . . . . . . . . . . . . . . . . . . . . . . . . . . . . . . . . . . . . . . . . . . . . . .
T R O U B L E S H O O T I N G G U I D E . . . . . . . . . . . . . . . . . . . . . . . . . . . . . . . . . . . . . . . . . . . . . . . . . . .

Carefully read all instruction materials accompanying the product.
To avoid electrical shocks, keep cords, plugs and portable electrical appliances away from water and other
liquids.
Turn the appliance OFF, then unplug from the outlet when not in use, before assembling or disassembling parts
and before cleaning. To unplug, grasp the plug and pull from the outlet. Never pull from the power cord.
Permanently Installed – Make sure appliance is OFF when not in use, before putting on or taking off parts, and
before cleaning. Allow the unit’s interior components to cool before handling. Avoid touching moving parts.
Do not operate any appliance with a damaged cord or plug or after the appliance malfunctions, or is dropped or
damaged in any manner. Contact the manufacturer at their customer service telephone number for information
on examination, repair, or adjustment. (Domestic customer service telephone number must be stated in the
instruction manual, literature contained within the product's packaging or permanently marked on the
appliance).
The use of attachments not recommended or sold by the manufacturer may cause fire, electric shock, or injury.
Do not operate the machine outdoors if the unit is at all exposed to the elements.
Do not operate at or store in below freezing temperatures
Do not let electrical cord hang from counter or table edge.
Unit must only be plugged into properly grounded outlets
Do not touch any hot surfaces. Use the handles or knobs provided for safe handling.
Do not place the unit on or near a hot gas or electric burner.
Do not use appliance for any purpose other than its intended use.
Do not dismantle, reconfigure, alter or adapt the unit in any way.
Do not immerse the unit in water or liquids of any kind.
Do not put hands or any materials other than food waste inside the unit during operation to reduce the risk of
injury to persons, or damage to the mechanism.
This appliance is not intended for use by persons (including children) with reduced physical, sensory, or mental
capabilities, or lack of experience and knowledge, unless they are closely supervised and instructed concerning
use of the appliance by a person responsible for their safety. Close supervision is necessary when any appliance
is used by or near children. Children should be supervised to ensure that they do not play with the appliance.
This appliance is intended for household use and other locations where small amounts of food waste are generated.
The FoodCycler™ is a Household Electric Appliances product.
Basic safety instructions should always be followed when handling electrical appliances. This includes the following:
F O O D C Y C L E R ™
I M P O R T A N T S A F E G U A R D S
1
SAVE THESE INSTRUCTIONS

P R O D U C T N A M E . . . . . . . . . . . . . . . . . . . . . . . . . . . . . . . . . . . . . . . . . . . . . . . . . . . . . . . .
M O D E L N U M B E R . . . . . . . . . . . . . . . . . . . . . . . . . . . . . . . . . . . . . . . . . . . . . . . . . . . . . . . . . . . .
PROCESSING MODE(S) .........................................
M A X W A T T A G E . . . . . . . . . . . . . . . . . . . . . . . . . . . . . . . . . . . . . . . . . . . . . . . . . . . . . . . . . . . . . . . . . . . . . . .
P O W E R I N P U T ( F C - 3 0 ) . . . . . . . . . . . . . . . . . . . . . . . . . . . . . . . . . . . . . . . . . . . . . . . . . . .
POWER INPUT (FC-30E) ...............................................
E N E R G Y U S A G E ( R U N N I N G ) . . . . . . . . . . . . . . . . . . . . . . . . . . . . . . . . . . . . .
E N E R G Y U S A G E ( S T A N D B Y ) . . . . . . . . . . . . . . . . . . . . . . . . . . . . . . . . . . . . . . . . . .
P R O C E S S I N G T I M E . . . . . . . . . . . . . . . . . . . . . . . . . . . . . . . . . . . . . . . . . . . . . . . . . . . . . . . . . . . . . .
C A P A C I T Y . . . . . . . . . . . . . . . . . . . . . . . . . . . . . . . . . . . . . . . . . . . . . . . . . . . . . . . . . . . . . . . . . . . . . . . . . . . . .
W A S T E V O L U M E R E D U C T I O N . . . . . . . . . . . . . . . . . . . . . . . . . . . . . . . . . . . . . . . . . . . . . . . . .
C O L O R . . . . . . . . . . . . . . . . . . . . . . . . . . . . . . . . . . . . . . . . . . . . . . . . . . . . . . . . . . . . . . . . . . . . . . . . . . . . . . . . . . . .
W E I G H T ( O U T O F B O X ) . . . . . . . . . . . . . . . . . . . . . . . . . . . . . . . . . . . . . . . . . .
D I M E N S I O N S ( O U T O F B O X ) . . . . . . . . . . . . . . . . . . . . . . . . . . . . . . . . .
FoodCycler FC-30
FC-30 / FC-30E
Drying, Grinding, Cooling
500W
110-120V 60 Hz
220-240V 50/60Hz
App. 0.8 kWh per cycle
2 kWh per month
4-8 hours
< 2.5L
80-90%
Grey
19 lbs, 13 ounces (9 kgs)
(W)11” x (D)12.6 x (H)14.2”
(”28cm x 32cm x36cm)
F O O D C Y C L E R ™
S P E C I F I C A T I O N S
2

1 ............................................................................................
2 ....................................................................................
3 ............................................................................................
4 ..............................................................................................
5 ................................................................................
6 .........................................................................................
7 ..............................................................................
F O O D C Y C L E R ™
P A R T S
3
123
45 6
FoodCycler™
FoodCycler™ unit lid
Carbon filters
Filter caps
Removable waste bucket
Unit back panel
Bucket lid with deodorizing
carbon filter liner
7
Each one of these parts forms the complete FoodCycler system. Your FoodCycler will be shipped with the
waste bucket, carbon filters and lid in their correct placement inside the unit. The filter caps are located
inside the unit, in the bucket. Remove the filter caps and install on filters prior to cycling.

F O O D C Y C L E R ™
U N I T S E T U P
1. Open unit's back panel.
Detailed instructions: Grip
the plastic tab (with the
arrow) at the top of the
back panel. Pull down
gently on tab to release
the back panel from unit.
2. Peel off filter stickers, if
applicable*
*Note: Not all units come with
filter stickers in place. If you do
not see the white plastic
stickers, then they have
already been removed prior to
leaving the manufacturer.
3. Open unit lid.
Detailed instructions: To
open the lid, turn the lid
counterclockwise until the
arrow on the bucket lid is
facing the unlock symbol
on the side of the unit.
4. Remove filter caps from
inside the unit's removable
bucket.
5. Remove plastic from filter
caps and install on top of
filters.
Detailed instructions:
Place the circle-shaped
openings on top of the filters,
ensuring that the half-moon-
shaped opening faces out
toward the back of the unit.
6. Replace back panel on unit.
Detailed instructions:
Place the back panel so that
the two bottom tabs fit into the
grooves lining the bottom of
the unit’s back cavity. Push the
back panel into the unit’s back
cavity until the panel’s top fits
into the unit groove. Press the
sides of the back panel until it
snaps into place in the unit’s
back cavity.
4

F O O D C Y C L E R ™
R U N N I N G A C Y C L E
1. Remove bucket*
*While you can add food
waste to your bucket when it
is inside the FoodCycler™, we
do not advise this as it risks
food waste falling outside of
the bucket and into the unit.
This can cause damage to
internal components.
2. Add food waste to bucket
*For a detailed list of the
items which can be
processed by the
FoodCycler™, see page 8.
3. Add bucket to unit,
aligning the placement
arrow on the upper lid of
the bucket with the
placement arrow at the
back of the unit cavity. If the
bucket does not seem to fit
into the unit, turn the
bucket's bottom bolt
slightly and then re-insert
the bucket.
*Remove internal bucket
stickers before using.
4. Close unit lid, fitting unit
lid into cavity with arrow
aligned to unlocked. Turn
lid so that arrow aligns with
the locked symbol on the
unit body.
6. Press the Start button
once to Power on unit, and
again to start cycle. If
power light is already on
(blue) only press the power
button once to start cycle.
5. Plug unit into outlet.
5

6
A D D I T I O N A L N O T E S O N R U N N I N G A C Y C L E
1) Always ensure that no food waste falls outside of the bucket and into the unit. This may cause
damage to the motor and other internal components. We recommend removing the bucket
from the unit prior to adding food waste to the bucket. Keep the bucket on your counter or
kitchen table and fill it up with food waste throughout the day/week until ready to start a cycle.
2) Do not overload your bucket. The bucket has a fill-line around the interior of the bucket. Do
not add food waste above this line. Do not pack down food waste. Overloading the bucket
might cause a jam.
3) If you find that you have more waste to add to your cycle while the unit is running, you can use
your unit’s Pause feature. “Pause” your unit in “Drying” cycle only; this should reduce the chance
that your food waste will not be completely dry by the end of the cycle.
In most cases, the volume of your bucket’s contents will be reduced by 50% within the first 30-60
mins of your cycle.
Note: Pausing the unit to add more food waste might impact the accuracy of cycle time
calculation, which will extend the overall cycle period (though the cycle will never last longer
than 8 hours). The by-product may not be fully processed by the end of the cycle. In this case,
you may want to run the unit a second time to completely dehydrate the bucket contents.

F O O D C Y C L E R ™
R E P L A C I N G Y O U R C A R B O N F I L T E R S
7
6. Reset filter light.
Detailed instructions:
To turn off the Change Filter
light (Reset), feel along the
upper, inner lip of the unit
back cavity (where, if the unit’s
back panel were in place, a
white Filter Reset arrow would
point). Press and hold the
small round button until you
hear a beep. The Change
Filter Light should go off. Refer
to picture instruction above.
1. Open unit's back panel. 2. Remove filter caps. 3. Remove used filters, turning
counterclockwise.
4. Remove new filters from
packaging and install in
unit, turning clockwise.
5. Replace filter caps on top
of new filters.
7. Replace the unit's back
panel.

F O O D C Y C L E R ™
W H A T C A N B E C Y C L E D ?
8
Most vegetable
& fruit scraps
Meat, tofu,
poultry & fish
Coffee grinds (incl.
filters), tea leaves &
teabags
Poultry & fish
bones
Eggs &
eggshells
Shellfish (incl.
shells)
Beans, seeds &
legumes
Celery, asparagus &
other fibrous plants
Fibrous herbs
Corn cobs &
husks
Whole fruits
and vegetables
Jellies & jams,
puddings
Dairy products Hard pits (incl.
peach, nectarine,
apricot, lychee &
mango)
Oils & fats
Most "compostable"
plastics
Cardboard
Candy & gum
Avocado pits
A small amount of
paper towel/tissue
Starches (bread,
cake, rice)
Sauces, dressings &
gravies
Starches (bread,
cake, rice)
Beef, pork &
lamb bones
Pineapple
leaves
Y E S C U T U P
P R I O R S M A L L
A M O U N T S N O
Most "compostable"
coffee pods

F O O D C Y C L E R ™
U S I N G Y O U R B Y - P R O D U C T I N T H E G A R D E N
Using an intuitive three-phase cycle, the FoodCycler™ pulverizes and aerates nearly all types of
food waste. Agitators quietly turn inside the grinding bucket, reducing food waste volume by up
to 90%. Simultaneously, the unit aerates and heats the bucket contents, leaving only a small
amount of dry biomass.
While the by-product does not have the same microbial or bacterial qualities as traditional
compost, it is still rich in the important nutrients your garden soil requires to thrive. The by-
product is scientifically proven to be beneficial for optimal vegetation growth.
FoodCycler™ is a convenient, compact and energy efficient compost alternative. Traditional
compost, and composting alternatives (such as vermicompost systems, bokashi and compost
tumblers) can take weeks, if not months, to transform food waste into a garden-ready
supplement that is high in various micro and macro nutrients, as well as crucial organic
biomatter. Because of the intense aeration, heating and pulverization of the unit’s full cycle, this
process is accelerated to complete within 4-8 hours. Cycling also ensures that meat, dairy and
even some bones and processed foods can be added to the cycle. The level of heat emitted by
the unit during the cycle is sufficient to completely eliminate all bacteria and potential pathogens
- even weed seeds - allowing the by-product to be used safely, and stored indefinitely. The
resulting biomass can also be used in the garden as a fertilizer or soil conditioner. See following
page for details on incorporating the by-product into your garden soil.
9

T H E F O O D
C Y C L E R
™
T I M E -
L I N E
T H R O U G H O U T
T H E D A Y
Add food scraps & leftovers
throughout the day, or until
your bucket is full.
4 - 8 H O U R S
The FoodCycling process takes
approximately 4 to 8 hours to fully
break down your food into
"foodilizer."
1 : 1 0 R A T I O
Mix foodilizer in with your soil
at a minimum ratio of 1 part
by-product to minimum of 10
parts soil (1:15 if your cycle
contains meat products)
1 - 4 W E E K S
10
For the absolute best results, add
your "foodilizer" to the garden 4
weeks prior to planting. This will
allow your by-product to break
down in the soil and nourish the
soil's existing microbes.

F O O D C Y C L E R ™
F A Q
Keep the unit at least 6” from all walls and surfaces to ensure proper ventilation of any steam
emissions.
Ensure that the unit is sitting on a flat, dry surface.
Do not store the unit next to heaters and kitchen appliances which generate significant heat.
Do not store the FoodCycler outdoors, or in any place where it is likely to get wet or
subjected to below freezing temperatures.
1. Where should I store my unit?
The FoodCycler™ can be run in just about any area indoors that has a power outlet and
sufficient space (including basements and heated garages).
2. What can I process in the FoodCycler
™
?
Like any healthy diet, the FoodCycler™ performs best when fed a wide variety of foods. To
ensure optimal food waste breakdown, add multiple different types of food waste to every cycle,
with heavier foods interspersed with lighter, dryer foods. Avoid high concentrations of the
following foods:
·starches (bread, cake, rice, pasta, mashed potatoes, stuffing)
·condiments, dressings, sauces & soups
·nut butters
·jam, jellies, marmalades
·high sugar fruits (grapes, cherries, melon, oranges, bananas, etc.)
The dense, starchy and/or moisture-rich composition of these foods make them difficult to
process in large quantities. For a complete guide on what you can and cannot process, please
see page 7.
Prior to cycling, chop up items with a high fibre content, such as parsley and asparagus, as these
items can easily wrap around the bucket's grinding arm and cause a jam.
If a jam occurs, the unit will stop processing and switch to self-protection mode (flashing Drying
light). The items causing the jam will need to be removed from the bucket prior to restarting the
cycle.
3.What you shouldn
’
t put into FoodCycler?
Do not attempt to cycle anything other than organic wastes in your FoodCycler™ (such as glass,
metal or wood). Likewise, do not cycle hard bones (such as pork, lamb or beef bones), pits,
11

The unit’s by-product can be used as a soil amendment, or homemade fertilizer. For best
results, we recommend adding the by-product to the soil at a ratio of 1 part fertilizer to 10
parts soil. For cycles with an abundance of animal protein (meat, dairy, etc), we recommend
increasing that ratio to 1 part fertilizer to 15 parts soil. We also recommend waiting a
minimum one week (4 weeks for best results) following soil application before planting seeds
or transplanting plants to the newly fertilized soil. Further, the healthier your food waste, the
healthier your garden! Foods high in fat, oil, sodium or sugar may not produce optimal
results.
Do not add the by-product directly to the soil surface. This will not feed the soil sufficiently,
and the by-product will absorb moisture, which will increase the likelihood that your soil
amendment will mold and/or attract unwanted critters to your yard or garden.
You can also throw it into your green bin or garbage can. Adding the by-product to your
household trash is still preferable to throwing in unprocessed food waste, as the by-product
will take up less space in landfills and will generate fewer transport emissions once collected
(being reduced in weight and volume).
Running a cycle with only citrus rinds (lemons, orange, etc), will help mitigate filter odours.
candy, gum, nuts or hard shells: these materials may cause serious damage to the bucket, and/or
cause a motor overload. Do not add oil, flammable materials or compounds to the unit.
Note: If a unit or bucket is damaged from cycling, or coming into contact with, the materials listed
above, the associated warranties will be considered void, as the inclusion of these materials goes
beyond the reasonable use of the unit.
4. Can I store unprocessed food waste in the unit?
We do not recommend leaving unprocessed food waste in the unit for long periods of time. The
carbon filters are only able to wick away odours during processing. Leaving decomposing
organic matter in the enclosed unit will generate odours, methane gas and might attract fruit flies
and/or other pests.
5. What do I do with my byproduct (or
“
foodilizer
”
)?
6. How do I extend the life of my filters?
The filter indicator is to remind you to replace your filters every 3-6 months (depending on use)
or approximately 500 cycle hours (whichever comes first). The filter indicator is merely a
recommendation, however, as the best test of your unit filters is cycle odour. The filter life
depends on the quality and quantity of the use of the unit.
12

We recommend shutting the FoodCycler™ off before leaving your home for an extended
period of time. You may also unplug the unit from the wall prior to any trips away from home.
Leaving the unit in Active mode (Start button lit up) will also consume the life of the filters.
Including coffee grounds in your regular cycles can help mitigate odours, and can also help
to keep your bucket clean!
7. How do I keep my bucket clean?
The bucket is designed to self-clean with every cycle. It is normal to have a residue in the base
and sides of the bucket after some cycles. Simply empty the contents of the finished cycle,
ensuring the internal grinding arm can fully rotate, and fill the bucket for the next cycle.
If a jam occurs and you are not able to rotate the internal grinding arm, remove contents and
manually soak the bucket with boiling water and mild soap overnight, to loosen the blockage.
8. I'm hearing "clunking"/squeaking sounds during my cycle - is this normal?
Noises during the cycle are perfectly normal. While the majority of cycles are quiet, particularly
dense, fibrous or moisture-rich food wastes in a cycle can cause the bucket to make sounds as it
processes food waste.
13

F O O D C Y C L E R ™
I N D I C A T O R L I G H T S G U I D E
The unit’s Drying Mode (green) can last anywhere between 60-100
mins and will automatically switch to Grinding once this period of
time has elapsed.
Note: If this light is flashing, it indicates that the unit is overloaded.
The unit will stop running to avoid a motor overload. In the event
that you experience a bucket overload, please remove the contents
causing the blockage and ensure that the bucket’s grinding arm
can fully rotate. Once the blockage is removed, resume the cycle.
14
The Power or Start button (blue) will flash once when the unit is plugged into an outlet, as
it enters the “Standby mode." To enter “Active mode” press the button a second time.
Active mode allows air circulation within the unit, allowing you to store unprocessed food
waste. Press the button a third time to enter the “Drying” cycle (solid blue light and green
Drying light activated).
Pressing the Power button or opening the lid when the unit is processing will pause the
cycle. If you would like to add more food waste to the current cycle (only available during
Drying), you may continue from where you left off by locking the lid and pressing the Start
button once again, as you did when you first started the cycle. The unit will resume
processing. Press and hold the Start button for 3 seconds to re-enter “Standby Mode."
The Change Filter light indicates that filter replacement is due
every 3-4 months, depending on use. Once you have replaced
your filters, reset Change Filter light (it will not go off
automatically) - see Filter Reset Instructions. *The filter light is only
a guide. If your unit does not smell, your filters do not yet require
replacement.
The Cooling Cycle (green) is the last mode in your unit's cycle. The
Cooling mode is the shortest phase and will end within 30 minutes.
The unit will switch automatically to “Standby mode” once this
phase is complete.
The Grinding Cycle (green) is the longest cycle mode and can last
anywhere between 3-6 hours, depending on bucket contents.
Once this cycle is done, the unit will switch automatically to
Cooling. (Hearing some "clunking noises" during this phase is
normal, see page 13)
LED LIGHTS

F L A S H I N G D R Y I N G L I G H T ( A N D
B E E P I N G )
A flashing Drying light indicates the unit is overloaded. The unit will
stop running to avoid a motor overload. In the event you experience
a bucket overload, simply remove the blockage, ensure the bucket’s
grinding arm can fully rotate. Resume cycle.
A L L C Y C L E L I G H T S F L A S H I N G T O G E T H E R
O R G R I N D I N G / C O O L I N G L I G H T
F L A S H I N G
Indicates internal components malfunction. Stop using unit and
reach out to the FoodCycler™ Customer Care Team.
15
F L A S H I N G P O W E R L I G H T
Indicates unit lid is open/has come unlatched OR that user has
paused the cycle.
Ensure lid is closed and in "locked" position and that the unit is not
paused. If food waste is preventing lid from closing, remove enough
food waste from bucket to allow lid to close and lock. If lid is
secured and locked, and the light continues flashing, reach out to
the FoodCycler™ Customer Care Team.
Other manuals for FC-30
1
Table of contents
Other FoodCycler Kitchen Appliance manuals
