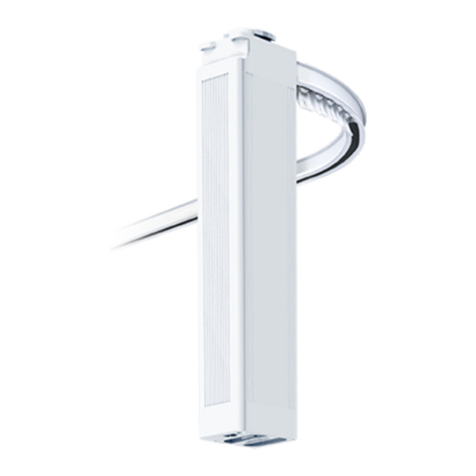
Forest SHUTTLE AC Instruction Manual

2
FOREST SHUTTLE® AC

2│ Installing the Forest Shuttle AC
Determine the installation mode of the FOREST SHUTTLE® AC
The Shuttle® AC motor can be used in two modes:
1. Remote controlled mode.
Both wires brown and black of the power cable are connected to constant Live AC voltage. Blue wire is connected
to Neutral, yellow/green wire to earth. The motor will respond to a Forest RF remote control, also to Touch
Impulse (manual opening/closing the curtain)
Wiring diagram:
L
N
PE
2. Building automation mode.
When Live AC voltage is connected (by the building automation system) to the brown or black wire, the motor will
open or close the curtain. When the Live AC voltage is disconnected, the curtain will stop moving.
The motor will not respond to a Forest remote control or Touch Impulse. Cable between actuator or switch and
motor maximum 30 meters (98 ft.)
Wiring diagram:
Building automation system
L
N
PE
.

3│ Installing the Forest Shuttle AC
QUICK INSTALLATION OF ASSEMBLED TRACKS :
Programming Shuttle® AC to a channel (only for remote controlled mode)
When the Shuttle® AC motor is used in REMOTE CONTROLLED MODE, then the motor can be programmed to a remote.
For prior programming of a remote it is not necessary to fix the Shuttle®AC motor to the track. Take next steps:
FIRST SELECT THE PRESS BUTTON 3x LED MOVES FROM KEEP BUTTON GREEN LED WITHIN 10 SEC.
DESIRES CHANNEL WITH A PEN 1st → 2nd → 3rd LED PRESSED FOR 5 SEC. STARTS BLINKING PRESS OPEN
3x 1x 5sec.
Re-adjusting the open and close end position
Possibly the OPEN and CLOSE end positions are already set to the curtain track. Adding extra carriers is taken in to
account. When the end positions need to be changed, take next steps:
→ MOVE THE CURTAIN TO THE OPEN POSITION
PRESS BUTTON 4x LED MOVES FROM KEEP BUTTON YELLOW LED BLINKS
WITH A PEN 1st → 2nd → 3rd → 4th LED PRESSED FOR 5 SEC. AND GOES OFF
4x 1x for 5sec.
Now the end positions are reset and have to be set again:
→PRESS THE CURTAIN TOWARDS CLOSE POSITION, CURTAIN WILL CLOSE AUTOMATIC.
→ PRESS THE CURTAIN TOWARDS OPEN POSITION, CURTAIN WILL OPEN AUTOMATIC.
→ DIRECTLY AFTER STOPPING OF THE MOTOR (AT OPEN POSITION) THE YELLOW LED WILL LIGHT UP.
NOW YOU CAN ADJUST THE OPEN POSITION TO DESIRED POSITION.
→ WAIT UNTIL THE YELLOW LED GOES OFF, THE END POSITIONS ARE NOW STORED INTO MEMORY.

4│ Installing the Forest Shuttle AC
Installing the FOREST SHUTTLE® AC
①Assemble the track
②Install the brackets and fix the track onto the brackets
③Do not attach the drapery yet. Attach the drapery only after the end positions have been set.
→ position the master carrier(s) into half open position
④Attach the motor to the track
make sure to secure the locking
pin into the motor pulley
⑤The Shuttle AC can be connected in 2 ways:
1. Remote controlled mode: the Shuttle AC is connected to constant AC power to a socket.
2. Building automation mode: the Shuttle AC is controlled by building automation

5│ Installing the Forest Shuttle AC
⑥Setting the end limits of the FOREST SHUTTLE® AC
SETTING MOTOR DIRECTION AND CLOSE LIMIT FOR REMOTE CONTROLLED MODE:
The Shuttle detects automatically the motor direction. By pulling the master carrier(s) towards closed position first, the
Shuttle will automatically learn that motor direction. The master carrier will travel automatically towards the closed
position.
SETTING OPEN LIMIT:
When the closed position is reached, that end limit is set. Pull the master carrier(s) to the open position. The master
carrier(s) will travel automatically towards the open position.
Stack back: When the master carrier reaches the fully open position it will stop (yellow LED4 is on). Now the open
limit setting can be adjusted by hand, by remote or dry contact input. When the master carrier is not moved for 10
seconds, the yellow LED4 will go off and the open limit is set. The minimal automatic adjustment is 3 cm (1.2”).
If you are not satisfied with the programmed end limits, then re-set the end limits as shown in the configuration table on page 6
and proceed from step ⑥on this page.

6│ Installing the Forest Shuttle AC
SETTING MOTOR DIRECTION AND CLOSE LIMIT FOR BUILDING AUTOMATION MODE:
When the Shuttle AC is powered for the first time:
•Decide where to put the ‘open position stop clip’
•Run once towards fully close position, and run once towards fully open position. The motor will stop running
automatic.
•When both close and open position are reached then the end limits will be saved.
•If the motor direction is wrong, please exchange the brown and black control wires.
Configure the FOREST SHUTTLE® AC
Bottom view of the Shuttle® Use a pin to change settings in the configuration menu.
Choose the setting you want to change (table below) and press
the button that many times (corresponding with setting).
LED1 LED2 LED3 LED4
configuration button Confirm the desired setting by pressing the button for 4 seconds
until the led blinks 3 times and goes OFF. These settings can also
be done when finishing the installation.
Speed (1 & 2):
Standard speed is 14cm/s. For faster speed, 17cm/s, press 2x button. To confirm, press and hold once more for 4 seconds until
the led blinks 3 times and goes OFF.
Programming RF remote channel (3) (only for remote controlled mode):
To programming a RF remote to a Shuttle®, press configuration button 3 times. LED3 is ON. Press and hold once more for 4
seconds, LED will start blinking for 10 seconds. In these 10 seconds press OPEN button on remote to program the channel to the
Shuttle®. Same procedure, but press CLOSE instead of OPEN, will erase the programmed channel.
Adding another channel, or another remote, can be done by pressing the P button 2 times, switch to new channel/remote and
press the OPEN button once. Now the new channel/remote will also control the Shuttle®.
Reset end limits (4):
For resetting only the end limits: press button 4x. To confirm, press and hold once more for 4 seconds until the led blinks 3 times
and goes OFF. When a Forest remote is programmed to the Shuttle®, the end limits can also be reset by pressing 5 times the P
button and 5 times the STOP button on the remote. End limits of all Shuttles® in range on this channel will reset end limits.
Touch Impulse (8, 9 & 10) (only for remote controlled mode):
The Shuttle® recognizes when the curtain is pulled by hand to open or close. The Shuttle® will then open or close the curtain all
the way. Default setting is high sensitive. Touch Impulse can be set to less sensitive or off, with 9 or 10 presses respectively. To
confirm, press and hold once more for 4 seconds until the led blinks 3 times and goes OFF.
Factory default (16)
To reset all settings, press button 16x. To confirm, press and hold once more for 4 seconds until the led blinks 3 times and goes
OFF.

7│ Installing the Forest Shuttle AC
Technical specification of the FOREST SHUTTLE® AC
Shuttle® AC
Part # 5233000000
Voltage Shuttle®: 100 - 240V~ 50 - 60Hz 0.8A
Max. power: 50W
Torque: 1Nm
Speed 1: 14 cm/s
Speed 2: 17 cm/s
Max. curtain weight: 40kg (no curves)
Length: 28cm (11”)
Net. weight motor: 980gr.
Protection degree: IP20
Max. running time
(in one direction): 240 sec.
Sound level: < 41dB
Ambient temperature: 0 - 40⁰C (32 - 104⁰F)
Relative humidity: 10 –80%
Maximum useable altitude
above sea level: 2000m (6561ft.)
Certification & Marking: CE
HB1 B2
Shuttle S 225mm 77mm 49mm
Shuttle MRec 270mm 77mm 49mm
Shuttle L 305mm 77mm 49mm
HB1 B2
Shuttle AC 305mm 77mm 49mm

8│ Installing the Forest Shuttle AC
Forest Shuttle® AC is not suitable for humid spaces, like bathrooms or outdoors.
It is important for the safety of persons to follow these instructions. Save these instructions.
Do not use the product for any other purpose than intended. In order for the Forest Shuttle® AC to function
correct and safe, the complete curtain system must be assembled with original parts and devices of
Forest Group Nederland B.V. This includes all components of the curtain track and power supply adaptor.
Forest Group does not assume liability for resulting damages to property or personal injury, defects, labour on location, service
calls, reinstallation or expenses involved shipping, packing or returning goods, if the product has been abused/modified in any
way or damaged by improper use or failure to observe these operating instructions. The warranty/guarantee will then expire!
Do not allow children to play with the system or controls. Keep remote controls away from children.
Frequently examine the installation for imbalance and signs of wear or damage. Do not use if repair or adjustment is necessary.
v1_4
Table of contents
Other Forest Engine manuals
