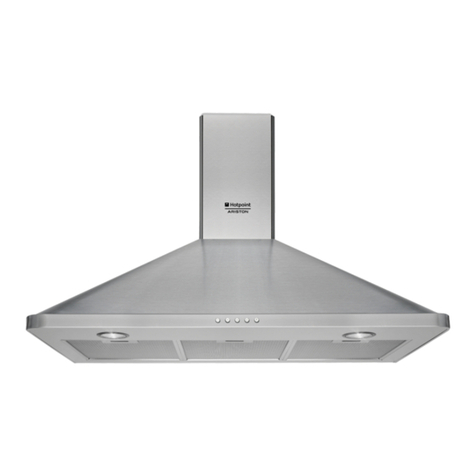
Forte VERTICE Series Assembly instructions

INSTALLATION, OPERATING AND MAINTENANCE
INSTRUCTIONS FOR COOKER HOODS MODEL:
VERTICE
120V - 60HZ
Cod. 395537

ENGLISH
INSTALLATION, OPERATING AND MAINTENANCE INSTRUCTIONS FOR COOKER HOODS:
MOD. VERTICE
120V – 60HZ
READ AND SAVE THESE INSTRUCTIONS
WARNINGS
CAUTION: Automatically Operated Device – To Reduce The Risk Of Injury Disconnect From
Power Supply Before Servicing.
WARNING: To Reduce The Risk Of Fire Or Electric Shock, Do Not Use This Fan With Any Solid-State Speed Control Device.
PAY ATTENTION TO:
A) THE NEED FOR FREQUENT CLEANING OF ALL GREASE FROM THE FAN AND FROM ALL OTHER GREASE-LADEN SURFACES;
B) THE NEED FOR FREQUENT REMOVAL AND CLEANING OF ANY FILTER UNIT PROVIDED; AND
C) THE NEED TO EXERCISE CARE WHEN USING CLEANING AGENTS OR DETERGENTS
WARNING: To provide protection against electric shock, connect to properly grounded outlets only.
For Residential Use Only
WARNING: GROUNDING INSTRUCTIONS
This appliance must be grounded. In the event of an electrical short circuit, grounding reduces the risk of electric shock by providing an escape wire for the
electric current. This appliance is equipped with a cord having a grounding wire with a grounding plug. The plug must be plugged into an outlet that is
properly installed and grounded.
WARNING – Improper grounding can result in a risk of electric shock.
Consult a qualified electrician if the grounding instructions are not completely understood, or if doubt exists as to whether the appliance is properly grounded.
Do not use an extension cord. If the power supply cord is too short, have a qualified electrician install an outlet near the appliance.
WARNING – TO REDUCE THE RISK OF FIRE, USE ONLY METAL DUCTWORK.
WARNING – TO REDUCE THE RISK OF A RANGE TOP GREASE FIRE:
a) Never leave surface units unattended at high settings. Boilovers cause smoking and greasy spillovers that may ignite. Heat oils slowly on low or medium
settings.
b) Always turn hood ON when cooking at high heat or when flambeing food (i.e. Crepes Suzette, Cherries Jubilee, Peppercorn Beef Flambe’).
c) Clean ventilating fans frequently. Grease should not be allowed to accumulate on fan or filter.
d) Use proper pan size. Always use cookware appropriate for the size of the surface element.
WARNING – TO REDUCE THE RISK OF INJURY TO PERSONS IN THE EVENT OF A RANGE TOP GREASE FIRE, OBSERVE THE FOLLOWING:
a) SMOTHER FLAMES with a close-fitting lid, cookie sheet, or metal tray, then turn off the
burner. BE CAREFUL TO PREVENT BURNS. If the flames do not go out immediately,
EVACUATE AND CALL THE FIRE DEPARTMENT.
b) NEVER PICK UP A FLAMING PAN – You may be burned.
c) DO NOT USE WATER, including wet dishcloths or towels – a violent steam explosion will result.
d) Use an extinguisher ONLY if:
1) You know you have a Class ABC extinguisher, and you already know how to operate it.
2) The fire is small and contained in the area where it started.
3) The fire department is being called.
4) You can fight the fire with your back to an exit.
SUITABLE FOR USE IN A HOUSEHOLD COOKING AREA
CONVIENT À L’EMPLOI DANS UNE ZONE DE CUISSON MÉNAGÈRE
THE MINIMUM DISTANCE BETWEEN THE SUPPORTING SURFACE OF THE COOKING HOB AND THE LOWEST PART OF THE RANGE HOOD MUST BE NOT
LESS THAN 26IN (65 CM) WITH A GAS HOB.
WARNING: TO PROVIDE PROTECTION AGAINST ELECTRIC SHOCK, CONNECT TO PROPERLY GROUNDED OUTLETS ONLY
AVERTISSEMENT: POUR ASSURER LA PROTECTION CONTRE LES CHOCS ÉLECTRIQUES, BRANCHER SUR UNE PRISE CORRECTEMENT MISE À LA TERRE
WARNING: GROUNDING INSTRUCTIONS
This appliance must be grounded. In the event of an electrical short-circuit, grounding reduces the risk of electric shock by providing an escape wire for the
electric current. This appliance is equipped with a cord having a grounding wire with a grounding plug. The plug must be plugged into an outlet that is
properly installed and grounded.
WARNING - Improper grounding can result in a risk of electric shock.
Consult a qualified electrician if the grounding instructions are not completely understood, or if doubt exists as to whether the appliance is properly grounded.
Do not use an extension cord. If the power supply cord is too short, have a qualified electrician install an outlet near the appliance.
AVERTISSEMENT: CONSIGNES DE MISE À LA TERRE
Cet appareil doit être mis à la terre. En cas de court-circuit, le fil de mise à la terre limite le risque de choc électrique parce qu’il assure le retour du courant à
la terre. L’appareil est livré avec un cordon muni d’un fil de terre et d’une fiche de mise à la terre, qui doit être branchée sur une prise mise à la terre
correctement installée.
AVERTISSEMENT - Une mise à la terre incorrecte peut entraîner des risques de choc électrique.
Consulter un électricien compétent en cas de doute sur ces consignes de mise à la terre ou en cas d’incertitude concernant la mise à la terre correcte du circuit
sur lequel l’appareil est branché. Ne pas utiliser de cordon de rallonge. Si le cordon d’alimentation est trop court, faire installer une prise par un électricien
compétent à proximité de l’appareil.
The present instruction manual is an integral part of the appliance itself, therefore it must be carefully kept and ALWAYS accompany it, even in case of its assignment to another owner or user or in
case the cooker hood is moved to another installation plant.
Make sure that the voltage (V) and frequency (Hz) indicated on the data plate inside the unit match those available at the installation site. Any eventual adjustment to the electrical system, which may
be necessary to install the cooker hood, must be carried out only by competent people.
Any repair carried out by no competent people may cause damages.
For any repair or needed technical action make reference to a Technical Assistance Centre, which is authorized to carry out the replacement of the spare parts. Always make sure that all the electrical
parts (lights, exhaustion unit) are disconnected when the appliance is not in use. By storms take off the main switch of the house electrical system or if the device is equipped with a plug, simply unplug
it from the mains socket
The using of the cooker hood must not be other than the use of exhausting units for cooking damps on domestic kitchens.
The manufacturer does not accept any liability for damages caused by people, animals or things, by installation and maintenance mistakes or by any illegitimate use.
We remind that the use of products functioning with electrical energy implies the observance of some essential security rules, as follows:
•This equipment is not intended for people (children included) with reduced mental or motor capacities, with lack of experience or knowledge, unless they are supervised or unless a person
responsible for their security, gives them instructions regarding the use of the equipment. Children must be supervised in order to be sure that they do not play with the equipment.
•Any cleaning action is forbidden if the appliance hasn’t been disconnected from the main power supply and if the main switch of the house electrical system is not off or if the device is equipped
with a plug, simply unplug it from the mains socket. If cleaning is not carried out according to these instructions, a fire may break out.
•Do not pull, take off or twist the cable coming out from the appliance, even though this has been disconnected from the main power supply.

•Do not sprinkle or throw any water directly on the appliance.
•Do not stick any sharp tool inside the exhausting holes and into the air discharge.
•Do not take out the filters in order to reach the internal sides of the appliance in case the main switch of the house electrical system is not off.
•Do not singe or flambé directly underneath the cooker hood. Take particular care when frying to ensure that the oil does not catch fire.
•CAUTION: Accessible parts may become hot when used with cooking appliances.
•It is forbidden to use the hood as a support surface unless it is expressly indicated.
•Only use the fixing screws supplied with the product for installation.
USE
This cooker hood can be employed as exhausting or filtering.
Exhausting (external evacuation). Remove any activated carbon filters if present. Kitchen smokes are driven outside through a flue (not provided with the hood) joined to the exhaust pipe flue
connector. This pipe must not under any circumstances be connected to cooker, boiler or burner exhaust pipes, etc.
The use of pipes and holes on the wall with a smaller diameter than the output of the motor will cause a decrease in suction performance and an increase of the noise level.
Use as short as possible tubes and with few curves. Use pipes with smooth internal surfaces.
Filtering (inside recycling). The fumes pass through activated carbon filters (available as an accessory) to be purified and recycled into the kitchen.
INSTALLATION
Read the instruction manual before installing and/or using the hood. The minimum distance between the supporting surface of the cooking hob and the lowest part of the range hood must be not less
than 26in (66,04cm) with a gas hob. If the mounting instructions of the gas hob indicate a wider distance, respect it.
It must not be superimposed on stoves with an upper radiating plate.
For proper operation we recommend installing the product at a distance from the floor level of 200-210 cm (78-82in).
Respect all the air discharge regulations.
The air must not be discharged in a pipe used to discharge exhaust fumes produced by gas-fed equipments or fuel-fed equipments (this does not apply to filtering hoods).
The room must be adequately ventilated when the hoods is used together with other gas or fuel equipments.
The hood placed above an induction hob can cause condensation, this is a normal phenomenon and not due to malfunctioning of the product.
For an easy access, it is advisable to move possible furniture under the installation area.
The hood is equipped with all the necessary fastenings for its installation, which are suitable for most surfaces. Verify that the installation surface is strong.
Installation must be carried out by qualified installers according to present regulations.
Before proceeding with the installation, turn the main switch of the system to "off".
Follow the assembly instructions according to the chosen hood model:
MOD. VERTICE
The hood can be installed in 2 different ways:
• Fixed directly to the ceiling:
This method of fixing can only be achieved if the distance between the ceiling and the false ceiling is between 247mm (9.7in) and 318mm (12.5in).
For fixing use the special adjustable brackets (fig. 5).
Perform the following steps in order:
1. Make an opening in the false ceiling following the dimensions shown in Fig. 1.
2. Drill 4 holes on the ceiling following the dimensions shown in Fig. 1 for the subsequent anchoring of the adjustable brackets.
3. Adjust the size of the brackets appropriately based on the distance between the ceiling and the false ceiling (Fig. 2).
4. Screw the brackets to the load-bearing ceiling using the 4 screws supplied (Fig. 3).
5. Access the lower side of the hood and open the main panel (Fig. 4).
6. Remove the metal filters and the central cover (Fig. 10 and Fig. 11) and bring the hood closer to its housing.
7. Electrically connect the hood and the air discharge pipe (Fig. 5).
8. Anchor the hood using the 4 screws to the brackets previously fixed to the ceiling (Fig. 6).
9. Reassemble the central cover and install the metal filters before closing the main panel.
• Fixed directly on the false ceiling:
WARNING: use this type of installation ONLY and EXCLUSIVELY when the false ceiling is able to support the weight of the hood:
MOD. VERTICE36: 25Kg. (55lb) - MOD. VERTICE48: 30Kg. (66lb)
For this method of installation, use the special brackets (Fig.7).
Perform the following steps in order:
1. Assemble the 4 brackets as shown in Fig. 7 and tighten the 4 adjusting screws leaving sufficient travel to engage the hood in the false ceiling.
2. Remove the metal filters and the central cover (Fig. 10 and Fig. 11) and place the hood in its housing.
3. Electrically connect the hood and the air discharge pipe.
4. With the hood positioned, adjust the adjusting screws until the hood is well anchored (Fig. 8).
The engine can also, by means of the special extension, be positioned far from the hood at a distance not exceeding 7mt. In this case the hood can only be used in the exhaust version.
Respect the installation methods as shown in Fig. 9 in order to keep the fan's rotation axis horizontal.
For the electrical connection of the motor away from the hood always use the supplied extension cord and make the earthing connection using the yellow-green wire.
ELECTRICAL CONNECTION
This equipment must be connected to a grounding plant.
Two types of electrical connection can be used:
1. Using a standard plug to be connected to the power cable and inserted in a mains socket which must be accessible (so that the plug can be disconnected when servicing is carried out). Make sure
that the plug is accessible also after the complete installation of the equipment.
2. By means of a fixed mains connection, fitting a bipolar switch, which ensures the disconnection, with an opening distance of the contacts allowing a complete disconnection on the conditions of the
overvoltage III category, according to installation regulations. The ground connection (yellow-green wire) must not be interrupted.
Refer to the plate inside the hood for the mains voltage and frequency ratings. If the power cable is damaged, it must be replaced by the manufacturer or by its service agent or a qualified person in
order to avoid any risk.
OPERATION
The hood is supplied with a multispeed motor. The hood should be run at low speed under normal conditions and at higher speeds only when there is a heavy build-up of fumes or odours. Ideally, the
hood should be switched on as soon as cooking is started and then kept on until all odours have been eliminated.
Hood remote control operation (Fig. A):
■On-Off motor
▲ ▼ On-Off lighting
+ -Increase-Decrease motor speed
Hood ignition (Fig. B):
The engine always starts in 2nd speed. The motor speed is signaled by a fixed light, by the signaling LEDs (L1, L2, L3, L4).
As the speed increases, the lower speed LEDs always stay on with a fixed light.
Remote control coding:
When the mains supply is switched on, the red LED (LA) lights up
At that moment the card is being programmed. Press the ■On-Off button on the remote control and then press again to start the engine.
When the red LED goes out the programming is closed and it is no longer possible to program the remote control.
The acquisition of the code is indicated by flashes of the red LED with its subsequent turning off. The procedure can be repeated.
The card stores only one remote control code at a time.
Generation of a new code (Reset):
It is possible to reprogram the remote control and reconnect it to the hood card. To generate a new coupling code between the radio control and the receiver, follow the Reset procedure as follows:
press the ▲, ■ and ▼ keys at the same time continuously for 2 seconds, at the same time the LEDs will light up, then press the ▲ and ▼ keys (within 5 seconds), 3 LED flashes will indicate that the
operation has been completed.
Warning! The Reset operation permanently deletes the pre-existing codes.
Delayed self-switching off:
Before the hood is switched off, it is possible to select delayed auto-off. Auto-off is already preset for 15 minutes and is activated by keeping the "-" button on the remote control pressed for a long
time. The hood remains in operation at the first speed with a flashing LED indicator. At the end of the 15 minutes the engine and the lighting will automatically switch off.
Maintenance warning for grease filters
Every 30 hours of operation of the hood, when it is switched off, all the LEDs of the hood speed buttons will light up for 30 seconds to alert the necessary cleaning of the metal grease filter. To reset
the timer simply press and hold the T4 button with the fan off. If the timer is not reset, all the LEDs will light up again each time the hood is switched off again. You can reset the timer at any time.
Charcoal filters maintenance alert (for hoods in the filtering version)
Every 120 hours of operation of the hood, when it is switched off, all the LEDs of the hood speed buttons will light up for 30 seconds to remind the cleaning of the metal grease filters and, if the hood
is in the filtering version, it is necessary to replace the carbon filters. To reset the timer, simply press the T4 button with the fan off, otherwise the LEDs will flash again after each time the hood is
switched off. You can reset the timer at any time.
Safety button:
In the event of loss of the remote control or the battery being depleted, the hood can be switched off by pressing the TP button
MAINTENANCE
Always disconnect the hood from the mains before carrying out any maintenance or cleaning operation.
Particular attention should be paid to the metallic anti-grease filters that are designed to trap particles of fat contained in the fumes. The metallic anti-grease filters must be washed at least once a
month or, if present in this model, when indicated by the electronic notice, with detergent in hot water (or in the dish-washer). The filters may discolour after a few washes. This is normal and does not
mean they have to be replaced. To remove the metal grease filters, use the handle (Fig. 2). It is recommended to refit the metal grease filters only if perfectly dry. ATTENTION: the grease collected in
the filters can easily catch fire and it is therefore extremely important to clean the metallic filters on a regular basis as per instructions.
The activated charcoal filters, if present, are designed to collect unpleasant odours in the cooking fumes. The air is then released purified in the environment. The charcoal filters must not be washed,
but replaced 2 or 3 times a year, depending on how much the hood is used. New filters are to be requested directly to the manufacturer.

To replace the activated carbon filters, open the mail panel and remove the central protection (Fig. 11 and Fig. 12).
At this point the activated carbon filters can be moved by rotating them about 90° with respect to their position to release then from the interlocking tabs, then accompanying the filter downwards
without the aid of tools (Fig.13 and Fig.14).
To reinstall the new activated carbon filters, reverse operations.
The hood features a LED light that, in addition to offering a good lighting and a significant energy savings, are guaranteed to last on average 10 times more than traditional lights. For replacement,
contact the Assistance Service.
In order to remove the remaining glue or any impurity, the cooker hood must be cleaned immediately after installation and after having removed the protective film.
The cooker hood must be cleaned frequently both internally and externally (at least once a month).
Do not let dirt gather on the inner and outer surfaces of the hood.
To clean the exterior of the hood do not use either acid or basic products, or abrasive sponges.
Clean the hood with a sponge dampen in warm water and a little quantity of neutral detergent (for example dishwasher detergent), in order to remove possible particles of grease.
Rinse with a damp cloth, removing all the detergent carefully, following the satin finish direction on the steel surface.
Drying is very important, especially in areas where water is particularly hard and leaves limestone.
All the ordinary and extraordinary maintenance can be performed without having to remove the hood.
Fig. A
Fig. B
This manual suits for next models
2
Table of contents
Other Forte Ventilation Hood manuals
Popular Ventilation Hood manuals by other brands

Miele
Miele DA 398-5 Installation diagram

Bosch
Bosch DHU685U instruction manual

KitchenAid
KitchenAid KVWB406DSS Installation Instructions and Use & Care Guide

Hotpoint
Hotpoint kitchen think HTU32 Instructions for installation and use
Vlano
Vlano EOS 600 IX Installation & user's instructions
Philco
Philco PC700SNL Installation
