4
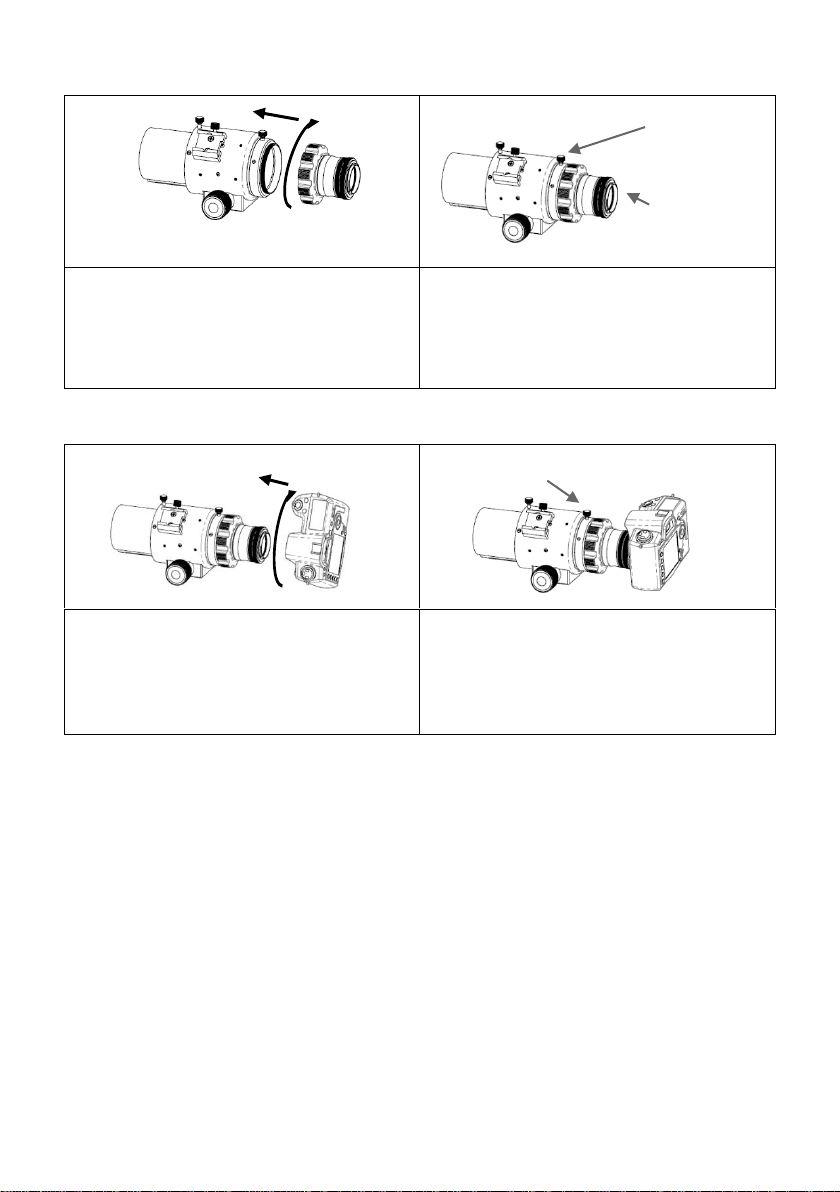
Step 3. Connect the set of adapter with the field flattener / reducer (and T2 ring mount) to
the telescope.
Connect the dual threaded adapter with
the field flattener / reducer on
telescope. Turn the field flattener /
reducer clockwise to fix it firmly on
drawtube
After fix it to the drawtube, you could
adjust the rotator on foucer to make
sure T2 ring mount position first before
installing DSLR camera. (Skip this step if
CCD camera)
Step 4. Connect to the camera (CCD or DSLR camera)
Connect the telescope and camera.
In this step, you may find your camera is
not always in the right position to the
user.
Make the camera to the right position to
user by adjusting the rotator on the 2.7’’
focuser
Step 5. Finish astrophotography- disassembly
Remove the camera from the T2 ring mount first.
Rotate the whole set of dual threaded adapter and the field flattener / reducer
counterclockwise. And then separate all the components step by step.
*Remark*
This Dual Thread Adapter is only designed for Founder Optics telescope use.