Troubleshooting:
Pump Not Working - When operating the pump or the rst time, it can take a ew minutes beore water begins to fow properly. Iit is still not working ater
aew minutes, please ollow our troubleshooting tips below. Before troubleshooting, UNPLUG YOUR PUMP.
Step 1 - Submerge Pump: Ensure your pump is ully submerged in water at all times to avoid pump damage.
Step 2 - Manual Check: Ithe pump cover is removable, try removing the cover to access the impeller area. Turn the rotor to ensure it is not broken or
jammed.
Pump Noise - Some sound rom the pump may be normal, but you can ollow these tips to reduce sound or resolve abnormal noises.
Step 1 - Submerge Pump: Ensure your pump is ully submerged at all times and clean odebris, dirt and algae buildup.
Step 2 - Check Location: You may hear the vibration othe pump touching the side walls othe ountain. Make sure the pump is only touching the bottom.
Step 3 - Check Flow Rate: Too low oa fow rate might cause spews or burps.
Water Flow Rate - Some ountains come with a dial or valve to adjust the fow rate, but iyou do not have this option or iyou are still unsatised with your
fow rate ater changing the settings, check out our tips below.
Step 1 - Adjust the Water Level: Insucient water levels can aect water intake by the pump. Check the ountain instructions to ensure the appropriate
water capacity for your fountain.
Step 2 - Check for Kinks: Check to make sure the tubing is not kinked. Kinks in the tubing can slow or halt the fow owater.
Step 3 - Clamp the Hose: To slow the water fow, try clamping the hose with a hose clamp or zip-tie.
Splashing - Having trouble with splashing? Some splashing is inevitable, especially when you rst turn on your ountain, but iyou are experiencing
excessive splashing, try our troubleshooting tips below.
Step 1 - Adjust the Water Level: Ensure the pump is ully submerged, but avoid overlling your ountain.
Step 2 - Flow Rate: Iyour pump includes a dial or valve to adjust the fow rate, try changing the settings to see iit aects splashing. Iyour pump is
not adjustable, check our Flow Rate section to learn about other ways to change the fow rate.
Step 3 - Adjust Position: Try arranging stones or placing a splash guard, at the ountain base. You can also place a screen in the basin.
Leaking - Iyour ountain is leaking, check these quick tips on how to x it.
Step 1 - Adjust the Water Level: Your ountain may leak iit is too ull.
Step 2 - Check Tubing: Check that the tubing is attached completely and correctly.
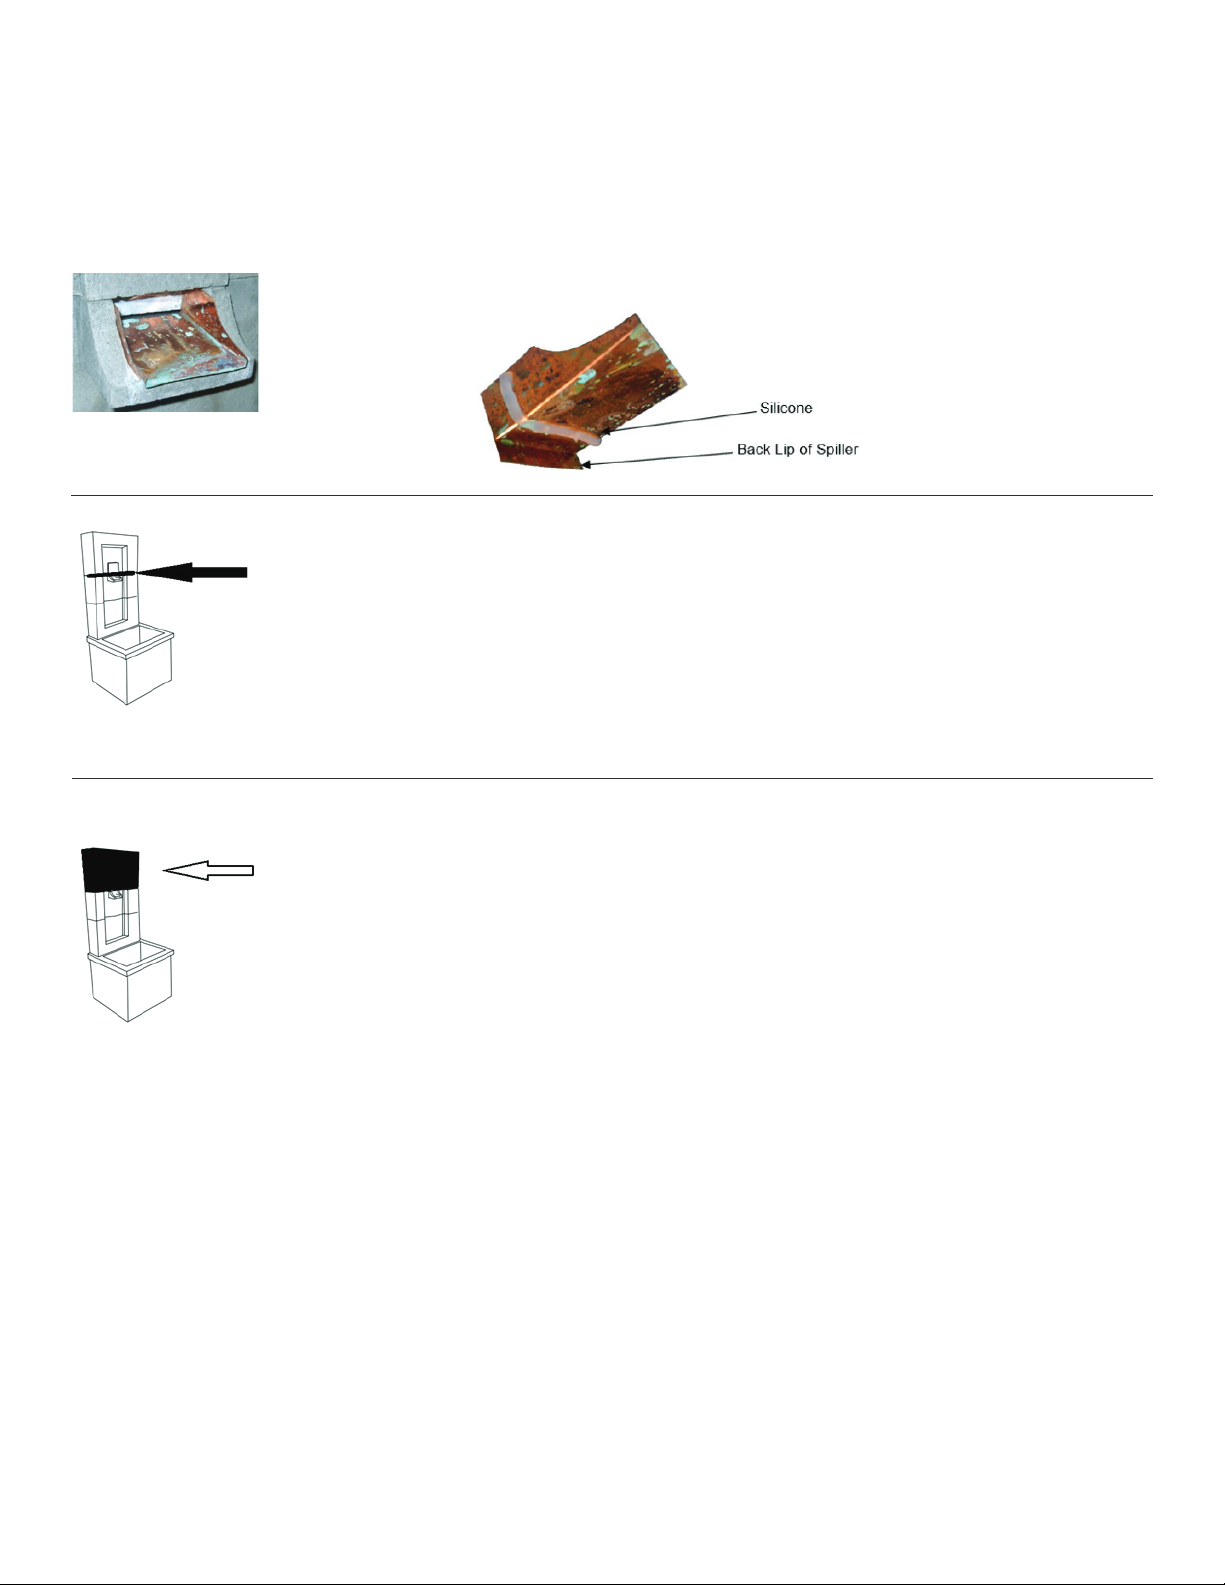
Step 3 - Check Stopper: Ensure stopper is completely seated in the ountain. You can also use 100% pure clear silicone to ensure a proper seal is achieved
Step 4 - Cracking: Your ountain may be cracked rom improper winter care; see Winter Care in Maintenance Tips.
Maintenance:
Pump Care - The fountain relies heavily on the quality of the pump. A well-maintained pump can last several years.
Step 1 - Fully submerge: Ensure the pump is ully submerged at all times to avoid damage.
Step 2 - Ensure water level is sufcient: Check water levels regularly as water may evaporate over time, and periodically change water to avoid algae
buildup.
Step 3 - Clean pump: Use soap and water, or white vinegar and water, with a small, sot brush to clean the pump odebris, dirt, and algae buildup.
This should be done every 2-3 months.
Surface Care - Paints and nishes may ade over time due to weathering. By ollowing these tips, you will be able to maintain your ountain’s surace.
Step 1 - Control Algae and White Scale: Due to water evaporation, you may see white residue on your ountain surace rom the mineral content in
your water supply. Algaecides and cleansers can help prevent buildup that occurs from minerals and hard water.
Step 2 - Protect and Refnish: Depending on the material oyour ountain, protectants and sprays may prolong the appearance othe surace. Paint and
renishing kits can be used or touch-up.
Winter Care - Many materials used to produce ountains can expand and contract in dierent temperatures/humidity levels. Ithe temperature alls below
32°F or humidity levels change drastically, ollow the steps below to protect your ountain.
Step 1 - Bring inside: Ipossible, bring your outdoor ountain inside or the winter.
Step 2 - Store in dry location: Iunable to bring inside, store your ountain in a dry and covered location.
Step 3 - Bring components inside: Move all internal components (stoppers, tubing, lights, pump, etc) inside. A pump can stay in a fountain for the
winter, but if you choose to leave it in, it must be completely dry and insulated with plastic bags and towel to ensure it stays dry. However it is
recommended to bring it inside.
Step 4 - Completely drain: It is important to prevent water rom accumulating anywhere, as reezing and thawing owater can cause pump damage
and cause cracks to orm in your ountain. Remove the drain plugs.
Step 5 - Elevate Fountain: Fountains may reeze to the ground and cause cracking in the base ilet outside in the winter. Iunable to store inside or in
a dry covered location, try to raise your ountain above ground.
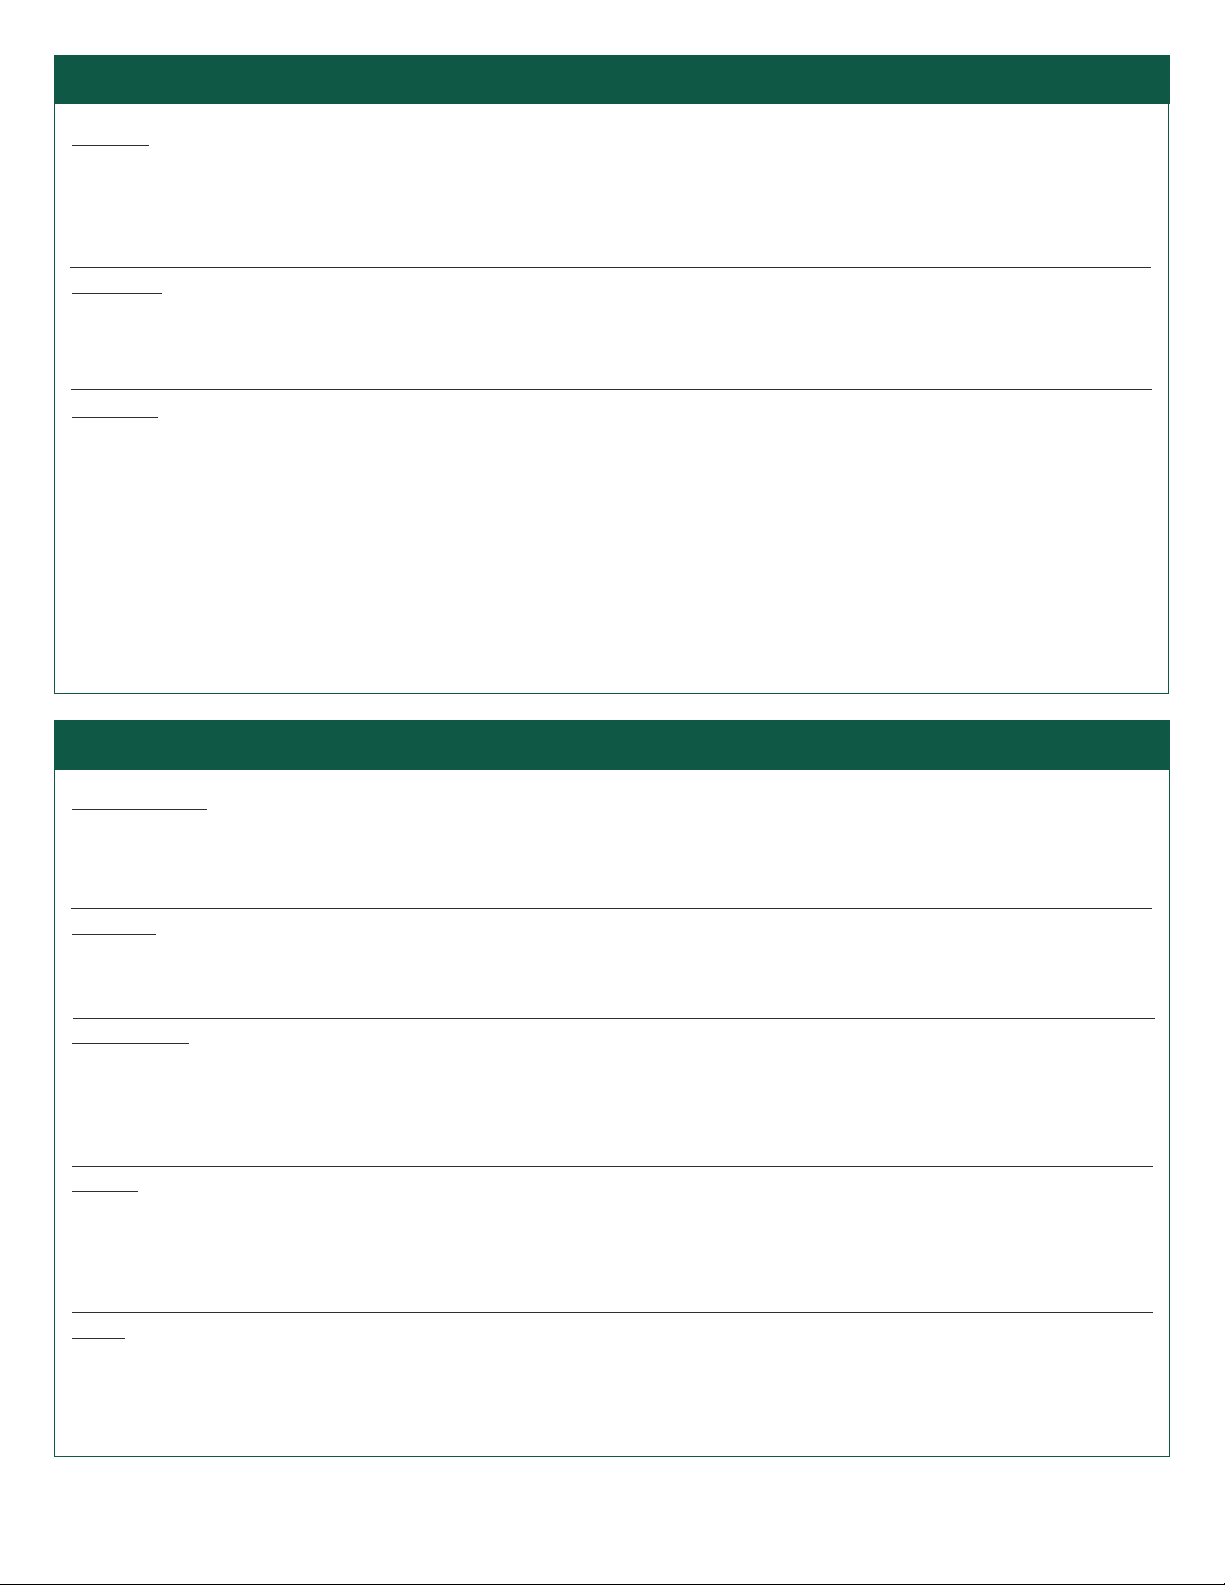
Step 6 - Cover Fountain: Make sure to use a breathable material when covering. DO NOT COVER IN PLASTIC! Make sure the ountain is taut so that
no snow or water can pool in the cover. Tie the opening at the bottom of the cover around the fountain.