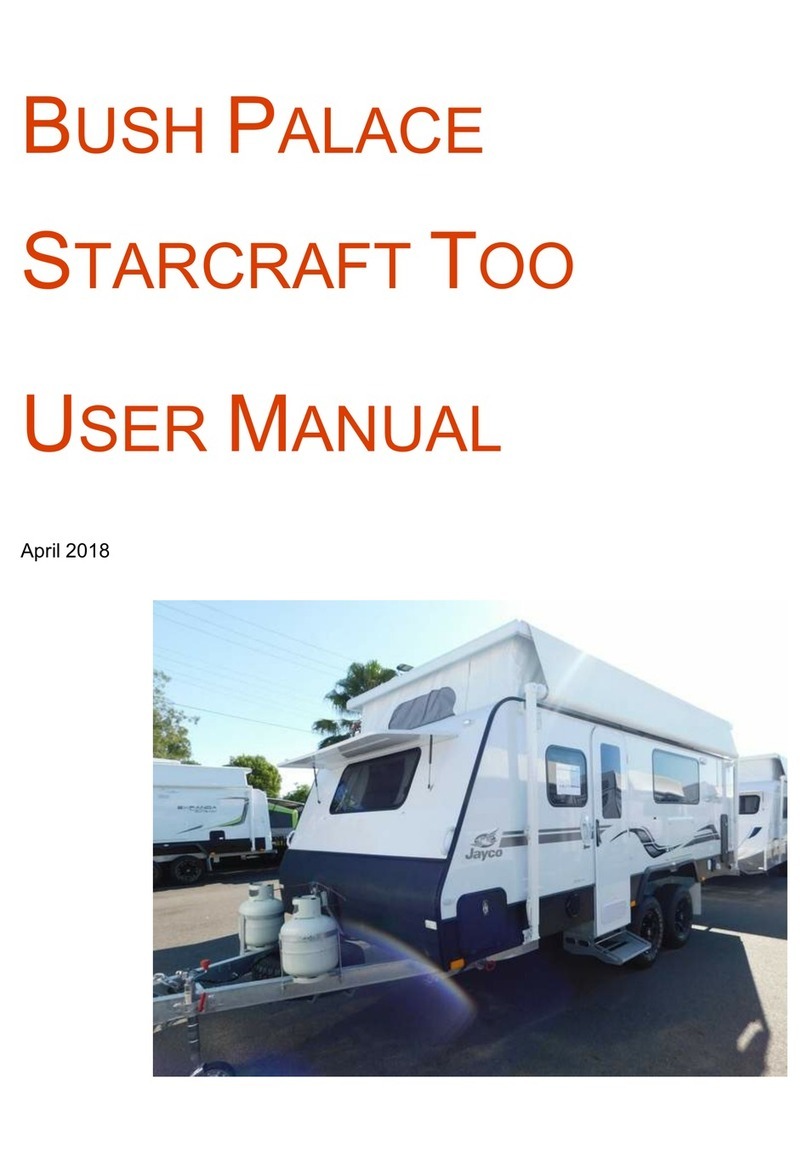
Frankia 2014 User manual

Operating instructions
for
motorhomes
from model year 2014
FRANKIA GP GmbH
Bernecker Strasse 12
D-95509 Marktschorgast
Phone: 09227 / 738-0 e-mail: info@frankia.de
Fax: 09227 / 738-33 Internet: www.frankia.de
Edition I

1
Dear FRANKIA customer,
Congratulations on your new FRANKIA motorhome.
It was a good decision to buy a new motorhome. Your new vehicle is a nice FRANKIA
motorhome with great technology, comfort and equipment. Soon you will see how much joy
it is to travel with a FRANKIA. You will be independent and free. Every day you can choose
your destination and stay. We thank you for the confidence that you put in our company.
Your FRANKIA is built on an IVECO, FIAT or MERCEDES chassis. For detailed technical
information you have received the separate operating instructions for the following
appliances: Chassis, refrigerator, hob, heating, current supply panel, radio, TV, telephone,
alarm system, generator, etc.
Before starting your journey we ask you kindly to read these operating instructions. You will
get important information for your motorhome operation so that you can use all technical
advantages of your FRANKIA. Furthermore, you will find helpful information for service and
care of your FRANKIA for its roadworthiness and operational safety. To make reading easier
we have used the following symbols:
Warning
!
Here you will find safety regulations
that will help avoid injury to persons.
Attention
Here you will find safety regulations
that will help avoid material damage.
Info
Here you will find general information and references.
This operating manual is subject to changes due to technical progress or to modified
regulations. This operating manual has been carefully put together. Nevertheless all
information is supplied without liability.
On behalf of all the FRANKIA-staff we wish you nice journeys and restful holidays.
Your FRANKIA-Team

Contents
2
CONTENTS
1. BEGINNING OF THE JOURNEY AND THE JOURNEY
1.1 Payload 4
1.2 Before the journey 5
1.3 Driving 6
1.4 Parking 8
1.5 Spending the night in your motorhome 9
1.6 Sleeping 10
2. AIRING
2.1 Roof lids 17
2.2 Midi-Heki, Heki III 18
2.3 Windows 18
2.4 Body door 19
3. GAS SYSTEM
3.1 General 20
3.2 Gas bottles 20
3.3 Gas hob 22
3.4 Heating - warm water 22
3.5 Gas supply 23
3.6 Refrigerator 26
4. ELECTRIC SYSTEM
4.1 General 29
4.2 Current supply panel 35
4.3 Fuses 12 Volt 37
4.4 Inverter 39
4.5 Generator 40
5. SANITATION FACILITIES
5.1 Central services unit 41
5.2 Fresh water and sewage 43
5.3 Washing room 45
5.4 Thetford toilet 46
5.5 Dejection tank 46
6. DIVERSE
6.1 Electric step 48
6.2 Electric mirrors 49
6.3 Heating 50
6.4 Tables 52
6.5 TV-cupboard 54
6.6 Sun blinds 57
6.7 Electric beds 60

Contents
3
6.8 Rear garages 62
6.9 1 person safety belt system 64
6.10 Back-up aid 64
6.11 Diverse 65
7. SERVICE AND CARE 67
8. WINTER
8.1 Winter holiday 71
8.2 Living in your motorhome in the winter 72
8.3 Immobilization 73
8.4 Antifreeze 74
9. FAULTS
9.1 Electric system 75
9.2 Gas system 77
9.3 Fresh water system 77
9.4 Sewage 78
9.5 Toilet tank 78
9.6 Heating 79
9.7 Electric front bed 80
9.8 Height adjustable bed above seating group 80
9.9 Vehicle 80
10. IMPORTANT TO KNOW 86
11. FRANKIA-DEALERS 87
11.1 Germany
11.2 Europe
11.3 Service partners

Chapter 1 – Beginning of the journey and the journey
4
1. BEGINNING OF THE JOURNEY AND THE
JOURNEY
1.1 The payload
Your motorhome has plenty of loading space. Therefore, please pay attention to the
positioning of your things in your motorhome so that it will have good roadholding.
The FRANKIA double floor offers an additional loading space. Some of this loading space is
accessible from the inside and the outside.
Do not forget to take some tools, reserve lamps, fuses and wheel chocks with you. These
things can be very helpful during your journey.
Loading of the motorhome
Your motorhome has plenty of loading space with outside lockers (depending on the model).
Please note that you can divide your loading space in the double floor with wood partition
walls if you wish.
Please note the following points:
!
!
Heavy objects should be loaded near to the bottom
and directly beside one
of, or better between, the axles. If you have heavy loads try to distribute them
equally to the left and the right side of the motorhome. This will stabilize the
vehicle handling, and loading near the axles will reduce rolling and pitching
of the vehicle body.
Please only put light objects into the upper storage spaces.
Warning
!
!
!
Because of the high centre of gravity a heavy roof load can have an
unfavourable effect on the vehicle handling. Make sure to secure the roof load
with straps.
Wedge tight your luggage so that nothing can move. Loose objects could
damage the motorhome body. Please make sure that nothing can clatter or
slide in the lockers.
!
!
Please do not put heavy objects in lockers that open in or against the driving
direction. The locker doors must be locked during the journey.
Make sure that everything is put away in lockers, drawers and other storage
spaces. In case of a full braking or an accident loose objects can become
dangerous missiles and seriously injure the passengers.
-
The maximum authorized weight and the maximum authorized axle weight (weight of
front axle and rear axle) should not be exceeded.
-
Please note that the installation of additional special equipment will reduce the standard
payload.

Chapter 1 – Beginning of the journey and the journey
5
- Before using your motorhome for the first time we recommend to weigh your motorhome
with full tanks on a calibrated vehicle scale so that you can establish your personal
payload for your motorhome.
this means maximum authorized weight
./. empty weight of your motorhome
./. weight of all passengers
____________________________________
= payload for your luggage
Info
If you overload your motorhome, it is possible that you may have
to pay a fine and overloading can damage the axles and wheels.
Please note the following points for the loading:
-
The inside of your motorhome should be in good order and safely packed so that you will
not encounter a problem if you have to brake suddenly.
-
Please pay attention to the following points:
∗sliding doors
∗contents in the cupboards
∗working board on the kitchen sink unit
∗loose objects on tables and shelves
∗travel utensils in the bathroom
∗table / table top
∗TV-cupboard
-
Secure loose objects e.g. with towels. This also prevents rattling noise.
1.2 Before the journey
∗Adjust the exterior mirrors
∗Open the blackout roller blinds (for the front windscreen and the driver and passenger
windows) completely and attach them
∗Check if the outside locker doors, especially the rear locker door are really interlocked and
not only ajar. If the large lateral locker doors of the rear garage are not closed correctly, a
warning light on the dashboard will light up.
∗Lock the body door
∗Manually retract the steps, if they do not retract automatically and the warning light on the
dashboard lights up.
∗Put the refrigerator on 12 V position (only works when the engine is running - depending
on the refrigerator model)
∗Remove the 230 V cable from the exterior socket
∗Close all doors and lockers and fasten the refrigerator door
∗Turn off all gas appliances, as gas hob, refrigerator, boiler and close the gas bottles
(except in Germany)

Chapter 1 – Beginning of the journey and the journey
6
∗Lock the TV cupboard
∗Fasten the table / table top
∗Wind up the rear supports
∗Put the soap dispenser and the toothmugs into the bathroom cupboard
Please check all of these things thoroughly before starting your journey so that you will have
a good and safe trip.
1.3 Driving
You need to drive a motorhome as all other cars with caution and appropriate speed. Please
always pay attention to the dimensions of your vehicle.
ALWAYS PAY ATTENTION TO THE DIMENSIONS
(LENGTH - WIDTH - HEIGHT) OF YOUR MOTORHOME!
Warning
!
!! Attention: Look out for service station roofs, rocks, branches, etc.
Further, please pay attention to the special regulations in foreign countries (for example to
carry along the safety vest or the rear warning signal in Italy for a projecting bike rack).
With a loaded motorhome you need to drive differently as you would with an empty
motorhome.
Please note the following points:
∗longer braking distance
∗different handling on gradients and slopes
∗headwinds can have an influence on the speed
∗higher crosswind-sensitivity on bridges, when leaving a tunnel and when overtaking a
truck
∗different vehicle handling in bends due to the height and weight
∗larger vehicle-dimensions: length, width, height (approx. 3 m)
∗small bridges, narrow streets, low passages, low service station roofs, etc.
∗limited visibility when you are reversing
∗correct adjustment of the mirrors

Chapter 1 – Beginning of the journey and the journey
7
Warning
!
!!! Attention:
The driver is responsible for all passengers using the available seat belts.
When driving, the pilot seats in the living room (option) may only be used
in driving direction.
All seats without seat belts are not allowed to be used during driving.
It is forbidden that people are in the alcove during the journey.
It is best to pack all loose things safely in your motorhome because they can
become dangerous missiles in the case of an impact or when making an
emergency stop.
Warning
!
Attention
You have the possibility to turn the driver seats in the direction of the living area.
You may only turn the seats when the motorhome is not driven and in a secured
position.
With motorhomes on IVECO chassis, the driver seats have to be locked in driving
direction before starting your journey. Otherwise, a red warning light will flash on
the dashboard.
Please turn off all gas appliances at the service station.
Attention
-
Please adapt your speed when driving on bad roads.
-
Compared to a car your vehicle has a long rear overhang (= the distance
between the rear axle and the rear end), which can swing out in narrow
curves and touch the road when the road condition is bad (e.g. deep
bumps). Therefore please drive with caution in narrow curves (for example
when entering or leaving a parking space) or on rough roads.
-
Because of its height a motorhome is very sensitive to cross wind. Please
drive with caution when there is cross wind.
Attention
Too low tyre pressure can cause excessive tyre wear or can lead to bursting of
the tyre when driving a fully loaded motorhome.
Therefore, please check the tyre pressure regularly.
For Fiat motorhomes the correct tyre pressure is indicated in the enclosed ALKO
manual and for Iveco and Mercedes motorhomes in the respective manual.

Chapter 1 – Beginning of the journey and the journey
8
1.4 Parking
Select a gear (if you have an automatic transmission, please put the gear shift in "P" position)
and put the hand brake on. Please don't forget to change your refrigerator to gas or 240 V
because the 12 V supply will be automatically switched off.
You should park your motorhome horizontally so that sewage can flow unhindered out of the
shower or sink unit. Wheel chocks can be very helpful.
When you are using the awning of your motorhome, you should secure it to the ground with
an additional fastener because a gust of wind can make your awning go up and cause
expensive damage to your vehicle.
Your motorhome has rear supports but do not use them for wheel changes.
Attention
For motorhomes with rear axle air suspension:
Always lower the motorhome completely with the air suspension before using the
rear supports.
Otherwise the supports and the motorhome bottom can be damaged.
Please find more information about the air suspension in the operating instructions
of the respective manufacturer.
Please note the following advice:
When your rear supports are down we suggest to put the hand crank to your
steering wheel because then you will be reminded of it before starting your
journey.
In summer please park your motorhome so that the sun cannot blaze down onto
the ventilation slots of your refrigerator. This will make your refrigerator work
better.
When parking your motorhome on a public road in built-up areas at night, please
remember to use the "red/white night park signs" which must be on your
motorhome (only for motorhomes over 3,5 tons).
Before leaving a campsite please check that you have not caused any damage and
left no refuse. The important characteristics of a camper are discretion and
environmental awareness.
Info

Chapter 1 – Beginning of the journey and the journey
9
1.5 Spending the night in your motorhome
In the following table please find the regulations of some European countries:
(subject to change)
Country
Belgium
Camp sites in all regions, especially near the coast, few motorhome parking
spaces, outside of campsites and motorhome parking spaces only at motorway
rest areas (max. one night).
Denmark
Dense network of campsites, not motorhome parking space, Quick-Stop spaces in
front of many campsites, overnight stay prohibited outside campsites
Germany
Dense network of campsites and motorhome parking spaces, One overnight stay
outside of campsites and motorhome parking spaces is permitted in order to
recreate driving fitness, pay attention to regional and local restrictions.
France
Dense network of campsites and motorhome parking spaces, pay attention to
local restrictions regarding overnight stay outside of campsites and motorhome
parking spaces.
Greece
Numerous campsites, especially near the coast, very few motorhome parking
spaces. Overnight stay prohibited outside campsites.
GB
Dense network of campsites, no motorhome parking spaces. Pay attention to local
restrictions regarding overnight stay outside of campsites.
Italy
Dense network of campsites and motorhome parking spaces, especially in the
north and centre of Italy. One overnight stay outside of campsites and motorhome
parking spaces is permitted, pay attention to regional and local restrictions.
Croatia
Dense network of campsites near the coast, few motorhome parking spaces,
Overnight stay outside of campsites and motorhome parking spaces prohibited,
also on private property.
Luxemburg
Dense network of campsites, no motorhome parking spaces, overnight stay
outside of campsites and motorhome parking spaces prohibited.
Netherlands
Dense network of campsites, many camping possibilities on farms, few
motorhome parking spaces. Overnight stay outside of campsites and motorhome
parking spaces prohibited.
Norway
Dense network of campsites, especially in the south, very few motorhome parking
spaces, pay attention to local restrictions regarding overnight stay outside of
campsites and motorhome parking spaces.
Austria
Widespread network of campsites in all regions, overnight stay outside of
campsites and motorhome parking spaces prohibited.
Sweden
Dense network of campsites in the south and centre, very few motorhome parking
spaces, pay attention to local restrictions regarding overnight stay outside of
campsites and motorhome parking spaces.
Switzerland
Widespread network of campsites, motorhome parking spaces in all regions,
overnight stay outside of campsites and motorhome parking spaces prohibited.
Spain
Dense network of campsites, few motorhome parking spaces, b pay attention to
local restrictions regarding overnight stay outside of campsites and motorhome
parking spaces.
On private property please always ask for the permission of the landlord.
Source: Promobil
from May 2012

Chapter 1 – Beginning of the journey and the journey
10
1.6 Sleeping
You can use your alcove bed immediately. You can fold up your alcove bed so that you have
easier access to the driver’s cab and have better visibility. Please note that you can leave the
alcove bed folded up during the journey too.
The front bed in A-class models can be folded down. Put your seat backrests to the front to
get the maximum height on your lifting bed. Please swivel the driver’s seat slightly to the
outside so that the backrest does not touch the steering wheel.
Please note that you can keep your bed linen in the bed, but do not forget to secure the bed
with the belt when it is folded up!!!
Attention
Do not use the folded up front bed to store things.
Only the bed linens for two persons may remain on the bed.
The Duo Beds (= option)
The Frankia Duo Beds for Coachbuilt or A-Class motorhomes have a double use: They can be
used either longways or as a big crosswise double bed of approx. 2 m x 2 m.
Attention
The pulled out duo bed may only be used when the support feet are hinged
down.

Chapter 1 – Beginning of the journey and the journey
11
A-class motorhomes:
•
Move the table into the driver’s cab (see chapter
“table”).
•Release the bed extension by turning the rotary
knob A.
•Lower the electric bed. The switch can be found
next to the panel above the body door.
•Hold the grips on the bed foot and pull out the
bed as far as possible. Lock the bed by turning
the rotary knob A.
•Press strong on the release button B of the
articulation before pivoting down the support
feet.
•You can adjust the height of the support feet
by turning the milled screw
•Do the same manipulation for the second
foot.
•Afterwards you can lower the bed
completely.
•Put the additional mattresses 1a and 1b onto the pulled-out
slatted frame according to the drawing:
I
II
IH
HH
H
'LORM$
'LORM$'LORM$
'LORM$
'LORM$
'LORM$'LORM$
'LORM$
I
II
I
H
HH
H
•
WƵůůŽƵƚƚŚĞďĞĚ
WƵƐŚŝŶƚŚĞďĞĚ
ZŽƚĂƌLJŬŶŽď
ZŽƚĂƌLJŬŶŽď

Chapter 1 – Beginning of the journey and the journey
12
•Hang in the ladder between the two beds.
•For the re-conversion follow the reversed
order.
•Push the additional mattress as far as possible
to the front so that the bed can completely swung
up.
•After lifting the bed please always lock the
bed extension.
Conversion of the FF2, FF2G, FF4 and A 50 Plus round seating group to a bed
In the FF2 and FF2G models
the round seating group can
easily be turned into two
single beds. With the help of
a strap (installed in the
middle) the backrests can be
moved up so that the
complete seating bench can
be used to lie on.
In addition, the gap between
the two single beds can be
closed by lowering the table
and folding out of the seating
bench tops. After putting on
the rear backrest upholstery
and the auxiliary upholstery,
you have a large bed surface
over almost the total
motorhome width
In the models FF4 and A 50 Plus, the 4 backrest upholstery cushions are used for this
conversion.

Chapter 1 – Beginning of the journey and the journey
13
Height adjustable bed above seating group
With some floor plans, there is an electrically adjustable bed
above the seating group.
The bed is secured with a strap. When the security strap is
locked in, there is no electricity in the operating panel. By
pressing the red button on the security strap the lock is
unlocked.
The operating panel is installed in the locker above the body
door.
The operating panel is in energy saving mode. To activate,
press the upper button „A“ for approx 6 seconds. The
directional arrows „C“ light up. By pressing and keeping
pressed of the respective button you can move the bed up and
down respectively.
To lower the bed, press the lower directional arrow „B“. The
bed will move downwards as long as the button is pressed or
until a pre-set position is reached.
Strap
Panel
4 positions of the bed are
programmed by the
manufacturer:
1) In the topmost position, the
mattress is only a few
centimers below the ceiling.
2) If you would like to leave
your bedding on the bed
during the day, only move
the bed up to the 2
nd
position.
Position 1

Chapter 1 – Beginning of the journey and the journey
14
3) In position 3, sleeping is
possible on the upper bed as
well as on the seating group
converted to a bed.
4) If you would only like to
sleep on the height
adjustable bed and not on
the lower bed/seating
group, you can lower the
bed even further. In order to
reach this position, you
have to fold down the
backrest upholstery.
Position 3
To move the bed up, push the upper directional arrow button.
Approx 20 sec. after the last push of a button on the panel, the control switches off.
For detailed information, please see the provided instruction manual from the manufacturer.
Attention
Make sure that no one is on or under the bed when moving it up or down.
Attention
When driving, the bed must be in the upper position and be secured with the
security strap!
The bed is only to be used when parked not when driven!
Attention
The max. combined load in all the upper cupboards below the bed may not
exceed 30 kg.
Info
The control of the bed is fused via circuit 1, while there is a separate 30 A fuse
for the motors in the additional distribution board near the electric block. (see
also chapter 4)

Chapter 1 – Beginning of the journey and the journey
15
Ladder for height adjustable bed above seating group (depending on floor plan)
The ladder for the height adjustable bed above the seating
group in the FF4 is stored on the rear cab wall behind the
driver’s seat. The bed (no matter in which position) can be
reached comfortably due to the extendable ladder beams. For
this loosen the butterfly handles on the sides, extend as
required equally on both sides and tighten the butterfly
handles.
Fold-up steps for height adjustable bed above seating group (depending on floor plan)
If the height
adjustable bed above
seating group is in
the lowest position, it
can easily be reached
via the fold-up steps.
Pull out the respective cupboard and fold out the lower step.
For the re-conversion follow the reversed order. Please make sure that the lower step is
completely folded up in order to avoid damage to the furniture.
There is storage space underneath the upper step.

Chapter 1 – Beginning of the journey and the journey
16
Conversion of the seating group to a makeshift bed (option)
Makeshift bed
•Move the table to the driver’s cab / or lower the
table top respectively.
•Pull out the aluminium profiles to the right
length and hang them into the supports on the
front of the seat bench.
•Fold the seat bench lids on both sides onto the
aluminium profiles.
•Place the upholstery onto the bed surface.
With A-class motorhomes you need to swivel the
driver’s seat slightly outwards so that the backrest
does not touch the steering wheel.
Like that you can move even big tabletops
completely into the driver’s cab and you can make
your bed without any difficulties.
For motorhomes with a safety belt on the side
seating bench, an additional upholstery piece is
included which can be put on the aluminium
profiles instead of the backrest upholstery which is
not detachable in this case.

Chapter 2 - Airing
17
2. AIRING
2.1 Roof lids
Your motorhome has roof lids which can be used for airing and darkening. Please press the
release button and move the bow up for opening the roof lid. You can lock your roof lid into
different positions.
If the motorhome is exposed to intense sunlight, it is not recommended to close the black out
blinds and plissé-curtains completely, but only to 2 thirds.
The glass has to be put in the position “continuous aeration” to avoid overheating damages.
You can open your roof lid completely or partly as you wish.
The roof lids have a flow-through ventilation, as it is
stipulated by law.
During the journey the roof lids must be closed.
You will get the optimum airing when you open the roof
lid in the kitchen together with your kitchen window.
By opening the roof lid in the washing room you can avoid
your mirrors getting steamed up.
Roof lid with ventilator
„Omnivent“ roof lids with
ventilator can be opened
by turning the knob „A“
in the shown direction.
Via the control panel „B“
you can switch on/off the
ventialtor and choose if
the air shall be blown in
or out. Red LEDs indicate
the current mode.
The „Fiamma“ roof lids with
ventilator can also be opened
by turning the knob.
With the rocker switch the
turning direction of the
ventilator is controlled.
A
B

Chapter 2 - Airing
18
2.2 Midi-Heki, Heki III
You will find all important information in the operating instructions from Seitz.
Heki III rooflight
The Heki 3 can be opened with a crank handle up to
an angle of 70°.
To fully close it, make 2 -3 extra turns after the glass
touches the roof.
The lights can be operated by a switch at the entrance.
Attention
During the journey the Heki III rooflight has to be kept closed.
For further information about the Heki III please refer to the Seitz operating instructions.
2.3 Windows
Your FRANKIA motorhome has combined roller blinds. This means that you have darkening
roller blinds for the night and aeration with or without insect meshes.
Please note that your darkening roller blind is not a sun protection roller blind. When the
motorhome is exposed to intense sunlight, it is not recommended to have the black out blinds
closed over a long period, because the material of the blinds could be damaged.
For opening the window please press the safety button and turn the locks to the side. You can
connect the insect meshes with the darkening roller blind and move them up or down
together.
Attention
Do not drive with opened hinged windows!

Chapter 2 - Airing
19
2.4 Body door
You can open the body door by turning the key to the left until it stops. Then pull on the door
handle and the door will open. Before removing the key, turn the key cylinder upright. To
close the door from the inside press down the locking lever.
It is recommended for your safety to lock the body door during the journey when people are
inside the living area.
Attention
Please watch out that the way to the door is not blocked when you are inside your
motorhome, especially at night (escape route).
Rubbish bin
The rubbish bin is integrated in the body door.
-
Open up the wooden lid.
-
Put the rubbish bag onto the frame
-
Put the frame with the rubbish bag back into the
rubbish bin.
Please note the following points regarding the airing:
Warning
!
A motorhome contains only a few cubic metres of air, isolated from the outside by
the isolated walls and the rubber seals of the windows.
The air exchange through the flow-through ventilations of roof lids and windows
is not enough to cover the passengers’ need for oxygene.
If the gas hob is also in use, the oxygene will become short very soon and there is
danger of suffocation!
If you do not let enough fresh air into your motorhome, you risk other problems: high
humidity and condensation caused by body transpiration, wet clothes and condensed air from
showering or cooking. To avoid these problems please pay attention to the following points:
-
While you live in the motorhome and the outside temperature is agreeable: Make sure
there is permanent exchange of air by airing the motorhome (opened windows and/or roof
lids).
-
In the winter you should let fresh air into the motorhome several times a day.
-
Keep clear the ventilation slots of the storage spaces.
-
Make sure there is sufficient air exchange also during the night (for example open a roof
lid). The more persons are sleeping in the motorhome, the more airing is needed.
-
An immobilized motorhome also needs airing from time to time to avoid condensation.
Please note that the surplus of humidity will condense on cold things first in your motorhome.
Therefore, please remove the condensation from the windows and if you have a coachbuilt
model then remove the condensation from the front and the corners of the alcove too.
Table of contents
Other Frankia Motorhome manuals