Friedman Buxom Betty User manual

1
Friedman Buxom Betty
Plugin Manual
Developed by Brainworx in partnership with Friedman Amplification and
Distributed by Plugin Alliance.

2
The Friedman Buxom Betty guitar amp delivers in one channel the best of
both American and British tones, from Rock and Roll to Blues, giving you
all the mellow cleans and punchy crunch right when you need it. Using a
unique combination of both Blackface and Plexi-style circuitry, the EL34
tube-powered amp can transform its tone with a simple adjustment of the
volume knob. With onboard tone controls that include a three-band EQ,
Presence knob, Brightness switch, and High/Low sensitivity adjustment,
the Buxom Betty allows you to tailor your sound just the way you like it.
The Buxom Betty takes pedals very well and loves boosts, OD’s, phasers,
flangers, tremolos, wahs, etc.
Working directly with Dave Friedman himself, we modeled this modern
masterpiece in Plugin form, bringing all that tone right into your DAW.
Transcending the basic controls of the original hardware, we’ve also
included our flagship amp FX rack that gives you a built-in vintage Delay
unit, Noise Gate and filtering for taming pickup and body noise, Power
Soak for playing higher gain at lower volume, and 100 Recording chains
featuring Brainworx Advanced IR Technology. These Recording Chains are
comprised of impulse responses that were painstakingly captured from
various boutique guitar amps through an array of vintage and modern
microphones, then processed with high-end outboard gear before being
mixed on the classic Neve® VXS™ console at our studio. The variety of
tones you get from this combination of production know-how and stellar
audio engineering practices produces record-ready sounds from your
rig, instantly.
2

3
The main applications for this Plugin are
• Achieve exceptional-sounding electric guitar tracks at any volume level,
without the need for great-sounding rooms or expensive guitar mics.
• Record electric guitars directly into the DAW, and then mix, edit and
process without ever leaving the DAW environment.
• Re-amp less-than-perfect DI guitar tracks previously recorded in other
guitar-amp situations.
• Faithfully emulate highly sought-after electric guitar tones made
famous by rock’s greatest guitar players.
• Get intense amounts of distortion without the need to maintain a high
output volume.
The Basics
Use this Plugin exactly like you would operate the real Buxom Betty
amplifier. First pick an input based on your desired distortion setting -
selecting ‘L’ input will provide a cleaner tone, selecting ‘H’ input is ideal
for maximum crunch. Start with a presence setting of ‘5’ and adjust to
taste along with the Bass, Middle, and Treble tone settings.
Friedman Buxom Betty
Plugin Manual

4
Amp
1Power
The Buxom Betty amp Plugin can be bypassed using this switch. Use this
switch to compare the processed settings to that of the original signal.
2Presence
This adds or takes away upper mids and highs in the power amp section.
Start at about 5 and adjust to taste.
3Bass
This adds or takes away bass or bottom end. As the amp gets louder you
may want to back this off a bit. Start at 5 and adjust to taste.
4Middle
Adds or takes away midrange. Start at 7-8, lower settings will scoop the
mids, higher levels will allow your audience to actually hear the guitar in
the mix.
5Treble
This adds or takes away treble. Start at 5 and adjust to taste.
6Volume
This is the Buxom Betty’s Master Volume. The more you turn it up the
louder it gets. This also adds gain/distortion. Adjust to taste. Don’t be
afraid.
7Bright
3-position switch that varies the overall brightness of the amp.
8Input Selector High & Low
The Buxom Betty´s 2 separate inputs play a role in how clean or distorted
the amp sound will be.
• H (High Input): Is a higher sensitivity input that is best suited for higher
amounts of gain (distortion).
• L (Low Input): Is a lower sensitivity input that is best suited for cleaner
tones and easing in the amount of break-up.
1 2 3 4 5 6 87
Friedman Buxom Betty
Plugin Manual

5
FX Rack
Noise Gate
1Closed
When lit, this LED indicates that the Noise Gate is Closed. This means the
Threshold setting is higher than the incoming signal and the noise gate
dims the output signal of the amplifier by the amount adjusted with the
Range control (e.g. 15dB in the picture above).
2Noise Gate on/off
On/Off switch. Enable or disable the Noise Gate completely. Switch up
(‘On’) means the Noise Gate is activated.
3Threshold
Continuous knob, -120db to 0db. The Noise Gate will dim the output signal
of the amplifier as soon as the input signal (your guitar signal) falls below
a certain level. This level is called Threshold. Adjust the Threshold so the
noise of the overdriven amp will be reduced, but make sure you don´t cut
fading notes or chords.
4Range
Continuous knob, 0db to 100db. The output level of your amplifier
will be reduced or muted when the input signal is lower than the
Threshold setting. You may dim the output level only by a few
decibels (dB), or completely mute the output in pauses by setting the
Range to its maximum.
Amp Filters
5Tight Filter
Discrete 3 steps: “Pre“, “Post“ and “Off“. With the Tight filter you can cut
Low frequencies of either the DI guitar signal (Pre) or the processed amp
output (Post).
• Pre: If your pickups produce an unintentional rumbling bass sound you
can filter the low end before the DI sound even hits the amplifier.
• Post: If you want to cut some of the low end of your amplifier setting
(maybe even only temporary) you can use this studio quality high pass
filter to reduce the bass.
• Off: When set to Off the Tight filter is in bypass mode.
1 2 3 4 5
Friedman Buxom Betty
Plugin Manual

6
1Tight Frequency
With the Tight filter you can cut Low frequencies of either the DI guitar
signal (Pre) or the processed amp output (Post).
2Smooth Frequency
With the Smooth filter you can cut high frequencies of either the DI guitar
signal (Pre) or the processed amp output (Post).
3Smooth Filter
Discrete 3 steps: “Pre“, “Post“ and “Off“. With the Smooth filter you can
cut High frequencies of either the DI guitar signal (Pre) or the processed
amp output (Post).
• Pre: If your pickups catch a lot of hiss or noise you can filter the high end
before the DI sound even hits the amplifier.
• Post: If you want to cut some of the high end of your amplifier setting
(maybe even only temporary) you can use this studio quality low pass
filter.
• Off: When set to OFF the Smooth filter is in bypass mode.
Delay
We closely modelled a vintage delay stomp box to capture the true
essence of retro delay effects. Limited frequency bandwidth and ever
decreasing high frequencies on repeats add authenticity to the sound.
We also included more contemporary features like a mix parameter &
DAW controlled bpm / tempo sync. We realise you will use your favourite
selection of external effects, such as Chorus, Flangers, Reverbs and
even other Delays to achieve your signature guitar tone but an instantly
accessible delay is extremely useful when surfing and creating patches.
For example, testing a new lead patch without hearing at least a touch of
delay wouldn’t sound realistic for many players, so we added this effect
for your convenience; plus we love vintage style echo!
4Delay On/Off
Use this parameter to activate or deactivate the delay and all of its
parameters with this switch.
• Switch up: Delay is activated.
• Switch down: Delay is bypassed / off.
1 2 3 4
Friedman Buxom Betty
Plugin Manual

7
1Tap*
Use this parameter with your mouse to click with the groove of the song
and the delay will adjust to your tapping automatically. This is a nice and
easy way to set delays to musically pleasing times, especially if there is
no fixed tempo in the song.
2Time
Alternatively you may just dial in a delay time based on milliseconds using
the Time knob. Use this parameter to adjust the delay time between 15ms
and 1000ms.
3x2*
Use this button to redouble the current Delay time.
4/2*
Use this button to half the current Delay time.
x2 & /2 Buttons
Both buttons can be pressed repeatedly as long as the maximum delay
time of 400ms is not exceeded.
5Host BPM
Click on the BPM number in the GUI and a pull-down menu opens up. Now
you can select musical values like half notes, quarters, triplets, etc. All
values will be based upon the tempo that is being displayed in the BPM
window. The tempo will be synced with the tempo of your audio session
automatically.
6Mix
Use this parameter to control the amount of dry (unprocessed) vs. wet
(processed) signal. The Mix parameter blend in as much delay signal with
the dry amplifier sound as desired. For unobtrusive delays we recommend
settings around 10%, heavier effect sounds may require settings of 50%
or more.
7Feedback
This controls the number of repeats. While a setting of 99% will result in
an almost infinite delay loop, a typical setting for a rock lead sound may
be around 25%.
* Note: Custom control, not automatable
1 2 6 73 54
Friedman Buxom Betty
Plugin Manual

8
1Lo-Fi
Use this parameter to add creative destruction to your delay signal.
With the Lo-Fi knob you control the amount of internal distortion, the
resampling quality, etc. The higher you go the worse the quality gets from
a pure technical stand point... but the more interesting it may sound for
many guitar sounds and styles.
Recording Chain
Brainworx Advanced IR Technology
Simply select a speaker and a complete studio setup by browsing through
the Recording Chains pull-down menu.
In the past two decades Brainworx owner Dirk Ulrich has produced and
recorded with members of Dream Theater, Toto, Michael Jackson and with
many more famous and infamous acts. The Brainworx Studio in Germany
(www.brainworx- studio.de) is equipped with one of only nine NEVE VXS
72 consoles ever made, and it also hosts some of the best outboard EQs
and mic pre-amps available.
Using this impressive setup Dirk has produced a huge variety of custo-
mized ‘Recording Chains’ for the Friedman Buxom Betty amplifier, which
you can apply to your Plugin amp settings. Imagine a selection of 100
perfectly mic’d and EQ-ed cabinets that you can select and use instantly
with a single mouse click!
We carefullyplaced up to 12microphones on each cabinet used. These
mics were then fed to individual channels on the vintage Neve VXS console.
This configuration gave us fine control over the mix of the various micro-
phones used and the ability to apply Neve filters and EQs. The final mix
was routed to Pro Tools for recording.
An innovative new approach was also used to capture various pre-amps
and EQ chains. A parallel chain was created that was split to three
different hardware preamps and EQs. These parallel chains were also
routed to their own discrete channels on the Neve VXS console and then
sent to Pro Tools for capture. This routing allowed us to record each chain
individually or blend them for interesting combinations.
Friedman Buxom Betty
Plugin Manual
1

9
The external gear we used:
1. Chain: The legendary German Telefunken V76Preampconnected to the
Massenburg GML8200EQ
2.Chain: AMEK 9098 channel strip
3.Chain: SSL 4000 E Series with Black EQ
Many amp simulations give you some captured impulses of a selection of
cabinets and microphones, then they leave it up to you to EQ and further
process these incomplete setups by mixing different microphone setups,
adjusting phase and EQ, and so on. But this really is not an easy job; it
takes years of experience to get it right.
Now all you have to do is select the Recording Chain that sounds best for
your amp channel and setting, adjust the Tone Stack and Gain and you’re
good to go.Recallable, reliable, flexible and fast.
And if for any reason you should not like any of the Recording Chains the
Plugin offers, you may use the RC Off feature. Use then your own mic’d
cabinet or external IR software. This setting will also give you the sound
of a tube amp wired straight into a console, which also may be a nice
effects sound.
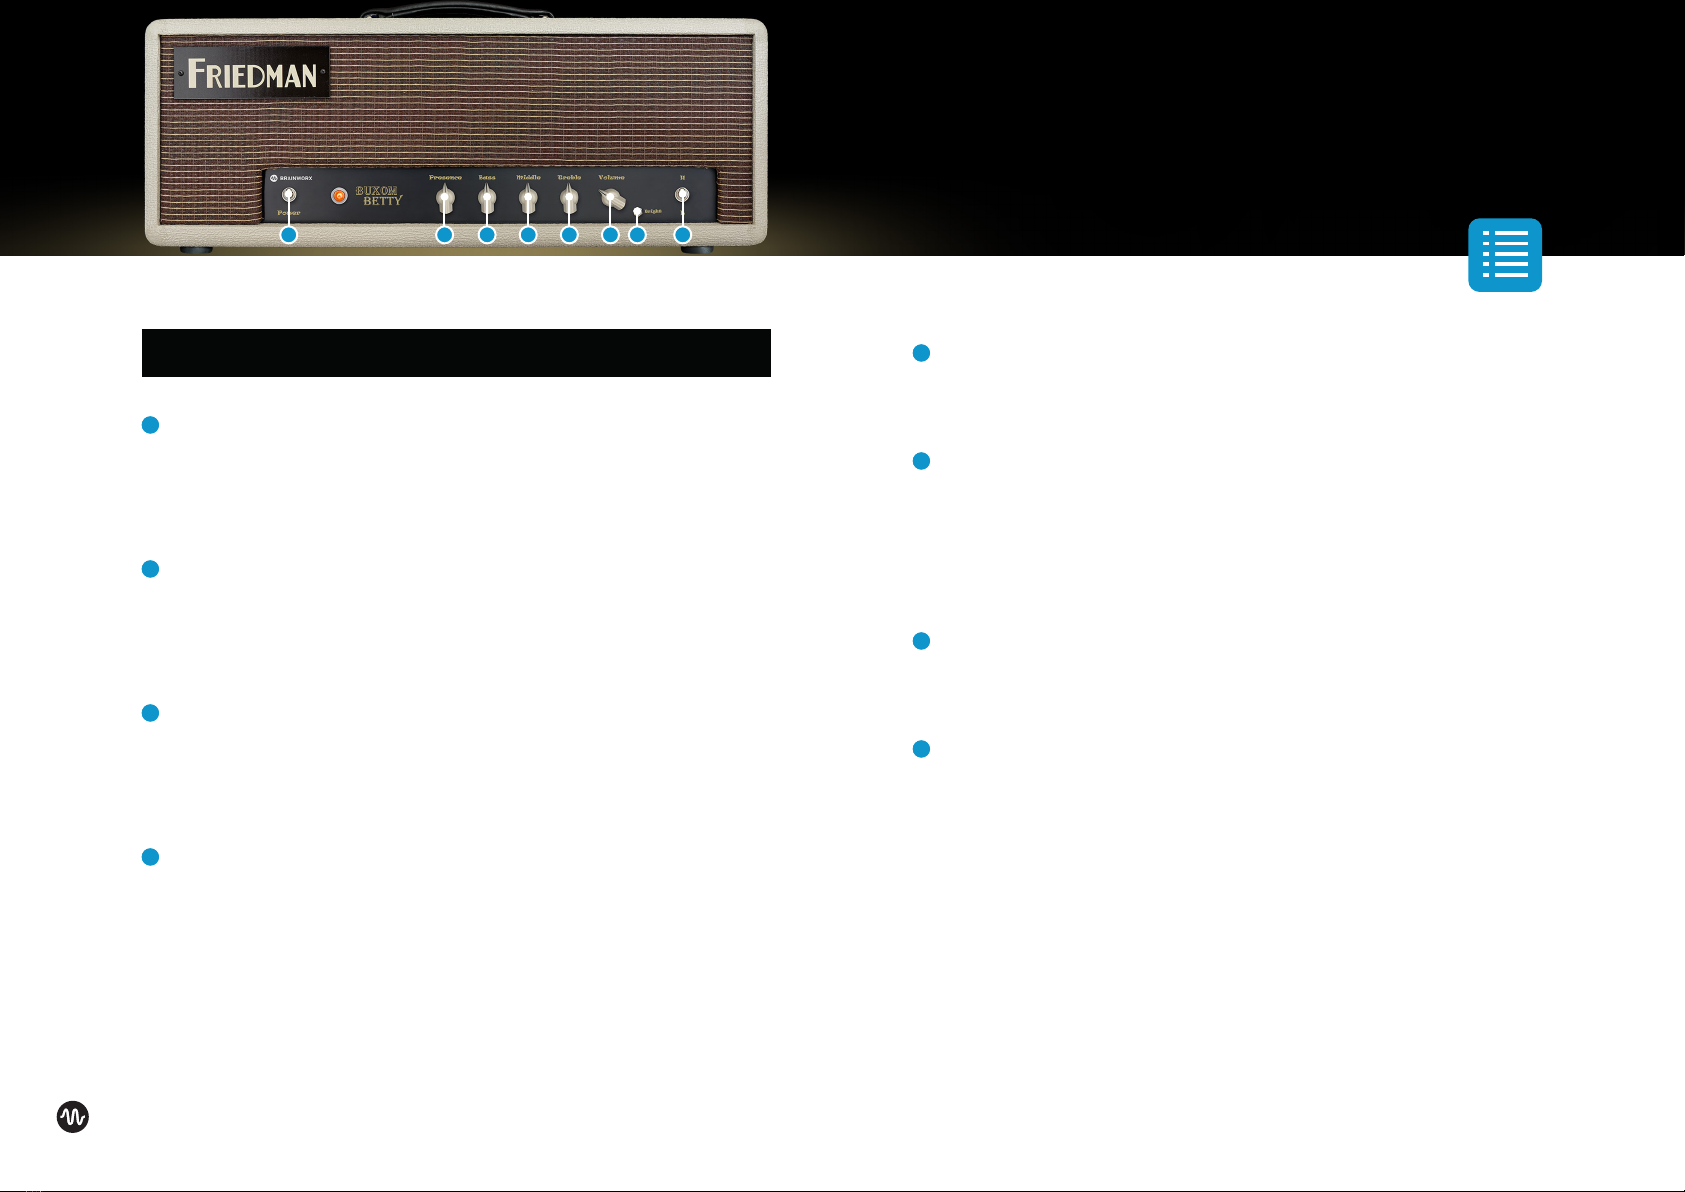
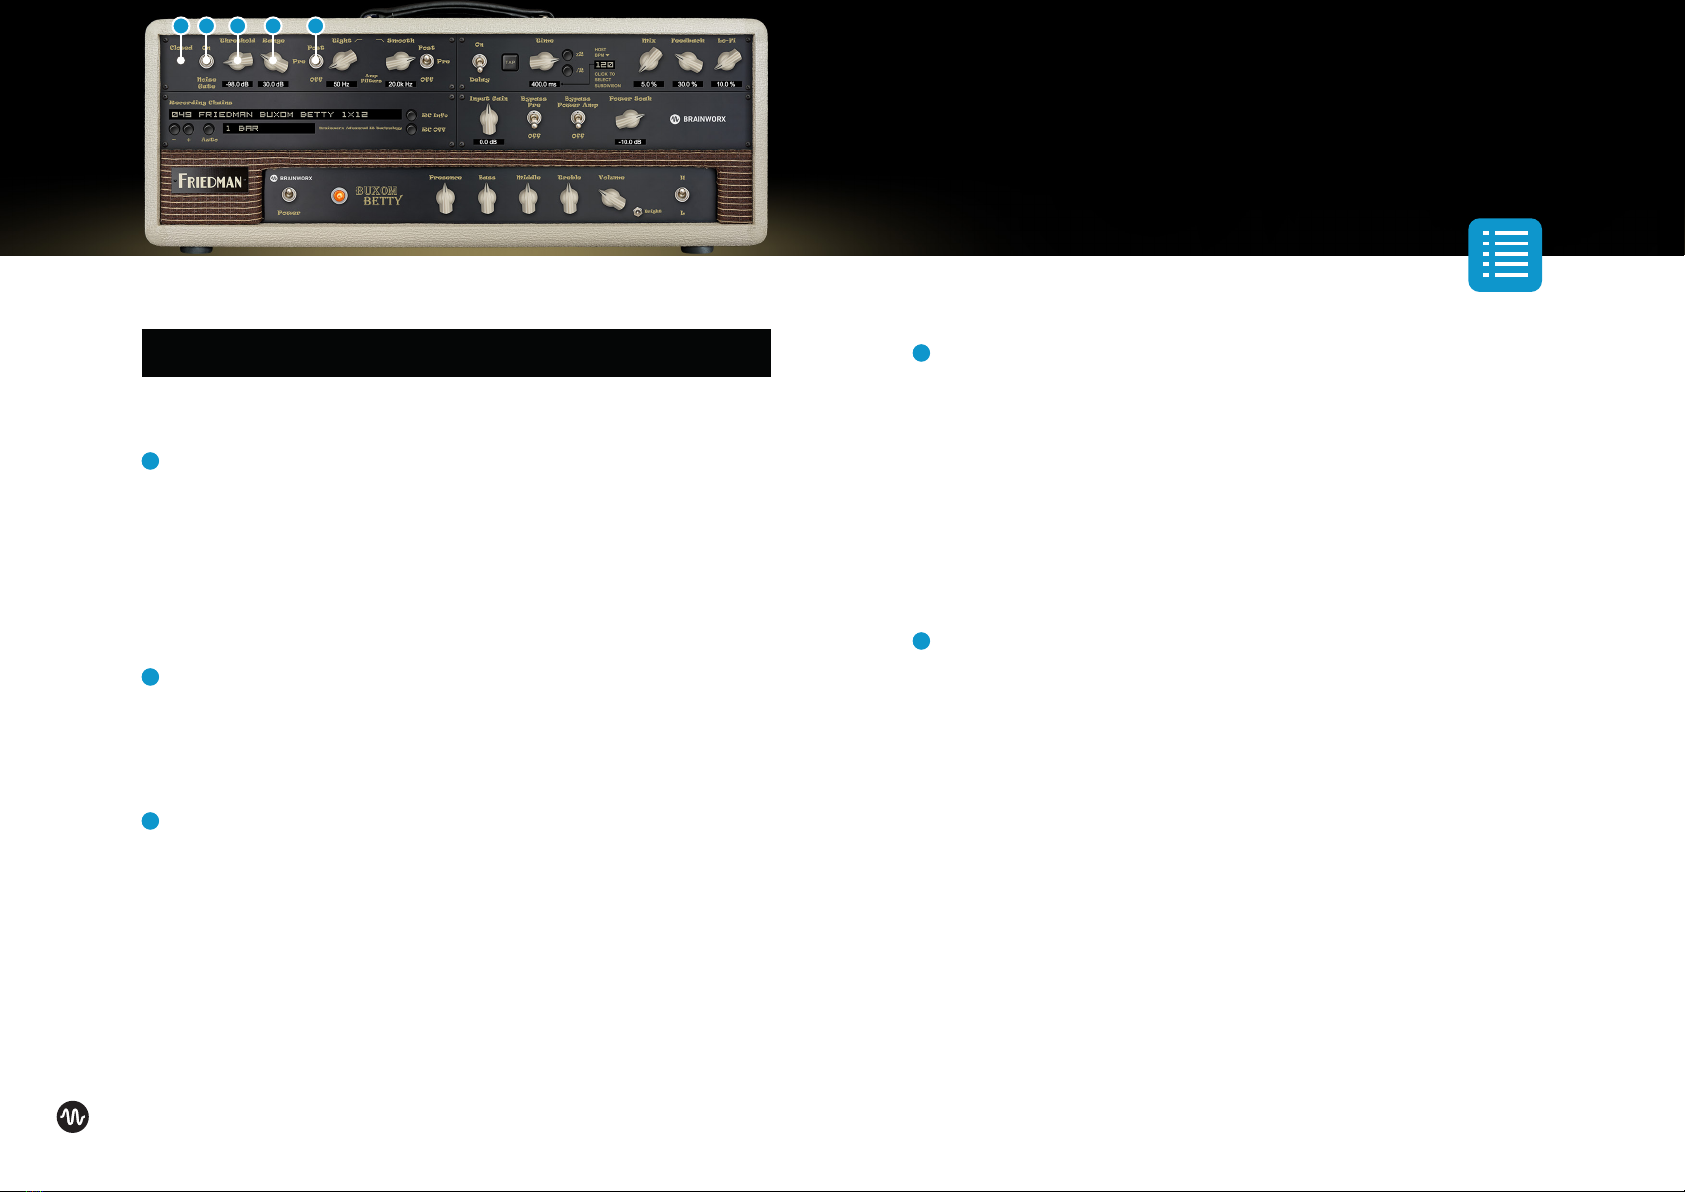
1+ / - Switches (Plus / Minus)
Browse through the Recording Chains by either using the pull-down
menu of the Recording Chain text box (see above) or just click through the
settings using the ‘+’ and ’-‘ symbols.
2Auto & Bar selection
If you are trying to find the best sounding Recording Chain for your song
it can be a hassle to have to play a few chords, grab the mouse to select
the next Recording Chain, play a few notes again, grabbing the mouse
again, etc.
For this reason the Buxom Betty offers you Auto mode: Just select a
pattern (1 Bar, 2 Bars or 4 Bars) and the Plugin will activate the available
Recording Chains automation, following the actual tempo setting of your
DAW. You can now play uninterrupted and simply listen to the sound of
the various Recording Chains as the Plugin switches through all of them
every single bar, every two bars or every four bars, depending on your setting.
As soon as you hear the speaker setup you like best just stop Auto mode by
clicking the Auto button again and manually select the desired Recording
Chain. Afterwards just fine-tweak the Tone Section and Gain and there you are.
1 2
Friedman Buxom Betty
Plugin Manual

10
1RC Info
The RC Info feature showing you exactly what kind of setup was used to
produce the Recording Chain you selected.
2RC Off
This button lets you bypass the entire Recording Chain section. Use then
your own mic‘d cabinet or external IR loader.
3Input Gain
If you want to drive the input of the Friedman preamp harder or softer you
may adjust the input gain to your liking. Some single coil pickups from
older or vintage guitars may deliver low level output that can be compen-
sated with the Input Gain.
The opposite goes for a lot of heavy metal style humbuckers. If you have
recorded the DI signal too hot or if you are using other Plugins before
entering the Friedman amp Plugin you may want to dim the input signal.
With most standard guitars you can and should leave the Input Gain at 0
(zero) though.
4Bypass Pre Amp
Bypass the pre amp section.
With the Bypass Pre switch you can switch off the Friedman preamp
completely, which may be wanted if you record your own hardware (tube
or solid state) guitar pre- amp with the Buxom Betty. In this case you
may still use the internal Power Amp and speaker / Recording Chains
simulation and will be able to achieve amazing results recording your
guitar sounds without using an external Power Amp and speaker.
Switch up: Preamp is bypassed (off), Switch down: Preamp is active (on).
5Bypass Power Amp
If you want to use only the distortion of the Friedman preamp you may
switch the power amp simulation off. This may sound cool if you use the
Buxom Betty plugin to distort other signals than a guitar. For a realistic
guitar recording we recommend leaving the power amp on, as it is an
integral part of the overall sound of the amp.
6Power Soak
Controls the output volume.
In the Hardware world power soaks are being used to reduce the volume
3 4 5 6
1Friedman Buxom Betty
Plugin Manual
2

11
of a guitar power amp. This way you can crank up a (tube) guitar power
amp to drive it until it starts clipping, and still record at a volume which
will protect your hearing and keep the neighbors friendly. A clipping tube
power amp adds distortion and harmonics to the guitar amp signal and is
something most guitar players love. A fully cranked up tube guitar amp
tamed in volume with a power soak will sound different than the same
amp with the master volume turned down.
We have modeled the behavior of the Friedman tube power amp, so you
may experiment with different settings of the Master of the amp and the
internal Power Soak. We recommend a setting of roughly -10dB for most
scenarios.
Cabinets we used for the Recording
American 4x12
Mesa Boogie Rectifier® 4fb 280W 4x12 Vintage 30
The STANDARD Rectifier® 4x12 is the “oversized” 4x12, providing
thundering low-end punch and resonance which is perfectly tuned with
the smooth, tailored midrange and articulate, clear high-end. This is the
most popular 4x12 cabinet and an icon in heavy music.
Friedman Buxom Betty 1x12
FriedmanBuxom Betty 1x12EXT - 1×12” open-back extension cabinet 65W
The Friedman Buxom Betty 1x12EXT is a 1×12”, open-back extension
cabinet. A perfect match for the Buxom Betty head, this cab utilizes tongue
and groove Baltic Birch construction to deliver the bass, mid response
and great sound you would expect from a Friedman cab.
At the heart of the cab is a Celestion G12M-65 Creamback 16 Ohm speaker.
The G12M Greenback is the definitive vintage Celestion ceramic magnet
guitar speaker. When the G12M was developed in the mid-sixties, players
like Hendrix, Clapton, Beck and Page, who typified the louder and more
aggressive blues rock-playing styles that came to characterize that era,
quickly adopted it.
Friedman Buxom Betty
Plugin Manual

12
The G12M-65 Creamback used in the Buxom Betty cab produces the
familiar woody G12M tone, but handles greater power. This makes it ideally
suited for yesterday and today’s amps, when a vintage and modern tone
is desired. The increased power handling brings with it low end grunt
complementing the warm and vocal mid range, crunchy upper-mids and
sweet, refined highs.
As with all Friedman cabinets, oversized 12-gauge speaker wire is
soldered between the speaker and terminal, assuring you capture every
ounce of valuable tone. The Buxom Betty 1x12EXT is handcrafted with
pride in the USA and designed to withstand the rigors of the road.
Friedman Vintage 4x12
Friedman 412 Vintage Cabinet closed-back 110W - 2x12“ Celestion
Vintage 30 (Bottom Slot) / 2x12“ Celestion Greenback G12M-25 (top
slots)
The Friedman Vintage 4×12 Cabinet is a 4×12”, closed-back speaker
cabinet which utilizes tongue and groove Baltic Birch construction to
deliver the bass, mid response and great sound you would expect from a
Friedman cab. The vintage salt and pepper grille cloth is reminiscent of
the legendary British amps of yesteryear.
At the heart of the cab are two 16 Ohm, Celestion G12M-25 Greenback
speakers placed strategically in the top two speaker slots of the cabinet.
The G12M Greenback has evolved over the decades but still retains its
essential sought-after tone. This model is voiced with additional broad
mid-range attack and restrained top-end, giving a forward, punchy
attitude to chords and a searing lead tone without fizz: ideal for Fried-
man’s high-powered rock heads. It’s an ideal speaker to bring drive and
definition to modern high-gain amps.
Loaded in the two bottom slots are two Celestion Vintage 30 speakers.
The V30’s sound has been captured on thousands of recordings from a
diverse range of notable players. It features enormously detailed and
complex overtones, a warm low-end, a famously rich vocal mid-range and
a beautifully detailed top-end. This cab delivers a wonderfully intricate
Vintage 30 crunch, revealing the complexities found in hand-wired
boutique amps.
The combination of these two different speaker models provides
the warmth of the Greenbacks and the power and thump of the V30’s,
creating a formidable speaker cabinet that is a perfect match
Friedman Buxom Betty
Plugin Manual

13
for any Friedman 100 Watt head. As with all Friedman cabinets, oversized
12-gauge speaker wire is soldered between the speaker and terminal,
assuring that you capture every ounce of valuable tone. The BE 4×12 is
handcrafted with pride in the U.S.A. and designed to withstand the rigors
of the road.
English 4x12
Marshall 1960TV Lead 100W 4x12 GreenbackG12M-25
The 1960TV is loaded with Celestion® G12M-25 Greenback speakers,
which are more forgiving than the 75 Watt Celestions used in the 1960A™;
the 25 Watt Greenbacks have a warmer, more saturated sound. This
100 Watt mono cabinet is 65mm taller than a 1960A and 1960B™, which
results in a lower mid-range resonant response.
To re-create the classic looks and tones of yesteryear, Marshall offers the
1960TV cabinet. The 1960TV houses four Marshall/Celestion designed
re-issue 25-watt Greenback speakers and is finished with the mid-
to late-‘60s style EC fret cloth and the smoother levant covering. The
Marshall 1960TV stands an impressive 4 inches taller than a standard 4
x 12“ - hence the ‚TV‘ in its name which is an acronym for ‚Tall, Vintage‘.
Friedman Dirty Shirley 1x12
Friedman Dirty Shirley opened-back 65W - 1x12“ Celestion G12M-65
Creamback
The Friedman Dirty Shirley 1×12 Cabinet is a 1×12”, open-back extension
cabinet. It utilizes tongue and groove Baltic Birch construction to deliver
the bass, mid response and great sound you would expect from a
Friedman cab. At the heart of the cab is a Celestion G12M-65 Creamback
16 Ohm speaker. The G12M Greenback is the definitive vintage Celestion
ceramic magnet guitar speaker. When the G12M was developed in the
mid-sixties, players like Hendrix, Clapton, Beck and Page, who typified
the louder and more aggressive blues rock-playing styles that came to
characterize that era, quickly adopted it. The G12M-65 Creamback used
in the Dirty Shirley cab produces the familiar woody G12M tone, but
handles greater power. This makes it ideally suited for yesterday and
today’s amps, when a vintage and modern tone is desired. The increased
power handling brings with it low end grunt complementing the warm
and vocal mid range, crunchy upper-mids and sweet, refined highs. As
with all Friedman cabinets, over-sized 12-gauge speaker wire is soldered
between the speaker and terminal, assuring you capture every ounce of
valuable tone. The Dirty Shirley 1x12EXT is handcrafted with pride in the
USA and designed to withstand the rigors of the road.
Friedman Buxom Betty
Plugin Manual

14
Orange 2x12
Orange PPC 212 closed-back 120W 2x12 Vintage 30
The 120W Orange Amplifiers PPC212-C guitar speaker cabinet is crafted
using 13-ply high-density 18mm birch plywood throughout like every
Power Projection Cabinet (PPC). Orange speaker enclosures, like Orange
amplifiers, are built to last with manufacturing techniques that assure
extremely rugged construction. Orange‘s unique ‚skid‘ design feet help to
acoustically couple these cabinets to the stage to provide a tighter bass
response and full range definition. All Orange Amplifiers‘ speaker enclo-
sures are equipped with Celestion Vintage 30 speakers and are equipped
with comfortable flush cabinet handles. The Celestion Vintage 30 Speaker
recreates the sound of the original Celestion Blue with new cone and
coil assembly. Improved performance: rated at 60W capability, handles
extra heat generated by higher power equipment. The Vintage 30 handles
massive overdrive tones with ease. It‘s a classic 2x12 loudspeaker.
Friedman Buxom Betty
Plugin Manual

15
Top Toolbar
1Undo / Redo
You can undo and redo changes you made to the controls of the Buxom
Betty plugin at any time. The Undo / Redo will work for as many as 32
steps. This makes experimenting and tweaking knobs easy. If you don´t
like what you did... just undo it.
2Settings (A/B/C/D)
The Buxom Betty amp plugin offers four internal settings (A/B/C/D) which
will be stored with every preset. So, one preset can contain up to four
amp and effects settings.
You may use similar amp settings with more or less delay, different delay
times, etc., to quickly switch between different sounds, or you can switch
from clean to crunch to lead within one setup / preset.
The Settings can be automated in your DAW. This way it´s possible to
switch from a dry rhythm sound to a lead sound with tons of delay, for
example.
3Copy / Paste
To set up variations of similar sounds you don´t have to dial in all the
parameters several times. Let´s say you like your setting A and want to
use the same sound, just without delay, as setting B.
• Simply press Copy while you are in setting A.
• Switch to setting B by pressing ‘B’ in the settings section.
• Press Paste, now setting B is identical to setting A.
• Bypass the Delay.
Now you can switch between A & B and play the same sound with or
without delay.
4FX Rack
Toggle between FX Rack and Standard view.
5About
Information about the development of the plugin.
Friedman Buxom Betty
Plugin Manual
1 2 3 4 5

16
1UI Scaling
Adapt the graphical user interface to the size and resolution of your
screen. The plugin will check if the user interface will fit your screen
before enlarging it. So if you accidentally chose a zoom factor which is
too big for your current settings, the plugin will automatically stay at the
maximum possible zoom factor.
Friedman Buxom Betty
Plugin Manual
1

17
Bottom Toolbar
1PA Logo
Clicking the Plugin Alliance logo takes you to the Plugin Alliance website
via your web browser, that´s if your computer is online.
2License Type
The toolbar displays information about the type of license you’re running:
Trial licenses will be displayed along with the number of days until
expiration; there is no note for full licenses as these are unlimited.
3$ (Icon)
If you are using a demo / trial version of our products, you can always click
this icon to open a browser that redirects you to the respective product
page in the Plugin Alliance store. This is where you can easily purchase a
product without having to look it up on our website.
4Key (Icon)
Clicking on the key icon brings up the activation dialog, allowing you
to manually reauthorize a device in the event of a license upgrade or
addition. You can also use this feature to activate additional computers
or USB ash drives.
5? (Icon)
Clicking the ? icon opens up a context menu that links to the product
manual PDF, as well as other helpful links, e.g. to check for product
updates online. You must have a PDF reader installed on your computer
to be able to read the manual.
System Requirements & FAQ (Links)
For latest System Requirements & Supported Platforms
https://www.plugin-alliance.com/en/systemrequirements.html
Particular details for your product
https://www.plugin-alliance.com/en/products.html
Installation, Activation, Authorisation and FAQ´s
https://www.plugin-alliance.com/en/support.html
Friedman Buxom Betty
Plugin Manual
54321

18
Factory Presets
We have made a lot of presets for the Buxom Betty amp plugin, many of
them have been made to work perfectly with classic guitars like Strats,
Teles or Paulas. All of the factory presets offer A/B/C/D variations, do try
them out!
This effectively quadruples the factory sounds you can browse through,
and many similar amp settings sound quite different with different Filter
or Delay settings.
These presets are only intended to give you an easy start and to demo
some of the tones you can get out of the Buxom Betty amp plugin.
Creating your own Sounds & Presets
When you start to create your own sounds the most important elements
to adjust are the Drive, Recording Chains and the Tone Stack.
(Bass, Middle, Treble, Presence, etc.)
• Set the controls of the Tone Stack to the center position (’12-o-clock’).
• Play through as many Recording Chains as you like and pick the one that
sounds closest to what you are looking for before altering the knobs.
• Once you found the Recording Chain you like best for your sound, start
tweaking the Tone Stack and Drive to fine tune your amp settings.
• Add Delay or activate the Filters, the Noise Gate, etc. for variations of
your sounds.
• Have fun!
Experiment, be creative. We are confident that the different tone selec-
tions of the amp and the huge selection of Recording Chains will offer
you many possible combinations that will sound great on a big variety of
musical styles and genres.
Combine the Buxom Betty amps with other plugins (dynamics, effects,
room simulation), and you will be able to create countless world-class
production-ready guitar sounds in the box. Enjoy.
Friedman Buxom Betty
Plugin Manual

Plug in, Rock out! - www.brainworx-music.de
Other manuals for Buxom Betty
1
Table of contents
Other Friedman Speakers manuals