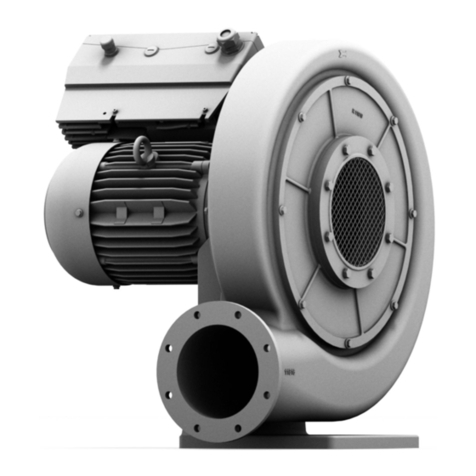
FUNKEN FRV 160 User manual

2
TABLE OF CONTENTS
1 General information............................................3
1.1 Safety instructions..................................................................3
1.2 Accident prevention................................................................3
1.3 Qualification of employed staff...........................................3
1.4 Intended use .............................................................................3
1.5 Private use.................................................................................4
1.6 Danger zone..............................................................................4
2 Transportation/storage......................................4
2.1 Transportation..........................................................................4
2.2 Items delivered.........................................................................4
2.3 Packaging...................................................................................4
2.4 Temporary storage..................................................................4
2.5 Transportation..........................................................................4
2.6 Disposal......................................................................................5
3 Installation ..........................................................5
3.1 Installation site.........................................................................5
3.2 Installation on mounting plane/foundation....................5
3.3 Inlet pipe joint connection.....................................................5
3.4 Earthing the device via the lightning conductor.............6
3.5 Removal .....................................................................................6
4 Commissioning....................................................6
4.1 Safety inspections...................................................................6
4.2 Initial commissioning .............................................................6
4.2.1 Test run.......................................................................................6
4.2.2 Initial commissioning procedure.........................................7
5 Electrical connection...........................................7
5.1 Terminal connection diagrams ............................................7
5.2 Cable connections ...................................................................7
5.3 Thermal contact/PTC thermistor
for motor protection ..............................................................7
5.4 Fluctuating power supply .....................................................7
5.5 Speed control via the frequency converter......................7
5.6 Connection diagrams .............................................................8
6 Operation.............................................................8
6.1 Decommissioning....................................................................8
6.2 Re-initialising the device after maintenance
or repair tasks...........................................................................8
7 Maintenance tasks and troubleshooting ..........8
7.1 Standstill....................................................................................9
7.2 Sporadic fan operation...........................................................9
7.3 Continuous fan operation .....................................................9
7.4 Removing the components............................................... 10
7.4.1 Removing the drive unit..................................................... 10
7.4.2 Removing the drive motor................................................. 10
7.5 Maintenance tasks............................................................... 10
7.5.1 Cleaning tasks ....................................................................... 10
7.5.2 Topping up the grease filling............................................. 10
7.5.3 Motor maintenance tasks.................................................. 10
7.5.4 Maintenance tasks on the impeller
and on suction-side accessories......................................11
7.6 Assembly ................................................................................ 11
7.7 Malfunctions.......................................................................... 13
7.8 Explanation of symbols ...................................................... 13
8 Copyright .......................................................... 13
9 Emergencies..................................................... 13
10 Operator’s responsibility................................. 13
11 Identification plate .......................................... 13
EC declaration of conformity..................................... 14

3
1 GENERAL INFORMATION
1.1 Safety instructions
FRv 125–280 radial fans comply with the EC Machinery
Directive and have been developed and manufactured in line
with current technological standards and recognised safety
standards and guidelines. They are safe to operate and
comply with high quality standards. This series of products
comprises future-oriented technology and is exceptionally
user-friendly and easy to maintain.
However, any fan can unavoidably pose a residual risk to
users or third parties, or the device may become impaired or
cause other material damage. For this reason, it is imperative
to observe and comply with all safety instructions. Failure
to comply with the safety instructions can endanger the life
and health of persons, cause environmental damage and/or
cause extensive material damage.
Compliance with the safety instructions given in the operat-
ing instructions helps you to operate the device economically
and exploit the full product benefits.
Observe the following safety measures for your
own safety:
• Disconnect the fan from the power supply before per-
forming any tasks to prevent electrical injuries.
• Always wear protective gloves when transporting and
installing the device to prevent injuries caused by sharp
edges.
• Wear a helmet and safety shoes when transporting and
installing the device to prevent injuries caused by falling
components.
1.2 Accident prevention
Accident prevention regulations (VBG1, VBG4, VBG7w, VBG9a
– Vorschriften der Berufsgenossenschaft – German regulations
for employers’ liability insurance association) and the generally
accepted rules of technology, particularly DIN VDE 0100 and
DIN VDE 0150 (VDE – Verband der Elektrotechnik, Elektronik
und Informationstechnik e.V. – German Association for Electri-
cal, Electronic and Information Technologies), apply.
For ATEX devices: VDE 0165, VDMA 24 169 (VDMA
– Verband Deutscher Maschinen- und Anlagenbau
– German Mechanical Engineering Industry Associ-
ation) and EU Machinery Directive 2014/34/EU (ATEX) apply.
Ensure that no critical gas concentrations are present during
repair, maintenance and assembly tasks in explosion protec-
tion zones. Use a gas detector. Handling sources of ignition of
any kind is prohibited in explosion protection zones. Weld-
ing, cutting and grinding tasks may only be conducted after
obtaining an appropriate welding permit.
Protect the fan from foreign bodies falling in and being
sucked in using a protective device (VDMA 24 169).
1.3 Qualification of employed staff
The fan must only be installed, operated and serviced by
trained, instructed and authorised persons. The transporta-
tion/storage, installation, electrical connection, commission-
ing and maintenance tasks described in the operating instruc-
tions and the servicing instructions must only be performed
by qualified staff.
Only perform repairs to the FRv 125–280 radial fans that are
described in chapter 7 “Maintenance tasks and troubleshoot-
ing”.
Fans in explosion protection areas must only be
operated by persons who are qualified in line with
the ATEX Directive 2014/34/EU.
1.4 Intended use
FUNKEN fans from the FRv 125–280 product series are
suitable for extracting dust-free air and other corrosive and/
or explosive gases, vapours or mists. The temperature of
the exhausted media is -5 °C to +40 °C. Furthermore, in this
series, the dust content of the gas being conveyed must not
be greater than the dust content of outside air in industrial
areas (< 5 mg/m³).
The temperature at the installation site must not exceed
+40 °C.
If included, the sole purpose of the repair switch on the de-
vice is to switch off the fan. It prevents accidental activation
during maintenance tasks. This switch is not the main switch
and not an emergency off switch.
If control devices with electronic components (e.g. frequency
converters) are employed, observe the device manufacturer’s
advice on preventing electromagnetic interference (EMC)
(earthing, cable lengths, cable shielding etc.).
FUNKEN FRv 125–280 radial fans are delivered as
standard without protective grilles on inlets and outlets

4
as they are usually connected to a larger system of ducts.
The operator must install a protective grille on the outlet
side in line with EN 292-1 to prevent injury and to prevent
parts from falling in.
Ensure that the fan is suitable for use in explosion protection
areas.
DANGER OF INJURY FROM ROTATING PARTS!
If installation makes it possible to accidentally reach into the
rotating impeller, fit a suitable protective device (e.g. protec-
tive grille). Any different usage or use that goes beyond this
scope is considered improper use. The manufacturer/supplier
is not liable for resulting damage. The risk is borne solely by
the user.
The user is responsible for proper use. Proper use also
includes compliance with the operating instructions and ad-
herence to the mandatory inspection and service conditions.
1.5 Private use
This fan has been developed, designed and built for industrial
and commercial use. Use in the private sector is therefore
prohibited.
1.6 Danger zone
The danger zone extends around the entire fan during as-
sembly, maintenance and repair tasks. Keep the area around
the fan free of objects.
2 TRANSPORTATION/STORAGE
2.1 Transportation
Transport fans carefully!
Improper transportation can cause damage. If damaged by
impacts or dropping, carefully check that the fan is working
correctly and that the current consumption of the fan is
correct. Do not operate damaged fans.
The fan or the transport unit can tip over during transpor-
tation. Pay attention to the centre of gravity (approximately
central) and the weight (see technical data). Secure the fan
using appropriate slings before transportation. Ensure the
stability of the unit, i.e. do not stack units.
2.2 Items delivered
Remove the packaging immediately on delivery. Check the
radial fan for possible transportation damage (report to the
forwarding agent immediately) and check that the delivery
is complete and correct. To do this, compare the details on
the fan identification plate with the details on the delivery
note. The same applies to accessories. Incorrect quantities
or transport damage can only be processed via the trans-
port insurance if the damage is confirmed by the forwarding
agent’s driver.
2.3 Packaging
The fans can be delivered in robust and secure transport
boxes and/or on pallets.
2.4 Temporary storage
Attention must be paid to the following points
during temporary storage:
• Store the fan in the original packaging or supplement the
original packaging depending on external influences.
• The storage site must be protected from weather, dry
and free of dust and must not be subject to high humidity
(max. 70%). The storage temperature must be between
-25 °C and +60 °C.
• The fan must be protected against impacts, vibrations etc.
2.5 Transportation
Lift the fan carefully out of its packaging. The fan is fixed
to a transport panel to protect it from
damage. Remove this panel.
Radial fans must only be handled by the
frame when being transported to the
intended installation site.
Ensure that the mode of transport is
selected to suit the fan weight. Ensure
that the weight is evenly distributed.

5
2.6 Disposal
Ensure that operating and auxiliary materials, packaging
materials and scrap parts are disposed of safely and in an
environmentally friendly manner. Local recycling options and
regulations must be observed.
If the fan is moving toxic or aggressive media, the fan must be
treated as hazardous waste and disposed of appropriately.
3 INSTALLATION
Installation must only be performed by trained specialist
staff in compliance with these operating instructions and the
applicable regulations.
3.1 Installation site
The type, conditions and ambient temperature of the instal-
lation site must be suitable for the fan.
The following points must be observed:
• The mounting surface or foundation must be suitable for
supporting the weight of the fan and accessories.
• The mounting surface must be level.
• The fan must be mounted without tension using vibra-
tion-absorbing elements and connected to the supply air/
exhaust system using elastic collars.
• The fan must be accessible for maintenance tasks at all
times and be surrounded by sufficient free space.
• Ensure that the fan has a sufficient supply of fresh air for
cooling the motor.
• During installation, ensure that operation generates
negative pressure in the shaft opening due to the fan’s
structural arrangement.
• Installation of the fan and its components is based on the
operator’s installation plan.
• Mount the fan on vibration dampers. These are bolted
onto the pre-bored points in the base frame and anchored
in the on-site foundation.
• If the fan is mounted outside, a PE drive protection
cover provided by the manufacturer must be attached. A
flame-retardant PP rain cover or deflector cover provided
by the client must also be welded in place.
3.2 Installation on a mounting plane/foundation
Follow these instructions step by step:
1) Trace the frame’s hole pitch onto the mounting surface/
foundation.
2) Drill the four holes using a drill that is suitable for the
screw diameter and composition of the mounting surface/
foundation.
3) Fasten the four vibration dampers in the foundation using
suitable anchors or screw joint materials.
4) Position the fan on the installation site by aligning the set
screws of the vibration damper with the bore holes in the
frame.
5) Screw down the vibration-absorbing elements in line with
the included vibration damper installation instructions.
Hole pitch:
Attachment:
3.3 Inlet pipe joint connection
The media flow must be supplied to the fan through a
straight, unobstructed, circular pipe or via an inlet nozzle
designed to optimise the flow.
The media flow must be discharged through a straight,
circular pipe.
Attachments, such as non-return valves or butterfly valves,
must not be attached directly in front of the fan inlet as
otherwise a significant reduction in output can be expected.
There must be a minimum space of at least three times the
pipe diameter between the fan and the aforementioned
attachments.
Rv 125/140
Rv 160/180
Rv 220/225
Rv 250/280
Hole pitch
230 x 230
270 x 270
350 x 350
400 x 400
Type
Vibration dampers
Mounting surface/foundation

6
It is vital to install a suction nozzle on free-inlet fans to
reduce noise and prevent negative influence on the perfor-
mance of the fan.
3.4 Earthing the device via the lightning conductor
The operator must provide an effective lightning conductor
system if local circumstances make this necessary. The radial
fan must be taken into consideration for any local lightning
protection regulations regarding lightning conductors.
Equipotential bonding in line with DIN VDE 0100 and DIN
VDE 0100-710 must always be provided. If an existing
lightning protection system is present, the radial fan must be
included in the lightning protection measures by a profes-
sional technician.
3.5 Removal
Removal must only be performed by trained specialist staff
in compliance with these operating instructions and the
applicable regulations.
Follow these instructions step by step:
1) Switch off the fan using the control unit –see chapter 6.1
“Decommissioning”.
2) Disconnect the motor wiring and isolate the bare wire
ends.
3) Disconnect the suction-side and pressure-side pipe
connections so that the fan is then only attached to the
foundation by its own mounting parts.
4) Undo the mounting screws (secure the fan against tipping
over) and then remove the fan from the foundation.
5) Pack the fan properly for decontamination.
4 COMMISSIONING
Commissioning must only be performed by trained specialist
staff in compliance with these operating instructions and the
applicable regulations.
Never reach into the area of the impeller if this test
run is conducted without a protective grille!
Ensure that no parts or articles of loose clothing are
sucked in!
4.1 Safety inspections
Conduct the following tests before
commissioning:
• After the fan has been positioned at its intended desti-
nation, rotate the impeller manually to check that it turns
smoothly.
• Check the pipe system and fan for foreign bodies (tools,
small parts etc.). Free air passage must be ensured.
• Check all (mechanical and electrical) protective measures
employed (e.g. protective grille, grounding resistor, TC
relay, motor protection switch).
• Check that the current type, voltage and frequency of the
mains connection are suitable for the fan and that they
match the details stated on the motor identification plate.
• Check that the connected regulating elements are working
correctly.
• Check that all screws, nuts etc. are firmly seated.
• The fan must be connected on the suction side and pres-
sure side.
• Take suitable protective measures to prevent persons
from reaching into the fan.
DANGER OF HEARING IMPAIRMENT!
We recommend using suitable ear protector devices in sound
levels above 85 dB (A).
4.2 Initial commissioning
4.2.1 Test run
Perform a test run after conducting the tests listed above.
Next, switch on fans with repair switches using the knob.
Wire all terminals in fans with terminal boxes.
During the test run, check the direction of rotation of the
impeller. The direction of rotation must match that indicated
by the direction of rotation arrow on the housing and motor
cover. If the fan rotates in the wrong direction, the radial fan
conveys less air.
Reverse the electrical polarity of the motor in compliance
with the safety regulations. This is done by inverting the
phase using the repair switch or the terminal box.
After a successful test run, switch the fan back off using the
repair switch or by disconnecting the terminal connections.

7
4.2.2 Initial commissioning procedure
After a successful test run:
Connect the fan to the supply air/exhaust air pipe sys-
tem using flexible collars (see chapter 3.3 “Inlet pipe joint
connection”).
1) Switch on the fan using the control unit (control sta-
tion). If the fan has a repair switch, this switch must
be set to “I”. If the fan has a terminal box, all terminals
must be wired.
2) Once operating speed has been reached, measure the
power consumption and compare it with the rated
motor current stated on the motor or fan identification
plate. Switch off immediately if continuous excess cur-
rent is measured. Check extraction mode at all available
speeds. If a motor fitted with suitable full motor pro-
tection is operated with continuous excess current, the
thermal contact/PTC thermistor switches off the motor.
3) Check that the fan and motor are running smoothly and
not making any unusual noises. No unusual oscillations
or vibrations must be present.
4) Lock the control unit, fan and switch cabinet, if present,
according to specifications (locking mechanism).
5) Hand over the system according to specifications. Ex-
cess grease may leak out of the labyrinth grease filling
during initial commissioning.
5 ELECTRICAL CONNECTION
MORTAL DANGER FROM ELECTRICAL CURRENT!
The electrical installation of the fan must only be conducted
by qualified electricians in compliance with these operating
instructions and the applicable regulations:
• VDE regulations including the
safety regulations
• Accident prevention regulations
• Installation instructions
5.1 Terminal connection diagrams
Only connect FUNKEN fans in line with valid terminal dia-
grams. A plan of the terminal connection diagrams can be
found on the plate on the motor cover, and at other locations.
5.2 Cable connections
Cable routing is determined by local conditions and regula-
tions. The type of cable and wire sizes are specified by the
authorised qualified electrician.
Motor protection and winding protection cables
must be routed separately to prevent interference.
Use a shielded cable for winding protection. The shielding
must be connected to the protective conductor clamp
(PE) in the control unit. The decision of whether the cable
shield must be applied on both sides can only be made on
site (e.g. due to very significant interference). In this case,
the applicable regulations must be complied with.
If on-site control units are employed, it is not necessary to
route a shielded cable as the thermal contact can be used for
230-V control voltage (up to 4 A).
After routing the cables, all cable inlets must be fitted with
splashproof seals.
5.3 Thermal contact/PTC thermistor for motor
protection
The client must ensure that the motor is equipped with
an interlock shutdown that stops the motor if the highest
permissible winding temperature is exceeded. This pre-
vents the motor from restarting after a malfunction.
5.4 Fluctuating power supply
DIN EN 60034-1 specifies a voltage tolerance of +/- 5%
(range A) for motors.
DIN IEC 60038 specifies a tolerance of +/- 10% for the mains
voltages 230 V, 400 V and 690 V.
5.5 Speed control via the frequency converter
If the device is driven by a frequency converter, there is no
need to use an all-pole sine filter between the frequency
converter and motor.
MORTAL DANGER FROM ELECTRICAL CURRENT!
Do not confuse sine filters with motor filters (often called
attenuation filters or du/dt filters).
An all-pole sine filter is the best and most reliable option
for preventing problems from arising in the first place. All-
pole sine filters produce sinusoidal output voltages: phase

8
to phase and phase to protective conductor.
Using sine filters prevents high discharge currents, additional
noise and damage to the motor insulation.
Operation in the field-weakening range (above 50 Hz) is
inadvisable.
5.6 Connection diagrams
6 OPERATION
The control unit regulates normal operation of the fan
(switching on and off). During maintenance and inspection
tasks, either the repair switch is used to switch the device on
and off or the connection cable in the terminal box is discon-
nected and isolated.
Check that the fan is working correctly on a daily basis, giving
particular attention to smooth running and noise generation.
6.1 Decommissioning
Switch the fan off using the control unit.
The radial fan itself either has a repair switch or a terminal
box. The fan is deactivated by setting the repair switch to the
“0” position or by disconnecting the motor connection cable
in the terminal box.
MORTAL DANGER FROM ELECTRICAL CURRENT!
If disconnecting in the terminal box, the power
supply must be switched off via the control unit
and secured against reactivation before disconnecting the
connecting cable of the drive motor.
To prevent the fan from being unintentionally reactivated via
the control unit,
• set the repair switch to “0” or
• disconnect and isolate the motor cable in the terminal box.
Subsequently, close the terminal box.
Both methods disconnect the motor unit from the electrical
connection.
6.2 Re-initialising the device after maintenance
or repair tasks
Before re-initialising the device, it is vital to conduct a safety
inspection in line with chapter 4.1 “Safety inspections”.
CAUTION! FLYING PARTS! Wear safety goggles!
• After completing the maintenance and repair tasks, set
the radial fan back into operation using the repair switch
(“I” position).
• If the fan has a terminal box, reconnect the terminal wir-
ing. Before wiring, check again that the power supply has
been switched off via the control unit.
7 MAINTENANCE TASKS AND
TROUBLESHOOTING
Only specialist staff trained in electronics/electrical
engineering/mechanics must perform mainte-
nance tasks in compliance with these operating
instructions, the servicing instructions and the
applicable regulations.
Three-phase AC
(3 x 400 V)
Squirrel cage motor
3 x 400 Y
Three-phase AC
(3 x 230 V)
Squirrel cage motor
3 x 230 ∆
u1
v1
w1
w2
u2
v2
u1
v1
w1
w2
u2
v2

9
Tasks that can only be performed during operation whilst
observing the applicable safety regulations and accident
prevention regulations (e.g. checking smooth running) are
excepted from this rule.
DANGER OF INJURY FROM ROTATING PARTS!
Before performing any work on fans:
If the fan has a repair switch, switch off the drive motor
by moving the switch to the “0” position. If the fan has a
terminal box, the power supply must be switched off via the
control unit and secured against reactivation before dis-
connecting the connecting cable of the drive motor. Subse-
quently, disconnect the motor wiring in the terminal box and
insulate the cable ends.
Only begin maintenance or repair tasks once the fan impeller
has come to a standstill and the motor has cooled.
DANGER OF INJURY FROM FLYING PARTS!
Before conducting maintenance tasks, remove harmful or
hazardous residue from the conveyed medium present in the
fan using appropriate measures.
Safety and hazard warnings during maintenance, repair and
cleaning tasks
Be aware of all rotating parts during cleaning,
maintenance and repair tasks. TANGLING HAZ-
ARD! Wear close-fitting clothing in the danger
zone.
Be aware of the danger of crushing during clean-
ing, maintenance and repair tasks.
Be aware of the danger from electrical current
when performing cleaning, maintenance and
repair tasks.
Cleaning, maintenance and repair tasks must
only be conducted in non-explosive atmospheres.
For reasons of safety, only tools made from
non-sparking materials must be used when per-
forming tasks of this kind.
Be aware of contaminated components during
cleaning, maintenance and repair tasks.
7.1 Standstill
Standstill or temporary storage of the fan must be avoided.
If this is not avoidable in certain cases, the fan must be run
for at least two hours every two months. This is important to
prevent the motor bearings from sustaining damage caused
by prolonged standstill.
7.2 Sporadic fan operation
If the radial fan is not employed in continuous operation but
only sporadically, it must be run for at least two hours every
two months. This is important to prevent the motor bearings
from sustaining damage caused by prolonged standstill.
7.3 Continuous fan operation
Annual routine inspections must take place if the fan is used
in continuous operation:
Check operational readiness:
•
Check plastic parts, e.g. for wear, damage, contamination
and water-tightness. If wear, damage or leaks are found,
shut down the fan for reasons of operational safety and
contact the supplier. If contamination is found, shut down
and clean the fan.
•
Free passage of air vents and condensate outlets.
•
Check that bolted connections are tight.
•
Check that the fan does not vibrate when running (if the
fan vibrates, see chapter 7.7 “Malfunctions”).
•
Check that the identification plate is legible and request a
new one if necessary.
•
Check the accessories.
Check the electrical connections:
• Check electrical wires and connecting terminals for corro-
sion and clean if necessary.
• Check the power consumption (if motor problems occur,
see chapter 7.7 “Malfunctions”).
Wear personal protective equipment (PPE)! Individual com-
ponents may be contaminated depending on their area of
application.
The warranty is rendered invalid if damage occurs due to a
failure to conduct the regularly required inspections.

10
7.4 Removing the components
DANGER OF INJURY!
If the fan has a repair switch, switch off the drive motor by
moving the switch to the “0” position.
If the fan has a terminal box, the power supply must first be
switched off via the control unit and secured against reac-
tivation. Subsequently, disconnect the motor wiring in the
terminal box and insulate the cable ends.
Only begin maintenance or repair tasks once the fan impeller
has come to a standstill and the motor has cooled.
Only the components listed below are permitted to be re-
moved. All warranty claims are invalidated if further compo-
nents are removed from the radial fan.
7.4.1 Removing the drive unit
• Remove the mounting screws from the support.
• Remove the plug from the intake cover.
• Undo the screws. If electronic tools are used, do not ex-
ceed a speed of 500 rpm and a torque of 2.5 Nm.
• Carefully remove the intake cover along with the seals.
Warning: do not use any sharp-edged tools.
• Remove the impeller plug.
• Undo the impeller/motor hub mounting screw.
• For FRv 125–180 or for FRv 200–280, release the im-
peller from the motor hub using the extractor and store
it safely. The edges of the impeller are very sensitive to
rough impacts. Remove the impeller carefully to prevent
cracking.
• Carefully remove the seals. Warning: do not use any
sharp-edged tools!
7.4.2 Removing the drive motor
Perform the steps listed above.
• Disconnect the motor cable from the repair switch or
in the fan terminal box and withdraw it from the repair
switch or terminal box.
• Remove the supply air and exhaust system, if present.
• Release the frame from the vibration dampers.
7.5 Maintenance tasks
The FUNKEN radial fan is maintenance-free under normal
operating conditions. Nevertheless, routine inspections
should be conducted at regular intervals (annually at
least). This is particularly important if the type of conveyed
medium is likely to deposit contamination (e.g. material
accretions due to extracting crystallising vapours) on the
housing and impeller. Local regulations must be complied
with during all cleaning and maintenance tasks.
7.5.1 Cleaning tasks
Only the impeller and condensate outlet must be cleaned.
The internal air passages must also be cleaned if the medium
has a strong tendency to crystallisation. Cleaning must be
conducted carefully. In particular, the following must not be
used:
• Cutting tools
• Tools that exceed a temperature of +40 °C
• Cleaning agents that can dissolve plastic
• Steam jet/high-pressure cleaners
7.5.2 Topping up the grease filling
The grease reservoir can gradually diminish over time
depending on the operating conditions (operating temper-
ature, speed, operating time) and the rotary motion of the
impeller.
We advise topping up the grease reservoir regularly to
guarantee the highly-effective function of the sealing sys-
tem in the long term. The particularly maintenance-friend-
ly construction of the FUNKEN radial fan allows this
maintenance task to be performed without any special
preparations being required for the fan. This task can even
be performed during operation.
Carrier
Frame
Support plate
Impeller
Intake cover Motor
Vibration dampers
Housing

11
To top up the grease, open the lubricating nipple cap and po-
sition the grease gun on the lubricating nipple. Approx. 20 ml
is usually sufficient for refilling. Excess grease is ejected by
the impeller. Please only use heavy-duty lubricating grease
based on lithium soap.
7.5.3 Motor maintenance tasks
The motor bearings are permanently lubricated. The
nominal bearing service life is at least 40,000 hours. Using
the maximum permissible load, the service life is at least
20,000 hours if the motor is operated at 50 Hz.
The service life of ATEX motors is at least 40,000 hours in
50-Hz operation. After lengthier downtimes, it is advisable to
inspect the bearings before commissioning, even for brand-
new motors.
The warranty/guarantee is invalidated if damage occurs due
to a failure to conduct the regularly required inspections.
Bearing inspection and lubrication
7.5.4 Maintenance tasks on the impeller and on
suction-side accessories
If the type of conveyed medium is expected to cause con-
tamination on the installation (material accretions), further
inspections and cleaning tasks must be performed in addition
to the recommended annual inspection. In this case, the in-
tervals are based on the respective operating conditions and
must be specified by the operator.
Extracting heavily contaminated conveyed media can cause
deposits to accrete on the fan impeller and the elastic con-
necting pieces between fan and plant parts. These affected
devices and plant parts must therefore be regularly checked,
cleaned and their seals inspected.
LEAKING MEDIUM!
Leaking connecting pieces, collars etc. cause malfunctions
and hazards due to leaking conveyed medium and must be
replaced.
Cleaning tasks:
• Move the fan into the desired position for performing
cleaning tasks.
• Clean fan parts using appropriate measures (see chap-
ter 7.4.1 “Cleaning tasks”).
7.6 Assembly
The components are basically assembled by performing the
steps described above in reverse order.
Ensure that the seals are correctly inserted.
If electric tools are used, do not exceed a torque of 2.4 to
2.5 Nm and a speed of max. 500 rpm! Only apply a very low
axial thrust when screwing in the screws.
Take particular care to position the seals precisely. Incor-
rectly enclosed seals can be blown away by the air flow and
destroy the impeller. Replace defective seals to ensure the
impermeability of the fan.
Rotate the impeller manually to check that it turns smoothly.
Perform a test run!
Number of poles
2
4/6/8
Grease service life
at motor cooling temperature
25 °C
20,000 h
40,000 h
40 °C
10,000 h
20,000 h

12
Malfunction Possible cause Remedy
Fan not rotating. a) No power output present
on the control unit.
b) Main switch set to “0”.
c) Motor cable not wired
in the terminal box.
d) Mains power not being supplied.
e) Defective control fuse.
f) Motor protection relay triggered.
• Establish power output.
• Set main switch correctly to “I”.
• Connect motor cable.
Check:
Mains power, fuses, connections, motor
temperature. Leave to cool
if necessary (if the problem recurs,
shut down the cause of overheating).
Motor protection trig-
gered.
Motor temperature too high. Check motor for blocking, bearing
damage, winding damage; check
connections and power supply.
Impeller scraping. a) Deposits on impeller or
nozzle.
b) Relative positions of impeller
and nozzle have
changed.
Check impeller area for foreign
bodies, check motor attachment. Release
support, centre
impeller/nozzle and retighten
screws.
Fan rotates and
does not convey any
air or conveys too little
air.
a) Air flow interrupted.
b) Fan rotating in incorrect
direction.
c) Non-uniform inflow to
impeller.
Establish free air passage, clean impeller,
check pipe system, check cover flaps.
Change direction of rotation by
reversing polarity.
Lengthen the inlet-side straight connection
pipe to at least three times the nominal
value of the fan inlet. Mount non-return
valves or butterfly valves at the earliest
after three times the nominal value of the
fan outlet.
Fan vibrates while
running.
a) Deposits have formed on the
impeller vanes.
b) Condensate outlet blocked, impel-
ler rotating in water.
Clean the impeller.
Clean the water drain.
The following table is intended to provide the service team with pointers to possible causes of malfunctions and a guide to
rectifying them:
The warranty is rendered invalid if damage occurs due to a failure to conduct the regularly required
inspections.

13
7.7 Malfunctions
Deviations from normal operating statuses of the fan can
indicate possible malfunctions and must be checked immedi-
ately by the service team.
CAUTION!
Long-term malfunctions can damage the fan and also cause
personal injury.
Before rectifying malfunctions, switch off the
power supply to the fan and secure it against reac-
tivation.
7.8 Explanation of symbols
Warning. Dangerous
electrical voltage!
Warning. Explosive
atmosphere!
Warning. Corrosive
substances!
Warning. Danger of
hand injury!
Warning. Danger of
trapping!
Wear
gloves!
Warning!
This combination of symbol and keyword indicates
a possibly dangerous situation that may lead to death or
serious injury if not avoided.
8 COPYRIGHT
The content and writings published in these operating and
maintenance instructions are subject to German copyright
law. Any form of reproduction, editing, distribution and any
form of exploitation outside that permitted by copyright law
requires the written consent of the respective creator or
author.
9 EMERGENCIES
In emergencies, switch off the main switch or disconnect the
power plug.
Fire extinguishers of fire classes A, B, C and F must be used
in case of fire. These fire extinguishers must only be used on
low-voltage plants (up to 1,000 volts).
Remain at a safe distance while extinguishing fires.
10 OPERATOR’S
RESPONSIBILITIES
The operator of the fan procures and employs the materials/
media required for the proper operation of the fan. Correct
handling of these materials/media and the involved dangers
are the sole responsibility of the operator. The operator
must provide hazard warnings and disposal instructions. The
safety data sheets of material manufacturers and media
manufacturers must be observed.
11 IDENTIFICATION PLATE
The identification plate is located on the identification plate
panel or housing wall of the fan.

14
EC DECLARATIONS OF CONFORMITY
EC declaration of conformity
In line with the
• EC Machinery Directive 2006/42/EC, Appendix II A
• EC Low-Voltage Directive 2014/35/EU
• EC Electromagnetic Compatibility Directive 2014/30/EU, Appendix I and II
We hereby declare that the devices in the FUNKEN Kunststoffanlagen GmbH device series:
FRv 125
FRv 140
FRv 160
FRv 180
FRv 200
FRv 225
FRv 250
FRv 280
comply with all relevant fundamental safety and health requirements of the EC/EU directive as
separate components within an installation on the basis of their design and construction and in the
form which we have brought onto the market. They comply with the standards listed below:
Directive/standard Title
DIN EN ISO 12100:2011 Safety of machinery – General principles for design – Risk assessment and risk reduc-
tion
DIN EN ISO 5801:2018-4 Fans – Performance testing using standardized airways
DIN ISO 21940-11:2017 Procedures and tolerances for rotors with rigid behaviour
DIN EN 61000-6-4:2011 Electromagnetic compatibility – Generic standards – Emission standard for industrial
environments
DIN EN 61000-6-2:2011 Electromagnetic compatibility – Generic standards – Emission standard for industrial
environments
VDMA 24167:1994 Fans – Safety requirements
This declaration is rendered invalid if any modifications are made to the devices in this device series
without our agreement.
Device designations:
FRv 125–280
Hennef, 11/03/2019 Peter Müller, Managing Director

15
EC declaration of conformity
In line with the
• EC directive – Equipment and protective systems intended for use in potentially
explosive atmospheres 2014/34/EU (ATEX)
We hereby declare that the devices in the FUNKEN Kunststoffanlagen GmbH device series:
FRv 125/D/Ex
FRv 140/D/Ex
FRv 160/D/Ex
FRv 180/D/Ex
FRv 200/D/Ex
FRv 225/D/Ex
FRv 250/D/Ex
FRv 280/D/Ex
FRv 125/R/Ex
FRv 140/R/Ex
FRv 160/R/Ex
FRv 180/R/Ex
FRv 200/R/Ex
FRv 225/R/Ex
FRv 250/R/Ex
FRv 280/R/Ex
Device designation:
II 3G c IIB T3 X 04 ATEX D132
comply with all relevant fundamental safety and health requirements of the EC/EU directive
as separate components within an installation on the basis of their design and construction and in
the form which we have brought onto the market. They comply with the standards
listed below:
Directive/standard Title
DIN EN 1127-1:2011-10 Explosive atmospheres – Explosion prevention and protection – Part 1: Basic concepts
and methodology
DIN EN ISO 80079-36:2016 Part 36: Non-electrical equipment for explosive
atmospheres – Basic method and requirements
DIN EN ISO 80079-37:2016 Part 37: Non-electrical equipment for explosive atmospheres – Non-electrical type of
protection constructional safety “c”
DIN EN 14986:2017-04 Design of fans working in potentially explosive atmospheres
DIN EN 13237:2013 Terms and definitions for equipment and protective systems intended for use in poten-
tially explosive atmospheres
This declaration is rendered invalid if any modifications are made to the devices in this device series
without our agreement.
Device designations:
FRv 125–280
Hennef, 11/03/2019 Peter Müller, Managing Director

16
SPACE FOR NOTES
16

1717

EN . 12/2019
FUNKEN Kunststoffanlagen GmbH
Meysstrasse 1
53773 Hennef, Germany
Telephone:+49 2242 92 09 0
Fax: +49 2242 92 09 11
Email: [email protected]
www.funken.de
Kunststoffanlagen
This manual suits for next models
6
Table of contents
Other FUNKEN Fan manuals
Popular Fan manuals by other brands

S&P
S&P PCD110X manual

Delta Electronics
Delta Electronics Breez Slim SLM70D Installation and operating instructions

Eberg
Eberg FANTO 120 instruction manual

Luminance Brands
Luminance Brands kathy ireland HOME VERANDA instructions

Jaga
Jaga BRIZA 26 HIGH PERFORMANCE manual

Cata
Cata E-100 GTH BK instruction manual

Vornado
Vornado Zippi owner's manual

Broan
Broan 349BR instructions

Monte Carlo Fan Company
Monte Carlo Fan Company Colony 5COM52 Series Owner's guide and installation manual

AERMEC
AERMEC FCX ACB Use and installation manual

ARDES
ARDES AR5EA41PB Instructions for use

Sun Microsystems
Sun Microsystems Fire 3800 installation guide